Category Archives: Home Maintenance

How Do I Calibrate My Snowblower For Optimum Performance?

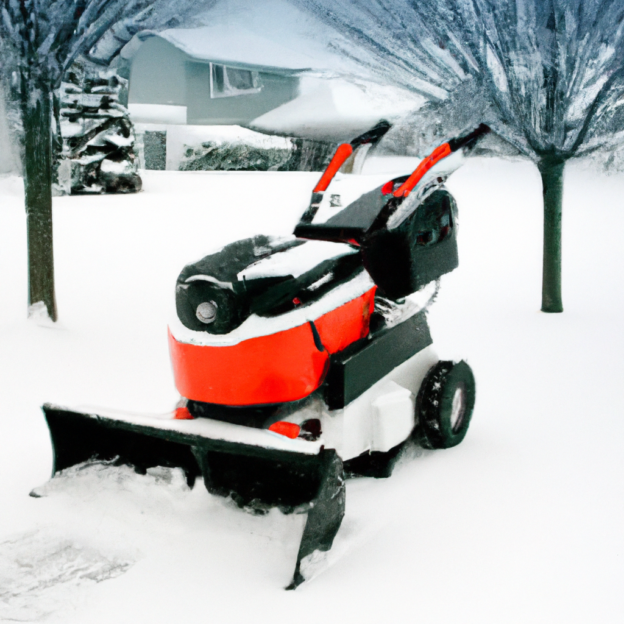
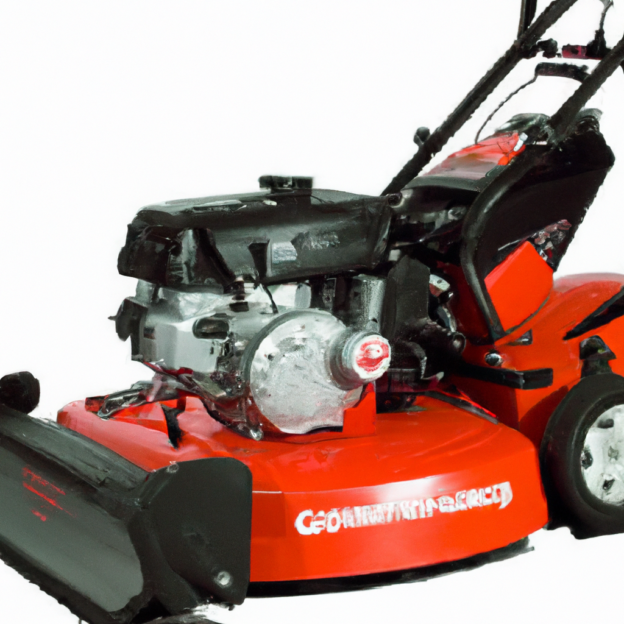
So you’ve finally bought a snowblower to tackle those pesky snowdrifts and make your life a little easier during the winter season. But now you’re wondering, how do you make sure your snowblower is performing at its best? Calibrating your snowblower is the key to maximizing its efficiency and effectiveness. In this article, we will guide you through the process of calibrating your snowblower for optimum performance, ensuring that it clears snow efficiently and effortlessly.

How Do I Calibrate My Snowblower For Optimum Performance?

Checking and Adjusting the Height and Angle

Checking the Skid Shoes

When it comes to calibrating your snowblower for optimum performance, one of the first things you’ll want to do is check the skid shoes. These are the adjustable plates located on the bottom of the snowblower that determine the height at which the machine operates.

To check the skid shoes, start by turning off the snowblower and allowing the engine to cool down. Then, visually inspect the skid shoes for any signs of wear or damage. If the skid shoes are worn down or uneven, it may be time to replace them.

Adjusting the Skid Shoes

If the skid shoes are in good condition but need adjustment, you can easily do this to ensure proper snowblower performance. First, locate the adjustment mechanism for the skid shoes, which is typically found on the sides of the snowblower.

To adjust the skid shoes, loosen the adjustment mechanism and raise or lower the shoes until they are at the desired height. It’s important to note that the height of the skid shoes should be set according to the surface you’ll be clearing. For example, if you’re clearing a gravel driveway, the skid shoes should be set to a higher position to avoid damaging the surface.

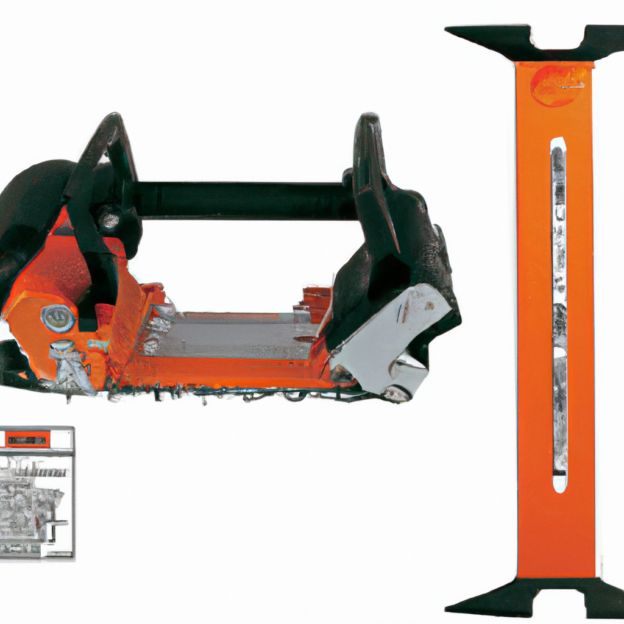
Checking the Scraper Blade

The next step in calibrating your snowblower is to check the scraper blade. This is the rubber or metal strip located at the bottom of the snowblower that comes into contact with the ground. The scraper blade helps remove snow from the surface as the snowblower moves forward.

Inspect the scraper blade for any signs of wear or damage. If the scraper blade is damaged, it should be replaced to ensure optimal performance. Additionally, check the alignment of the scraper blade to make sure it is parallel to the ground.

Adjusting the Scraper Blade

If the scraper blade is in good condition but needs adjustment, you can make the necessary changes to ensure proper operation. To adjust the scraper blade, locate the adjustment mechanism usually found near the bottom of the snowblower.

Loosen the adjustment mechanism and raise or lower the scraper blade until it is at the desired height. Keep in mind that the scraper blade should be set low enough to effectively remove snow, but not so low that it scrapes the surface below, causing damage.

Checking the Auger Height

The auger is the rotating mechanism on the front of the snowblower that collects and moves the snow into the discharge chute. To calibrate your snowblower for optimum performance, it’s important to check the height of the auger.

Visually inspect the auger to ensure it is aligned properly and not making contact with the ground. Look for any signs of wear or damage, such as bent or broken blades. If you notice any issues with the auger, it may need to be repaired or replaced.

Adjusting the Auger Height

To adjust the height of the auger, locate the adjustment mechanism near the back of the snowblower. Loosen the mechanism and raise or lower the auger until it is at the desired height. The height of the auger should be set based on the depth of the snow you’ll be clearing.

Keep in mind that setting the auger too low can cause it to make contact with the ground, leading to damage. On the other hand, if the auger is set too high, it may not effectively collect and move the snow.

Checking the Chute Angle

The chute angle determines the direction in which the snow is discharged from the snowblower. To ensure optimal performance, it’s important to check the chute angle and make any necessary adjustments.

Inspect the chute to ensure it is aligned properly and not clogged with snow or debris. Ensure that the chute rotates smoothly and is not loose or damaged. If there are any issues with the chute, they should be addressed before operating the snowblower.

Adjusting the Chute Angle

To adjust the chute angle, locate the adjustment mechanism near the chute. This mechanism allows you to change the angle at which the snow is discharged. Loosen the adjustment mechanism and rotate the chute to the desired angle.

It’s important to note that the chute angle should be adjusted based on the direction you want the snow to be thrown. Consider factors such as wind direction and the area you want to clear when setting the chute angle.

Inspecting and Replacing the Belts

Locating the Belts

In order to calibrate your snowblower for optimum performance, it’s necessary to inspect the belts and replace them if needed. The belts are an essential component in the operation of the snowblower, as they transfer power from the engine to the auger and impeller.

To locate the belts, refer to your snowblower’s user manual. It will provide instructions on accessing the belt compartment and identifying the different belts used in your specific model.

Inspecting the Belts for Wear

Once you’ve located the belts, it’s important to visually inspect them for any signs of wear or damage. Look for fraying, cracks, or any other visible signs of deterioration. Additionally, check for proper tension in the belts. Over time, belts may become loose, which can negatively impact the snowblower’s performance.

If you notice any significant wear or damage, it’s recommended to replace the belts to ensure optimal performance and prevent unexpected breakdowns during use.

Replacing the Belts

If inspection reveals that the belts need to be replaced, it’s important to follow the manufacturer’s guidelines outlined in the user manual. These guidelines will provide step-by-step instructions on how to safely remove the old belts and install new ones.

When replacing the belts, be sure to use the correct size and type specified by the manufacturer. Using the wrong belts can lead to equipment failure and potential safety hazards. If you’re unsure about the proper size or type of belt, consult a professional or contact the manufacturer for assistance.

Inspecting and Cleaning the Fuel System

Checking the Fuel Tank

To calibrate your snowblower for optimum performance, it’s essential to inspect and maintain the fuel system. Begin by checking the fuel tank for any signs of damage or leaks. Pay attention to the fuel tank cap, ensuring it is tightly sealed and free from cracks or corrosion.

Inspect the fuel lines connecting the tank to the engine for any visible signs of wear, such as cracks or leaks. If you notice any issues with the fuel tank or lines, it’s crucial to address them before operating the snowblower to prevent fuel leaks and potential fire hazards.

Inspecting the Fuel Line

In addition to checking the fuel tank, inspect the fuel line itself for any signs of damage or blockage. A clogged or damaged fuel line can interfere with the flow of fuel to the engine, leading to poor performance or engine failure.

Carefully examine the fuel line for any visible signs of wear, such as cracks, leaks, or brittleness. If you notice any issues, it’s important to replace the fuel line to ensure proper fuel delivery.

Cleaning the Carburetor

The carburetor plays a crucial role in the fuel system of your snowblower, as it mixes the fuel and air before sending it into the engine. Over time, debris, dirt, and stale fuel can accumulate in the carburetor, leading to poor performance or engine malfunctions.

To clean the carburetor, refer to the user manual for specific instructions on your snowblower model. Generally, the process involves removing the carburetor, disassembling it, and thoroughly cleaning each component with carburetor cleaner. Once cleaned, reassemble the carburetor and reinstall it according to the manufacturer’s guidelines.

Adjusting the Carburetor

In addition to cleaning, it may be necessary to adjust the carburetor to optimize fuel and air mixture for proper engine performance. However, it’s important to note that carburetor adjustments can be complex and may require specific tools and expertise.

If you’re unsure about adjusting the carburetor, it’s best to seek professional assistance or consult the user manual. Improper adjustments can lead to engine damage, poor fuel efficiency, and potentially hazardous operating conditions.

Checking and Changing the Spark Plug

Locating the Spark Plug

To ensure optimal performance of your snowblower, it’s important to check and change the spark plug as needed. The spark plug is responsible for igniting the fuel-air mixture within the engine’s combustion chamber.

To locate the spark plug, refer to your snowblower’s user manual. It will provide specific instructions on accessing the spark plug, which is usually positioned on the side or top of the engine.

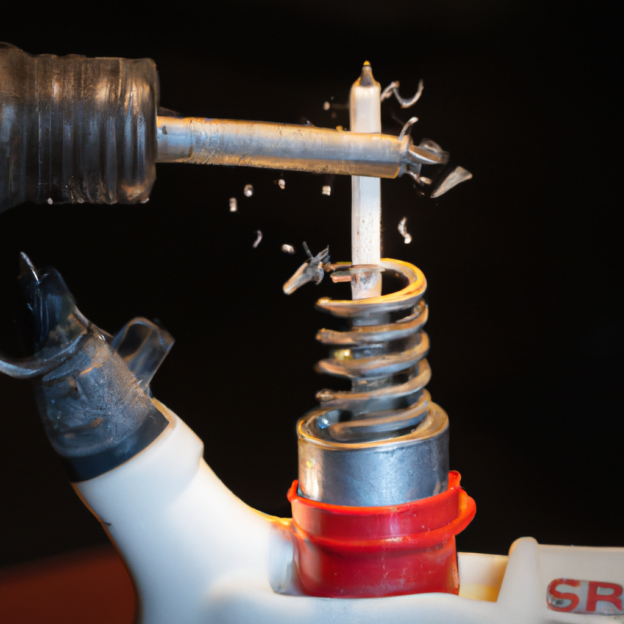
Removing the Spark Plug

Before removing the spark plug, make sure the engine is turned off and has had time to cool down. This will prevent any potential injuries due to hot components.

Using a spark plug socket wrench, carefully remove the spark plug by turning it counterclockwise. Be cautious not to damage the spark plug or surrounding components during removal.

Inspecting the Spark Plug

Once the spark plug is removed, visually inspect it for any signs of wear or damage. Look for deposits, such as carbon buildup or oil fouling, on the electrodes or insulator.

If the spark plug appears dirty or worn, it’s recommended to clean it with a wire brush or replace it with a new one. A worn or dirty spark plug can result in starting issues, poor fuel efficiency, and reduced engine performance.

Replacing the Spark Plug

If inspection reveals that the spark plug needs to be replaced, it’s important to use the correct type and heat range as specified by the manufacturer. Consult the user manual or contact a professional if you’re unsure about the proper spark plug for your snowblower model.

To install the new spark plug, carefully thread it into the spark plug hole by hand. Once hand-tightened, use the spark plug socket wrench to give it a final turn, ensuring a snug fit without overtightening.

How Do I Calibrate My Snowblower For Optimum Performance?

Checking and Changing the Engine Oil

Locating the Oil Cap and Drain Plug

Regular maintenance of the engine oil is crucial for optimal performance and longevity of your snowblower. Engine oil lubricates the internal components, reducing friction and preventing excessive wear.

To locate the oil cap and drain plug, refer to your snowblower’s user manual. It will provide specific instructions on accessing these components, which are typically located on the side or bottom of the engine.

Checking the Oil Level

Before checking the oil level, make sure the engine is turned off and has had time to cool down. This will ensure accurate oil level readings and prevent any potential injuries.

Remove the oil cap and wipe the dipstick clean with a cloth or paper towel. Reinsert the dipstick fully and remove it again to check the oil level. The dipstick should have markings indicating the proper oil level range. If the oil level is below the recommended range, additional oil should be added.

Changing the Engine Oil

Routine oil changes are necessary to maintain the performance and longevity of your snowblower. Consult your snowblower’s user manual for specific instructions on the oil change procedure, as it may vary depending on the model.

Typically, the process involves draining the old oil by removing the drain plug and allowing it to flow into a suitable container. Once the oil has drained completely, reinstall the drain plug and refill the engine with the recommended type and amount of oil.

Dispose of the old oil properly by taking it to a recycling facility or an authorized collection point that accepts used motor oil.

Inspecting and Lubricating the Moving Parts

Inspecting the Auger

Regular inspection of the moving parts, such as the auger, is essential for maintaining the performance and safety of your snowblower. The auger is responsible for collecting and moving the snow into the discharge chute.

Visually inspect the auger for any signs of damage or excessive wear. Look for bent or broken blades, loose components, or abnormal noises during operation. If you notice any issues with the auger, they should be addressed promptly to prevent further damage or potential safety hazards.

Lubricating the Auger

Proper lubrication of the auger ensures smooth operation and reduces friction between moving parts. Consult your snowblower’s user manual for specific instructions on the lubrication requirements, as they may vary based on the model.

Typically, a suitable lubricant, such as lithium grease, is applied to designated areas of the auger and its components. It’s important to use the correct type and amount of lubricant specified by the manufacturer. Applying too much or the wrong type of lubricant can lead to equipment damage or performance issues.

Inspecting the Impeller

Similar to the auger, the impeller is responsible for collecting and moving the snow through the discharge chute. Regular inspection of the impeller is necessary to ensure proper operation and prevent clogs or malfunctions.

Visually inspect the impeller for any signs of damage or debris accumulation. Check for bent or broken blades, loose components, or obstructions within the impeller housing. If you notice any issues with the impeller, address them promptly to maintain optimal snowblower performance.

Lubricating the Impeller

Proper lubrication of the impeller is crucial for reducing friction and ensuring smooth operation. Refer to your snowblower’s user manual for specific instructions on lubricating the impeller, as it may vary depending on the model.

Apply the recommended lubricant to the designated areas of the impeller and its components. Be sure to use the correct type and amount of lubricant specified by the manufacturer. Incorrect lubrication can cause damage to the impeller or impede its performance.

Inspecting the Cables

The cables on your snowblower play a crucial role in controlling the various functions, such as engaging the auger or adjusting the chute. Regular inspection of the cables is necessary to ensure they are in good condition and properly connected.

Visually inspect the cables for any signs of wear, fraying, or damage. Check for proper tension and ensure that the cables are securely fastened. Replace any damaged or worn cables to maintain precise control of your snowblower.

Lubricating the Cables

Proper lubrication of the cables allows for smooth operation and reduces the risk of binding or seizing. Consult your snowblower’s user manual for specific instructions on lubricating the cables, as it may vary based on the model.

Using a suitable cable lubricant, apply a small amount to the moving points of the cables. Work the lubricant into the cables by manually operating the controls multiple times. Be cautious not to apply excessive lubricant, as it can attract dirt and debris, potentially causing damage.

Inspecting and Adjusting the Tires

Checking the Tire Pressure

The tires of your snowblower play a critical role in its overall performance and maneuverability. Regularly checking the tire pressure is essential to ensure optimal operation on different surfaces and in various weather conditions.

Consult your snowblower’s user manual for the recommended tire pressure, as it may vary depending on the model. Use a tire pressure gauge to measure the existing pressure in each tire. Adjust the pressure as necessary, using an air compressor or by adding or releasing air.

Adjusting the Tire Pressure

To adjust the tire pressure, refer to the recommended pressure provided in your snowblower’s user manual. If the current tire pressure is too high, release air by removing the valve stem cap and gently pressing the valve stem with a small tool or the tip of a tire pressure gauge.

If the current tire pressure is too low, use an air compressor to add air until the desired pressure is reached. Avoid overinflating the tires, as it can negatively impact performance and may cause tire damage.

Checking the Tire Tread

The tread on your snowblower’s tires provides traction and helps maintain stability while operating on different surfaces. Regularly inspecting the tire tread is essential to ensure adequate grip and prevent slipping on icy or slippery terrain.

Visually inspect the tire tread for any signs of excessive wear or unevenness. Check for worn or missing tread elements, as well as any visible signs of damage. If the tread is severely worn or damaged, it’s recommended to replace the tires to maintain safe and efficient snowblower operation.

Adjusting the Tire Tread

Unlike vehicle tires, snowblower tires generally do not have adjustable treads. If the tire tread is worn or damaged beyond repair, replacing the tires with new ones designed for your specific snowblower model is the best solution.

It’s important to use the correct tire size and type as specified by the manufacturer. Using improper tires can affect the snowblower’s performance, stability, and overall safety.

Inspecting and Testing the Electric Start

Checking the Battery

If your snowblower is equipped with an electric start feature, regular maintenance and inspection of the battery are crucial to ensure reliable operation during cold weather conditions. A weak or faulty battery can lead to starting issues and inconvenience when you need to clear snow.

Inspect the battery for any signs of damage, corrosion, or leakage. Check the battery connections to ensure they are secure and free from rust or debris. It’s also important to measure the battery voltage using a multimeter to determine its overall health.

If the battery shows signs of deterioration or has a low voltage reading, it may need to be charged or replaced to ensure proper functioning of the electric start feature.

Inspecting the Starter Motor

The starter motor is responsible for cranking the engine during the starting process, enabling the snowblower to operate. Regular inspection of the starter motor is essential to ensure it is in good condition and functions as intended.

Visually inspect the starter motor for any signs of damage, such as broken or worn-out components. Check the connections to ensure they are secure and free from corrosion.

If you notice any issues with the starter motor, it’s recommended to seek professional assistance or contact the manufacturer for further guidance. Repairing or replacing the starter motor requires expertise and specific tools.

Testing the Electric Start

Before the winter season begins, it’s crucial to test the electric start feature of your snowblower to ensure it’s in working order. This will prevent any unwelcome surprises when you need to start the snowblower during freezing temperatures.

Follow the user manual’s instructions on operating the electric start feature. Typically, this involves connecting the snowblower to a power source, such as an electrical outlet, and engaging the electric start button or switch.

Observe the snowblower’s response when using the electric start. If the engine starts smoothly and without any issues, the electric start is functioning properly. However, if the engine fails to start or experiences any irregularities, further troubleshooting or professional assistance may be necessary.

Cleaning and Storing the Snowblower

Removing Debris and Snow Build-up

Once you’ve completed the necessary inspections and maintenance tasks, it’s important to clean the snowblower to remove any debris or snow build-up. This is especially important before storing the snowblower for an extended period.

Start by turning off the snowblower and allowing the engine to cool down. Remove any snow or ice accumulation on the exterior using a brush or shovel. Pay close attention to the auger and discharge chute, ensuring they are clear of any debris.

Inspect the engine and other components for any traces of debris or oil leaks. If necessary, use a cloth or brush to remove any dirt or grime. Taking the time to clean your snowblower will help maintain its performance and prevent rust or corrosion.

Cleaning the Snowblower

To clean the snowblower more thoroughly, start by disconnecting the spark plug wire from the spark plug. This will prevent accidental engine starts during the cleaning process.

Using a garden hose or pressure washer set to a low pressure setting, carefully rinse off any visible dirt or debris from the snowblower. Avoid spraying directly into the engine or electrical components to prevent damage. Pay attention to hard-to-reach areas and ensure all parts are thoroughly rinsed.

After rinsing, scrub any remaining stains or stubborn dirt with a brush and a mild detergent or snowblower cleaner. Rinse thoroughly once again, ensuring all cleaning solutions are removed.

Allow the snowblower to dry completely before moving on to the next step.

Storing the Snowblower

Proper storage of your snowblower during the off-season is essential to maintain its performance and prevent damage. Follow these steps to store your snowblower safely:

  1. Drain the fuel tank: If you won’t be using the snowblower for an extended period, it’s recommended to drain the fuel tank completely to prevent stale fuel from causing starting issues or engine damage. Consult the user manual for specific instructions on fuel draining.

  2. Remove the spark plug: Remove the spark plug and apply a small amount of oil into the cylinder through the spark plug hole. Gently pull the starter cord a few times to distribute the oil evenly inside the cylinder. This will help prevent rust and ensure smooth engine operation when you’re ready to use the snowblower again.

  3. Clean and lubricate moving parts: Apply a thin layer of lubricant to the auger, impeller, and other moving parts to prevent rust and ensure smooth operation. Wipe off any excess lubricant to avoid attracting dirt and debris.

  4. Store in a dry and secure location: Find a clean and dry storage space to keep your snowblower protected from the elements. Ideally, store it in a covered area, such as a garage or shed, to prevent exposure to moisture and precipitation. If possible, elevate the snowblower off the ground to minimize contact with damp surfaces.

By following these storage guidelines, you can extend the lifespan of your snowblower and be prepared for the next winter season.

Tips and Precautions

Start with the User Manual

When calibrating and maintaining your snowblower, always refer to the user manual provided by the manufacturer. The user manual contains specific instructions and guidelines for your snowblower model, ensuring that you perform the necessary tasks correctly and safely.

Wear Protective Gear

Ensure your safety by wearing appropriate protective gear when operating or performing maintenance on your snowblower. This includes sturdy gloves, eye protection, and non-slip footwear. Additionally, consider wearing hearing protection if your snowblower generates a high level of noise.

Perform Regular Maintenance

Regular maintenance is crucial for keeping your snowblower in optimal condition. Follow the manufacturer’s recommended maintenance schedule, including tasks such as oil changes, filter replacements, and inspections. By staying on top of maintenance, you can prevent unexpected breakdowns and ensure your snowblower operates at its best.

Keep an Eye on Warning Signs

Be attentive to warning signs that indicate potential issues with your snowblower. These may include unusual noises, excessive vibration, poor performance, or difficulty starting. Address any warning signs promptly, as they often indicate the need for maintenance or repairs.

Seek Professional Help if Needed

If you’re unsure about any part of the calibration or maintenance process, it’s always best to seek professional assistance. Don’t hesitate to contact the manufacturer’s customer service or consult a certified technician who specializes in snowblower repairs. They can provide guidance and ensure the proper servicing of your snowblower.

Calibrating your snowblower for optimum performance is a comprehensive process that requires attention to detail and periodic maintenance. By following these guidelines and performing the necessary inspections and adjustments, you can ensure that your snowblower is ready to tackle snow removal efficiently and reliably.

How Often Should I Clean My Snowblower’s Air Filter?

So you’ve got a trusty snowblower to help you battle through those frosty winter days. But have you ever wondered how often you should be giving your snowblower’s air filter a good clean? Well, look no further for answers. In this article, we’ll uncover the importance of maintaining a clean air filter, the signs that suggest it’s time for a cleaning, and provide helpful tips on how frequently you should be tackling this task. So sit back, relax, and let’s get your snowblower ready to take on winter’s snowy onslaught!

Factors Affecting Air Filter Cleaning Frequency

Maintaining a clean air filter is crucial for the optimal performance and longevity of your snowblower. Several factors can affect how frequently you should clean your snowblower’s air filter.

Frequency of Use

The frequency with which you use your snowblower plays a significant role in determining how often you should clean the air filter. If you use your snowblower frequently, especially during heavy snowfall or in large areas, the air filter may accumulate dirt and debris more quickly. In such cases, it is advisable to clean the air filter more frequently to ensure uninterrupted performance.

Conditions of Use

The conditions in which you operate your snowblower also impact the cleaning frequency of the air filter. If you use your snowblower in dusty or dirty environments, such as areas with loose gravel or construction sites, the air filter is more likely to become clogged with debris. Similarly, operating the snowblower in wet or humid conditions can lead to the accumulation of moisture in the air filter, which may require more frequent cleaning.

Air Quality

The air quality in your location can have a significant impact on how often you should clean your snowblower’s air filter. If you live in an area with high levels of airborne pollutants, such as dust, pollen, or industrial emissions, the air filter is likely to become dirty faster. Regular cleaning is necessary to prevent the filter from becoming clogged, as a clogged filter can reduce the snowblower’s performance and potentially cause engine damage.

Type of Fuel Used

The type of fuel you use in your snowblower can also affect the cleaning frequency of the air filter. Some fuels, such as ethanol-blended gasoline, can leave behind residue that can accumulate on the air filter. This residue can restrict airflow and decrease the efficiency of the snowblower. If you consistently use fuels that are known to leave residue, you may need to clean the air filter more often to maintain optimal performance.

Signs That Your Snowblower’s Air Filter Needs Cleaning

Cleaning the air filter of your snowblower is essential to ensure its smooth operation. However, it can be challenging to determine exactly when the air filter needs cleaning. Here are some signs that indicate it’s time to clean your snowblower’s air filter:

Reduced Power and Performance

If you notice a decrease in the power and performance of your snowblower, it might be an indication that the air filter is dirty. A clogged air filter restricts airflow, which can lead to reduced engine power and diminished overall performance. Cleaning or replacing the air filter can help restore the snowblower’s power and efficiency.

Difficulty Starting

A dirty air filter can make it difficult for the snowblower to start. If you experience issues with starting your snowblower, particularly if it used to start easily before, the air filter may be clogged. Cleaning the air filter can remove any obstructions and improve the starting process.

Excessive Fuel Consumption

If your snowblower is consuming fuel at a faster rate than usual, it could be a sign of a dirty air filter. A clogged air filter restricts the airflow, causing the engine to run inefficiently and consume more fuel to generate the required power. Cleaning or replacing the air filter can help restore normal fuel consumption.

Dirty or Clogged Filter

A visual inspection of the air filter can also give you an indication of its cleanliness. If the filter appears dirty, clogged, or covered in debris, it is a clear sign that it needs cleaning. Removing the filter and cleaning it thoroughly can prevent further issues and ensure optimal performance.

How Often Should I Clean My Snowblowers Air Filter?

Recommended Cleaning Schedule for Snowblower Air Filter

To ensure that your snowblower operates at its best, it is important to follow a regular cleaning schedule for the air filter. Here are some guidelines to help you establish a cleaning routine:

Manufacturer’s Recommendations

The manufacturer of your snowblower is the best source of information when it comes to maintenance recommendations, including cleaning the air filter. Read the owner’s manual or consult the manufacturer’s website to determine their specific recommendations regarding the cleaning frequency of the air filter.

Every 10 Hours of Use

As a general rule of thumb, it is recommended to clean your snowblower’s air filter every 10 hours of use. This interval provides a balance between ensuring optimal performance and avoiding excessive cleaning. Regular cleaning at this interval can help prevent debris accumulation and maintain the snowblower’s efficiency.

Monthly Inspection

In addition to the periodic cleaning every 10 hours of use, it is also advisable to inspect the air filter monthly. This visual check allows you to identify any signs of dirt or damage that may require immediate attention. Regular inspections can help catch issues early on and prevent major problems down the line.

Regular Visual Check

Make it a habit to visually inspect the air filter before each use of your snowblower. Look for any visible dirt, debris, or damage, and clean or replace the filter as needed. Regular visual checks ensure that the air filter is clean and in good condition, promoting optimal performance.

Step-by-Step Guide: How to Clean a Snowblower’s Air Filter

Cleaning the air filter of your snowblower is a relatively simple process that can be done at home. Follow these step-by-step instructions to clean your snowblower’s air filter effectively:

Step 1: Gather Required Tools

Before you begin, gather the necessary tools and supplies. You will need protective gloves, safety eyewear, a clean cloth or brush, and compressed air (optional). Having these tools easily accessible will make the cleaning process efficient and safe.

Step 2: Turn off the Snowblower

Ensure that the snowblower is turned off and the engine is cool before attempting to clean the air filter. This step is crucial to prevent any accidental injuries or damage to the snowblower.

Step 3: Remove the Air Filter Cover

Locate the air filter cover on your snowblower. It is usually located near the engine and can be identified by its distinctive shape and design. Remove the cover carefully by unscrewing or unclipping it, depending on the model of your snowblower.

Step 4: Inspect the Air Filter

Once the cover is removed, visually inspect the air filter for dirt, dust, or debris accumulation. Shake the filter gently to dislodge any loose particles. If the filter is excessively dirty or damaged, it may need to be replaced instead of cleaned.

Step 5: Clean the Air Filter

If the air filter is relatively clean, you can proceed with cleaning it. Use a clean cloth or brush to remove the visible dirt and debris from both sides of the filter. Ensure that all the dirt is removed, but be careful not to damage the filter material in the process.

Step 6: Reinstall the Air Filter

After cleaning the air filter, carefully place it back in position. Ensure that it fits snugly and is correctly aligned with the filter housing. If the filter requires any special installation or alignment, refer to the manufacturer’s instructions.

Step 7: Replace the Air Filter if Necessary

If the air filter is heavily damaged, excessively dirty, or cannot be adequately cleaned, it is recommended to replace it with a new filter. Check the owner’s manual or consult the manufacturer to ensure you purchase the correct replacement filter for your specific snowblower model.

How Often Should I Clean My Snowblowers Air Filter?

Precautions to Take When Cleaning a Snowblower’s Air Filter

While cleaning the air filter of your snowblower is a relatively straightforward task, it is essential to take certain precautions to ensure your safety and avoid damage to the equipment.

Wearing Protective Gloves and Eyewear

Before you start the cleaning process, put on protective gloves and safety eyewear. This will protect your hands and eyes from any dirt, debris, or harmful particles that may be present on the air filter or within the snowblower.

Cleaning in a Well-Ventilated Area

Ensure that you clean the air filter in a well-ventilated area. This will prevent the inhalation of any dust or particles that may be released during the cleaning process. Cleaning in a well-ventilated space also helps minimize the exposure to cleaning solvents or compressed air fumes if used.

Avoiding Damage to the Air Filter

Take care not to damage the air filter while cleaning it. Use gentle, sweeping motions with a cloth or brush to remove dirt and debris. Avoid excessive force that may tear or distort the filter material. Damaged filters may not provide adequate filtration and can compromise the performance of your snowblower.

Using Compressed Air Carefully

If you choose to use compressed air to clean the air filter, use caution. High-pressure air can damage or dislodge delicate filter material. Hold the compressed air nozzle several inches away from the filter and blow air in short bursts. This will help remove any stubborn debris without causing damage.

Other Maintenance Tips for Keeping Your Snowblower in Top Condition

In addition to regular air filter maintenance, there are several other essential maintenance tasks to keep your snowblower in top condition. Incorporating these tasks into your overall maintenance routine will ensure that your snowblower operates reliably and efficiently:

Regular Oil Changes

Regularly changing the oil in your snowblower is crucial for maintaining its smooth operation. Consult the owner’s manual for the recommended oil change intervals and use the appropriate oil specified by the manufacturer. Clean oil lubricates the engine and keeps it running smoothly, reducing wear and tear.

Inspecting and Adjusting Drive Belt Tension

Inspecting and adjusting the drive belt tension is necessary to ensure proper traction and power transfer in your snowblower. Over time, the drive belt can become loose or stretched, leading to reduced efficiency. Regularly inspect the drive belt and adjust the tension as recommended by the manufacturer.

Checking and Replacing Spark Plugs

Spark plugs play a vital role in the ignition process of your snowblower’s engine. Regularly inspecting and cleaning spark plugs can help maintain efficient combustion and prevent issues like misfires or difficulty starting. If the spark plug is excessively worn or damaged, it should be replaced with a new one.

Cleaning the Carburetor

A clean carburetor is essential for proper fuel delivery and combustion in the snowblower’s engine. Over time, the carburetor can become clogged with dirt, debris, or fuel deposits. Regularly cleaning the carburetor or using a fuel additive can prevent clogging and ensure optimal engine performance.

Benefits of Cleaning Your Snowblower’s Air Filter Regularly

Regularly cleaning your snowblower’s air filter offers a range of benefits that positively impact its performance and longevity.

Improved Performance and Efficiency

A clean air filter allows for optimal airflow, ensuring efficient combustion within the snowblower’s engine. This leads to improved performance and enhanced fuel efficiency. By removing any dirt or debris that may restrict airflow, you can ensure that your snowblower operates at its best during the winter season.

Longer Lifespan of Engine

A clogged or dirty air filter can negatively impact the lifespan of your snowblower’s engine. Restricted airflow can cause the engine to work harder, potentially leading to overheating or premature wear and tear. Cleaning the air filter regularly reduces strain on the engine and helps prolong its lifespan.

Reduced Risk of Damage and Costly Repairs

A clean air filter prevents debris and dirt from reaching the internal components of the engine. By keeping the engine free from contaminants, you reduce the risk of damage to critical parts, such as the piston or cylinder. This reduces the likelihood of costly repairs and extends the overall lifespan of your snowblower.

Enhanced Safety and Reliability

A properly maintained air filter contributes to the overall safety and reliability of your snowblower. By ensuring optimal engine performance, you minimize the chances of unexpected breakdowns or malfunctions while operating the snowblower. This allows you to clear snow from your property with confidence and peace of mind.

Different Types of Air Filters for Snowblowers

Snowblowers can utilize various types of air filters, each with its own characteristics and benefits. Understanding the different types can help you choose the most suitable filter for your snowblower:

Foam Filters

Foam filters are commonly used in snowblowers due to their excellent filtration capabilities. They are designed to trap fine particles and debris effectively while allowing free airflow. Foam filters are generally washable and reusable, making them a cost-effective option in the long run.

Paper Filters

Paper filters are another common type used in snowblowers. They are typically disposable and offer good filtration performance. Paper filters can effectively trap larger particles and debris, providing adequate protection to the engine. Regular replacement is necessary to ensure optimal performance and maintain the snowblower’s efficiency.

Mesh Filters

Mesh filters, often made of metal or synthetic materials, are known for their durability and resistance to damage. They offer good filtration performance and are capable of capturing larger debris effectively. Mesh filters are generally washable and reusable, making them a suitable option for those looking for a more sustainable choice.

Cone Filters

Cone filters, also known as high-performance filters, are designed to provide superior filtration and airflow. They feature a cone-shaped design that maximizes surface area, allowing for increased filtration capacity. Cone filters are often made of high-quality materials and can offer enhanced performance in challenging operating conditions.

When to Replace Your Snowblower’s Air Filter

While regular cleaning is essential to maintain the air filter’s performance, there are instances where replacement becomes necessary. Here are some signs that indicate it’s time to replace your snowblower’s air filter:

Signs of Irreparable Damage

If the air filter is damaged beyond repair, such as tears, holes, or significant deformation, it is crucial to replace it immediately. A damaged filter cannot effectively filter the incoming air, putting the engine at risk of damage.

Excessive Wear and Tear

Over time, air filters can experience wear and tear, affecting their filtration and airflow capabilities. If you notice signs of significant deterioration, such as worn-out filter material or reduced structural integrity, it is advisable to replace the air filter.

Manufacturer’s Recommendations

Always refer to the manufacturer’s recommendations regarding the replacement intervals for your snowblower’s air filter. Filters should be replaced according to the guidelines provided by the manufacturer to ensure optimal engine performance and reliability.

Lack of Efficiency despite Cleaning

If you have thoroughly cleaned the air filter and it still does not exhibit proper filtration or airflow, it may be time to replace it. A filter that cannot be adequately cleaned or shows no improvement in performance after cleaning indicates that it has exceeded its useful life.

Conclusion

Regular maintenance and cleaning of your snowblower’s air filter are vital to ensure its optimal performance and longevity. By understanding the factors affecting air filter cleaning frequency, identifying signs that indicate the need for cleaning, and following a recommended cleaning schedule, you can keep your snowblower operating at its best.

Taking precautions when cleaning the air filter, such as wearing protective gear and working in a well-ventilated area, is essential for safety and effectiveness. Additionally, incorporating other maintenance tasks, such as regular oil changes and inspecting critical components, helps keep your snowblower in top condition.

By cleaning your snowblower’s air filter regularly, you can benefit from improved performance, extended engine lifespan, reduced risk of damage, and enhanced safety and reliability. Be aware of the different types of air filters available and know when it’s time to replace the filter to maintain optimal filtration and airflow.

As a responsible snowblower owner, taking care of your equipment through proper air filter maintenance and overall maintenance routine ensures long-term benefits, efficient snow clearing, and peace of mind throughout the winter season.

What Do I Do If My Snowblower’s Pull Cord Snaps?

So, you wake up one winter morning to a foot of snow outside and the biting cold creeping through your windows. Determined to conquer the snowdrifts that stand between you and your morning commute, you head out to your trusty snowblower. But just as you grab the pull cord to start it up, disaster strikes – it snaps! Panic sets in, but fear not, because we’ve got you covered. In this article, we’ll walk you through step-by-step instructions on what to do if your snowblower’s pull cord decides to give up on you, leaving you stranded in a sea of snow.

What Do I Do If My Snowblowers Pull Cord Snaps?

Assess the Damage

When your snowblower’s pull cord snaps, the first step is to assess the damage. Take a close look at the pull cord to determine the extent of the breakage. Is it completely severed, or is there still a portion of the cord intact? Inspecting the pull cord will help you understand the type of repair or replacement required. Additionally, while inspecting the pull cord, take the time to check for any other damages such as loose screws, cracks, or worn-out parts. Identifying these issues early on will prevent further damage and ensure a more efficient repair process.

Replace the Snapped Pull Cord

If your snowblower’s pull cord has snapped, don’t worry! You can easily replace it with the right tools and materials. Before starting the replacement process, gather all the required tools and materials. This typically includes a screwdriver, pliers, a new pull cord, and any necessary replacement parts. Once you have everything ready, you can move on to removing the recoil assembly. Carefully detach the old, broken pull cord from the assembly and attach the new pull cord, making sure it is securely fastened. Finally, reinstall the recoil assembly, ensuring all the screws are tightened properly.

Seek Professional Help

If you’re unsure about repairing the pull cord yourself or if you don’t have the necessary tools and expertise, it is best to seek professional help. Contact a certified technician who specializes in snowblower repairs. They will have the knowledge and experience to handle the repair safely and ensure it is done correctly. Another option is to take your snowblower to a repair shop. This way, you can have peace of mind knowing that the repair will be performed by professionals who understand the intricacies of snowblower maintenance and can address any other potential issues that may arise.

What Do I Do If My Snowblowers Pull Cord Snaps?

Preventive Measures

To avoid encountering a snapped pull cord in the future, it is crucial to follow proper preventive measures. Regular maintenance checks play a vital role in keeping your snowblower in good condition. This includes inspecting and cleaning the pull cord, making sure it is not frayed or entangled. Additionally, proper handling and storage are essential to prevent any damage to the pull cord or other parts of the snowblower. Avoid pulling the cord forcefully or yanking it when starting the snowblower, as this can strain the cord and lead to breakage. Finally, store the snowblower in a clean, dry area to protect it from environmental factors that can cause wear and tear.

Replace the Entire Recoil Assembly

In some cases, replacing just the pull cord may not be sufficient, especially if the entire recoil assembly is damaged or worn out. To determine if the recoil assembly needs replacement, assess its condition. Look for signs of corrosion, cracks, or excessive wear. If you notice any of these issues, it’s time to obtain a new recoil assembly. Contact a reputable snowblower parts dealer or the manufacturer to find the exact replacement for your model. Once you have the new assembly, carefully remove the old one and install the new recoil assembly following the manufacturer’s instructions. This comprehensive replacement will ensure a more effective and long-lasting solution.

Use a Temporary Fix

If you find yourself in a situation where you need a quick solution for the snapped pull cord, there are temporary fixes you can try. One option is to knot the snapped ends of the cord together. This may provide a temporary hold, allowing you to start the snowblower and clear the snow. Keep in mind that this is only a temporary solution and may not be as reliable as a complete replacement. Another alternative is to use a grip or handlebar rope as a makeshift pull cord. While not as convenient or durable, it can serve as a short-term fix until a more permanent solution can be implemented.

Troubleshooting Tips

In addition to addressing the pull cord issue, it’s crucial to troubleshoot any other potential problems that may arise with your snowblower. Start by checking the spark plug, which is responsible for igniting the fuel and air mixture within the engine. Inspect it for signs of damage or wear, and replace if necessary. Next, give the carburetor a thorough inspection, ensuring it is clean and free from debris. A clogged carburetor can cause starting issues and hinder the snowblower’s performance. Finally, examine the fuel system, including the fuel filter and lines, for any blockages or leaks. Regularly troubleshooting these components will help keep your snowblower running smoothly.

Safety Precautions

When working on any repair or maintenance task involving a snowblower, it is crucial to prioritize safety. Before performing any repairs on the pull cord or other parts, always disconnect the spark plug to prevent accidental starting. Additionally, wearing protective gloves and eyewear is essential to shield your hands and eyes from any potential injuries. The recoil assembly and other components may have sharp edges or debris that could cause harm. Lastly, make sure to work in a well-ventilated area to avoid inhaling any harmful fumes. Taking these safety precautions will help ensure a safe and successful repair process.

Consider Upgrading to an Electric Start

If you frequently experience issues with the pull cord or want a more convenient option, it may be worth considering upgrading to an electric start system for your snowblower. Electric start systems eliminate the need for pulling a cord and instead rely on a push-button ignition. This feature can significantly simplify the starting process, especially on cold winter days. Additionally, electric start systems tend to be more reliable and require less physical effort. However, it’s important to note that upgrading to an electric start system may involve additional installation steps and costs. Consult the manufacturer or a certified technician for more information.

Learn How to Properly Use the Snowblower

To avoid potential issues with the pull cord or any other parts of your snowblower, it is essential to learn how to operate it correctly. Start by reading the user manual provided by the manufacturer. Familiarize yourself with the specific features, controls, and maintenance instructions for your model. Additionally, follow all safety guidelines outlined in the manual, including proper dress attire, recommended operating procedures, and maintenance schedules. By operating the snowblower correctly, you can minimize the risk of any damage occurring to the pull cord or other components while maximizing the machine’s performance.

In conclusion, a snapped pull cord may seem like a daunting repair, but with the right knowledge and tools, it can be addressed effectively. Whether you choose to replace the cord yourself, seek professional help, or consider alternative solutions, such as upgrading to an electric start system, taking care of a snowblower’s pull cord is essential for efficient operation. By implementing regular maintenance checks, following proper handling and storage practices, and operating the snowblower correctly, you can prevent future issues with the pull cord and enjoy hassle-free snow clearing experiences for years to come.

What Should I Do If My Snowblower Starts Smoking?

So, picture this: You wake up to find a fresh layer of snow outside. You grab your trusty snowblower and confidently make your way to clear the driveway. But suddenly, you notice something alarming – your snowblower starts smoking! Panic sets in as you wonder what you should do in this situation. Before you start envisioning costly repairs or a ruined winter season, take a deep breath. In this article, we’ll guide you through the steps to take if your snowblower starts smoking, so you can quickly get back to conquering the snow-covered streets.

What Should I Do If My Snowblower Starts Smoking?

Causes of Smoking Snowblower

When your snowblower starts smoking, it’s important to first understand the potential causes so that you can effectively troubleshoot and resolve the issue. Here are some common reasons why a snowblower might smoke:

1. Oil or fuel leak

One of the main causes of a smoking snowblower is an oil or fuel leak. If there is a leakage in the fuel line or from the engine, it can result in the production of smoke. It’s important to inspect the area around the fuel tank and engine for any signs of leakage, such as puddles or a strong odor.

2. Clogged engine or air filter

A clogged engine or air filter can also lead to a smoking snowblower. When the engine or air filter becomes blocked with debris, it can restrict the flow of air and cause the engine to overheat, resulting in smoke. Regular cleaning and maintenance of the engine and air filter can prevent this issue.

3. Excessive oil in the engine

If there is too much oil in the engine, it can cause the snowblower to smoke. This usually happens when the user overfills the oil reservoir or fails to drain old oil properly before adding new oil. It’s essential to follow the manufacturer’s instructions regarding the correct oil level for your specific snowblower model.

4. Blocked muffler or exhaust system

A blocked muffler or exhaust system can restrict the flow of exhaust gases, leading to a smoking snowblower. Debris, such as snow or ice, can accumulate in the muffler or exhaust pipe, causing smoke to escape. Regularly checking and cleaning the muffler and exhaust system can help prevent this issue.

5. Overheating engine

If the engine of your snowblower becomes overheated, it can generate smoke. This can occur due to various reasons, such as the accumulation of debris, low oil levels, or improper fuel mixture. Ensuring proper maintenance and monitoring the engine’s temperature can help prevent overheating and subsequent smoking.

Safety Precautions

Before you begin troubleshooting the issue with your smoking snowblower, it’s essential to prioritize your safety. Here are some safety precautions to follow:

1. Turn it off immediately

As soon as you notice your snowblower smoking, the first step is to turn it off immediately. This will help prevent any further damage or potential safety hazards.

2. Move to a well-ventilated area

Once the snowblower is turned off, move it to a well-ventilated area. Operating the machine in an open, outdoor space will help minimize the risk of inhaling harmful smoke and fumes.

3. Allow the snowblower to cool down

After moving the snowblower to a safe location, allow it to cool down completely. This will prevent any potential burns or injuries when working on the machine.

4. Put on protective gear

Before you start troubleshooting the smoking snowblower, it’s crucial to put on protective gear. This may include safety goggles, gloves, and ear protection to safeguard yourself from any potential hazards.

What Should I Do If My Snowblower Starts Smoking?

Steps to Troubleshoot Smoking Snowblower

Now that you’ve taken the necessary safety precautions, you can proceed with troubleshooting the smoking snowblower. Here are the steps to follow:

1. Inspect for oil or fuel leaks

Carefully inspect the snowblower for any signs of oil or fuel leaks. Look for puddles or stains around the fuel tank and engine. If you detect a leak, it’s important to fix it before further using the snowblower.

2. Check the engine air filter

Remove the air filter and inspect it for any clogs or dirt. A dirty or clogged air filter can restrict airflow, leading to smoke production. Clean or replace the air filter if necessary, following the manufacturer’s instructions.

3. Ensure correct oil level

Check the oil level in your snowblower’s engine. If it exceeds the recommended level, carefully drain the excess oil according to the manufacturer’s instructions. Make sure to use the correct type of oil as specified in the user manual.

4. Clean the muffler and exhaust system

Inspect the muffler and exhaust system for any blockages. Remove any snow, ice, or debris that may have accumulated in these areas, using a cloth or brush. It’s essential to clean these components regularly to promote proper exhaust flow.

5. Check for signs of overheating

Examine the engine for signs of overheating, such as discoloration, strong fuel odor, or unusual noises. If you suspect overheating, investigate the cause, which could be a result of low oil levels, improper fuel mixture, or other mechanical issues.

Solutions When You Find a Problem

After troubleshooting your smoking snowblower, you may come across specific issues that need to be addressed. Here are some solutions for common problems:

1. Fix leaks and replace damaged parts

If you discover any leaks or damaged parts during the inspection, it’s vital to fix them promptly. Replace any faulty components, such as fuel lines or gaskets, and ensure everything is properly sealed.

2. Clean or replace the engine air filter

If the air filter is dirty or clogged, clean it thoroughly or replace it with a new one. A clean air filter promotes better airflow and prevents smoke production.

3. Adjust oil level if necessary

If you find that the oil level exceeds the recommended amount, carefully drain the excess oil according to the manufacturer’s instructions. Maintaining the correct oil level helps prevent smoke and engine damage.

4. Clear any blockages in the muffler or exhaust

If the muffler or exhaust was blocked, clean it thoroughly to remove any obstructions. Regularly inspecting and cleaning these components will ensure proper exhaust flow and minimize smoke production.

5. Identify and fix the cause of overheating

If your snowblower was overheating, identify the underlying cause and address it accordingly. This may involve checking for proper oil levels, verifying the fuel mixture, or seeking professional assistance for more complex mechanical issues.

When to Seek Professional Help

While many smoking snowblower issues can be resolved through troubleshooting, there are situations where professional help is necessary. Here are some scenarios in which you should consider seeking assistance:

1. Lack of experience or knowledge

If you’re unsure about how to troubleshoot or fix the smoking snowblower issue, it’s best to leave it to a professional. Lack of experience or knowledge can potentially lead to further damage.

2. Extensive damage or mechanical issues

If you discover extensive damage or complex mechanical issues during your troubleshooting process, it’s advisable to consult a professional technician. They will have the expertise and tools to address these problems effectively.

3. Persistent smoking after troubleshooting

If your snowblower continues to smoke even after following the troubleshooting steps, it indicates a more significant underlying problem. In such cases, it’s essential to seek professional help to prevent further damage and ensure your safety.

Regular Maintenance to Prevent Smoking

To avoid encountering a smoking snowblower in the future, it’s important to prioritize regular maintenance. Here are some maintenance tips to help prevent smoke-related issues:

1. Clean and inspect the snowblower regularly

Regularly cleaning your snowblower, including the engine, air filter, and exhaust system, will prevent the accumulation of debris, which can lead to smoking. Perform visual inspections to identify any potential problems before they escalate.

2. Change fuel and oil as recommended

Follow the manufacturer’s guidelines for fuel and oil changes. Using fresh fuel and changing the oil at the recommended intervals ensures optimal performance and reduces the likelihood of smoking.

3. Keep the engine well-lubricated

Proper lubrication of the snowblower’s engine is crucial to prevent overheating and smoking. Regularly lubricate moving parts according to the manufacturer’s instructions to keep the engine running smoothly.

4. Avoid overworking the machine

Avoid overworking your snowblower by adhering to its limitations and recommended usage guidelines. Overworking the machine can strain the engine and lead to excessive smoke production.

5. Store the snowblower properly

During the off-season, store your snowblower in a clean, dry area to prevent moisture and rust buildup. Follow the manufacturer’s instructions for proper storage, including fuel and oil removal if necessary.

By following these regular maintenance practices, you can minimize the chances of encountering a smoking snowblower and ensure its longevity and optimum performance.

In conclusion, when your snowblower starts smoking, it’s important to promptly address the issue to prevent further damage and potential safety hazards. Understanding the potential causes, taking necessary safety precautions, and following the troubleshooting steps can help you identify and resolve the problem. If needed, don’t hesitate to seek professional assistance for more complex issues. Finally, prioritizing regular maintenance practices will help prevent smoking and ensure the efficient operation of your snowblower.

How Do I Clean The Spark Plug On My Snowblower?

So, you’ve got yourself a snowblower and you’re ready to tackle those winter storms head-on. But before you rev it up and start clearing the snow like a champion, there’s one important step you don’t want to overlook – cleaning the spark plug. The spark plug is a crucial component of your snowblower’s engine, responsible for igniting the fuel-air mixture and keeping everything running smoothly. If it’s clogged or dirty, your snowblower may not start or run efficiently. Luckily, cleaning the spark plug is a fairly simple task that you can do yourself. In this article, we’ll walk you through the steps on how to clean the spark plug on your snowblower, so you can keep it in top shape all season long.

How Do I Clean The Spark Plug On My Snowblower?

Reasons to clean the spark plug

Cleaning the spark plug in your snowblower is an important maintenance task that shouldn’t be overlooked. There are several reasons why you should regularly clean the spark plug.

Improve performance

A clean spark plug can significantly improve the performance of your snowblower. Over time, the spark plug can become dirty and clogged with carbon deposits, which can hinder its ability to ignite the fuel-air mixture properly. By cleaning the spark plug, you ensure that it can deliver a strong, consistent spark, resulting in better engine performance and smoother operation.

Prevent starting issues

A dirty spark plug can also cause starting issues. If the spark plug is coated with carbon deposits or other contaminants, it may not produce a strong enough spark to ignite the fuel in the engine. This can lead to difficulty starting the snowblower or even prevent it from starting altogether. By keeping the spark plug clean, you can avoid these frustrating starting problems and ensure that your snowblower is always ready to go when you need it.

Extend plug life

Regularly cleaning the spark plug can help extend its life. When the spark plug is dirty or clogged, it has to work harder to produce a spark. This can lead to increased wear and tear on the electrode and insulator, potentially shortening the lifespan of the plug. By cleaning the spark plug regularly, you can remove any contaminants that may be causing premature wear and extend the overall life of the plug.

Preparation

Before you begin cleaning the spark plug on your snowblower, there are a few steps you should take to ensure your safety and make the process easier.

Turn off the snowblower

First and foremost, turn off your snowblower and make sure the engine is completely shut down. This will prevent any accidental starts and keep you safe while working on the spark plug.

Allow the engine to cool

Next, allow the engine to cool down. The spark plug and surrounding areas can become very hot during operation, so it’s important to give it enough time to cool off before attempting to remove the spark plug.

Gather necessary tools

Lastly, gather the necessary tools for the job. You will need a socket wrench or spark plug socket, a wire brush, and possibly a pair of pliers or spark plug boot puller to disconnect the spark plug wire. Having these tools on hand will make the process much easier and more efficient.

Removing the spark plug

Once you have properly prepared, it’s time to remove the spark plug from your snowblower. Here’s how:

Locate the spark plug

The spark plug is typically located on the side of the engine, near the cylinder head. Refer to your snowblower’s manual or look for a small, cylindrical component with a wire attached to it. This is the spark plug.

Disconnect the spark plug wire

Using a pair of pliers or a spark plug boot puller, gently grasp the spark plug wire and pull it away from the spark plug. Be careful not to pull on the wire itself, as this can damage it. Instead, focus on gripping the boot or connector and pulling straight back.

Remove the spark plug

With the spark plug wire disconnected, use a socket wrench or spark plug socket to loosen and remove the spark plug from the engine. Turn the wrench or socket counterclockwise to loosen it and then remove it by hand. Set the spark plug aside in a clean, safe place.

How Do I Clean The Spark Plug On My Snowblower?

Inspecting the spark plug

Now that the spark plug is removed, it’s time to inspect it for any signs of damage or wear. This inspection will help you determine if cleaning is necessary or if the spark plug needs to be replaced.

Examine the spark plug

Take a close look at the spark plug. Look for any signs of damage, such as cracks or chips in the ceramic insulator or electrode. Additionally, check for any excessive carbon deposits or oil fouling on the spark plug. These can indicate other issues with the engine that may need to be addressed.

Check for signs of damage

Inspect the electrode and center electrode, looking for signs of wear or erosion. The electrode should have a flat, smooth surface, and the spark plug should have a consistent gap between the electrodes. If you notice any irregularities, such as a worn-down electrode or a widened gap, it may be time to replace the spark plug.

Assess the electrode condition

The condition of the electrode can tell you a lot about the performance of your snowblower’s engine. If the electrode is covered in black, oily deposits, it could indicate rich fuel mixture or oil burning issues. On the other hand, a white, powdery residue may suggest a lean fuel mixture. Take note of any unusual conditions and consider adjusting the fuel mixture or seeking further professional assistance if necessary.

Cleaning the spark plug

If you determine that the spark plug is dirty but still in good condition, cleaning it can help restore optimal performance. Here’s how to clean the spark plug effectively:

Use a wire brush

Start by using a wire brush to carefully scrub away any carbon deposits or other contaminants from the spark plug. Gently brush the electrode, insulator, and the threaded portion of the plug to remove any built-up residue. Be thorough but gentle to avoid damaging the spark plug.

Avoid using abrasive material

It’s important to note that using abrasive material, such as sandpaper or a metal pick, can damage the electrode or insulator. Stick to a soft-bristled wire brush to minimize the risk of causing any harm while cleaning.

Clean the electrode and insulator

Pay particular attention to the electrode and insulator, as these are the areas that directly affect the spark plug’s performance. Cleaning off any carbon deposits or other contaminants will improve the spark plug’s efficiency and reliability.

Reinstalling the spark plug

After the spark plug is clean, it’s time to reinstall it in the snowblower’s engine. Follow these steps to ensure proper installation:

Apply anti-seize compound

Before reinstalling the spark plug, apply a small amount of anti-seize compound to the threads. This will help prevent the spark plug from seizing or becoming difficult to remove in the future.

Hand tighten the spark plug

Using your fingers, carefully thread the spark plug back into the engine. Start by turning it clockwise to ensure it is properly aligned with the threads. Once it is threaded in snugly, use a socket wrench or spark plug socket to hand tighten the spark plug. Be careful not to overtighten, as this can damage the spark plug or the engine.

Reconnect the spark plug wire

Finally, reconnect the spark plug wire by sliding the boot or connector back onto the spark plug until it clicks into place. Make sure it is securely attached to prevent any loose connections that could affect the spark plug’s performance.

Testing the spark plug

After completing the cleaning and reinstallation process, it’s important to test the spark plug to ensure it is working correctly. Here are two tests you can conduct:

Check for spark

With the spark plug wire reconnected, position the spark plug near a grounded metal surface, such as the engine block. Pull the starter cord or engage the electric starter to cranking the engine while observing the spark plug. If you see a strong, blue spark jumping across the electrodes, it indicates that the spark plug is functioning properly.

Conduct spark plug resistance test

If you suspect that the spark plug may still be faulty even after cleaning, you can perform a spark plug resistance test using a multimeter. Set the multimeter to the resistance or ohms mode and attach the leads to the metal terminal and the threaded portion of the spark plug. If the multimeter displays a resistance reading within the manufacturer’s specifications, the spark plug is likely in good condition. If not, it may be time to consider replacing the spark plug.

Maintaining the spark plug

Regular maintenance is crucial to ensuring the longevity and optimal performance of the spark plug. Here are some key maintenance tips:

Regular cleaning schedule

Make it a habit to clean the spark plug on a regular basis, especially if you frequently use your snowblower or notice any signs of fouling or carbon deposits. A routine cleaning schedule will help prevent any buildup and ensure consistent performance.

Using fuel additives

Fuel additives, such as fuel stabilizers or cleaners, can also help maintain the cleanliness of your spark plug. These additives can help remove deposits and prevent carbon buildup, resulting in a cleaner and more efficient spark plug.

Replacing the spark plug

Despite regular cleaning and maintenance, spark plugs do have a limited lifespan. If you notice that the spark plug is wearing out, damaged, or not performing optimally even after cleaning, it may be time to replace it. Consult your snowblower’s manual or a professional technician for guidance on selecting the right spark plug for your specific engine model.

Common spark plug problems

Understanding common spark plug problems can help you identify issues and take appropriate action. Here are a few problems you may encounter:

Fouling

Spark plug fouling occurs when carbon deposits build up on the electrode, insulator, or both. This can happen due to a rich fuel mixture, oil burning issues, or excessive idling. Fouling can lead to starting difficulties, poor engine performance, and even misfires. Regular cleaning and adjusting the fuel mixture can help prevent and address fouling issues.

Carbon deposits

Carbon deposits can accumulate on the spark plug over time, especially if the fuel-air mixture is not properly balanced. These deposits can interfere with the spark plug’s ability to generate a strong spark, resulting in reduced engine performance and starting issues. Cleaning the spark plug regularly can help minimize carbon deposits and maintain optimal performance.

Worn electrodes

Over time, the electrode on the spark plug can wear down or erode, affecting its ability to generate a strong spark. Symptoms of worn electrodes include misfires, reduced engine performance, and difficulty starting the snowblower. If the electrode is significantly worn or damaged, it’s recommended to replace the spark plug to restore optimal performance.

Conclusion

Cleaning the spark plug in your snowblower is a simple yet important maintenance task that can greatly benefit the performance and longevity of your machine. By following the proper steps outlined in this article and maintaining a regular cleaning schedule, you can ensure that your snowblower’s spark plug continues to deliver that strong, reliable spark necessary for smooth operation. Keep in mind the importance of proper preparation, thorough inspection, and appropriate cleaning techniques to maximize the effectiveness of your spark plug maintenance routine.

What Should I Do If My Snowblower Is Vibrating Excessively?

So, you’ve fired up your snowblower and suddenly noticed that it’s shaking like crazy. Not exactly the smooth, efficient snow-clearing experience you were hoping for, right? Well, fear not, because in this article, we’ll explore a few simple steps you can take to address that excessive vibration issue and get your snowblower running as smoothly as possible again. Whether it’s a minor adjustment or a more involved repair, we’ve got you covered. So, let’s get to the bottom of this vibrating mystery and tackle it head-on, shall we?

What Should I Do If My Snowblower Is Vibrating Excessively?

This image is property of www.ereplacementparts.com.

Check the Engine Mounts

Inspect the Engine Mounts for Damage

When your snowblower is vibrating excessively, one of the first things you should check is the engine mounts. Over time, the engine mounts can become worn or damaged, causing the engine to vibrate more than usual. Inspect the engine mounts carefully for any signs of cracks, tears, or other damage. If you notice any issues with the engine mounts, it’s important to replace them as soon as possible to prevent further damage to your snowblower.

Tighten Loose Engine Mounting Bolts

In addition to inspecting the engine mounts for damage, it’s also essential to check the tightness of the engine mounting bolts. Over time, these bolts can become loose due to the continuous vibrations of the snowblower. Grab a wrench or a socket set and carefully tighten any loose engine mounting bolts you come across. However, be cautious not to overtighten, as this can also cause damage. Ensuring that the engine mounts are secure and tightly fastened can significantly reduce excessive vibrations in your snowblower.

Inspect the Belts and Pulleys

Check for Worn or Damaged Belts

Excessive vibration in your snowblower can also be caused by worn or damaged belts. Therefore, it’s vital to inspect the belts for any signs of wear, such as cracks, fraying, or stretching. If you notice any damage to the belts, it’s crucial to replace them promptly to avoid any further issues. Worn-out belts can cause the snowblower’s components to function improperly, resulting in excessive vibrations and potential damage to the machine.

Tighten Loose Belt Tension

Loose belt tension can also contribute to excessive vibrations in your snowblower. Inspect the belt tension carefully and adjust it if necessary. Most snowblowers provide an adjustment mechanism that allows you to tighten or loosen the belt tension. Check your snowblower’s manual for instructions on how to adjust the belt tension properly. By ensuring the belts are properly tensioned, you can diminish vibrations and improve the overall performance of your snowblower.

Inspect and Lubricate Pulleys

While inspecting the belts, it’s a good idea to inspect the pulleys as well. Pulleys can accumulate dirt, debris, and even ice, which may cause the snowblower to vibrate excessively. Clean the pulleys thoroughly and ensure that there are no obstructions. Additionally, lubricate the pulleys as recommended by the snowblower’s manufacturer. Properly maintaining the pulleys will not only reduce vibrations but also extend their lifespan, ensuring smooth operation of your snowblower.

What Should I Do If My Snowblower Is Vibrating Excessively?

This image is property of www.ereplacementparts.com.

Examine the Auger and Impeller

Inspect the Auger for Damage or Misalignment

The auger is an essential component of your snowblower, responsible for breaking up and propelling the snow. If the auger is damaged or misaligned, it can result in excessive vibrations. Carefully examine the auger for any signs of cracks, chips, or bent blades. If you notice any damage, it’s important to replace the auger before further use to prevent worsening the problem. Additionally, check the alignment of the auger, as misalignment can also lead to increased vibrations in your snowblower.

Check the Impeller for Damage or Clogs

Similar to the auger, the impeller plays a crucial role in moving the snow out of the chute. If the impeller is damaged or clogged, it can disrupt the snowblower’s operation and cause excessive vibrations. Take the time to inspect the impeller for any signs of damage or obstructions. Remove any debris or clogs you find, ensuring that the impeller can rotate freely. By keeping the impeller in good condition, you can minimize vibrations and maintain optimal performance of your snowblower.

Inspect the Shear Pins

Check if Shear Pins are Broken or Missing

Shear pins are designed to protect the snowblower’s auger and engine from damage in case of a sudden impact with a hard object, such as a rock or ice chunk. However, they can break or go missing over time, leading to excessive vibrations. Take a moment to inspect the shear pins and determine if any of them are broken or missing. If you do find a damaged or missing shear pin, replace it immediately to prevent further damage to the auger or engine.

Replace Shear Pins if Necessary

If your inspection reveals broken or missing shear pins, it’s crucial to replace them promptly. Shear pins are relatively inexpensive and easy to replace, making it a simple maintenance task for you to tackle. Refer to your snowblower’s manual for the correct size and type of shear pins to purchase. Once you have the replacement shear pins, carefully install them according to the manufacturer’s instructions. By ensuring that all shear pins are intact, you can minimize vibrations and protect your snowblower from unnecessary damage.

What Should I Do If My Snowblower Is Vibrating Excessively?

This image is property of i.ytimg.com.

Check for Clogs in the Chute

Remove any Debris or Snow Buildup in the Chute

Another common cause of excessive vibration in a snowblower is clogs in the chute. Clogs can occur when snow or debris becomes stuck, restricting the airflow and causing the snowblower to vibrate. Inspect the chute carefully and remove any debris or snow buildup you find. Use a shovel or a brush to dislodge larger chunks of snow, and make sure that the chute is clear and unobstructed. Regularly clearing the chute will help maintain smooth operation and prevent unnecessary vibrations in your snowblower.

Evaluate the Skid Shoes and Scraper Blade

Inspect the Skid Shoes for Wear

Skid shoes are essential components of a snowblower, as they help provide clearance between the auger blades and the ground. Over time, skid shoes can become worn or damaged, leading to increased vibrations. Take a close look at the skid shoes and check for any signs of wear, such as excessive scraping or uneven surfaces. If you notice significant wear, it’s important to replace the skid shoes to ensure smooth operation and reduce vibrations in your snowblower.

Examine the Scraper Blade for Damage

The scraper blade is responsible for clearing snow from the ground, and if it’s damaged, it can cause excessive vibrations. Carefully examine the scraper blade for any signs of wear, chipping, or bending. Even a small amount of damage can affect the performance of your snowblower and lead to unwanted vibrations. If you notice any issues with the scraper blade, replace it promptly to maintain optimal functionality and minimize vibrations during operation.

What Should I Do If My Snowblower Is Vibrating Excessively?

This image is property of i.ytimg.com.

Adjust the Auger and Drive Control Cables

Ensure Proper Cable Tension

The auger and drive control cables are vital for controlling the operation of your snowblower. If these cables become damaged or stretched, it can lead to excessive vibrations. Check the tension of both the auger and drive control cables and ensure they are properly adjusted. If you notice any signs of damage or see that the cables are too loose or too tight, it’s essential to make the necessary adjustments. Follow the instructions outlined in your snowblower’s manual to ensure the correct tension and prevent unnecessary vibrations.

Check for Damaged or Stretched Cables

In addition to checking the tension of the cables, it’s important to inspect them for any signs of damage or stretching. Over time, cables can wear out, fray, or become stretched, affecting the performance of your snowblower and causing vibrations. Carefully examine the cables, from the control handles down to the corresponding components, and replace any damaged or stretched cables you find. By maintaining strong and properly functioning cables, you can significantly reduce vibrations and improve the overall operation of your snowblower.

Inspect the Wheels and Axles

Check for Bent or Damaged Wheels

The condition of the wheels on your snowblower can greatly impact the level of vibration during operation. Inspect the wheels carefully and check for any signs of damage, such as bends, cracks, or flat spots. Bent or damaged wheels can cause your snowblower to wobble and vibrate excessively. If you notice any issues with the wheels, replace them promptly to ensure smooth and stable operation, reducing vibrations and improving the overall performance of your snowblower.

Examine the Axles for Misalignment

Misaligned axles can also contribute to excessive vibrations in your snowblower. Take a close look at the axles and determine if they are aligned properly. If you notice any misalignment, use a wrench or adjustable pliers to carefully adjust the axles until they are straight and aligned. It’s essential to ensure that both axles are aligned correctly to prevent unnecessary vibrations and maintain the stability of your snowblower while in use.

What Should I Do If My Snowblower Is Vibrating Excessively?

This image is property of www.weingartz.com.

Verify the Engine RPM

Adjust the Engine RPM to Specifications

Another crucial aspect to consider when troubleshooting excessive vibrations in your snowblower is the engine’s RPM (revolutions per minute). Low or inconsistent RPM can lead to increased vibrations during operation. Consult your snowblower’s manual to determine the recommended engine RPM for optimal performance. Using a tachometer, adjust the engine RPM to meet the manufacturer’s specifications. By ensuring that the engine RPM is appropriately set, you can reduce vibrations and ensure smooth operation of your snowblower.

Seek Professional Assistance

Contact a Certified Technician if the Problem Persists

If you’ve followed all the previous steps and are still experiencing excessive vibrations in your snowblower, it may be time to seek professional assistance. Certified technicians have the expertise and knowledge to diagnose and resolve complex issues that may be causing excessive vibrations in your snowblower. Contact the manufacturer or a trusted repair service and explain the problem you’re facing. They will guide you through potential solutions or schedule a repair appointment if necessary. Remember, it’s essential to address the issue promptly to prevent further damage and maintain the optimal performance of your snowblower.

How Do I Replace The Shear Pins On My Snowblower?

So you’ve found yourself with a broken shear pin on your trusty snowblower, and you’re wondering how to get it fixed and back in action. Don’t worry, we’ve got you covered. In this article, we’ll walk you through the step-by-step process of replacing shear pins on your snowblower, so that you can quickly get back to tackling those snowy driveways and sidewalks without any hassle. Whether you’re a seasoned snowblower owner or a newbie in need of guidance, we’ll provide all the information you need to successfully replace those pesky shear pins and keep your snowblower running smoothly all winter long.

How Do I Replace The Shear Pins On My Snowblower?

Preparing for the Replacement

Understanding the Function of Shear Pins

Before you begin replacing the shear pins on your snowblower, it’s important to understand their function. Shear pins are designed to break if the auger blades encounter an obstruction, such as a rock or thick ice. This prevents damage to the more expensive and complex parts of the snowblower, such as the gearbox or engine. By sacrificing the shear pins, you can protect your snowblower from costly repairs.

Identifying the Type of Shear Pins

Snowblowers can have different types of shear pins, depending on the make and model. It’s essential to identify the specific type of shear pins your snowblower requires before attempting to replace them. Some common types include bolt-style shear pins, cotter pin-style shear pins, or roll pin-style shear pins. Consult your owner’s manual or contact the manufacturer to determine the correct type of shear pins for your snowblower.

Gathering the Necessary Tools

To replace the shear pins on your snowblower, you’ll need a few tools. Make sure you have a wrench or socket set that fits the bolt size of your shear pins. Additionally, keep a pair of pliers or a screwdriver handy for removing retaining clips, if applicable. It’s always a good idea to gather these tools before starting the replacement to avoid unnecessary delays or frustration.

Ensuring Safety Measures

Before you begin any maintenance or replacement work on your snowblower, it’s crucial to prioritize safety. Make sure the snowblower is turned off and completely cooled down before starting the replacement. Additionally, disconnect the spark plug wire to prevent accidental start-ups. It’s also essential to wear protective gloves and goggles to safeguard yourself from any potential injuries. By taking these safety measures, you can ensure a smooth and safe replacement process.

Locating the Shear Pins

Checking the Owner’s Manual

To locate the shear pins on your specific snowblower model, the first step is to consult the owner’s manual. The manual will provide you with detailed instructions and diagrams that pinpoint the exact location of the shear pins. It may also include additional tips or precautions specific to your snowblower model. Familiarize yourself with the manual’s instructions to proceed confidently with the replacement.

Examining the Auger

The auger is the rotating blade mechanism responsible for breaking up and moving the snow in the snowblower. To identify the shear pins, examine the auger assembly closely. In most snowblowers, the shear pins are located on the sides of the auger blades, near the point where they attach to the auger shaft. Look for any bolts, cotter pins, or retaining clips that secure the auger blades in place. These are the components that need to be removed to access and replace the shear pins.

Inspecting the Gearbox

While the shear pins themselves are not located in the gearbox, it’s essential to inspect this area as well. The gearbox is responsible for transferring power from the engine to the auger blades. Inspect the gearbox for any signs of damage, leaks, or excessive wear. A damaged gearbox can place additional strain on the shear pins and lead to more frequent replacements. If you notice any issues with the gearbox, it’s advisable to consult a professional for repairs before replacing the shear pins.

How Do I Replace The Shear Pins On My Snowblower?

Removing the Shear Pins

Turning off the Snowblower

Before attempting to remove the shear pins, it’s crucial to turn off the snowblower and ensure it’s completely powered down. This will prevent any accidental start-ups during the replacement process. Take a few moments to verify that the engine is off, disconnect the spark plug wire, and allow the machine to cool down before proceeding.

Clearing the Auger of Snow

Before you can access the shear pins, it’s important to clear the auger of any accumulated snow or debris. This can prevent any blockages or obstructions that may hinder the removal or replacement process. Use a shovel or gloved hands to clear away the snow from the auger blades. Ensure that the area is clean and free of any objects before continuing.

Securing the Auger

To safely remove the shear pins, it’s crucial to secure the auger blades in place. This will prevent the auger from rotating or shifting during the removal process, minimizing the risk of injury. Depending on your snowblower model, there may be specific instructions in the owner’s manual on how to secure the auger. This could involve using wooden blocks or other tools to hold the blades in place. Follow the recommended instructions carefully to ensure proper stabilization.

Removing the Retaining Clip or Bolt

Once the auger is securely in place, it’s time to remove the retaining clip or bolt that holds the shear pin in position. This may require using pliers, a wrench, or a socket set, depending on the specific type of retaining mechanism used. Carefully remove the retaining clip or unscrew the bolt, making sure to keep track of any washers or other components that may come loose during the process. Set these pieces aside in a safe location, as you will need them for reinstalling the new shear pin.

Extracting the Shear Pin

With the retaining clip or bolt removed, you can now extract the shear pin itself. The shear pin should slide out relatively easily once the retaining mechanism is removed. If it feels stuck or difficult to remove, check for any remaining debris or obstruction and clear it away. Take care not to apply excessive force, as this could damage the auger blades or surrounding components. Once the shear pin is removed, set it aside and prepare to install the new one.

Selecting and Installing the New Shear Pins

Choosing the Correct Shear Pins

Now that you have removed the old shear pin, it’s time to select a suitable replacement. Consult your owner’s manual or contact the manufacturer to obtain the correct shear pin specifications for your snowblower model. It’s crucial to choose shear pins that match the exact dimensions and type recommended by the manufacturer. Using the wrong shear pins could compromise the safety and performance of your snowblower. Once you have the correct shear pins, you’re ready to proceed with the installation.

Inserting the New Shear Pin

To insert the new shear pin, first, align it with the holes on the auger blade and the auger shaft. Gently push the shear pin through both holes until it’s fully inserted. Make sure the pin fits snugly and does not protrude excessively on either side. It’s important to avoid bending or warping the shear pin during the insertion process, as this could impair its ability to break appropriately in case of an obstruction.

Securing the Pin in Place

Once the new shear pin is inserted, it’s time to secure it in place. If your snowblower model uses a retaining clip, carefully reattach it by sliding it into the designated groove. Ensure that the clip is fully engaged and holds the shear pin securely. If your snowblower uses a bolt instead of a retaining clip, thread the bolt back into place and tighten it securely using a wrench or socket set. Double-check that the shear pin is firmly held and does not move unnecessarily.

Replacing the Retaining Clip or Bolt

After the new shear pin is secured, it’s important to reattach the retaining clip or bolt that holds it in position. If you removed any washers or other components earlier, ensure that they are properly reinstalled before securing the retaining mechanism. Take care to align the retaining clip correctly and ensure it is securely in place. If using a bolt, tighten it to the appropriate torque specification mentioned in the owner’s manual. The replacement process for the shear pins is now complete.

Testing the Replacement

Turning on the Snowblower

Before you test the replacement shear pins, it’s essential to turn on the snowblower and allow it to warm up for a few minutes. This will ensure that the engine and other components are adequately lubricated and functioning correctly. Once the snowblower is running, take a moment to listen for any unusual noises or vibrations that may indicate an issue.

Checking the Auger’s Performance

To test the replacement shear pins, engage the auger and observe its performance. The auger should rotate smoothly and break up any snow or debris in its path. If you notice any unusual noises, vibrations, or lack of effectiveness in clearing the snow, this could indicate a problem with the shear pins. In such cases, consider rechecking the installation to ensure the shear pins are properly aligned and secured.

Observing the Shear Pins

As the snowblower operates and the auger rotates, keep an eye on the shear pins. Over time, shear pins can wear down or break due to regular use. Observing the shear pins during operation can help you identify any signs of wear or damage. If you notice any sheared or significantly worn shear pins, it’s essential to replace them promptly to avoid potential damage to the snowblower.

Tips and Considerations

Inspecting Shear Pins Regularly

To ensure the optimal performance and safety of your snowblower, make it a habit to inspect the shear pins regularly. Check them for signs of wear, excessive rust, or damage. This can help you catch any potential issues before they cause a failure during operation. Inspecting the shear pins should be part of your routine snowblower maintenance.

Keeping Spare Shear Pins

In addition to regular inspections, it’s a good idea to keep spare shear pins on hand. Accidents can happen, and having extras readily available will save you from disruptions or delays if a shear pin needs replacement. Purchase a set of shear pins compatible with your snowblower model and store them in a safe place. Having spare shear pins can provide peace of mind and ensure that you’re always prepared.

Avoiding Overloading the Snowblower

To prevent unnecessary strain on the shear pins, avoid overloading your snowblower by taking smaller and more manageable passes when clearing snow. Trying to clear too much snow at once can put excessive stress on the auger blades and shear pins, increasing the likelihood of a failure. Take your time and allow the snowblower to work efficiently without excessive force or resistance.

Consulting a Professional if Needed

If you’re uncertain about replacing the shear pins on your snowblower or encounter any difficulties during the process, it’s always a good idea to consult a professional. They have the expertise and experience to ensure the job is done correctly and safely. Don’t hesitate to reach out to a qualified technician or the manufacturer if you have any concerns or questions regarding the shear pin replacement process.

How Do I Clean A Clogged Snowblower Chute?

So, you’re in the middle of winter and your trusty snowblower suddenly decides to play games with you by getting its chute all clogged up. Frustrating, right? But don’t worry, because in this article, we’re going to show you exactly how to tackle this snow-covered obstacle. From the tools you’ll need to the step-by-step process, we’ve got you covered. Say goodbye to those snowy blockages and get ready to have your snowblower running smoothly again in no time!

How Do I Clean A Clogged Snowblower Chute?

1. Safety Measures

When it comes to cleaning a clogged snowblower chute, safety should be your top priority. Snowblowers can be powerful and potentially dangerous machines, so taking the necessary precautions is essential to prevent accidents and injuries.

1.1 Wear Protective Gear

Before you start cleaning the clogged chute, make sure to wear the appropriate protective gear. This includes safety goggles or glasses to protect your eyes from flying debris, gloves to keep your hands safe from sharp edges or moving parts, and sturdy footwear to protect your feet.

1.2 Turn off the Snowblower

To ensure your safety, always turn off the snowblower and disconnect it from any power source before attempting to clean the clogged chute. This will prevent the machine from accidentally starting up while you are working on it, reducing the risk of injuries.

1.3 Disconnect the Spark Plug

For an extra layer of safety, disconnecting the spark plug is highly recommended. This will completely cut off the power supply to the snowblower, eliminating any possibility of it starting accidentally. Remember to consult your snowblower’s manual for specific instructions on how to disconnect the spark plug.

2. Diagnostic Step

Before diving into the cleaning process, it’s important to identify the source of the clog in your snowblower. By doing so, you can pinpoint the exact area that needs attention and troubleshoot accordingly.

2.1 Identify the Source of Clog

Take a close look at your snowblower to determine where the clog is occurring. It could be in the chute, impeller, auger, or somewhere else. By identifying the source of the clog, you can save time and effort by focusing your cleaning efforts on that specific area.

2.2 Inspect the Chute

Start by inspecting the chute, which is the part of the snowblower through which the snow is thrown. Check for any visible obstructions or blockages, such as rocks, ice chunks, or debris. If you can see a buildup of snow, it’s likely that the clog is located in the chute.

2.3 Check the Impeller

Next, examine the impeller, which is responsible for propelling the snow through the chute. Look for any objects that may be caught in the impeller, such as branches or large pieces of ice. If the impeller is obstructed, it can cause a blockage in the chute and prevent the snow from being properly ejected.

2.4 Examine the Auger

Another area to inspect is the auger, which is the part of the snowblower that scoops up the snow from the ground. Inspect the auger blades for any signs of clogging, such as packed snow or ice. If the auger is not able to rotate freely, it can contribute to the clogging issue.

How Do I Clean A Clogged Snowblower Chute?

3. Necessary Tools

In order to effectively clean a clogged snowblower chute, you’ll need a few tools on hand. These tools will help you remove the clog and ensure a smooth cleaning process.

3.1 Snow Shovel

A snow shovel will come in handy to remove any excess snow around the clogged chute. This will make it easier to access and clean the affected area of the snowblower.

3.2 Ice Scraper

An ice scraper can be useful for breaking up any ice or hard-packed snow that may be causing the clog. It will help loosen the debris, making it easier to remove from the chute.

3.3 Stiff Bristle Brush

A stiff bristle brush can be used to clean the chute and other parts of the snowblower. It will help remove any remaining debris or snow that may be stuck in hard-to-reach areas.

3.4 Screwdriver

A screwdriver may be required to remove certain panels or covers on the snowblower, allowing you to access the clogged chute more easily. Make sure to use the appropriate size and type of screwdriver for your specific snowblower model.

3.5 Pliers

Pliers can be helpful for removing any stubborn or hard-to-reach debris from the chute. They provide extra gripping power and allow you to maneuver around tight spaces.

3.6 Wrench

Depending on your snowblower model, a wrench may be needed to loosen and remove any bolts or screws that are securing the chute or other components. Make sure to have the correct size of wrench to avoid damaging the fasteners.

4. Step-by-Step Cleaning Process

Now that you have taken all the necessary safety precautions and gathered the required tools, it’s time to move on to the step-by-step cleaning process. Follow these instructions to effectively clean a clogged snowblower chute.

4.1 Remove Excess Snow

Using a snow shovel, clear away any excess snow or debris from the area around the clogged chute. This will make it easier to access and clean the affected area of the snowblower.

4.2 Disengage the Auger

Before starting any cleaning, make sure to disengage the auger. This will prevent the blades from spinning while you are working on the chute, reducing the risk of injuries.

4.3 Clear the Chute Opening

Using a snow shovel or your hands, carefully remove any visible obstructions or blockages from the chute opening. Make sure to clear the entire length of the chute to ensure optimal snowblower performance.

4.4 Remove the Clog from the Auger Housing

If the clog is located in the auger housing, use a screwdriver or wrench to remove any necessary panels or covers. Once you have access to the auger housing, carefully remove the clog by hand or with the help of pliers. Be cautious of any sharp edges or rotating parts.

4.5 Check and Clean the Discharge Chute

Inspect the discharge chute for any remaining debris or snow. Use a stiff bristle brush to clean the inside of the chute and remove any stubborn clogs. Make sure the discharge chute is clear and unobstructed to ensure proper snowblower operation.

4.6 Reassemble the Snowblower

Once the chute is clear and all debris has been removed, replace any panels or covers that were removed. Ensure that all fasteners are tightened securely. Double-check that the auger is disengaged and the spark plug is reconnected before starting the snowblower again.

5. Preventative Maintenance

Cleaning a clogged snowblower chute is just one part of proper snowblower maintenance. To keep your snowblower in optimal condition and prevent future clogs, follow these preventative maintenance tips.

5.1 Clear Snow Before it Accumulates

Try to clear snow regularly as it falls instead of waiting for it to accumulate. This will prevent excessive buildup and reduce the chance of clogs in the chute or other parts of the snowblower.

5.2 Regularly Lubricate Moving Parts

Keep the moving parts of your snowblower well-lubricated to ensure smooth and efficient operation. Consult your snowblower’s manual for the recommended lubrication points and frequency.

5.3 Inspect and Replace Worn Components

Regularly inspect all components of your snowblower for any signs of wear or damage. Replace any worn or damaged parts promptly to prevent further issues and ensure the longevity of your snowblower.

5.4 Store the Snowblower Properly

When the winter season is over, properly store your snowblower to avoid any damage or performance issues. Clean the machine thoroughly, remove any remaining fuel, and store it in a dry and covered area to protect it from the elements.

6. Troubleshooting

Despite following all the necessary steps and taking preventative measures, you may encounter some issues with your snowblower. Here are some common troubleshooting tips for addressing potential problems.

6.1 Clog continues to occur

If you find that clogs persist even after thoroughly cleaning the chute, there may be an underlying issue with your snowblower. It could be a problem with the auger, impeller, or other components. Consider consulting a professional for further assistance and diagnosis.

6.2 Auger not rotating

If the auger is not rotating as it should, check for any obstructions or debris that may be causing a blockage. Clear any clogs and ensure the auger is disengaged before attempting to troubleshoot any electrical or mechanical issues.

6.3 Reduced throwing distance

If you notice a decrease in the throwing distance of the snowblower, it could indicate a clog or a problem with the impeller. Clean the chute, impeller, and any other areas that may be obstructed. If the issue persists, consult a professional for further evaluation.

6.4 Snow chute gets clogged quickly

If the snow chute gets clogged quickly after cleaning, make sure you are clearing the chute opening completely during the cleaning process. Additionally, check the auger blades for any signs of damage or wear. Replace worn blades and regularly maintain the snowblower to prevent further clogging issues.

How Do I Start A Gas-powered Snowblower?

So, you wake up one morning to find your driveway covered in a thick layer of snow. The winter magic is beautiful, but it’s definitely not fun to shovel it all by hand. Luckily, you’ve got a gas-powered snowblower ready to save the day. The only problem is, you have no clue how to start it. Don’t worry, we’ve got you covered. In this article, we will guide you through the simple steps of starting a gas-powered snowblower, so you can make clearing snow a breeze.

How Do I Start A Gas-powered Snowblower?

Preparing Your Snowblower

Before you can start your gas-powered snowblower, there are a few important steps you need to take to ensure that it is in good working condition and ready to tackle the snow. This preparation not only ensures your safety but also helps to prolong the life of your snowblower. Let’s go through each step in detail.

Ensure Your Safety

Safety should always be your top priority when operating any type of machinery, including a snowblower. Before you start working on your snowblower, make sure you are wearing the appropriate safety gear, which includes goggles or safety glasses, gloves, and sturdy footwear. It’s also a good idea to wear hearing protection, as snowblowers can be quite loud.

Check Fuel Level

The first thing you should do when preparing your snowblower is to check the fuel level. Without enough fuel, your snowblower won’t be able to start or run properly. Look for the fuel tank, which is usually located near the back of the snowblower. Check the fuel gauge or simply open the fuel cap to visually inspect the level of fuel. If it is low, you will need to fill it up with fresh gasoline before attempting to start the snowblower.

Inspect the Spark Plug

The spark plug is a crucial component of your snowblower’s engine. It ignites the fuel and air mixture, allowing the engine to start. Before starting your snowblower, it’s important to inspect the spark plug to ensure it is in good condition. Locate the spark plug, usually found on the side of the engine. Remove the spark plug wire and use a spark plug wrench to remove the plug. Check the electrode for any signs of wear or damage. A worn-out or damaged spark plug should be replaced with a new one.

Check the Oil Level

Just like a car, a snowblower requires oil to lubricate its engine and prevent friction. Before starting your snowblower, check the oil level to ensure it is at the appropriate level. Locate the oil dipstick, usually located near the engine or on top of the oil cap. Remove the dipstick, wipe it clean, and reinsert it. Then, remove it again and check the oil level. It should be within the designated range. If it is low, add the appropriate type and amount of oil specified in your snowblower’s manual.

Adjust the Choke

The choke helps to regulate the air and fuel mixture in the engine during startup. Before starting your snowblower, it’s important to adjust the choke to the correct position. Locate the choke lever, usually located near the engine. The choke has three positions: open, closed, and halfway. If the engine is cold, set the choke lever to the closed position. If the engine is warm, set the choke lever to the open position. Adjusting the choke correctly will help ensure a smooth and hassle-free start.

Priming the Engine

Once you’ve gone through the necessary preparations, it’s time to prime the engine. Priming helps to introduce fuel into the engine, making it easier to start. Here’s a step-by-step guide on how to prime your snowblower’s engine.

Locate the Primer Bulb

The primer bulb is a small, rubber bulb that is usually located near the carburetor or fuel tank. Its purpose is to draw fuel into the engine. Take a moment to locate the primer bulb on your snowblower. It is typically red or black in color and may have a small plastic button on top.

Press the Primer Bulb

To prime the engine, press and release the primer bulb several times. Each press creates pressure that forces fuel into the engine. The number of times you need to press the primer bulb will vary depending on your snowblower’s model and the temperature outside. Refer to your snowblower’s manual for the recommended number of primer bulb presses.

Repeat the Priming Process

After pressing the primer bulb the recommended number of times, it’s a good idea to repeat the priming process once more. This ensures that enough fuel is present in the engine for a successful start. It may take a few tries to find the optimal number of primer bulb presses for your specific snowblower, but with practice, you’ll become more familiar with the process.

Setting the Throttle and Choke

Now that the engine is primed, it’s time to set the throttle and choke to the appropriate positions. The throttle controls the engine speed, while the choke regulates the air and fuel mixture during startup. Let’s walk through the steps of setting these controls correctly.

Find the Throttle Lever

The throttle lever is usually located on the handlebars of the snowblower. It may be a lever or a knob that can be easily adjusted. Take a moment to locate the throttle lever on your snowblower.

Adjust the Throttle

To set the throttle, start by moving the lever or knob to the “Fast” or “Full” position. This increases the amount of fuel flowing to the engine, allowing it to run at a higher speed. However, if you anticipate encountering heavy or wet snow, it may be beneficial to set the throttle to a lower speed to prevent overworking the engine.

Locate the Choke Lever

The choke lever is usually located near the engine, close to the carburetor. It may be a separate lever or combined with the throttle lever. Locate the choke lever on your snowblower.

Set the Choke Position

When starting a cold engine, set the choke lever to the closed or halfway position. This restricts the air intake, allowing for a richer fuel mixture. If the engine is warm or has been running for a while, set the choke lever to the open position. Adjusting the choke correctly ensures that the engine starts smoothly and runs efficiently.

How Do I Start A Gas-powered Snowblower?

Using the Electric Starter

Some snowblowers come equipped with an electric starter, which eliminates the need for manual pulling. Using the electric starter is convenient and can save you time and effort. Here’s how to use it effectively.

Locate the Electric Starter

The electric starter is usually located near the engine or on the handlebars of the snowblower. It may consist of a small button or switch, or it may be in the form of a key ignition. Locate the electric starter on your snowblower.

Connect the Electric Starter

If your snowblower has a key ignition, insert and turn the key to the “On” position. If your snowblower has a button or switch, simply press or toggle it into the “Start” position. This connects the electric starter to the engine, allowing it to start with a push of a button or turn of a key.

Start the Electric Starter

Once the electric starter is connected, press the button or turn the key. The starter motor will engage and spin the engine, initiating the combustion process. The engine should start within a few seconds. If it fails to start, refer to the troubleshooting section in your snowblower’s manual for guidance.

Using the Recoil Starter

If your snowblower does not have an electric starter or if the electric starter fails, you can rely on the recoil starter to start the engine manually. The recoil starter uses a pull rope and handle to crank the engine. Here’s how to use it effectively.

Find the Recoil Starter Handle

The recoil starter handle is usually located on the side of the engine. It is a small, plastic handle attached to a pull rope. Locate the recoil starter handle on your snowblower.

Position Yourself Correctly

Before pulling the recoil starter handle, make sure you are in a stable position with your feet properly planted on the ground. Ensure that there is enough clearance around you to safely operate the snowblower. Maintaining a steady grip on the handlebars will help you maintain control during startup.

Pull the Recoil Starter Handle

To start the engine, firmly grasp the recoil starter handle and pull it upward with a quick, smooth motion. The pull rope will engage the engine’s flywheel, causing it to rotate and create the necessary combustion to start the engine. Repeat this motion until the engine starts. If the engine fails to start after several attempts, refer to the troubleshooting section in your snowblower’s manual for guidance.

Starting the Snowblower

With the engine primed and the throttle and choke properly set, it’s time to start the snowblower. Whether using the electric starter or the recoil starter, the starting process is relatively straightforward.

Hold the Starter Handle Firmly

If you are using the recoil starter, make sure you have a firm grip on the starter handle before starting the engine. This ensures that you have proper control and minimizes the risk of injury.

Begin Pulling the Starter Rope

If using the recoil starter, pull the starter rope with a quick, smooth motion. The engine should start within a few pulls. Be prepared for a sudden jolt as the engine comes to life. If the engine fails to start, refer to the troubleshooting section in your snowblower’s manual for guidance.

Repeat Until Engine Starts

Continue pulling the starter rope or activating the electric starter until the engine starts. This may require a few attempts, especially if the engine is cold. Once the engine starts, you can move on to adjusting the controls and preparing to clear the snow.

Adjusting Controls

After starting the snowblower’s engine, it’s important to make a few additional adjustments to ensure optimal performance. These adjustments include releasing the choke, adjusting the throttle, and engaging the auger and drive controls.

Release the Choke

Once the engine has warmed up and is running smoothly, it’s time to release the choke. Locate the choke lever, which should be set to the closed or halfway position. Move the lever to the open position to allow for normal air intake. Running the engine with the choke closed for an extended period can cause damage or poor performance.

Adjust the Throttle

Depending on the snow conditions and the intensity of the snowfall, you may need to adjust the throttle to control the engine speed. If you are dealing with heavy, wet snow, it may be beneficial to increase the throttle to a higher speed. Conversely, if the snow is light or you want more precise control, you can decrease the throttle to a lower speed.

Engage the Auger and Drive Controls

To start clearing the snow, engage the auger and drive controls. The auger is the rotating mechanism responsible for collecting and throwing snow, while the drive controls allow you to move the snowblower forward or backward. Familiarize yourself with the location and operation of these controls, as they may vary depending on your snowblower’s model.

Clearing Snow with the Snowblower

Now that your snowblower is running and the controls are properly adjusted, it’s time to start clearing snow. Proper technique and positioning are crucial for an efficient and effective snow removal process. Here’s how to do it:

Properly Position the Snowblower

Position the snowblower at the edge of the snow-covered area you want to clear. Make sure you have a clear path to walk or follow behind the machine. You should also be aware of any obstacles or hazards in the area, such as rocks, tree branches, or uneven terrain.

Engage the Auger and Drive Controls

With the snowblower in position, engage the auger and drive controls. This allows the auger to collect the snow and the drive controls to propel the snowblower forward. Different models may have different methods for engaging these controls, so refer to your snowblower’s manual for specific instructions.

Push the Snowblower Forward

As you walk behind the snowblower, gently push it forward. The rotating augers will scoop up the snow and throw it out through the chute, clearing a path as you go. Maintain a steady pace and avoid rushing, as this can lead to clogs or uneven clearing. Continue pushing the snowblower forward until you have cleared the desired area.

Maintenance and Troubleshooting

To keep your snowblower in optimal condition and ensure smooth operation, it’s important to perform regular maintenance tasks and address any issues that may arise. Here are some maintenance and troubleshooting tips to help you keep your snowblower in top shape.

Regularly Check and Change Oil

Regular oil checks and changes are essential for maintaining the performance and longevity of your snowblower’s engine. Follow the manufacturer’s guidelines for oil type and change frequency. Typically, oil should be checked before each use and changed annually or after a certain number of hours of operation.

Clean or Replace the Spark Plug

The spark plug plays a vital role in the engine’s ignition process. Over time, it can become fouled with carbon deposits or wear out. Regularly inspect the spark plug and clean or replace it as necessary. Refer to your snowblower’s manual for specific instructions on spark plug maintenance.

Inspect and Tighten Loose Parts

After each use, take a few moments to inspect your snowblower for any loose or damaged parts. Check for loose bolts or screws, damaged belts, or any abnormalities in the machine’s operation. Tighten or repair any loose parts to prevent further damage and ensure safe operation.

Clear Clogs and Debris

During use, snowblowers can sometimes experience clogs or blockages caused by chunks of snow or other debris. If you notice a decrease in performance or the machine becomes jammed, turn off the snowblower and disconnect the spark plug wire. Carefully remove any clogs or debris, taking extra caution not to damage any internal components.

Safety Precautions

Operating a snowblower can be a potentially hazardous task, so it’s essential to follow certain safety precautions to protect yourself and others around you. Always prioritize safety when using your snowblower by following these guidelines.

Wear Safety Gear

Before starting your snowblower, make sure you are wearing the appropriate safety gear. This includes safety goggles or glasses to protect your eyes from flying debris, gloves to protect your hands, and sturdy footwear with good traction to prevent slipping. If your snowblower is particularly noisy, consider wearing hearing protection as well.

Keep Hands and Feet Clear

When operating a snowblower, it’s important to keep your hands and feet clear of any moving parts. Be cautious of the rotating auger and other mechanisms, and never attempt to clear a clog or remove debris while the engine is running. Always turn off the snowblower and disconnect the spark plug wire before attempting any maintenance tasks.

Operate in Well-Ventilated Areas

Snowblowers emit exhaust fumes that can be harmful if inhaled in large quantities. To ensure you are operating in a safe environment, always use your snowblower outside or in a well-ventilated area. Avoid using it indoors, in enclosed spaces, or in areas with poor ventilation.

Avoid Fuel Spills

When refueling your snowblower, be careful not to spill gasoline. Gasoline is highly flammable, and any spills can pose a fire hazard. Ensure the fuel cap is securely tightened and use a funnel to prevent spills. If any fuel does spill, clean it up immediately and dispose of it properly.

Store Properly

When you have finished using your snowblower, store it in a safe and secure location. This includes keeping it out of reach of children and pets, as well as protecting it from the elements. Store your snowblower in a dry area, away from flammable materials, and follow manufacturer guidelines for long-term storage.

In conclusion, starting and operating a gas-powered snowblower requires careful preparation, proper adjustments, and adherence to safety guidelines. By following the steps outlined in this comprehensive guide, you can ensure that your snowblower starts smoothly, operates efficiently, and helps you tackle the most challenging snow removal tasks. Remember to prioritize safety at all times, and don’t hesitate to consult your snowblower’s manual or seek professional assistance if needed. Stay safe and enjoy the convenience of a well-maintained snowblower during the winter season.

How Do I Maintain My Snowblower?

So you finally got yourself a shiny new snowblower to tackle those heavy snowfalls, but now you’re wondering how to keep it in top shape. Maintaining your snowblower is essential for its longevity and efficiency. From conducting regular inspections and cleaning to changing the oil and storing it properly, this article will guide you through the simple steps to ensure your snowblower continues to work like a charm, no matter how much snow is piling up outside. Don’t worry, it’s easier than it sounds!

Inspecting and Cleaning the Snowblower

Inspecting the Spark Plug

The first step in maintaining your snowblower is to inspect the spark plug. The spark plug is a crucial component that ignites the fuel and air mixture in the engine, so it’s important to make sure it’s in good condition. Start by removing the spark plug wire and using a spark plug socket to remove the plug. Check for any signs of wear or damage, such as corrosion or a worn electrode. If necessary, clean the spark plug with a wire brush or replace it with a new one.

Cleaning or Replacing the Air Filter

The air filter is responsible for trapping dirt and debris before it enters the engine. Over time, the filter can become clogged and restrict airflow, leading to poor engine performance. To clean the air filter, remove it from the snowblower and gently tap it to remove any loose debris. If the filter is heavily soiled, it may need to be replaced. Refer to your snowblower’s manual for instructions on how to properly clean or replace the air filter.

Checking and Replacing the Fuel Filter

The fuel filter is another important component to inspect. Its purpose is to remove any impurities from the fuel before it reaches the engine. Start by locating the fuel filter, typically found in the fuel line or inside the fuel tank. Check for any signs of clogging or damage. If the filter is dirty or damaged, it should be replaced with a new one. Remember to follow the manufacturer’s recommendations on how often to replace the fuel filter.

Examining the Belts and Pulleys

The belts and pulleys in your snowblower are responsible for transferring power from the engine to the auger and impeller. Over time, these components can become worn or loose, which can affect the performance of your snowblower. Inspect the belts for any signs of cracking, fraying, or stretching. Check the pulleys for any wobbling or damage. If any issues are found, it’s important to replace the belts or pulleys to ensure proper operation.

Inspecting the Scraper Bar and Skid Shoes

The scraper bar and skid shoes are located at the bottom of the snowblower and come into contact with the ground. These components help to clear the snow and protect the housing of the snowblower. Inspect the scraper bar for any signs of wear or damage. If it is worn down, it should be replaced. Similarly, check the skid shoes for any signs of wear. If they are worn unevenly or broken, they should be replaced to prevent damage to the snowblower and ensure proper clearance.

Cleaning the Chute and Auger

The chute and auger are integral parts of your snowblower, responsible for directing and throwing the snow. It’s important to regularly clean these components to prevent clogging and ensure optimal performance. Start by removing any loose snow or debris from the chute and auger. Use a brush or scraper to remove any compacted snow or ice. Avoid using metal tools that can damage the auger or chute. Regular cleaning will help prevent clogs and keep your snowblower running smoothly.

Removing Debris from the Impeller

The impeller is located behind the auger and is responsible for blowing the snow out of the chute. Over time, debris such as sticks, rocks, or ice can get lodged in the impeller, which can affect its performance. To remove debris from the impeller, disconnect the spark plug wire and use a sturdy stick or broom handle to carefully dislodge any obstructions. Make sure to wear gloves and exercise caution to avoid injury. Regularly checking and clearing any debris from the impeller will help maintain optimal snowblower performance.

Inspecting and Cleaning the Controls

The controls of your snowblower, including the throttle, choke, and starter, should be regularly inspected and cleaned to ensure they are in proper working order. Check for any signs of wear or damage, such as loose or sticky controls. Clean any dirt or debris that may have accumulated on the controls using a soft cloth or brush. If any controls are not functioning correctly, they should be repaired or replaced to ensure safe and efficient operation.

Cleaning the Exterior

Lastly, don’t forget to clean the exterior of your snowblower. Snow, ice, and dirt can accumulate on the housing and other exterior components, which can lead to rust or corrosion over time. Use a damp cloth or sponge to wipe down the exterior and remove any dirt or debris. Avoid using harsh chemicals or abrasive materials that can damage the paint or plastic parts. Regularly cleaning the exterior of your snowblower will help extend its lifespan and maintain its appearance.

Preparing for Storage

Draining the Fuel System

Before storing your snowblower for an extended period, it’s important to properly drain the fuel system. Gasoline can deteriorate over time and lead to clogs or damage to the engine if left sitting in the snowblower’s fuel system. Start by running the snowblower until it runs out of fuel. This will help ensure that there is minimal gasoline left in the system. If your snowblower has a fuel valve, turn it off. Then, start the engine and allow it to run until it stalls. This will help remove any remaining fuel from the carburetor.

Changing the Engine Oil

Changing the engine oil is another important step in preparing your snowblower for storage. Over time, oil can become contaminated with dirt and debris, which can lead to engine damage if not properly maintained. Refer to your snowblower’s manual for instructions on how to change the oil. Typically, this involves removing a drain plug and allowing the old oil to drain into a container. Once the oil has drained completely, replace the drain plug and fill the engine with fresh oil according to the manufacturer’s specifications.

Greasing the Bearings and Moving Parts

To ensure smooth and efficient operation, it’s important to grease the bearings and moving parts of your snowblower before storing it. Refer to your snowblower’s manual for the specific locations where grease should be applied. Typically, this includes greasing the auger shaft, impeller shaft, and any other rotating or moving parts. Use a high-quality grease recommended by the manufacturer and apply it in the designated areas. Greasing the bearings and moving parts will help prevent rust and corrosion during storage and maintain their performance.

Cleaning the Snowblower Thoroughly

Before storing your snowblower, it’s crucial to clean it thoroughly to remove any dirt, debris, or moisture that may be present. Use a damp cloth or sponge to wipe down the exterior and remove any dirt or debris. Pay special attention to the auger, chute, and impeller areas, as they tend to accumulate the most snow and ice. Use a brush or scraper to remove any compacted snow or ice. Allow the snowblower to dry completely before storing it to prevent rust or corrosion.

Storing the Snowblower in a Dry Place

Finally, when it comes to storing your snowblower, it’s important to choose a dry and secure location. Moisture and humidity can cause rust and corrosion, so avoid storing the snowblower in a damp basement or garage. Instead, find a cool and dry spot, such as a shed or a dedicated storage area. Make sure the snowblower is covered to protect it from dust and other debris. Additionally, store the snowblower in an upright position to prevent any fuel or oil leaks.

How Do I Maintain My Snowblower?

Regular Maintenance Tasks

Checking the Tire Pressure

Regularly checking the tire pressure is an important maintenance task for your snowblower. Proper tire pressure ensures optimal traction and maneuverability, allowing the snowblower to perform at its best. Refer to your snowblower’s manual for the recommended tire pressure. Use a tire pressure gauge to check the pressure and add or release air as necessary. It’s a good idea to check the tire pressure before each use to ensure safe and efficient operation.

Inspecting and Tightening the Bolts and Nuts

Inspecting and tightening the bolts and nuts on your snowblower is essential for maintaining its structural integrity and preventing any loose parts during operation. Regularly inspect all bolts and nuts, including those on the handles, housing, and chute assembly. If any are loose, use the appropriate tools to tighten them securely. Be careful not to overtighten, as this can cause damage to the components. Taking the time to inspect and tighten the bolts and nuts will help prevent accidents and ensure the snowblower operates safely.

Greasing the Axle Shaft

The axle shaft is a critical component that connects the wheels and allows for smooth movement of the snowblower. Regularly greasing the axle shaft is important to reduce friction and ensure proper operation. Refer to your snowblower’s manual for instructions on how to grease the axle shaft. Typically, this involves applying grease to the fittings or joints using a grease gun. Greasing the axle shaft will help extend its lifespan and maintain optimal performance.

Inspecting and Adjusting the Drive Belt

The drive belt is responsible for transferring power from the engine to the wheels, allowing the snowblower to move forward or backward. Over time, the belt can become worn or loose, affecting the snowblower’s performance. Regularly inspect the drive belt for any signs of damage, such as cracking or fraying. If any issues are found, it’s important to replace the drive belt or make the necessary adjustments. Refer to your snowblower’s manual for instructions on how to properly inspect and adjust the drive belt.

Inspecting and Adjusting the Auger Belt

The auger belt is another important component of your snowblower that should be regularly inspected and adjusted. The auger is responsible for collecting and moving the snow into the chute. Inspect the auger belt for any signs of wear or damage, such as cracking or stretching. If any issues are found, it’s important to replace the auger belt or adjust it to the proper tension. Refer to your snowblower’s manual for instructions on how to properly inspect and adjust the auger belt.

Lubricating the Auger and Impeller

Proper lubrication of the auger and impeller is essential for maintaining their performance and preventing excessive wear. Refer to your snowblower’s manual for the recommended lubricant and locations where lubrication is required. Typically, this involves applying a light grease or oil to the auger and impeller, ensuring that all moving parts are properly lubricated. Regularly lubricating the auger and impeller will help reduce friction and extend their lifespan.

Inspecting and Adjusting the Skid Height

The skid shoes, located at the bottom of the snowblower, determine the height at which the snowblower clears the ground. Regularly inspecting and adjusting the skid height is important to ensure proper clearance and prevent damage to the snowblower or the surface being cleared. Adjust the skid height according to the type of surface you’ll be clearing. For example, set the skid height higher for gravel surfaces to prevent rocks from being picked up, and lower for paved surfaces. Refer to your snowblower’s manual for instructions on how to properly adjust the skid height.

Inspecting and Adjusting the Scraper Bar

The scraper bar is located at the bottom of the snowblower and helps to remove snow down to the pavement. Regularly inspecting and adjusting the scraper bar is important to maintain optimal clearing performance. Check the scraper bar for any signs of wear or damage, such as excessive wear or bending. If necessary, adjust the scraper bar to the proper height to ensure it makes proper contact with the ground. Refer to your snowblower’s manual for instructions on how to properly inspect and adjust the scraper bar.

Checking the Engine Oil Level

Regularly checking the engine oil level is important to ensure proper lubrication of the engine and prevent damage. Refer to your snowblower’s manual for instructions on how to check the engine oil level. Typically, this involves removing the dipstick, wiping it clean, reinserting it, and then removing it again to check the oil level. Add oil if necessary, ensuring that it is the correct type and viscosity recommended by the manufacturer. Regular oil checks and maintenance will help extend the life of your snowblower’s engine.

Inspecting the Spark Plug Gap

Regularly inspecting the spark plug gap is important to maintain proper ignition and prevent engine misfires. Refer to your snowblower’s manual for instructions on how to check and adjust the spark plug gap. Typically, this involves using a gap tool to measure the distance between the center and ground electrode of the spark plug. If the gap is too wide or too narrow, adjust it accordingly using the gap tool. Regularly checking and adjusting the spark plug gap will help ensure optimal engine performance and fuel efficiency.

When to Service Your Snowblower

Following the Manufacturer’s Guidelines

It’s important to follow the manufacturer’s guidelines when it comes to servicing your snowblower. Different models and brands may have specific maintenance intervals or recommendations. Refer to your snowblower’s manual for a comprehensive guide on when and how to perform maintenance tasks. By following the manufacturer’s guidelines, you can ensure that your snowblower operates safely and efficiently.

After Extended Periods of Inactivity

If your snowblower has been sitting unused for an extended period, such as over the summer months, it’s a good idea to perform a thorough maintenance routine before using it again. Even if the snowblower was properly stored, it’s still important to inspect and clean the various components to ensure they are in proper working condition. This includes inspecting and cleaning the spark plug, air filter, fuel filter, belts, pulleys, scraper bar, skid shoes, chute, and auger.

When the Snowblower is Difficult to Start

If your snowblower is difficult to start or requires multiple attempts before it turns on, it may be a sign that it requires servicing. Difficulty starting can be caused by a variety of issues, such as a dirty spark plug, clogged air filter, or faulty ignition system. Inspect and clean the spark plug and air filter, and if the issue persists, consult a professional for further diagnosis and repairs.

If It Is Not Throwing Snow Properly

If your snowblower is not throwing snow properly, such as snow not being discharged from the chute or the throwing distance being reduced, it’s important to address the issue. This can be caused by a variety of factors, such as a clogged chute, worn auger or impeller, or a loose belt. Inspect and clean the chute and auger, and check the belts for proper tension. If the issue persists, consult a professional for further inspection and repairs.

When You Notice Unusual Noises or Vibrations

Unusual noises or vibrations coming from your snowblower can indicate underlying issues that require servicing. Strange grinding or rattling noises can be a sign of worn or damaged components, while excessive vibrations can indicate a loose or imbalanced part. If you notice any unusual noises or vibrations, it’s important to inspect the snowblower and address the issue promptly. Consult a professional if necessary for further diagnosis and repairs.

How Do I Maintain My Snowblower?

Safety Precautions

Reading the Operator’s Manual

Before operating your snowblower, it’s crucial to read and familiarize yourself with the operator’s manual. The manual provides important safety information, as well as instructions on how to properly operate and maintain your snowblower. Understanding the manual will help ensure that you use the snowblower safely and effectively, reducing the risk of accidents or damage.

Wearing Appropriate Safety Gear

When operating a snowblower, wearing appropriate safety gear is essential to protect yourself from potential hazards. This includes goggles or safety glasses to protect your eyes from flying debris, ear protection to reduce noise levels, and sturdy footwear with good traction to prevent slips and falls. Additionally, wearing gloves and warm clothing will provide insulation and protect your hands and body from the cold.

Working in a Well-Ventilated Area

When performing maintenance tasks on your snowblower, it’s important to work in a well-ventilated area to avoid the buildup of harmful fumes. If you’re working indoors, such as in a garage, make sure the space is properly ventilated to allow for fresh air circulation. If working outdoors, ensure there is a steady flow of fresh air. Good ventilation will help prevent the inhalation of exhaust fumes and promote a safe and healthy working environment.

Disconnecting the Spark Plug Wire

Before performing any maintenance or repair tasks on your snowblower, it’s important to disconnect the spark plug wire to prevent accidental starts. This will ensure that the engine cannot be accidentally started while you’re working on it, reducing the risk of injury. Simply locate the spark plug wire and disconnect it by pulling the rubber boot away from the spark plug.

Using a Fuel Stabilizer

When storing your snowblower for an extended period, it’s advisable to use a fuel stabilizer in the gasoline to prevent it from deteriorating. Fuel stabilizers help to prevent the formation of varnish and gum in the fuel system, which can clog the carburetor and lead to engine problems. Follow the manufacturer’s instructions on the appropriate amount of stabilizer to use, and make sure to run the engine for a few minutes to circulate the treated fuel throughout the system.

Avoiding Loose Clothing or Jewelry

When operating a snowblower, it’s important to avoid wearing loose clothing or jewelry that can get caught in moving parts. Loose clothing or dangling jewelry can present a safety hazard if they come into contact with belts, augers, or other rotating components. Make sure to wear proper fitting clothing and remove any jewelry or accessories that can pose a risk.

Using a Sturdy Ice Scraper

When clearing packed or hardened snow, it’s important to use a sturdy ice scraper to loosen it before using the snowblower. Using a metal or plastic ice scraper with a long handle allows you to safely break up stubborn snow and ice without risking damage to the snowblower. This will make the snowblower’s job easier and prevent unnecessary strain on the machine.

Keeping Hands and Feet Away from Moving Parts

When operating or working on the snowblower, it’s crucial to keep your hands and feet away from any moving parts. Never attempt to clear obstructions or unclog the chute while the engine is running. Before performing any maintenance tasks, make sure the snowblower is turned off and the engine is completely cool. Always use tools or implements provided with the snowblower to safely clear debris or perform necessary maintenance.

Clearing Jammed Snow Safely

If your snowblower becomes jammed with snow or ice, it’s important to clear it safely to avoid injury or damage to the machine. Start by turning off the engine and waiting for all moving parts to come to a complete stop. Use a solid object, such as a sturdy stick or broom handle, to carefully dislodge the jammed snow or ice from the auger or chute. Avoid using your hands or feet, as they can be injured by the rotating auger. Take your time and exercise caution to clear the jam safely.

Being Cautious of Hidden Obstacles

When operating a snowblower, it’s important to be cautious of any hidden obstacles that may be hidden beneath the snow. Rocks, branches, or other debris can cause damage to the auger or other components if they are not cleared properly. Take your time and be mindful of your surroundings, using the snowblower’s adjustable skid height to avoid any potential obstacles. Clearing the area of any potential hazards before operating the snowblower will help prevent damage and ensure safe operation.

Troubleshooting Tips

If the Engine Won’t Start

If you’re having trouble starting the snowblower’s engine, there could be a few potential issues to address. First, check to ensure that there is fuel in the tank and that the fuel valve is open if applicable. Inspect the spark plug to make sure it is clean and properly gapped. If the spark plug is dirty or damaged, clean or replace it as necessary. Check the ignition switch and wiring for any loose connections or damage. If the engine still won’t start, consult a professional for further diagnosis and repairs.

If the Engine Runs Roughly or Stalls

If your snowblower’s engine runs roughly or stalls during operation, there may be an underlying issue that needs to be addressed. Start by inspecting the spark plug and air filter to ensure they are clean and in good condition. Check the fuel filter and fuel lines for any clogs or restrictions. If these components are clean and functioning properly, it may be necessary to consult a professional for further diagnosis and repairs.

If the Snowblower Doesn’t Throw Snow Far Enough

If your snowblower is not throwing snow far enough or the discharge chute is clogging frequently, there may be a few potential causes to investigate. Start by checking the auger and impeller for any signs of wear or damage. Worn or damaged components can affect the snowblower’s throwing distance and performance. Inspect the belts for proper tension and any signs of wear or stretching. If necessary, replace the belts or adjust the tension. Lastly, make sure the chute and auger are clear of any debris or obstructions that may be hindering the snowblower’s performance.

If the Snowblower Vibrates Excessively

Excessive vibrations coming from your snowblower can be a sign of an underlying issue that needs to be addressed. First, ensure that all bolts and nuts are properly tightened and secure. Loose parts can cause vibrations during operation. Inspect the auger and impeller for any signs of damage or balance issues. If necessary, replace any worn or damaged components. Excessive vibrations can also sometimes be caused by an engine imbalance or a bent driveshaft. If the issue persists, consult a professional for further diagnosis and repairs.

If the Snowblower Leaves a Layer of Snow on the Ground

If your snowblower is leaving a layer of snow on the ground after clearing, there may be a few potential causes to consider. First, check the skid shoes and scraper bar to ensure they are properly adjusted and making good contact with the ground. Adjust the skid height as necessary to achieve the desired clearance. Inspect the auger and impeller for any signs of wear or damage that may be preventing proper snow discharge. Lastly, make sure the chute is clear of any obstructions or debris. Addressing these potential issues should help improve the snowblower’s clearing performance.

Using the Snowblower on Different Types of Snow

Handling Light, Powdery Snow

When clearing light, powdery snow, it’s important to adjust the snowblower’s speed and settings accordingly. Light snow can be easily blown away, so you may need to decrease the snowblower’s speed to prevent it from throwing the snow too far. Adjust the chute deflector to direct the snow where you want it to go. Additionally, it’s important to be mindful of the wind direction, as light snow can be easily blown back towards you.

Dealing with Wet, Heavy Snow

Clearing wet, heavy snow requires a different approach than light, powdery snow. Wet snow tends to be heavier and more difficult to move. To effectively clear wet snow, it’s important to set the snowblower to a higher speed to ensure that it has enough power to throw the snow. Adjust the chute deflector to direct the snow away from the cleared area. Take smaller passes and avoid overloading the machine to prevent clogs or damage.

Clearing Packed or Hardened Snow

Clearing packed or hardened snow can be challenging, but with the right approach, it can be done effectively. Start by using a sturdy ice scraper to break up the packed or hardened snow before using the snowblower. Take your time and make multiple passes to gradually clear the area. Setting the snowblower to a lower speed can help provide more power to break up the packed snow. Adjust the chute deflector to direct the snow where you want it to go.

Removing Snow with Ice or Icy Conditions

When dealing with ice or icy conditions, it’s important to exercise caution and use the appropriate tools and techniques. Use a sturdy ice scraper or de-icing solution to break up and melt the ice before attempting to use the snowblower. Take your time and make sure the area is clear and safe before operating the machine. Adjust the speed and chute deflector as necessary to effectively clear the ice while ensuring your safety.

Winter Storage Tips

Storing the Snowblower in a Safe Location

When storing your snowblower for the winter season, it’s important to choose a safe location that is protected from the elements and secure from potential theft. A dry and well-ventilated garage, shed, or storage area is ideal for storing your snowblower. Make sure the area is free from any flammable materials and is locked to prevent unauthorized access. Additionally, keep the area free from clutter to ensure easy access to the snowblower when needed.

Using Fuel Stabilizer for Long-Term Storage

Using a fuel stabilizer is an important step in preparing your snowblower for long-term storage. Fuel stabilizers help prevent the deterioration of gasoline, which can lead to clogs or damage to the engine. Before adding a fuel stabilizer, run the snowblower until the fuel tank is nearly empty to minimize the amount of treated fuel in the system. Refer to the fuel stabilizer’s instructions for the appropriate amount to use. Run the engine for a few minutes to ensure that the treated fuel circulates throughout the system.

Disconnecting the Spark Plug Wire

Before storing your snowblower for an extended period, it’s important to disconnect the spark plug wire to prevent accidental starts. This will ensure that the engine cannot be accidentally started while in storage, reducing the risk of injury or damage. Locate the spark plug wire and pull the rubber boot away from the spark plug to disconnect it. Store the spark plug wire in a safe location to prevent it from becoming damaged or lost.

Removing the Battery (if applicable)

If your snowblower is equipped with a battery, it’s a good idea to remove it before storing the snowblower for an extended period. This will help prevent the battery from deteriorating and ensure it remains in good condition for the next winter season. Consult your snowblower’s manual for instructions on how to safely remove the battery. Store the battery in a cool, dry place and consider using a battery maintainer to keep it charged during storage.

Covering the Snowblower

When storing your snowblower, it’s important to cover it to protect it from dust, debris, and moisture. Use a fitted cover or tarp specifically designed for snowblowers to ensure a proper fit and protection. This will help prevent rust or corrosion on exposed metal parts, as well as keep the snowblower clean and ready for use in the next winter season. Make sure the snowblower is completely dry before covering it to avoid trapping moisture.

Taking Care of the Battery (Electric Models)

Checking the Battery Connections

If you have an electric snowblower that is powered by a battery, it’s important to regularly check the battery connections to ensure they are secure and free from corrosion. Inspect the battery terminals for any signs of corrosion, such as a white, powdery substance. If corrosion is present, carefully clean the terminals using a wire brush and a mixture of baking soda and water. Rinse the terminals with clean water and dry them thoroughly before reconnecting.

Charging the Battery

To ensure optimal performance, it’s important to keep the battery of your electric snowblower charged. Regularly check the battery’s charge level using a battery charger or the snowblower’s built-in indicator. If the charge is low, connect the battery to a charger and follow the manufacturer’s instructions for charging. Avoid overcharging the battery, as this can shorten its lifespan. Once fully charged, disconnect the battery from the charger and reconnect it to the snowblower.

Storing the Battery

If you plan to store your electric snowblower for an extended period, it’s important to take proper care of the battery to ensure it remains in good condition. Before storing, make sure the battery is fully charged. Store the battery in a cool, dry place away from direct sunlight or extreme temperatures. Consider using a battery maintainer or trickle charger to keep the battery charged during storage. Refer to your snowblower’s manual for further instructions on storing the battery.

Replacing the Battery

If your electric snowblower’s battery is no longer holding a charge or is not providing sufficient power, it may be necessary to replace it. Batteries have a limited lifespan and will eventually need to be replaced. Consult your snowblower’s manual for the correct battery size and specifications. Make sure to dispose of the old battery properly, following the relevant regulations in your area. Installing a new battery will help ensure optimal performance of your electric snowblower.

Importance of Professional Servicing

Benefits of Professional Snowblower Servicing

While there are many maintenance tasks you can perform on your snowblower yourself, there are certain benefits to having it professionally serviced. Professional servicing ensures that your snowblower is thoroughly inspected, maintained, and repaired by trained technicians who have the knowledge and tools to identify and address any issues. By having your snowblower professionally serviced, you can have peace of mind knowing that it has been properly cared for and is in optimal condition for the winter season.

When to Consider Professional Servicing

While regular maintenance tasks can be performed by the owner, there are certain situations where professional servicing may be necessary. If you’re unsure of how to properly perform maintenance tasks or if you’re experiencing persistent issues with your snowblower, it’s advisable to consult a professional. Additionally, if your snowblower is still covered by a warranty, professional servicing may be required to maintain the warranty coverage. Consulting a professional for servicing will ensure that any necessary repairs or adjustments are done correctly.

Finding a Trusted Service Provider

When seeking professional snowblower servicing, it’s important to find a trusted service provider who can accurately diagnose and address any issues. Start by asking for recommendations from friends, family, or neighbors who own snowblowers. Read online reviews and check the provider’s credentials and certifications. Look for a service provider that specializes in snowblowers and has experience with your specific make and model. Contact the provider and ask questions about their services, pricing, and turnaround time. Choosing a trusted service provider will give you confidence in the quality of their work and ensure that your snowblower receives the attention it needs.

In conclusion, maintaining your snowblower is essential for ensuring its optimal performance and longevity. Regularly inspecting and cleaning key components, preparing for storage properly, performing regular maintenance tasks, and following safety precautions will help keep your snowblower in good working condition. By understanding how to troubleshoot common issues and use the snowblower on different types of snow, you can make the most out of your snowblowing experience. Whether you choose to perform maintenance tasks yourself or seek professional servicing, proper care will help you tackle snow removal efficiently and safely.