Tag Archives: Troubleshooting

How Do I Troubleshoot Common Snowblower Problems?

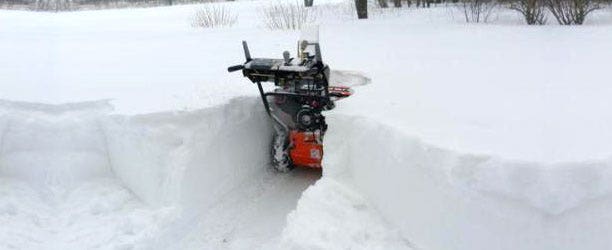
So you’re gearing up for winter and getting everything ready to tackle the snow, but you’ve encountered a problem with your trusty snowblower. No need to panic, because in this article, we’ll walk you through some common issues you might face and how to troubleshoot them. From clogged chutes to engines that won’t start, we’ve got you covered. Get ready to take on winter like a pro with these helpful tips and tricks for troubleshooting your snowblower.

1. Engine Won’t Start

If your snowblower’s engine won’t start, there are a few things you should check before calling for professional help.

1.1. Check Fuel Level

The first thing to check is the fuel level. Make sure you have enough fuel in the tank to properly start the engine. If the fuel level is low, refill it with fresh gasoline and try starting the engine again.

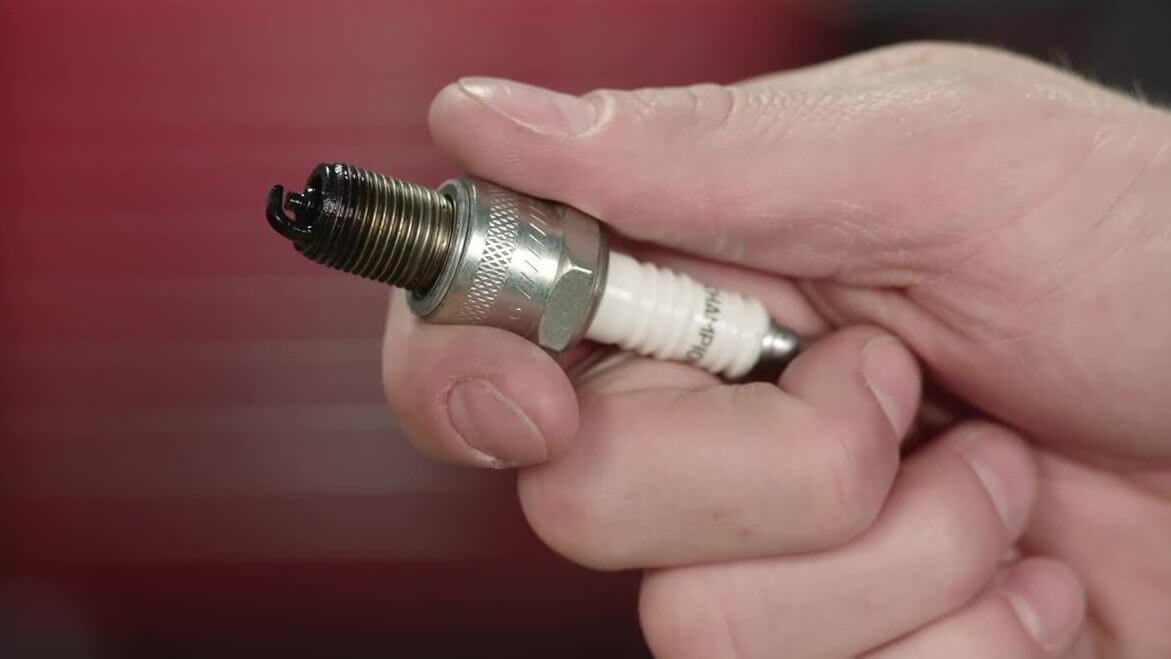
1.2. Inspect Spark Plug

A faulty spark plug can prevent the engine from starting. Remove the spark plug and inspect it for any signs of damage or wear. If the spark plug is dirty or the electrode is worn out, replace it with a new one.

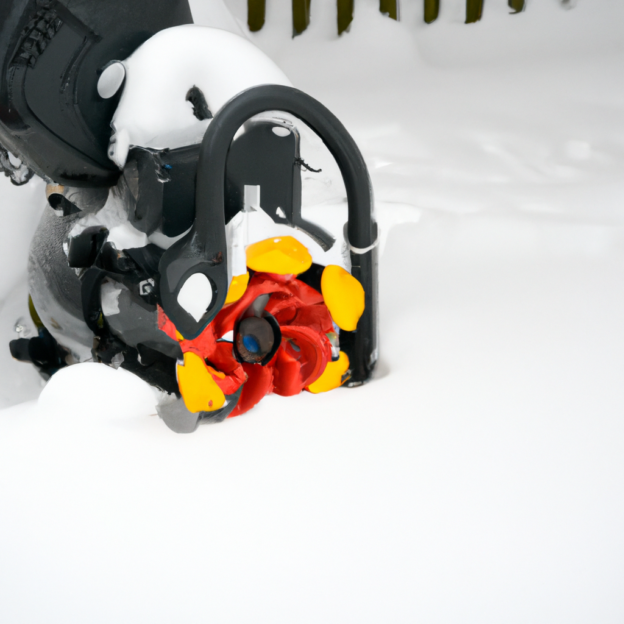
1.3. Clean or Replace Carburetor

A clogged carburetor can also cause the engine to not start. Remove the carburetor and clean it thoroughly with carburetor cleaner. If cleaning doesn’t solve the issue, you may need to replace the carburetor.

1.4. Check Ignition System

The ignition system plays a vital role in starting the engine. Inspect the ignition coil, spark plug wire, and ignition switch for any signs of damage. If any components are faulty, they may need to be replaced to ensure proper ignition.

2. Engine Runs Roughly

If your snowblower’s engine is running roughly, it can affect its performance and efficiency. Here are a few troubleshooting steps to address this issue.

2.1. Check Fuel Quality

Poor fuel quality can lead to engine issues. Ensure that you are using fresh gasoline with the correct fuel-to-oil ratio recommended by the manufacturer. If the fuel quality is compromised, drain the old fuel and refill with fresh fuel.

2.2. Clean or Replace Air Filter

A clogged air filter can restrict airflow to the engine, causing it to run roughly. Remove the air filter and clean it with compressed air or replace it with a new one if it is damaged or excessively dirty.

2.3. Adjust Throttle and Choke

Improper throttle and choke settings can affect engine performance. Adjust the throttle to the appropriate position and ensure the choke is adjusted correctly for starting and running conditions.

2.4. Inspect Fuel Line and Filter

A clogged or damaged fuel line or filter can cause fuel supply issues, leading to rough engine performance. Inspect the fuel line for any cracks, leaks, or blockages. Replace the fuel line or filter if necessary.

How Do I Troubleshoot Common Snowblower Problems?

This image is property of cdn-icmob.nitrocdn.com.

3. Auger Not Turning

If the auger on your snowblower is not turning, it will not effectively remove snow. Here’s what you can do to troubleshoot this problem.

3.1. Check Shear Pins and Bolts

Shear pins and bolts secure the auger to the shaft. Check if any shear pins or bolts are broken or missing. Replace them with new ones if necessary. Ensure that the auger is properly attached to the shaft.

3.2. Inspect Drive Belt

A worn or damaged drive belt can cause the auger to stop turning. Inspect the drive belt for any signs of wear or damage. If the belt appears worn or cracked, replace it with a new one as soon as possible.

3.3. Check Auger Control Cable

The auger control cable connects the control handle to the auger. Check if the cable is properly attached and not loose or broken. Adjust or replace the cable if required.

3.4. Inspect Shear Key

The shear key is a small metal piece that connects the auger to the engine shaft. If the shear key is damaged or broken, it will prevent the auger from turning. Inspect the shear key and replace it if necessary.

4. Wheels Not Engaging

If the wheels of your snowblower are not engaging, it can make it difficult to move and operate the machine. Follow these troubleshooting steps to address this issue.

4.1. Check Traction Drive Belt

The traction drive belt connects the engine shaft to the wheels, allowing them to engage. Inspect the traction drive belt for any signs of wear or damage. If the belt is worn or broken, replace it with a new one.

4.2. Inspect Wheel Drive Plate

The wheel drive plate transfers power from the engine to the wheels. Inspect the drive plate for any signs of wear or damage. If the drive plate is worn out, it may need to be replaced.

4.3. Adjust Cable Tension

The cable tension controls the engagement of the wheels. Ensure that the cable is properly tensioned, allowing the wheels to engage when the control lever is activated. Adjust the cable tension as necessary.

4.4. Inspect Wheel Engagement Lever

The wheel engagement lever controls the engagement and disengagement of the wheels. Check if the lever is functioning properly and not stuck or damaged. Lubricate or replace the lever if needed.

How Do I Troubleshoot Common Snowblower Problems?

This image is property of www.weingartz.com.

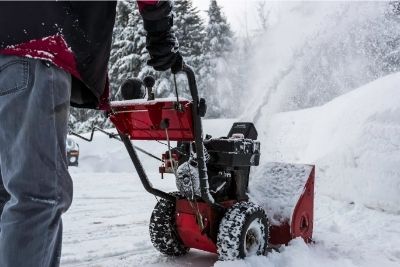
5. Snow Not Discharged Properly

If your snowblower is not discharging snow properly, it can lead to inefficient snow removal. Follow these troubleshooting steps to address this issue.

5.1. Clear Snow Clogs

Obstructions or clogs in the snow discharge chute can prevent snow from being discharged properly. Clear any snow buildup or debris in the chute to ensure smooth snow discharge.

5.2. Inspect Impeller

The impeller is responsible for throwing snow out of the discharge chute. Inspect the impeller for any damage or obstructions. Remove any debris or replace the impeller if necessary.

5.3. Check Discharge Chute

The discharge chute directs the snow away from the machine. Ensure that the chute is not clogged or misaligned. Adjust or clear the chute as needed to improve snow discharge.

5.4. Adjust Auger Belt Tension

The auger belt transfers power from the engine to the auger. If the belt is loose or worn, it may not be able to properly discharge the snow. Adjust the tension of the auger belt or replace it if necessary.

6. Electric Starter not Working

If the electric starter on your snowblower is not working, you may face difficulties starting the engine. Here are some troubleshooting steps to address this problem.

6.1. Check Power Source

Ensure that the power source supplying the electric starter is functioning. Check if the outlet has power and that any extension cords or connections are secure. If necessary, try a different power source or outlet.

6.2. Inspect Starter Motor

The starter motor is responsible for turning the engine with the help of gears. Inspect the starter motor for any signs of damage or malfunctions. If the starter motor is faulty, it may need to be replaced.

6.3. Test Starter Switch

The starter switch activates the electric starter motor. Test the starter switch to ensure it is functioning properly. If the switch is defective, it may need to be replaced.

6.4. Check Starter Solenoid

The starter solenoid controls the flow of electricity to the starter motor. Check the solenoid for any signs of damage or failure. Replace the solenoid if necessary to ensure proper functioning of the electric starter.

How Do I Troubleshoot Common Snowblower Problems?

This image is property of i.ytimg.com.

7. Handlebar or Controls Malfunctioning

If the handlebar or controls on your snowblower are malfunctioning, it can affect the overall operation of the machine. Here’s how you can address this problem.

7.1. Tighten Loose Connections

Check all connections between the handlebar and the rest of the machine. Tighten any loose bolts, nuts, or screws that may be causing the handlebar or controls to malfunction.

7.2. Inspect Control Cables

Inspect the control cables that connect the handlebar to various components of the snowblower. Ensure that the cables are not frayed, damaged, or stretched. Replace any faulty cables to restore proper functionality.

7.3. Lubricate Mechanisms

Lubricate any moving mechanisms, such as control levers or linkages, to ensure smooth operation. Use a silicone-based lubricant or a lubricant recommended by the manufacturer. Avoid using excessive amounts of lubricant.

7.4. Replace Faulty Components

If the handlebar or controls continue to malfunction, even after ensuring all connections are tight and lubricating the mechanisms, there may be faulty components that require replacement. Consult the manufacturer or a professional for further assistance.

8. Excessive Vibrations

Excessive vibrations during operation can indicate underlying issues with your snowblower. Here are some steps to troubleshoot this problem.

8.1. Check for Loose Bolts or Nuts

Inspect the snowblower for any loose bolts or nuts. Vibration can cause fasteners to become loose over time. Tighten any loose bolts or nuts to reduce excessive vibrations.

8.2. Inspect Auger Bearings

Worn or damaged auger bearings can cause excessive vibrations. Inspect the bearings for any signs of wear, noise, or roughness. Replace any worn or damaged bearings to reduce vibrations.

8.3. Replace Damaged Skid Shoes

Skid shoes help guide the snowblower over the ground. If the skid shoes are worn or damaged, it can lead to excessive vibrations. Replace any damaged or worn skid shoes to improve stability and reduce vibrations.

8.4. Adjust Engine Mounting Bolts

Loose or improperly adjusted engine mounting bolts can contribute to excessive vibrations. Ensure that the engine mounting bolts are secure and properly tightened. Adjust or tighten the bolts as necessary.

How Do I Troubleshoot Common Snowblower Problems?

This image is property of i.ytimg.com.

9. Poor Snow Throwing Distance

If your snowblower is not throwing snow a sufficient distance, it can be frustrating and time-consuming. The following troubleshooting steps can help improve snow throwing distance.

9.1. Check Engine RPM

Insufficient engine RPM can affect the snow throwing distance. Consult the owner’s manual to determine the recommended RPM for your specific snowblower model. Adjust the engine throttle or consult a professional mechanic to ensure the engine is running at the correct RPM.

9.2. Adjust Snow Chute Angle

The snow chute angle determines the direction and distance of the snow being thrown. Adjust the chute angle to optimize the snow throwing distance. Consult the owner’s manual for instructions on adjusting the chute angle for your snowblower model.

9.3. Clear Snow Build-up

Built-up snow or ice can obstruct the snowblower’s chute, impeller, or auger, resulting in poor snow throwing distance. Regularly clear any snow or ice build-up to ensure unobstructed snow discharge and maximize throwing distance.

9.4. Inspect Auger Paddles

Worn or damaged auger paddles can lead to reduced snow throwing distance. Inspect the auger paddles for any signs of wear or damage. Replace any worn or damaged paddles to maintain optimal performance and snow throwing distance.

10. Excessive Fuel Consumption

If your snowblower is consuming an excessive amount of fuel, it can be costly and inefficient. Follow these troubleshooting steps to address this issue.

10.1. Ensure Proper Fuel Mixture

Ensure that you are using the correct fuel-to-oil mixture recommended by the manufacturer. Improper fuel mixture can result in increased fuel consumption. Use a fuel measuring cup to ensure accurate fuel mixing.

10.2. Clean or Replace Fuel Line

A clogged or dirty fuel line can restrict fuel flow, causing the engine to consume more fuel. If the fuel line appears clogged or damaged, clean it thoroughly or replace it with a new one to maintain proper fuel flow.

10.3. Check Fuel Tank Vent

A blocked or improperly functioning fuel tank vent can lead to inefficient fuel consumption. Ensure that the fuel tank vent is clear and allowing proper airflow. Clean or replace the vent if necessary.

10.4. Adjust Carburetor Settings

Incorrect carburetor settings can result in excessive fuel consumption. Consult the owner’s manual for guidance on adjusting the carburetor settings. If you are unsure, it’s best to seek assistance from a professional.

By following these troubleshooting steps, you can address common snowblower problems and keep your machine running smoothly. Remember to consult the owner’s manual or seek professional assistance if you encounter any difficulties during troubleshooting.

How Do I Troubleshoot Common Snowblower Problems?

This image is property of www.thespruce.com.

How Do I Test The Compression On My Snowblower?

So you’ve noticed that your snowblower isn’t running as efficiently as it used to, and now you’re wondering how to test the compression to get to the bottom of the problem. When it comes to diagnosing issues with your snowblower, testing the compression is a crucial step that can reveal underlying issues causing poor performance. By understanding the compression levels of your snowblower, you can pinpoint potential problems and take the necessary steps to get it back up and running smoothly. But how exactly do you test the compression on your snowblower? Let’s find out. Testing the compression on your snowblower is an essential step in ensuring its optimal performance and identifying any potential issues. This article will guide you through the process of testing the compression on your snowblower, step by step. So, let’s get started!

How Do I Test The Compression On My Snowblower?

Step 1: Prepare Your Snowblower for Testing

Before diving into the compression testing process, it’s crucial to prepare your snowblower properly. Here are a few simple tasks you need to complete:

Disconnect the Spark Plug Wire

For safety purposes, always disconnect the spark plug wire before working on your snowblower. This step will prevent accidental engine starts and potential harm.

Remove Any Debris or Obstructions

Clear your snowblower from any debris or obstructions that may hinder the testing process. Ensure that the engine and surrounding areas are clean and free from dirt, snow, or other accumulations.

Check the Fuel Level

Before starting the compression test, it’s necessary to have an adequate amount of fuel in your snowblower’s tank. Make sure to check the fuel level and refill if necessary.

Inspect the Oil Level

Proper lubrication is crucial for the longevity of your snowblower’s engine. Check the oil level using the dipstick or oil level indicator. If the oil level is low, top it up to the recommended level.

Step 2: Gather the Necessary Tools

To perform a compression test, you’ll need a few tools. Make sure you have these items on hand before proceeding:

Compression Gauge

A compression gauge is a tool used to measure the compression pressure in your snowblower’s engine cylinders. It consists of a gauge with a pressure scale and a hose with a spark plug adaptor.

Socket and Wrench Set

A socket and wrench set will be required to remove the spark plug from your snowblower. Make sure you have the appropriate sizes for your particular model.

Assistant (Optional)

Having an assistant can be helpful, especially if you need someone to hold the snowblower steady or help you pull the recoil starter cord. However, this is an optional step, and you can perform the test alone if necessary.

Step 3: Remove the Spark Plug

To access the engine cylinders and perform a compression test, you’ll need to remove the spark plug. Follow these simple steps:

Locate the Spark Plug

The spark plug is typically located on the side or top of your snowblower’s engine. Consult your snowblower’s manual if you’re having trouble locating it.

Disconnect the Wire

Once you’ve located the spark plug, carefully disconnect the spark plug wire. This step will prevent accidental ignition while you’re performing the compression test.

Remove the Spark Plug

Using a socket and wrench or a spark plug wrench, loosen and remove the spark plug from the engine. Take care not to damage the spark plug or its threads during the removal process.

How Do I Test The Compression On My Snowblower?

Step 4: Prepare the Compression Gauge

Before conducting the compression test, it’s essential to prepare the compression gauge properly. Follow these steps:

Choose the Appropriate Adapter

Compression gauges usually come with multiple spark plug adapters. Select the one that fits the threads of your spark plug hole. The adapter should screw into the spark plug hole easily and securely.

Attach the Compression Gauge

Once you’ve chosen the correct adapter, attach the compression gauge to the spark plug hole. Make sure it is connected tightly to avoid any air leaks during the test.

Ensure the Gauge is Set to Zero

Check if the compression gauge’s pressure scale is set to zero. It’s crucial to start with a zero reading to ensure accurate results when measuring the compression pressure.

Step 5: Test the Compression

Now that your snowblower is prepared, it’s time to proceed with the actual compression test. Follow these steps:

Place the Snowblower on a Flat Surface

Position your snowblower on a flat and stable surface, ensuring that it is secure and won’t move during the compression test. This stability is essential to prevent any accidents.

Disable the Ignition System

To prevent the engine from starting during the compression test, disable the ignition system by either removing the spark plug wire or turning the ignition switch to the “off” position.

Insert the Compression Gauge into the Spark Plug Hole

With the ignition system disabled, carefully insert the compression gauge’s hose and spark plug adaptor into the spark plug hole. Apply gentle pressure to ensure a tight seal.

Pull the Recoil Starter Cord

With one hand holding the compression gauge securely, use your other hand to pull the recoil starter cord. Pull it two to three times vigorously to crank the engine and build up compression pressure.

Step 6: Evaluate the Compression Reading

After performing the compression test, it’s time to evaluate the compression reading and analyze the results. Here’s what you need to do:

Observe the Compression Reading

Once you’ve pulled the recoil starter cord, the compression gauge will display a reading. Take note of this reading and move on to the next steps.

Compare the Reading to the Manufacturer’s Specifications

Refer to your snowblower’s manual or contact the manufacturer to obtain the recommended compression specifications. Compare the reading you obtained from the compression gauge to these specifications.

Repeat the Test for Each Cylinder

If your snowblower has multiple cylinders, repeat the compression test for each one. It’s important to perform the test for all cylinders individually to identify any discrepancies or variations.

Consult a Professional if Compression is Low

If the compression reading falls below the manufacturer’s specifications, it may indicate a problem with the engine’s internal components. In such cases, it’s advisable to consult a professional technician or snowblower repair specialist for further diagnosis and repairs.

Step 7: Reinstall the Spark Plug

After evaluating the compression reading, it’s time to reinstall the spark plugs. Follow these steps:

Inspect the Spark Plug

Examine the spark plug for any signs of damage, such as cracks or excessive wear. If the spark plug appears worn or damaged, it’s recommended to replace it with a new one.

Apply Anti-Seize Compound

Before reinstalling the spark plug, apply a thin coat of anti-seize compound to its threads. This will help prevent the spark plug from seizing in the future and ease removal during future maintenance.

Hand-Tighten the Spark Plug

Using your hand, carefully thread the spark plug back into the spark plug hole. Once it is finger-tight, use a socket or spark plug wrench to gently tighten it. Avoid overtightening, as it can damage the spark plug or the engine.

Connect the Spark Plug Wire

Finally, reconnect the spark plug wire to ensure the electrical connection is restored. Make sure it is firmly connected to prevent any misfires or electrical issues.

Step 8: Perform Routine Maintenance

Maintaining your snowblower regularly is essential to keep it in optimal condition. Here are a few routine maintenance tasks you should perform:

Change the Oil as Needed

Regularly change the oil in your snowblower according to the manufacturer’s recommendations. Fresh, clean oil will promote better engine performance and prolong its lifespan.

Replace the Spark Plug Regularly

Over time, spark plugs can wear out and affect the overall performance of your snowblower’s engine. To maintain optimal combustion, replace the spark plug at regular intervals as recommended by the manufacturer.

Clean or Replace the Air Filter

A clean air filter is crucial for proper airflow and combustion within the snowblower’s engine. Clean or replace the air filter as necessary to prevent any debris or dirt from entering the engine.

Check and Adjust Belt Tension

Inspect the belts on your snowblower for any signs of wear or damage. If necessary, adjust the belt tension to ensure smooth operation and prevent any slippage or loss of power.

Step 9: Store Your Snowblower Properly

When the snow season comes to an end, it’s crucial to store your snowblower properly for extended periods of inactivity. Follow these steps for proper storage:

Add Fuel Stabilizer

Add a fuel stabilizer to the fuel tank before storing your snowblower. This additive will prevent the fuel from deteriorating and minimize the risk of clogging the carburetor or fuel lines.

Empty the Fuel Tank

Run the snowblower until the fuel tank is nearly empty, ensuring there is minimal leftover fuel. This step helps prevent any fuel-related issues during storage and keeps the fuel system clean.

Store in a Dry Location

Find a dry and well-ventilated area to store your snowblower. Moisture can cause rust and corrosion, so storing it in a protected environment will help maintain its condition.

Cover the Snowblower

Using a protective cover or tarp, shield your snowblower from dust, debris, and potential damage. This will help preserve its exterior and prevent any unwanted elements from entering the engine or other components.

Step 10: Safety Precautions

Lastly, but certainly not least, it’s essential to prioritize your safety when working on your snowblower. Follow these safety precautions:

Wear Protective Gloves and Eyewear

Always wear protective gloves and eyewear to shield your hands and eyes from any potential hazards, such as debris or moving parts.

Work in a Well-Ventilated Area

Ensure you have proper ventilation when working with your snowblower. Carbon monoxide emissions can be harmful, so it’s crucial to operate the machine in an area with adequate fresh air circulation.

Keep Hands and Clothing Clear of Moving Parts

Avoid placing your hands or wearing loose clothing near moving parts of the snowblower, such as belts, blades, or augers. Always maintain a safe distance and exercise caution.

Follow Manufacturer’s Safety Guidelines

Refer to your snowblower’s manual and adhere to the manufacturer’s safety guidelines. They provide important information specific to your model and highlight any unique safety precautions you should observe.

Now that you have a comprehensive guide on how to test the compression on your snowblower, you can confidently assess its performance and ensure that it’s in good working condition. Remember to prioritize safety and maintenance to keep your snowblower running smoothly year after year.

What Should I Do If My Snowblower Starts Smoking?

So, picture this: You wake up to find a fresh layer of snow outside. You grab your trusty snowblower and confidently make your way to clear the driveway. But suddenly, you notice something alarming – your snowblower starts smoking! Panic sets in as you wonder what you should do in this situation. Before you start envisioning costly repairs or a ruined winter season, take a deep breath. In this article, we’ll guide you through the steps to take if your snowblower starts smoking, so you can quickly get back to conquering the snow-covered streets.

What Should I Do If My Snowblower Starts Smoking?

Causes of Smoking Snowblower

When your snowblower starts smoking, it’s important to first understand the potential causes so that you can effectively troubleshoot and resolve the issue. Here are some common reasons why a snowblower might smoke:

1. Oil or fuel leak

One of the main causes of a smoking snowblower is an oil or fuel leak. If there is a leakage in the fuel line or from the engine, it can result in the production of smoke. It’s important to inspect the area around the fuel tank and engine for any signs of leakage, such as puddles or a strong odor.

2. Clogged engine or air filter

A clogged engine or air filter can also lead to a smoking snowblower. When the engine or air filter becomes blocked with debris, it can restrict the flow of air and cause the engine to overheat, resulting in smoke. Regular cleaning and maintenance of the engine and air filter can prevent this issue.

3. Excessive oil in the engine

If there is too much oil in the engine, it can cause the snowblower to smoke. This usually happens when the user overfills the oil reservoir or fails to drain old oil properly before adding new oil. It’s essential to follow the manufacturer’s instructions regarding the correct oil level for your specific snowblower model.

4. Blocked muffler or exhaust system

A blocked muffler or exhaust system can restrict the flow of exhaust gases, leading to a smoking snowblower. Debris, such as snow or ice, can accumulate in the muffler or exhaust pipe, causing smoke to escape. Regularly checking and cleaning the muffler and exhaust system can help prevent this issue.

5. Overheating engine

If the engine of your snowblower becomes overheated, it can generate smoke. This can occur due to various reasons, such as the accumulation of debris, low oil levels, or improper fuel mixture. Ensuring proper maintenance and monitoring the engine’s temperature can help prevent overheating and subsequent smoking.

Safety Precautions

Before you begin troubleshooting the issue with your smoking snowblower, it’s essential to prioritize your safety. Here are some safety precautions to follow:

1. Turn it off immediately

As soon as you notice your snowblower smoking, the first step is to turn it off immediately. This will help prevent any further damage or potential safety hazards.

2. Move to a well-ventilated area

Once the snowblower is turned off, move it to a well-ventilated area. Operating the machine in an open, outdoor space will help minimize the risk of inhaling harmful smoke and fumes.

3. Allow the snowblower to cool down

After moving the snowblower to a safe location, allow it to cool down completely. This will prevent any potential burns or injuries when working on the machine.

4. Put on protective gear

Before you start troubleshooting the smoking snowblower, it’s crucial to put on protective gear. This may include safety goggles, gloves, and ear protection to safeguard yourself from any potential hazards.

What Should I Do If My Snowblower Starts Smoking?

Steps to Troubleshoot Smoking Snowblower

Now that you’ve taken the necessary safety precautions, you can proceed with troubleshooting the smoking snowblower. Here are the steps to follow:

1. Inspect for oil or fuel leaks

Carefully inspect the snowblower for any signs of oil or fuel leaks. Look for puddles or stains around the fuel tank and engine. If you detect a leak, it’s important to fix it before further using the snowblower.

2. Check the engine air filter

Remove the air filter and inspect it for any clogs or dirt. A dirty or clogged air filter can restrict airflow, leading to smoke production. Clean or replace the air filter if necessary, following the manufacturer’s instructions.

3. Ensure correct oil level

Check the oil level in your snowblower’s engine. If it exceeds the recommended level, carefully drain the excess oil according to the manufacturer’s instructions. Make sure to use the correct type of oil as specified in the user manual.

4. Clean the muffler and exhaust system

Inspect the muffler and exhaust system for any blockages. Remove any snow, ice, or debris that may have accumulated in these areas, using a cloth or brush. It’s essential to clean these components regularly to promote proper exhaust flow.

5. Check for signs of overheating

Examine the engine for signs of overheating, such as discoloration, strong fuel odor, or unusual noises. If you suspect overheating, investigate the cause, which could be a result of low oil levels, improper fuel mixture, or other mechanical issues.

Solutions When You Find a Problem

After troubleshooting your smoking snowblower, you may come across specific issues that need to be addressed. Here are some solutions for common problems:

1. Fix leaks and replace damaged parts

If you discover any leaks or damaged parts during the inspection, it’s vital to fix them promptly. Replace any faulty components, such as fuel lines or gaskets, and ensure everything is properly sealed.

2. Clean or replace the engine air filter

If the air filter is dirty or clogged, clean it thoroughly or replace it with a new one. A clean air filter promotes better airflow and prevents smoke production.

3. Adjust oil level if necessary

If you find that the oil level exceeds the recommended amount, carefully drain the excess oil according to the manufacturer’s instructions. Maintaining the correct oil level helps prevent smoke and engine damage.

4. Clear any blockages in the muffler or exhaust

If the muffler or exhaust was blocked, clean it thoroughly to remove any obstructions. Regularly inspecting and cleaning these components will ensure proper exhaust flow and minimize smoke production.

5. Identify and fix the cause of overheating

If your snowblower was overheating, identify the underlying cause and address it accordingly. This may involve checking for proper oil levels, verifying the fuel mixture, or seeking professional assistance for more complex mechanical issues.

When to Seek Professional Help

While many smoking snowblower issues can be resolved through troubleshooting, there are situations where professional help is necessary. Here are some scenarios in which you should consider seeking assistance:

1. Lack of experience or knowledge

If you’re unsure about how to troubleshoot or fix the smoking snowblower issue, it’s best to leave it to a professional. Lack of experience or knowledge can potentially lead to further damage.

2. Extensive damage or mechanical issues

If you discover extensive damage or complex mechanical issues during your troubleshooting process, it’s advisable to consult a professional technician. They will have the expertise and tools to address these problems effectively.

3. Persistent smoking after troubleshooting

If your snowblower continues to smoke even after following the troubleshooting steps, it indicates a more significant underlying problem. In such cases, it’s essential to seek professional help to prevent further damage and ensure your safety.

Regular Maintenance to Prevent Smoking

To avoid encountering a smoking snowblower in the future, it’s important to prioritize regular maintenance. Here are some maintenance tips to help prevent smoke-related issues:

1. Clean and inspect the snowblower regularly

Regularly cleaning your snowblower, including the engine, air filter, and exhaust system, will prevent the accumulation of debris, which can lead to smoking. Perform visual inspections to identify any potential problems before they escalate.

2. Change fuel and oil as recommended

Follow the manufacturer’s guidelines for fuel and oil changes. Using fresh fuel and changing the oil at the recommended intervals ensures optimal performance and reduces the likelihood of smoking.

3. Keep the engine well-lubricated

Proper lubrication of the snowblower’s engine is crucial to prevent overheating and smoking. Regularly lubricate moving parts according to the manufacturer’s instructions to keep the engine running smoothly.

4. Avoid overworking the machine

Avoid overworking your snowblower by adhering to its limitations and recommended usage guidelines. Overworking the machine can strain the engine and lead to excessive smoke production.

5. Store the snowblower properly

During the off-season, store your snowblower in a clean, dry area to prevent moisture and rust buildup. Follow the manufacturer’s instructions for proper storage, including fuel and oil removal if necessary.

By following these regular maintenance practices, you can minimize the chances of encountering a smoking snowblower and ensure its longevity and optimum performance.

In conclusion, when your snowblower starts smoking, it’s important to promptly address the issue to prevent further damage and potential safety hazards. Understanding the potential causes, taking necessary safety precautions, and following the troubleshooting steps can help you identify and resolve the problem. If needed, don’t hesitate to seek professional assistance for more complex issues. Finally, prioritizing regular maintenance practices will help prevent smoking and ensure the efficient operation of your snowblower.

What Should I Do If My Snowblower Won’t Start?

So, you wake up in the morning, ready to tackle the heavy snow that has accumulated overnight. You bundle up in your warmest winter gear, march outside, and go to start your trusty snowblower. But wait, it won’t start! Panic sets in as you imagine hours of back-breaking shoveling ahead. But fear not, because in this article, we will discuss some simple troubleshooting steps to help you figure out what to do when your snowblower refuses to start.

Checking the Fuel

Checking the Fuel Tank

The fuel tank is the first component you should check if your snowblower won’t start. Start by ensuring that the gas tank is filled with fresh fuel. Stale fuel can prevent the engine from starting or running smoothly. If you suspect that the fuel may be old, drain the tank and refill it with fresh gasoline. Additionally, inspect the fuel tank for any signs of damage, such as leaks or cracks. If you notice any issues, it is best to have the fuel tank repaired or replaced before attempting to start the snowblower again.

Checking the Fuel Level

Another important step is to check the fuel level in the tank. Ensure that there is enough fuel to effectively power the engine. If the fuel level is low, refill the tank as necessary. However, be cautious not to overfill the tank, as this can lead to fuel spillage and potentially damage the snowblower.

Checking the Fuel Quality

The quality of the fuel can greatly impact the performance of your snowblower. In colder temperatures, it is crucial to use fuel with the correct winter blend or add a fuel stabilizer to prevent the fuel from freezing and causing issues with starting the engine. If you suspect that the fuel may be contaminated or of poor quality, it is advisable to drain the tank and replace it with fresh fuel. The use of stale or contaminated fuel can lead to engine problems and hinder the snowblower’s performance.

Examining the Spark Plug

Inspecting the Spark Plug Wire

An important aspect of troubleshooting a snowblower that won’t start is checking the spark plug wire. Inspect the wire for any signs of physical damage, such as fraying or wear. Ensure that the wire is securely connected to both the spark plug and the ignition coil. If you notice any issues with the spark plug wire, it is recommended to replace it with a new one to ensure proper ignition.

Removing and Inspecting the Spark Plug

The spark plug plays a vital role in the combustion process of the snowblower’s engine. To inspect the spark plug, carefully disconnect the spark plug wire and use a spark plug wrench to remove the plug from the cylinder head. Examine the spark plug for signs of fouling, such as black carbon deposits or oil residue. If the spark plug is dirty or damaged, it may need cleaning or replacement to restore optimal engine performance.

Cleaning or Replacing the Spark Plug

If the spark plug is dirty or fouled, you can try cleaning it to improve its functionality. Use a wire brush or a spark plug cleaner to gently remove any carbon or oil deposits. If cleaning does not resolve the issue, it is advisable to replace the spark plug altogether. When replacing the spark plug, ensure that you use the correct type and gap specified in the snowblower’s manual. A faulty or worn-out spark plug can prevent the engine from starting or running smoothly.

What Should I Do If My Snowblower Wont Start?

Inspecting the Ignition System

Checking the Ignition Switch

The ignition switch is responsible for supplying power to the snowblower’s ignition system. If the ignition switch is defective or not functioning correctly, it can prevent the engine from starting. Inspect the ignition switch for any visible damage or loose connections. Ensure that the switch is in the “on” position when attempting to start the snowblower. If you suspect that the ignition switch is faulty, it is recommended to have it replaced by a professional to avoid any further complications.

Testing the Ignition Coil

The ignition coil is a crucial component of the snowblower’s ignition system. It converts the low voltage from the battery into the high voltage necessary for creating a spark. To test the ignition coil, use a multimeter to measure the resistance across its terminals. Refer to the snowblower’s manual for the specific resistance values that indicate a properly functioning coil. If the ignition coil fails the resistance test, it may need to be replaced to restore proper ignition.

Examining the Safety Key

Some snowblowers are equipped with a safety key or switch that must be engaged for the engine to start. Inspect the safety key and ensure it is in the correct position. If the safety key is missing, damaged, or not engaged correctly, it can prevent the engine from starting. Replace the safety key with a new one if necessary, following the manufacturer’s instructions. It is essential to always prioritize safety and ensure that all safety features are in good working condition.

Checking the Choke

Verifying the Choke Position

The choke plays a critical role in starting a cold engine by enriching the fuel mixture. Check the position of the choke and ensure that it is in the appropriate setting for starting. Refer to the snowblower’s manual for specific instructions on the correct choke position. Incorrect choke adjustment can make it difficult for the engine to start or cause it to run poorly.

Cleaning the Choke

Over time, the choke can become clogged with dirt, debris, or residue from fuel. This can hinder its functionality and prevent the engine from starting. To clean the choke, remove it from the snowblower and use a suitable cleaner or carburetor cleaner to remove any build-up. Ensure that the choke is thoroughly cleaned and free from any obstructions before reattaching it to the snowblower. Regular maintenance and cleaning of the choke can help prevent starting issues.

What Should I Do If My Snowblower Wont Start?

Inspecting the Carburetor

Cleaning the Carburetor Bowl

The carburetor bowl is prone to collecting dirt, debris, and residue from fuel. This can disrupt the proper fuel mixture and cause starting issues. To clean the carburetor bowl, you will need to remove it from the snowblower and carefully disassemble it. Use a carburetor cleaner or a suitable cleaning solution to remove any deposits or obstructions from the bowl and its components. Ensure that all passageways and jets are clean and clear before reassembling the carburetor.

Checking the Carburetor Gaskets

Inspect the carburetor gaskets for any signs of damage or wear. Damaged gaskets can lead to vacuum leaks and affect the fuel-air mixture, resulting in starting problems. If you notice any issues with the gaskets, it is advisable to replace them to ensure a proper seal. Use genuine manufacturer-approved gaskets for the best results and to maintain the integrity of the snowblower’s carburetor system.

Adjusting the Carburetor

In some cases, the carburetor may need adjustment to optimize the fuel-air mixture for starting and running the snowblower. Carburetor adjustment should be done cautiously and preferably following the snowblower’s manual or the manufacturer’s instructions. Each snowblower model may have specific settings and requirements for adjusting the carburetor. If you are not confident or experienced in carburetor adjustment, it is recommended to seek assistance from a professional.

Examining the Air Filter

Removing and Inspecting the Air Filter

The air filter prevents dirt, debris, and other contaminants from entering the engine. A clogged or dirty air filter can restrict airflow and affect the engine’s performance. Remove the air filter and inspect it for any signs of dirt, debris, or damage. If the air filter appears dirty or clogged, it may require cleaning or replacement.

Cleaning or Replacing the Air Filter

If the air filter is dirty, you can clean it with compressed air or by gently tapping it on a hard surface to remove excess dirt. However, if the air filter is excessively dirty or damaged, it is recommended to replace it with a new one. A clean and properly functioning air filter ensures adequate airflow to the engine and contributes to optimal performance.

Checking the Oil Level

Verifying the Oil Level

Checking the oil level is essential for maintaining the proper lubrication of the snowblower’s engine. Refer to the manufacturer’s instructions to locate the oil dipstick and check the oil level. If the oil level is low, add the recommended type and quantity of oil as specified in the manual. However, ensure not to overfill the oil, as it can lead to engine damage.

Changing the Oil

Regular oil changes are crucial for maintaining the performance and longevity of the snowblower’s engine. Over time, oil can become contaminated or degrade, leading to reduced lubrication effectiveness. Refer to the snowblower’s manual for the recommended oil change intervals and specifications. Follow the manufacturer’s instructions to properly drain and refill the oil, ensuring that you dispose of the used oil in an environmentally friendly manner.

Inspecting the Fuel Line

Checking for Clogs

Inspect the fuel line for any signs of clogs or blockages. Clogged fuel lines can prevent the flow of fuel to the engine, causing starting issues. Carefully examine the fuel line for any kinks, bends, or damage. If you notice any clogs or damage, it is advisable to replace the fuel line to ensure proper fuel flow.

Inspecting for Damage

In addition to checking for clogs, it is essential to inspect the fuel line for any signs of damage, such as cracks or leaks. Damaged fuel lines can cause fuel leaks and pose a safety hazard. If you detect any damage, promptly replace the fuel line with a new one. Ensure that you use the appropriate fuel line size and type specified by the snowblower manufacturer.

Checking the Starter Motor

Inspecting the Starter Motor Connections

The starter motor is responsible for initiating the engine’s cranking motion. Inspect the starter motor connections, including the battery cables and solenoid connections, for any signs of corrosion, loose connections, or damage. Tighten any loose connections and clean any corrosion using a wire brush. If the connections are severely corroded or damaged, they may need to be replaced to ensure proper functionality of the starter motor.

Testing the Starter Motor

If you have checked all the other components and the snowblower’s engine still won’t start, it may indicate a problem with the starter motor itself. To test the starter motor, use a multimeter to measure its voltage or perform a physical inspection to identify any visible signs of damage or malfunction. If the starter motor is not functioning correctly, it may require repairs or replacement. Consider consulting a professional or a reliable repair service for assistance with starter motor issues.

Bring it to a Professional

When to Seek Professional Help

If you have exhausted all troubleshooting steps and your snowblower still won’t start, it may be time to seek professional help. Professional technicians have the expertise and specialized tools necessary to diagnose and repair complex issues. Additionally, they can provide guidance on routine maintenance and offer valuable advice to prevent future problems. If you are unsure or uncomfortable with any repairs, it is always a good idea to consult a professional.

Choosing a Reliable Repair Service

When selecting a repair service for your snowblower, it is important to choose a reliable and reputable provider. Consider factors such as their experience, customer reviews, certifications, and warranty policies. Look for a repair service that specializes in snowblower repairs and has a proven track record of quality service. Getting recommendations from friends, family, or neighbors can also help you find a trustworthy repair service. Remember to inquire about service costs and turnaround time to make an informed decision.

In conclusion, troubleshooting a snowblower that won’t start involves a thorough inspection of various components such as the fuel system, spark plug, ignition system, choke, carburetor, air filter, oil level, fuel line, and starter motor. By following the outlined steps and performing regular maintenance, you can increase the chances of getting your snowblower up and running smoothly. However, if you encounter persistent issues or lack the necessary expertise, it is always advisable to seek professional help to ensure the safe and efficient operation of your snowblower.

How Do I Know If My Blower Spark Plug Is Bad?

Curious about the health of your blower spark plug? Worried it might be on the verge of calling it quits? In this article, we will explore the telltale signs that can help you determine if your blower spark plug is indeed bad. From sputtering engines to difficulty starting, we’ve got you covered with all the need-to-know information about identifying a faulty blower spark plug. So, sit back, relax, and let us guide you through this informative journey!

Common Symptoms

Difficulty starting the blower

One of the common symptoms of a bad blower spark plug is difficulty starting the blower. If you find yourself struggling to start the blower or if it takes several attempts before it finally starts, it may be due to a faulty spark plug. The spark plug plays a crucial role in igniting the fuel-air mixture in the engine, and if it is not functioning properly, it can lead to difficulties in starting the blower.

Frequent stalling or misfiring

Another telltale sign of a bad blower spark plug is frequent stalling or misfiring of the engine. If the spark plug is not producing a strong enough spark, it can result in incomplete combustion of the fuel-air mixture, leading to the engine stalling or misfiring. You may notice a rough idle or a lack of power when operating the blower. This is often a sign that the spark plug is in need of replacement.

Reduced power or performance

A noticeable decrease in power or performance can also indicate a bad blower spark plug. When the spark plug is not providing an adequate spark, the engine may struggle to generate the power needed to operate the blower effectively. If you feel that your blower is not performing as it should or if it feels weaker than usual, it is worth checking the condition of the spark plug.

Visual Inspection

Checking for physical damage or wear

To determine if your blower spark plug is bad, start by conducting a visual inspection. Look for any visible signs of physical damage or wear, such as cracks, chips, or broken electrodes. Physical damage can negatively impact the performance of the spark plug and may indicate the need for replacement.

Inspecting for carbon deposits

Inspecting for carbon deposits is another important aspect of the visual inspection. Carbon deposits can accumulate on the spark plug over time and can interfere with the proper functioning of the spark plug. If you notice a thick layer of black soot or carbon deposits on the spark plug, it is an indication that it is not operating efficiently and should be replaced.

Examining the electrode

Take a closer look at the electrode of the spark plug. The electrode should be clean and free of any signs of damage or excessive wear. If the electrode appears worn out or if there are any signs of erosion, it is a clear indication that the spark plug is in poor condition and needs to be replaced.

How Do I Know If My Blower Spark Plug Is Bad?

This image is property of i.ytimg.com.

Spark Testing

Using a spark tester

Spark testing is a simple and effective way to determine the functionality of a spark plug. Using a spark tester, connect the tester to the spark plug wire and then crank the blower’s engine. The spark tester will indicate whether or not the spark plug is producing a consistent spark. This allows you to assess the condition of the spark plug and determine if it needs to be replaced.

Checking for consistent spark

While using the spark tester, pay attention to the consistency of the spark. A healthy spark plug should produce a strong, consistent spark every time. If the spark appears weak or sporadic, it may indicate a problem with the spark plug. In such cases, replacing the spark plug is recommended to restore optimal performance to the blower.

Assessing the spark color

In addition to the consistency of the spark, the color of the spark can also provide valuable insights into the condition of the spark plug. A healthy spark plug will produce a bright blue spark. If the spark appears yellow, orange, or even white, it may indicate a problem with the spark plug. Different colors may suggest fuel mixture issues or other underlying problems, which should be addressed to maintain the blower’s performance.

Resistance Testing

Gathering necessary tools

Resistance testing is another method to determine the condition of a spark plug. To perform this test, you will need a digital multimeter with an ohm function. It is important to gather the necessary tools before proceeding with the resistance test.

Determining the correct resistance value

The resistance value of a spark plug can vary depending on the manufacturer and model. Refer to the spark plug manufacturer’s specifications or the blower’s manual to determine the correct resistance value for your spark plug. This information will help you determine if the spark plug is within the acceptable range or if it needs to be replaced.

Testing the spark plug’s resistance

To test the spark plug’s resistance, disconnect the spark plug wire and remove the spark plug from the blower’s engine. Set the multimeter to the ohm function and measure the resistance by touching the multimeter’s probes to the terminal and electrode of the spark plug. Compare the measured resistance to the specified value. If the resistance is significantly higher or lower than the recommended range, it may indicate a faulty spark plug that requires replacement.

How Do I Know If My Blower Spark Plug Is Bad?

This image is property of besthomegear.com.

Compare with New Spark Plug

Understanding the appearance of a new spark plug

Before replacing the spark plug, it is helpful to understand the appearance of a new, properly functioning spark plug. A new spark plug will have a clean, undamaged electrode and an insulator with no signs of carbon deposits. Familiarizing yourself with the appearance of a new spark plug will allow you to compare it to the old spark plug and assess its condition accurately.

Comparing the differences between old and new spark plugs

Once you have removed the old spark plug, compare it side by side with a new spark plug. Look for any noticeable differences in the electrode, insulator, or overall condition. If the old spark plug shows signs of wear, damage, or excessive carbon deposits, it is a clear indication that it needs to be replaced. Comparing the differences between old and new spark plugs can give you valuable information about the condition of the old spark plug.

Replacement Considerations

Knowing the recommended interval for spark plug replacement

It is important to be aware of the recommended interval for spark plug replacement in your blower. Spark plugs typically need to be replaced after a certain number of operating hours or after a specified period. Refer to the manufacturer’s recommendations or consult the blower’s manual to determine the appropriate replacement interval. Following these guidelines ensures that your blower continues to operate at its best.

Considering other potential issues

While a bad spark plug is a common cause of blower problems, there may be other underlying issues contributing to the symptoms experienced. It is important to consider potential issues such as fuel quality, air filters, or other components of the blower’s ignition system. Addressing any additional issues alongside spark plug replacement can help improve overall performance and prevent future problems.

Seeking professional help

If you are unsure about how to proceed with the inspection or replacement of the spark plug, it is always wise to seek professional help. A knowledgeable technician can diagnose the problem accurately, replace the spark plug if necessary, and ensure that the blower is functioning optimally. Professional assistance can save time, prevent further damage, and provide peace of mind.

How Do I Know If My Blower Spark Plug Is Bad?

This image is property of i.ytimg.com.

Preventive Maintenance

Regularly inspecting the spark plug

To avoid potential issues with your blower’s spark plug, it is essential to include regular inspections as part of your preventive maintenance routine. Inspect the spark plug periodically for any signs of wear, damage, or carbon deposits. By catching any problems early on, you can prevent them from escalating into more significant issues and ensure that the spark plug continues to perform optimally.

Cleaning or replacing the spark plug

In some instances, the spark plug may require cleaning rather than immediate replacement. If the spark plug appears dirty or has light carbon deposits, cleaning it with a specialized spark plug cleaner may restore its performance. However, if the spark plug is significantly worn or damaged, it is best to replace it with a new one to maintain the blower’s efficiency.

Following manufacturer’s maintenance schedule

To keep your blower in good working condition, it is important to follow the manufacturer’s maintenance schedule. This schedule typically includes recommended maintenance tasks, such as spark plug replacement, at specified intervals. Adhering to the maintenance schedule ensures that your blower receives the necessary attention and prolongs its lifespan.

Signs of a Healthy Spark Plug

Strong and consistent spark

A healthy spark plug will produce a strong and consistent spark when tested. The spark should be bright blue in color and visible in all conditions. A robust spark indicates that the spark plug is functioning properly and igniting the fuel-air mixture effectively.

Clean appearance and absence of carbon deposits

A spark plug in good condition will have a clean appearance. There should be no signs of chipping, cracking, or excessive wear on the electrode or insulator. Additionally, a healthy spark plug will be free from carbon deposits, which can hinder its performance.

Proper spark plug gap

The spark plug gap refers to the distance between the center electrode and the ground electrode. A healthy spark plug will have the correct gap, as specified by the manufacturer. This gap is crucial for ensuring optimal performance and proper combustion in the engine.

How Do I Know If My Blower Spark Plug Is Bad?

This image is property of i0.wp.com.

Effects of a Bad Blower Spark Plug

Impaired engine performance

A bad blower spark plug can significantly impact the performance of the engine. When the spark plug is faulty, the spark produced may not be strong enough to ignite the fuel-air mixture properly. This can result in a decrease in power, rough idle, or hesitation during acceleration. Addressing a bad spark plug promptly can restore the engine’s performance and improve overall efficiency.

Reduced fuel efficiency

A malfunctioning spark plug can also lead to reduced fuel efficiency. When the spark plug is not operating efficiently, it can result in incomplete combustion of the fuel. This can cause the engine to consume more fuel than necessary, leading to decreased fuel efficiency and increased operating costs. Replacing the spark plug can help restore optimal combustion and improve fuel economy.

Increased risk of engine damage

Operating a blower with a bad spark plug can pose a risk of engine damage. Incomplete combustion caused by a faulty spark plug can result in the accumulation of unburned fuel and deposits in the engine. Over time, these deposits can lead to engine damage, such as fouled valves or a damaged piston. Regularly inspecting and replacing the spark plug can help prevent more extensive and costly engine repairs.

Conclusion

Keeping an eye out for common symptoms and performing regular visual inspections, spark testing, and resistance testing can help identify a bad blower spark plug. Comparing the old spark plug with a new one can further confirm the need for replacement. It is crucial to follow the manufacturer’s maintenance schedule and engage in preventive maintenance practices to ensure the optimal performance of your blower. By addressing a bad spark plug promptly, you can improve engine performance, fuel efficiency, and prevent further damage, ultimately prolonging the lifespan of your blower.

How Do I Know If My Blower Spark Plug Is Bad?

This image is property of www.lawnmowerfixed.com.

Why Is My Honda Snowblower Not Throwing Snow Far?

In this article, we will explore the possible reasons why your Honda snowblower is not throwing snow as far as it should be. We will discuss common issues that could be affecting its performance and provide you with some troubleshooting tips to help you get it back in top shape. By the end of this article, you will have a better understanding of what could be causing the issue and how to fix it, ensuring that your Honda snowblower is ready to tackle the toughest of snowfalls. If you’ve ever found yourself asking this question, you’re not alone. Many Honda snowblower owners have experienced poor snow throw and have wondered what could be causing it. In this article, we will explore the possible causes for this issue and provide troubleshooting solutions to help you improve your snowblower’s performance.

Why Is My Honda Snowblower Not Throwing Snow Far?

This image is property of i.ytimg.com.

Possible Causes for Poor Snow Throw

Clogged Discharge Chute

One of the most common causes of poor snow throw is a clogged discharge chute. Over time, the chute can become obstructed by a buildup of packed snow or frozen water. This can prevent the snowblower from effectively throwing the snow.

To address this issue, it is important to clear the discharge chute regularly. Use a snow shovel or another tool to remove any accumulated snow or ice. This will ensure that the chute remains clear and allows for proper snow throw.

Worn or Damaged Auger Belt

Another potential cause for poor snow throw is a worn or damaged auger belt. The auger belt is responsible for turning the auger, which scoops up the snow and throws it out of the discharge chute. If the belt is worn or damaged, it may not effectively turn the auger, resulting in poor snow throw.

To determine if the auger belt is the issue, inspect it for excessive wear or any signs of damage. If the belt appears worn or broken, it should be replaced. Follow the manufacturer’s instructions on how to properly replace the auger belt to ensure the best results.

Lack of Engine Power

A lack of engine power can also contribute to poor snow throw. If the snowblower’s engine is not running at its full capacity, it may not have enough power to effectively throw the snow. Several factors can cause a lack of engine power, including a dirty air filter, stale fuel, incorrect fuel mixture, or spark plug issues.

To address this issue, start by checking the air filter. If it is dirty or clogged, clean or replace it as needed. Additionally, ensure that the fuel being used is fresh and the correct mixture for your snowblower. If the spark plug appears old or damaged, it may need to be replaced. These steps will help ensure that your snowblower’s engine is operating at its full potential.

Improper Use of Controls

Sometimes, the cause of poor snow throw can be attributed to the improper use of controls. If the throttle setting is incorrect, the drive control is not engaged, or the auger control is not operated correctly, it can affect the snowblower’s performance.

To address this issue, make sure you are using the correct throttle setting for the snow conditions. Engage the drive control to provide the necessary power to the wheels. Additionally, ensure that you are properly operating the auger control to effectively throw the snow. Familiarize yourself with the snowblower’s controls and follow the manufacturer’s instructions for best results.

Faulty Shear Pins

Shear pins are small metal pins that connect the auger to the auger shaft. They are designed to break if the auger encounters a heavy load, such as hitting a hard object. This is done to protect the auger and other components from damage. However, if the shear pins are broken or missing, it can affect the snowblower’s ability to throw snow.

To address this issue, inspect the shear pins and replace any that are broken or missing. Follow the manufacturer’s instructions on how to properly replace the shear pins to ensure the best results.

Insufficient Snow Depth

Lastly, insufficient snow depth can also contribute to poor snow throw. If the snow depth is below the minimum capacity of the snowblower, it may not be able to effectively scoop up and throw the snow.

Unfortunately, there isn’t a quick fix for this issue. If you frequently experience poor snow throw due to insufficient snow depth, you may need to consider alternative methods for snow removal, such as shoveling or using a lighter-duty snow blower.

Troubleshooting and Solutions

Now that we have explored the possible causes for poor snow throw, let’s discuss some troubleshooting solutions to help you improve your Honda snowblower’s performance.

Clearing Clogged Discharge Chute

Regularly clearing the discharge chute of any accumulated snow or ice is essential for optimal snow throw. Use a snow shovel or another tool to remove any obstructions and ensure that the chute remains clear.

Replacing Worn or Damaged Auger Belt

If the auger belt is worn or damaged, it should be replaced. Follow the manufacturer’s instructions on how to properly replace the auger belt for your specific snowblower model.

Addressing Engine Power Issues

To address engine power issues, start by checking and cleaning or replacing the air filter if necessary. Make sure that the fuel being used is fresh and the correct mixture for your snowblower. If the spark plug appears old or damaged, it may need to be replaced.

Proper Use of Controls

Ensure that you are using the correct throttle setting for the snow conditions. Engage the drive control to provide the necessary power to the wheels. Additionally, operate the auger control correctly to effectively throw the snow. Familiarize yourself with the snowblower’s controls and follow the manufacturer’s instructions.

Replacing Faulty Shear Pins

Inspect the shear pins and replace any that are broken or missing. Follow the manufacturer’s instructions on how to properly replace the shear pins for your specific snowblower model.

Ensuring Adequate Snow Depth

Unfortunately, there isn’t a solution for insufficient snow depth. If you frequently experience poor snow throw due to this issue, consider alternative methods for snow removal, such as shoveling or using a lighter-duty snow blower.

Why Is My Honda Snowblower Not Throwing Snow Far?

This image is property of www.rcpw.com.

Conclusion

Understanding the reasons behind your Honda snowblower’s poor snow throw can help you identify and fix the problem. By addressing issues such as clogged discharge chutes, worn or damaged auger belts, lack of engine power, improper use of controls, faulty shear pins, and insufficient snow depth, you can improve the performance of your snowblower and ensure it throws snow far. Remember to follow the manufacturer’s instructions and perform regular maintenance to keep your Honda snowblower in top condition. Stay safe and enjoy the winter season with a properly functioning snowblower!

Why Is My Honda Snowblower Not Throwing Snow Far?

This image is property of www.weingartz.com.

Why Doesn’t My Snowblower Throw Snow Very Far?

In this article, we will explore the possible reasons why your snowblower isn’t throwing snow as far as you would like. We will look at common issues such as clogged chute, improper adjustment of the discharge chute, and inadequate engine power. By understanding these factors, you will be able to troubleshoot and potentially solve the problem, ensuring that your snowblower performs at its best during the winter season. So, let’s dive into the topic and find out why your snowblower might not be throwing snow very far!

Why Doesnt My Snowblower Throw Snow Very Far?

This image is property of i.ytimg.com.

Common Reasons for Limited Snow-throwing Distance

Snowblowers are a convenient tool for clearing snow from driveways and walkways during the winter season. However, if you find that your snowblower is not throwing snow as far as it should, there may be several common reasons for this issue. In this article, we will explore these reasons and provide you with some tips and tricks to improve the performance of your snowblower.

Insufficient Engine Power

One of the main reasons why your snowblower may not throw snow very far is due to insufficient engine power. The engine is responsible for powering the auger and impeller, which are essential components in throwing snow. Here are a few factors that can contribute to lack of power:

Inadequate Horsepower

If your snowblower has a low horsepower rating, it may struggle to throw snow over long distances. Higher horsepower allows the machine to generate more power, resulting in increased throwing distance. Consider investing in a snowblower with a higher horsepower rating if your current one is not up to par.

Fuel-related Issues

Another factor that can affect the engine power is fuel-related issues. Make sure you are using the correct fuel and that it is not contaminated or stale. Using stale fuel or mixing incorrect fuel-to-oil ratios can lead to inefficient combustion, affecting the overall performance of your snowblower.

Spark Plug Problems

A faulty spark plug can also cause a decrease in engine power. Over time, spark plugs can become worn out or covered in carbon deposits, making it difficult for the engine to ignite the fuel-air mixture properly. Regularly inspect and clean or replace the spark plug to ensure optimal performance.

Carburetor Troubles

A clogged or poorly adjusted carburetor can result in a decrease in engine power. The carburetor is responsible for mixing the fuel and air before it enters the engine. If this mixture is not properly balanced, it can lead to inefficient combustion and decreased snow-throwing distance. Clean or adjust the carburetor, or consult a professional if you are unsure.

Worn-out Auger or Impeller

Another common reason for limited snow-throwing distance is a worn-out auger or impeller. The auger is responsible for breaking up and lifting the snow, while the impeller throws the snow out of the discharge chute. Here are some factors to consider:

Blade Wear and Tear

Over time, the blades of the auger can become worn down or damaged, reducing their effectiveness in breaking up snow. Inspect the blades regularly and replace them if necessary to ensure efficient snow removal.

Damaged Impeller

If the impeller is damaged or not functioning properly, it may not throw the snow as far as it should. Look for any signs of damage or obstruction and repair or replace the impeller if needed.

Belt Slippage

A loose or worn-out drive belt can cause the auger and impeller to spin at a slower speed, resulting in a decrease in snow-throwing distance. Check the condition of the drive belt and tighten or replace it if necessary.

Incorrect Auger Height Adjustment

The height of the auger plays a crucial role in the snow-throwing process. If the auger is too low, it may dig into the ground, causing the snow to be thrown closer to the machine. Conversely, if the auger is too high, the machine may not properly engage with the snow. Ensure that the auger is properly adjusted to the manufacturer’s recommendations for optimal performance.

Clogged Discharge Chute

A clogged discharge chute is another common issue that can hinder the snow-throwing distance of your snowblower. The discharge chute is where the snow is expelled from the machine. Here are a few reasons why the discharge chute may be obstructed:

Obstructions in the Chute

Debris such as sticks, rocks, or ice chunks can get stuck in the discharge chute, preventing the snow from being properly expelled. Always inspect the discharge chute before use and remove any obstructions.

Ice Build-up

In cold weather conditions, ice can accumulate inside the discharge chute, causing a blockage. To prevent ice build-up, periodically clear the chute during use or consider treating it with a lubricant or silicone spray designed for winter conditions.

Snow Blockage

If the snow is too wet or heavy, it may get stuck inside the discharge chute, limiting the throwing distance. Avoid pushing the snowblower too fast or attempting to clear large amounts of heavy snow at once. Opt for smaller passes and adjust the speed accordingly to prevent blockages.

Incorrect Discharge Chute Positioning

The position of the discharge chute can also affect the throwing distance. Ensure that the discharge chute is properly aligned and positioned in the direction you want the snow to be thrown. Adjust the chute as needed during operation to optimize performance.

Improper Snowblower Setup or Operation

Improper setup or operation of your snowblower can also lead to limited snow-throwing distance. It is essential to familiarize yourself with the proper setup and operation procedures outlined in the manufacturer’s instructions. Here are some common mistakes to avoid:

Incorrect Throttle Setting

The throttle controls the engine speed. Setting it too low can result in decreased snow-throwing distance. Adjust the throttle to the recommended setting specified by the manufacturer for optimal performance.

Wrong Speed and Direction

Operating the snowblower at the wrong speed or in the wrong direction can affect the throwing distance. Follow the manufacturer’s guidelines regarding speed and direction to ensure efficient snow removal.

Improper Skid Shoe Adjustment

Skid shoes are metal plates located at the bottom of the snowblower, which control the height at which the machine rides on the surface. If the skid shoes are set too low, the snowblower may scrape the ground, limiting the throwing distance. Adjust the skid shoes according to the surface conditions to avoid this issue.

Incorrect Scraper Blade Position

The scraper blade is located at the bottom of the snowblower and helps to remove snow from the surface. If the scraper blade is set too low, it can dig into the ground, affecting the snow-throwing distance. Check the scraper blade position and adjust it according to the manufacturer’s recommendations.

Why Doesnt My Snowblower Throw Snow Very Far?

This image is property of www.rcpw.com.

Snow Characteristics and Conditions

Snow characteristics and weather conditions can also impact the snow-throwing distance of your snowblower. Here are a few factors to consider:

Wet or Heavy Snow

Wet or heavy snow is more challenging to throw, as it is denser and requires more power to lift and propel. Adjust the speed and take smaller passes when dealing with wet or heavy snow to maximize the throwing distance.

Icy Snow

Ice or frozen snow can hinder the performance of your snowblower. Consider using a snow melting agent or salt to help break up the ice before using the snowblower. Be cautious when operating your machine on icy surfaces, as it may result in reduced throwing distance and potential slip hazards.

Deep Snow

Deep snow can be more challenging for a snowblower to handle. Consider clearing the snow in stages, taking multiple passes and gradually increasing the depth with each pass. Do not overload the machine by attempting to clear too much snow at once, as it can strain the engine and reduce throwing distance.

Compact Snow

If the snow has been repeatedly driven over or compacted, it may be more challenging to break up and throw. Adjust the speed and take smaller passes to ensure the snowblower can effectively clear the compacted snow.

Maintenance and Troubleshooting Tips

Regular maintenance and troubleshooting are essential for ensuring optimal snow-throwing performance. Here are a few tips to help maintain your snowblower:

Check Engine Power and Components

Regularly inspect the engine, spark plug, carburetor, and other components for signs of wear or damage. Clean or replace any worn-out parts to maintain optimal power and performance.

Clean or Replace Worn-out Parts

Inspect the auger blades, impeller, discharge chute, and other parts for wear or damage. Clean or replace any worn-out parts to ensure efficient snow removal.

Clear Discharge Chute Obstructions

Check the discharge chute before and during use to ensure there are no obstructions. Remove any debris or ice buildup to prevent blockages and maximize throwing distance.

Ensure Proper Setup and Operation

Refer to the manufacturer’s instructions for proper snowblower setup and operation. Follow the guidelines for adjusting skid shoes, scraper blade position, throttle setting, and other settings to optimize performance.

Adjust Snowblower for Different Snow Types

Adjust the speed, direction, and technique of using the snowblower based on the type and condition of the snow. Be mindful of wet or heavy snow, icy conditions, deep snow, and compacted snow to achieve the best throwing distance.

Why Doesnt My Snowblower Throw Snow Very Far?

This image is property of i.ytimg.com.

Professional Servicing and Repairs

If you are unable to resolve the limited snow-throwing distance issue on your own, it may be necessary to seek assistance from a snowblower expert. Here are a few reasons to consider professional servicing and repairs:

Seeking Assistance from a Snowblower Expert

A professional snowblower expert can diagnose and repair any underlying issues that may be affecting the snow-throwing distance. They have the knowledge and experience to troubleshoot and resolve complex problems.

Repairing or Replacing Faulty Components

If various components, such as the engine, auger, impeller, or discharge chute, are damaged or worn out, a professional can repair or replace these parts to restore optimum performance.

Scheduled Maintenance Services

Snowblowers, like any other machinery, require regular maintenance to keep them in top shape. Many snowblower experts offer scheduled maintenance services that include cleaning, adjustment, and inspection of various components.

Winterizing Your Snowblower

A snowblower expert can also provide guidance on winterizing your machine to ensure it remains in optimal condition during the offseason. This may include draining fuel, changing oil, lubricating moving parts, and storing the snowblower in a safe place.

Preventive Measures for Efficient Snow-throwing

To prevent limited snow-throwing distance in the first place, there are a few preventive measures you can take. Here are some tips to keep your snowblower running efficiently:

Regular Cleaning and Lubrication

Periodically clean your snowblower to remove dirt, debris, and excess snow. Lubricate moving parts as recommended by the manufacturer to maintain smooth operation.

Proper Storage and Protection

When not in use, store your snowblower in a dry and protected area, away from harsh weather conditions. Use a cover to further protect it from dust and moisture.

Follow Manufacturer’s Instructions

Always refer to the manufacturer’s instructions for proper setup, operation, and maintenance of your snowblower. Following these guidelines will ensure that your machine functions optimally and has a longer lifespan.

Use Suitable Fuel and Oil

Use the recommended fuel and oil specified by the manufacturer for your snowblower. Using incorrect or low-quality fuel or oil can impair the machine’s performance and lead to limited snow-throwing distance.

Why Doesnt My Snowblower Throw Snow Very Far?

This image is property of i.ytimg.com.

Conclusion

By identifying and addressing the common issues related to limited snow-throwing distance, you can optimize the performance and efficiency of your snowblower. Regular maintenance, troubleshooting, and adhering to the manufacturer’s guidelines are crucial in ensuring an effective snow removal experience. Remember to check engine power and components, keep the auger and impeller in good condition, clear any obstructions in the discharge chute, and operate the snowblower correctly. By following these steps, you will be able to enjoy a snow-free path with your snowblower and make your winter chores a breeze.