Tag Archives: Snowblower

Are There Snowblower Training Or Certification Programs Available?

So, you’ve finally decided to invest in a snowblower to tackle those winter woes. But, before you dive headfirst into the world of snow removal, you might be wondering if there are any training or certification programs available to help you become a snowblower pro. After all, you want to ensure you’re using your new machine effectively and safely, right? Well, you’re in luck! In this article, we’ll explore whether there are any snowblower training or certification programs out there to help you conquer the snow-covered streets with confidence. Yes, there are snowblower training and certification programs available to help individuals become proficient in operating and maintaining snowblowers. These programs are designed to provide comprehensive training on the safe and efficient use of snowblowers, as well as certification that validates the knowledge and skills acquired during the training process. In this article, we will explore the different types of snowblower training programs, the benefits of obtaining certification, where to find training programs, the costs and duration of training, the requirements for enrollment, the topics covered in the training curricula, and the responsibilities and best practices of snowblower operators.

Are There Snowblower Training Or Certification Programs Available?

Types of Snowblower Training Programs
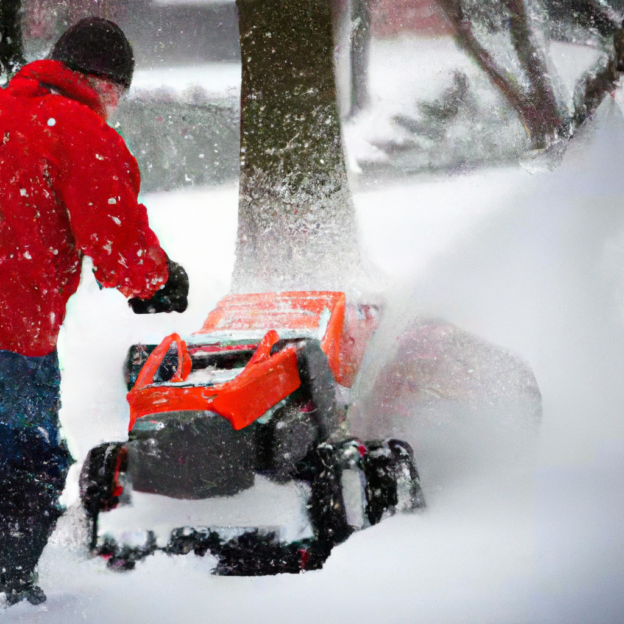
On-Site Training

On-site training programs are conducted at the location where the snowblower is primarily used. This type of training allows participants to receive hands-on instruction and guidance from experienced trainers who can provide real-time feedback. On-site training programs are often tailored to the specific needs and equipment of the organization or individual seeking training. This type of training can be particularly beneficial for individuals who prefer practical learning and require personalized instruction.

Online Training

Online snowblower training programs offer a flexible and convenient way for individuals to learn at their own pace and convenience. These programs typically consist of modules or video tutorials that cover various topics related to snowblower operation and maintenance. Online training programs often include quizzes and assessments to evaluate the participant’s understanding of the material. This type of training is ideal for individuals who have busy schedules or prefer self-paced learning.

Manufacturer-Specific Training

Manufacturer-specific training programs are offered by snowblower manufacturers and focus on the operation and maintenance of their specific models. These programs provide in-depth knowledge of the manufacturer’s equipment, including the proper use and care guidelines. Participants in these programs can gain valuable insights into the unique features and functionalities of specific snowblower models. Manufacturer-specific training programs are highly recommended for individuals who primarily work with a particular brand of snowblower.

Equipment Operation Training

Equipment operation training programs are more comprehensive and cover a broader range of topics related to snowblower operation and maintenance. These programs provide participants with a thorough understanding of the different types of snowblowers available, the various attachments and accessories, and the proper operating procedures for specific snowblower models. Equipment operation training programs are suitable for individuals who want to expand their overall knowledge and skills in snowblower operation.

Snowblower Certification Programs

Snow Equipment Operator Certification

Snow equipment operator certification programs validate an individual’s proficiency in safely and effectively operating snowblowers. These programs typically require participants to demonstrate their skills through practical assessments that evaluate their ability to operate the equipment in different conditions and scenarios. Snow equipment operator certification provides employers with assurance that the individual has the necessary skills to handle snow clearing operations efficiently and responsibly.

Winter Maintenance and Safety Certification

Winter maintenance and safety certification programs focus on the safe and proper maintenance of snowblowers, as well as the implementation of best practices for winter safety. These programs cover topics such as preventive maintenance, troubleshooting common issues, and winter safety protocols. Winter maintenance and safety certification can be particularly valuable for individuals responsible for equipment maintenance and ensuring a safe working environment during winter months.

Manufacturer Certification Programs

Manufacturer certification programs are specific to a particular brand of snowblower and validate an individual’s knowledge and skills in operating and maintaining that brand’s equipment. These programs are typically offered by manufacturers and provide participants with in-depth knowledge of the specific models, features, maintenance requirements, and troubleshooting techniques related to the manufacturer’s snowblowers. Manufacturer certification can enhance an individual’s credibility and job prospects, particularly if they frequently work with a specific brand’s equipment.

Benefits of Snowblower Training and Certification

Improved Efficiency and Productivity

Snowblower training and certification can significantly improve the efficiency and productivity of snow clearing operations. Proper training ensures that operators are familiar with the controls and operational procedures of the equipment, allowing them to work faster and more effectively. Additionally, certification programs provide participants with valuable tips and techniques to optimize their snowblowing techniques, resulting in quicker and more thorough snow removal.

Reduced Risk of Accidents and Injuries

Snowblower training and certification programs emphasize the importance of safety protocols and proper handling techniques. By completing these programs, operators gain a deeper understanding of the potential hazards associated with snowblower operation and learn how to mitigate risks. This knowledge reduces the likelihood of accidents and injuries, protecting both the operator and those in the surrounding area.

Increased Equipment Lifespan

Proper operation and maintenance techniques are crucial for extending the lifespan of snowblowers. Training programs educate operators on the regular maintenance tasks required to keep the equipment in optimal condition, such as lubrication, filter replacement, and belt adjustments. By following these guidelines, operators can prevent unnecessary wear and tear on the equipment, leading to increased equipment lifespan and reduced repair costs.

Enhanced Job Opportunities

Obtaining snowblower training and certification can open up a range of job opportunities in the snow removal industry. Many employers now require operators to have formal training and certification to ensure their competence and reliability. By acquiring certification, individuals can enhance their resumes and demonstrate their commitment to their profession. Certification can also provide a competitive advantage when applying for snow removal contracts or seeking employment with reputable snow removal companies.

Finding Snowblower Training and Certification Programs

Industry Associations and Organizations

Industry associations and organizations related to snow removal, landscaping, or equipment operation often provide information on training and certification programs. These associations may collaborate with reputable training providers or offer their own training programs. They can be a valuable resource for finding reliable and recognized training options.

Manufacturer Websites

Snowblower manufacturers often have dedicated sections on their websites that provide information on training and certification programs. These programs may be offered directly by the manufacturers or in collaboration with accredited training providers. Manufacturer websites also provide detailed information on the equipment models and features, helping individuals better understand the nuances of specific snowblowers.

Equipment Dealerships

Equipment dealerships that sell snowblowers often offer training and certification programs to their customers. These programs are typically designed to familiarize operators with the specific models and brands of equipment sold by the dealership. Equipment dealerships can provide valuable hands-on training and guidance, ensuring operators understand the equipment’s unique features and optimal operation.

Vocational Schools and Colleges

Vocational schools and colleges that offer programs in equipment operation, landscaping, or snow removal may provide snowblower training and certification as part of their curriculum. These programs often offer comprehensive training on various equipment types and provide a broader understanding of the snow removal industry. Vocational schools and colleges can be an excellent option for individuals looking for more extensive training and formal education in the field.

Are There Snowblower Training Or Certification Programs Available?

Costs and Duration of Snowblower Training Programs

The costs and duration of snowblower training programs can vary depending on the type and depth of the training. On average, on-site training programs can range from a few hundred to a few thousand dollars, depending on the customization and duration of the program. Online training programs are generally more affordable and can range from $50 to $300. Manufacturer-specific training programs may vary in cost, and some may be provided free of charge as an added value for customers. Equipment operation training programs offered by vocational schools or colleges may have tuition fees associated with them.

The duration of snowblower training programs depends on the program’s scope and intensity. On-site training programs can be as short as a half-day workshop or extend up to several weeks, depending on the depth of the training. Online training programs can typically be completed at the participant’s own pace, with an average completion time of a few hours to a few days. Vocational school programs may range from several weeks to several months, covering a broader range of topics related to snow removal and equipment operation.

Requirements for Snowblower Training and Certification

Age Restrictions

The age requirements for snowblower training and certification programs vary depending on the program’s content and legal regulations. Some programs may require participants to be at least 16 years old, while others may have no specific age restrictions. It is essential to review the program’s requirements before enrollment to ensure compliance with any age-related regulations.

Physical Fitness

Snowblower operation can be physically demanding, requiring individuals to push or maneuver heavy equipment through snow. Therefore, some training programs may have physical fitness requirements to ensure participants can safely handle the equipment. These requirements may include the ability to lift a specific weight, tolerate prolonged periods of physical exertion, and maintain proper posture and body mechanics during operation.

Educational Background

Most snowblower training and certification programs do not have strict educational background requirements. However, basic literacy and comprehension skills are often necessary to understand the training materials and successfully complete the assessments. Some advanced programs or vocational school courses may have educational prerequisites, such as a high school diploma or equivalent.

Snowblower Training Curricula and Topics Covered

Safe Operation and Handling Techniques

Snowblower training curricula typically include modules or lessons on safe operation and handling techniques. These topics cover the proper use of controls, starting and stopping procedures, maneuvering in different snow and terrain conditions, and understanding the equipment’s limitations. Emphasis is placed on operator safety and the prevention of accidents or equipment damage.

Maintenance and Repair Procedures

Maintenance and repair procedures are an essential part of snowblower training curricula. These topics cover the regular maintenance tasks needed to keep the equipment in optimal condition, such as changing oil, inspecting belts, adjusting skid shoes, and cleaning or replacing spark plugs. Participants learn troubleshooting techniques to identify and resolve common issues that may arise during operation.

Understanding Snow Types and Conditions

Snow types and conditions vary and can significantly impact snowblower operation. Training programs often include modules on identifying different snow types, understanding their characteristics, and adapting snowblowing techniques accordingly. Participants learn how to adjust the snowblower’s settings to optimize performance in various snow conditions, ensuring efficient and effective snow removal.

Safety Protocols and Personal Protective Equipment

Safety protocols and the proper use of personal protective equipment (PPE) are crucial components of snowblower training. Participants learn about the importance of wearing appropriate PPE, such as safety glasses, hearing protection, and non-slip footwear. They also gain an understanding of how to identify and avoid potential hazards, implement safe work practices, and respond to emergencies and sudden equipment malfunctions.

Snowblower Operator Responsibilities and Best Practices

Pre-Operational Inspections

Before operating a snowblower, it is essential to perform pre-operational inspections. Snowblower training programs emphasize the significance of inspecting the equipment for any visible defects, loose or worn parts, or leaks. Participants learn how to check fluid levels, ensure proper tire pressure, inspect belts and pulleys, and ensure all safety features are functioning correctly. Performing pre-operational inspections helps prevent equipment malfunctions and ensures safe and efficient operation.

Clearing Obstacles and Avoiding Property Damage

Snowblower operators must be vigilant in identifying and clearing any obstacles in the operating area to prevent damage to the equipment and surrounding property. Training programs teach participants how to scan the area for objects hidden under the snow, such as rocks, branches, or other debris. Operators are trained to carefully maneuver around obstacles and avoid collisions while maintaining a steady and controlled snowblowing pattern.

Proper Storage and Maintenance

Proper storage and maintenance are necessary to protect the snowblower during periods of non-use or offseason. Operators learn the importance of storing the equipment in a clean, dry, and secure location to prevent rust or damage. Training programs provide guidelines on winterizing the equipment, such as draining fuel, lubricating moving parts, and covering the machine to protect it from the elements. Regular maintenance schedules are also emphasized to keep the equipment in optimal condition.

Winter Weather Preparedness

Snowblower operators must be prepared for winter weather conditions and changes that may occur while performing snow removal tasks. Training programs cover topics such as effective layering of clothing, identifying signs of frostbite or hypothermia, and proper hydration and nutrition during prolonged periods of outdoor work. Operators are trained to monitor weather forecasts and adjust their work strategies accordingly to ensure their safety and well-being.

Frequently Asked Questions about Snowblower Training

How long does snowblower operator training take?

The duration of snowblower operator training can vary depending on the program. On-site training programs can be completed in a few hours to several days, depending on the depth of the training and the equipment being used. Online training programs can typically be completed at the participant’s own pace within a few hours to a few days. Vocational school programs may span several weeks or months, covering a broader range of topics related to snow removal and equipment operation.

Is snowblower training mandatory for employment?

The requirement for snowblower training may vary depending on the employer and the jurisdiction in which the operator is working. Many employers now require operators to have formal training and certification to ensure their competence and safety. Additionally, some jurisdictions may have specific regulations or licensing requirements for individuals operating snow removal equipment. It is essential to check with prospective employers and local regulatory authorities to determine the specific training requirements for employment.

Can I operate a snowblower without certification?

The ability to operate a snowblower without certification depends on local regulations and employer policies. While some jurisdictions may not have specific certification requirements, many employers now prefer or require operators to have formal training and certifications. Certification provides employers with confidence in an operator’s skills and ensures they can handle snow removal operations safely and efficiently. Additionally, some manufacturers may require certification as part of the warranty or maintenance agreements for their equipment.

Are snowblower certifications transferable?

Snowblower certifications may or may not be transferable, depending on the specific certification program and the organizations recognizing the certification. Some certifications are recognized nationally or across industry associations and are easily transferable between employers or locations. However, some certifications may be specific to a particular organization, manufacturer, or region and may not hold the same recognition or transferability. It is important to check with the issuing organization or employer to determine the transferability of the certification.

Conclusion

Snowblower training and certification programs offer individuals the opportunity to become knowledgeable and skilled operators of snow removal equipment. These programs provide valuable insights into the safe and efficient operation of snowblowers, as well as the necessary maintenance and safety protocols. By obtaining certification, individuals can enhance their job prospects, reduce the risk of accidents and injuries, and improve overall productivity and equipment lifespan. Whether through on-site training, online programs, manufacturer-specific training, or vocational education, snowblower training and certification are essential for anyone involved in snow removal operations.

How Do I Adjust The Deflector On My Snowblower’s Chute?

So, you’ve got a snowblower and you’re ready to tackle that winter wonderland outside. But there’s just one problem – the snow isn’t evenly distributing out of the chute. You’ve tried adjusting the direction of the chute, but it’s still not quite right. Well, fear not! In this article, we’ll be guiding you through the process of adjusting the deflector on your snowblower’s chute, so you can ensure that the snow is blowing exactly where you want it to go. No more random snow showers or uneven piles – just a beautifully cleared driveway and a sense of triumph over winter’s wrath. Let’s get started, shall we?

How Do I Adjust The Deflector On My Snowblowers Chute?

Why Adjusting the Deflector is Important

Adjusting the deflector on your snowblower’s chute is a crucial step in optimizing its performance and ensuring efficient snow discharge. By making the necessary adjustments, you can prevent clogging and buildup in your machine, which can ultimately lead to a smoother snow clearing experience. In this article, we will discuss the importance of adjusting the deflector, provide a step-by-step guide on how to do it, offer maintenance tips, and troubleshoot common issues.

Improves Snowblower Performance

One of the primary reasons why adjusting the deflector is important is that it significantly improves your snowblower’s performance. When the deflector is correctly positioned, it allows you to control the distance and direction of the snow discharge. By adjusting the deflector to the appropriate height, you can ensure that the snow is thrown a sufficient distance away from your path, allowing for efficient and thorough snow removal.

Prevents Clogging and Build-up

Another crucial reason for adjusting the deflector is to prevent clogging and build-up in your snowblower’s chute. When the deflector is set too low, it can lead to snow accumulating in the chute and causing blockages. This can result in reduced performance and potentially damage your machine. By adjusting the deflector to the optimal height, you can help prevent these clogs from occurring and maintain the efficiency of your snowblower.

Ensures Efficient Snow Discharge

Adjusting the deflector on your snowblower also ensures efficient snow discharge. When the deflector is properly positioned, it allows for the snow to be thrown in the desired direction, away from your cleared path. This enables you to clear your driveway or walkway more effectively and ensures that the snow is being discharged where you want it to go. Without proper deflector adjustment, the snow may not be discharged efficiently, making your snowblowing task more challenging and time-consuming.

How Do I Adjust The Deflector On My Snowblowers Chute?

Step-by-Step Guide to Adjust the Deflector

Now that you understand why adjusting the deflector is important, let’s walk through a step-by-step guide on how to adjust it properly:

1. Safety Precautions

Before starting any maintenance or adjustment on your snowblower, it is essential to take proper safety precautions. Make sure the machine is turned off and remove the spark plug wire to prevent accidental startup. Wear gloves to protect your hands, and if possible, work in a well-lit area.

2. Gather the Necessary Tools

To adjust the deflector, you may need tools such as a wrench, screwdriver, or socket set, depending on the specific model of your snowblower. Refer to your owner’s manual to determine the necessary tools required for your particular machine.

3. Locate the Deflector Adjustment Mechanism

Find the deflector adjustment mechanism on your snowblower. This is typically located on the chute near the top, where the snow is discharged. The mechanism may be a lever, a knob, or a locking mechanism, depending on the design of your snowblower.

4. Loosen the Deflector’s Locking Mechanism

Use the appropriate tool to loosen the deflector’s locking mechanism. This will allow you to make adjustments to the deflector height.

5. Adjust the Deflector Height

Once the locking mechanism is loosened, adjust the deflector height by moving it up or down. Refer to your owner’s manual for specific instructions on how to adjust the deflector on your snowblower model. It is essential to find the optimal height that allows for efficient snow discharge without causing blockages.

6. Tighten the Deflector’s Locking Mechanism

After adjusting the deflector to the desired height, securely tighten the locking mechanism. Ensure that the deflector is firmly locked in place to prevent any unintentional movement during operation.

7. Test the New Deflector Position

Finally, start your snowblower and test the new deflector position. Pay close attention to the snow discharge pattern and distance. If necessary, repeat the adjustment process until you achieve the desired results.

Maintenance Tips for the Deflector

To ensure the longevity and optimal performance of your snowblower’s deflector, follow these maintenance tips:

Cleaning and Lubricating the Mechanism

Regularly clean the deflector adjustment mechanism to remove any debris or snow buildup. Use a brush or a cloth to remove dirt and lubricate any moving parts with a suitable lubricant, as recommended by the manufacturer. This will help maintain smooth operation and prevent the mechanism from seizing.

Inspecting for Damage or Wear

Periodically inspect the deflector for any signs of damage or wear. Look for cracks, bends, or loose parts that may affect its functionality. If you notice any issues, it is important to address them promptly by repairing or replacing the deflector.

Replacing the Deflector if Necessary

If the deflector on your snowblower becomes severely damaged or worn beyond repair, it is crucial to replace it. Refer to your owner’s manual or contact the manufacturer for guidance on obtaining a suitable replacement deflector for your specific snowblower model.

Common Issues and Troubleshooting

Although adjusting the deflector should help prevent most issues, here are a few common problems you may encounter and some troubleshooting tips:

Deflector Not Moving Smoothly

If you experience difficulty in adjusting the deflector or notice that it does not move smoothly, it may be due to dirt, debris, or rust. Clean the adjustment mechanism thoroughly and lubricate it as necessary. If the problem persists, there may be an issue with the mechanism itself, and it may require repair or replacement.

Deflector Stuck in One Position

If the deflector is stuck in one position and cannot be adjusted, check for any obstructions or damage to the locking mechanism. Remove any debris or clear any blockages that may be preventing the deflector from moving. If the issue persists, consult the owner’s manual or seek professional assistance.

Deflector Does Not Stay in Place

If the deflector keeps moving or does not stay in the adjusted position during operation, the locking mechanism may not be securely tightened. Double-check that the locking mechanism is tightened correctly and ensure that it is adjusted to the desired position. If the problem persists, consider replacing the locking mechanism or seeking professional help.

Conclusion

Adjusting the deflector on your snowblower’s chute is a vital part of maintaining optimal performance and ensuring efficient snow discharge. By following the step-by-step guide and implementing regular maintenance tips, you can enjoy a smoother snowblowing experience and prevent issues such as clogging or poor snow discharge. Remember to prioritize safety, consult your owner’s manual, and seek professional assistance when needed. With proper deflector adjustments and maintenance, your snowblower will be ready to conquer winter’s snowfall with ease. Stay safe and happy snowblowing!

Can I Use A Snowblower On Uneven Terrain?

So you’ve got a snowblower and a yard that’s anything but flat. But can you use a snowblower on uneven terrain? The short answer is yes, you can. However, the type of snowblower you have and the severity of the unevenness will determine just how effective it will be. In this article, we’ll explore the different factors to consider when using a snowblower on uneven terrain, as well as some tips to ensure a smooth operation and a well-cleared path.

Can I Use A Snowblower On Uneven Terrain?

This image is property of pixabay.com.

Types of Snowblowers

When it comes to clearing snow from your property, there are three main types of snowblowers to choose from: single-stage, two-stage, and three-stage snowblowers. Each type has its own unique features and benefits, so it’s important to understand the differences before making a decision.

Single-stage Snowblower

A single-stage snowblower is the most basic and compact option available. It consists of a rotor with rubber paddles that helps propel the machine forward while also digging into the snow. The rotor also throws the snow out of the chute, clearing a path as you go.

Two-stage Snowblower

A two-stage snowblower is a step up from the single-stage model. It features an additional component called an impeller, which helps throw the snow out of the chute more forcefully. This makes the two-stage snowblower more powerful and capable of tackling heavier and deeper snowfall.

Three-stage Snowblower

The three-stage snowblower takes it a step further, offering even more power and efficiency. In addition to the rotor and impeller, it also has an accelerator that moves faster than the rotor, effectively clearing the snow in three stages. This makes it the most robust and effective option for removing large amounts of snow.

Considerations for Uneven Terrain

If you have uneven terrain on your property, there are a few important factors to consider when choosing a snowblower. These considerations will help ensure that you can effectively and safely clear snow from your property.

Ground Clearance

One of the most important considerations for uneven terrain is ground clearance. You want to make sure that the snowblower has enough clearance to maneuver over bumps, dips, and uneven surfaces. This will prevent the machine from getting stuck and allow for smooth operation.

Wheel Size and Traction

Another crucial factor is the size of the wheels and the traction they provide. Larger wheels with deep treads will offer better stability and traction on uneven terrain. This will allow the snowblower to maintain control and effectively clear the snow, even on slippery surfaces.

Adjustable Height

Having an adjustable height feature is also beneficial for uneven terrain. This allows you to raise or lower the snowblower’s housing to match the height of the terrain, minimizing the risk of the machine getting stuck or causing damage to the surface.

Weight and Stability

Lastly, consider the weight and stability of the snowblower. A heavier machine will provide better stability on uneven terrain and reduce the chances of it tipping over. Look for a snowblower with a sturdy and well-built frame that can handle the demands of uneven surfaces.

Can I Use A Snowblower On Uneven Terrain?

This image is property of pixabay.com.

Single-stage Snowblower

How it Works

A single-stage snowblower works by using a rotor with rubber paddles to scrape the snow off the ground and throw it out of the chute. The rubber paddles rotate and make contact with the surface, effectively clearing the snow in a single motion.

Pros

One advantage of a single-stage snowblower is its compact size and lightweight design. This makes it easier to maneuver and store, especially in small spaces. Single-stage snowblowers are also generally more affordable compared to their two-stage and three-stage counterparts.

Cons

However, single-stage snowblowers may not be as effective on uneven terrain. The lack of powered wheels and the reliance on the paddles for propulsion can make it challenging to navigate over bumps and dips. Additionally, single-stage snowblowers may struggle with deeper or wetter snow, requiring multiple passes to fully clear the area.

Suitability for Uneven Terrains

While single-stage snowblowers can still be used on uneven terrain, they may not offer the same level of performance and convenience as other types. If your terrain is relatively flat and the snowfall is light to moderate, a single-stage snowblower can still get the job done effectively.

Two-stage Snowblower

How it Works

A two-stage snowblower works by using an auger to gather the snow and feed it into an impeller. The auger breaks up the snow and moves it towards the impeller, which then throws the snow out of the chute with greater force.

Pros

Two-stage snowblowers are more powerful than single-stage models, making them suitable for heavier and deeper snowfall. They can handle wet snow more effectively and are generally faster at clearing larger areas. The addition of powered wheels also enhances maneuverability and control on uneven terrain.

Cons

Two-stage snowblowers are typically larger and heavier than single-stage models, which can make them more difficult to store and maneuver in tight spaces. They also tend to be more expensive, requiring a higher upfront investment. Additionally, the auger in a two-stage snowblower may not be as effective on icy or packed snow, requiring additional effort or the use of other tools.

Suitability for Uneven Terrains

Thanks to their powered wheels and greater stability, two-stage snowblowers are better suited for uneven terrains compared to single-stage models. They can handle bumps and uneven surfaces more effectively, allowing for smoother operation and optimal snow clearing.

Can I Use A Snowblower On Uneven Terrain?

This image is property of pixabay.com.

Three-stage Snowblower

How it Works

A three-stage snowblower operates similarly to a two-stage model, but with an additional accelerator component. The accelerator moves faster than the rotor, effectively breaking down the snow into smaller pieces before it gets thrown out of the chute. This results in even faster and more efficient snow clearing.

Pros

The three-stage snowblower is the most powerful option available, making it capable of handling the heaviest snowfall with ease. Its faster clearing speed translates to less time spent clearing snow, which is especially beneficial for larger properties or areas with frequent heavy snowfall.

Cons

One drawback of a three-stage snowblower is its high price point. The added accelerator component also increases the overall complexity of the machine, potentially requiring more maintenance and repair. It is also a larger and heavier machine, which might limit its maneuverability in tight spaces or on smaller properties.

Suitability for Uneven Terrains

Similar to two-stage models, three-stage snowblowers come equipped with powered wheels that enhance maneuverability and stability on uneven terrain. They are able to handle bumps and dips more effectively, making them a suitable choice for properties with uneven surfaces.

Tips for Using a Snowblower on Uneven Terrain

When using a snowblower on uneven terrain, there are a few tips to keep in mind to ensure safe and effective operation.

Inspect the Terrain

Before starting, take a moment to inspect the terrain for any large obstacles or hazards. Remove any debris or objects that could get caught in the snowblower or cause damage.

Clear Obstacles

If there are any obstacles on the surface, such as rocks or branches, clear them away before using the snowblower. These objects can pose a risk to both the machine and the operator.

Adjust Height Settings

Make sure to adjust the height settings of the snowblower according to the unevenness of the terrain. This will help prevent the machine from getting stuck or causing damage to the surface.

Use Proper Technique

When operating the snowblower, use proper technique and maintain a steady pace. Avoid pushing or forcing the machine over large bumps or obstacles to minimize the risk of tipping or damaging the snowblower.

Work Slowly and Steadily

On uneven terrain, it’s important to work slowly and steadily. This allows the snowblower to effectively clear the snow while maintaining control and stability. Rushing or going too fast can increase the chances of accidents or damage.

Can I Use A Snowblower On Uneven Terrain?

Benefits of Using a Snowblower on Uneven Terrain

Using a snowblower on uneven terrain can offer several benefits beyond simply clearing snow from your property.

Efficient Snow Clearing

Snowblowers, especially two-stage and three-stage models, are designed to clear large areas of snow quickly and efficiently. This means less time spent clearing snow and more time to enjoy the winter season.

Reduced Manual Effort

By using a snowblower, you can significantly reduce the physical effort required to clear snow. The machine does the heavy lifting, allowing you to save your energy for other tasks or activities.

Time-saving

With their power and efficiency, snowblowers can save you valuable time compared to manual shoveling. This is especially beneficial if you have a large property or experience heavy snowfall regularly.

Prevents Damage to Surfaces

Snowblowers are designed to clear snow without damaging the underlying surfaces. This is particularly important on uneven terrain, where using a shovel could potentially cause damage or uneven wear and tear.

Potential Risks and Precautions

While snowblowers can be a handy tool for clearing snow on uneven terrain, there are some potential risks to be aware of.

Tipping Over

If not operated with caution, snowblowers can tip over on uneven terrain. This can pose a risk to both the operator and the machine itself. It’s important to maintain balance and stability while using the snowblower and avoid steep inclines or slopes if possible.

Damage to the Machine

Operating a snowblower on uneven terrain can put additional strain on the machine. Rocks, roots, or other hidden objects can cause damage to the auger or other components. Regular maintenance and inspection are crucial to ensure the machine remains in good working condition.

Injury Hazards

Operating any type of machinery involves a certain level of risk. It’s important to follow all safety guidelines and wear appropriate protective gear, such as goggles and gloves, to minimize the risk of injury.

Precautionary Measures

To mitigate these risks, it’s important to take some precautionary measures. Read and follow the manufacturer’s instructions and safety guidelines. Regularly inspect the machine for any signs of damage or wear. Be aware of your surroundings and operate the snowblower in a well-lit area. And always prioritize safety first.

Can I Use A Snowblower On Uneven Terrain?

Factors that Influence Suitability

Various factors can influence the suitability of a snowblower for use on uneven terrain.

Severity of Unevenness

The severity of the unevenness in your terrain will play a role in determining the suitability of a snowblower. Light to moderate unevenness can usually be managed with any type of snowblower, but more severe unevenness may require a more robust and powerful machine.

Size and Power of Snowblower

Larger and more powerful snowblowers tend to perform better on uneven terrain compared to smaller models. The size and power of the snowblower should be chosen based on the size of your property and the amount of snowfall you typically experience.

Operator’s Experience

The operator’s experience and skill level also play a role in choosing the right snowblower for uneven terrain. If you’re unfamiliar with operating a snowblower or have limited experience, it may be best to start with a smaller and more manageable machine.

Type of Uneven Terrain

The specific type of uneven terrain on your property will impact the suitability of a snowblower. Deep ruts, large rocks, or steep slopes may require a more specialized or heavy-duty snowblower to effectively clear the area.

Conclusion

When deciding to use a snowblower on uneven terrain, there are several important considerations to keep in mind. Assess the severity of the unevenness, the size and power of the snowblower, and your own experience and skill level. Follow proper usage and safety guidelines, such as inspecting the terrain, clearing obstacles, and working slowly and steadily. Consider the benefits of using a snowblower, such as efficient snow clearing, reduced manual effort, and time-saving. However, be aware of the potential risks and take precautionary measures to mitigate them. By carefully considering these factors and utilizing snowblowers properly, you can effectively and safely clear snow from your uneven terrain.

Are There Any Insurance Policies That Cover Snowblower Damages?

So, you’ve invested in a trusty snowblower to tackle those relentless winter storms, but now you’re left wondering – what happens if it gets damaged? We all know that snowblowers can be a pricey investment, and the last thing you want is to be stuck with unexpected repair costs. But fear not, because in this article, we’ll explore the world of insurance policies and find out if there are any options out there that can offer you protection against snowblower damages. Hang tight, because we’re about to give you the lowdown on insurance coverage for your winter companion.

Are There Any Insurance Policies That Cover Snowblower Damages?

Overview of insurance coverage for snowblower damages

When it comes to protecting your snowblower from damages, it’s essential to understand your insurance coverage options. Snowblowers can be quite an investment, and unexpected damages can be costly to repair or replace. Fortunately, there are several insurance policies available that can provide coverage for snowblower damages. In this article, we will explore the different types of insurance policies that offer protection for your snowblower, as well as the coverage exclusions you should be aware of.

Understanding insurance coverage

Insurance coverage is designed to protect you financially in the event of unexpected damages or losses. When it comes to snowblower damages, insurance policies can offer coverage for repairs or replacement costs, depending on the type of policy and coverage you have. It’s important to note that not all insurance policies automatically cover snowblower damages, so it’s crucial to review your policy and understand what is included and what is excluded.

Types of insurance policies

There are several types of insurance policies that can provide coverage for snowblower damages. The most common policies include homeowners insurance, renters insurance, condo insurance, auto insurance, and specialty insurance. Each type of policy offers different levels of coverage, so it’s important to choose the one that best suits your needs.

Coverage exclusions

While insurance policies can offer valuable coverage for snowblower damages, there are also certain exclusions to be aware of. Common exclusions include wear and tear, maintenance-related issues, and improper use or storage. It’s important to read the fine print of your policy so that you understand what is covered and what is not. It’s also a good idea to speak with your insurance provider to clarify any questions or concerns you may have regarding the exclusions in your policy.

Homeowners insurance policies

For homeowners, one option for covering snowblower damages is a standard homeowners insurance policy. This type of policy typically provides coverage for both your home and personal property. However, it’s important to note that coverage limits and deductibles may apply.

Personal property coverage

Within a homeowners insurance policy, personal property coverage can extend to protect your snowblower from damages. This coverage is designed to provide reimbursement for repairs or replacement costs if your snowblower is damaged due to covered perils, such as fire, theft, vandalism, or certain weather events.

Coverage limitations

While homeowners insurance can provide coverage for snowblower damages, it’s important to be aware of the limitations that may apply. Some policies may have special limits on coverage for certain items, including snowblowers. For example, there may be a cap on the amount of reimbursement you can receive for your snowblower, which may not fully cover the cost of a new snowblower if yours is damaged beyond repair.

Renters insurance policies

If you are a renter, you may be wondering if your belongings, including your snowblower, are covered by insurance. Renters insurance can provide coverage for personal belongings, including your snowblower, in the event of damages or losses. Like homeowners insurance, renters insurance has both coverage limits and exclusions to be aware of.

Coverage for personal belongings

Within a renters insurance policy, coverage for personal belongings can help protect your snowblower from damages caused by covered perils, such as fire, theft, or certain weather events. This coverage can provide reimbursement for repairs or replacement costs, up to the limits specified in your policy.

Limits and exclusions

Similar to homeowners insurance, renters insurance policies may have limitations on coverage for certain items, including snowblowers. It’s important to review your policy and understand any coverage limits that apply. Additionally, renters insurance may have exclusions for specific perils or circumstances, so it’s crucial to be aware of what is covered and what is not.

Loss assessment coverage

In some cases, renters insurance policies may also offer loss assessment coverage. This coverage can provide additional protection if you are held responsible for damages that occur to the rental property, such as a snowblower damaging a neighboring unit. Loss assessment coverage can help cover the costs of repairs or replacement in these situations.

Condo insurance policies

If you own a condominium, your condo insurance policy can provide coverage for your personal property, including your snowblower. Condo insurance is specifically designed to protect the unit owner’s belongings and provide liability coverage, similar to homeowners insurance.

Personal property coverage

Within a condo insurance policy, personal property coverage can include protection for your snowblower. This coverage can provide reimbursement for repair or replacement costs in the event of damages caused by covered perils, such as fire, theft, or certain weather events.

Special assessments

One consideration unique to condo insurance is the potential for special assessments. Special assessments are additional fees charged to condo owners to cover unexpected expenses, such as repairs to common areas. It’s important to review your condo insurance policy to understand if it includes coverage for special assessments that may arise due to damages caused by a snowblower or other circumstances.

Master policy considerations

In addition to having your own condo insurance policy, it’s important to consider the master policy held by the condo association. The master policy typically covers the structure of the building and common areas, but may not provide coverage for your personal belongings, including your snowblower. It’s crucial to understand what is covered under the master policy and ensure that your own insurance policy provides the necessary protection for your personal property.

Auto insurance policies

If you transport your snowblower using a trailer or truck, it’s important to consider the coverage provided by your auto insurance policy. Auto insurance can offer protection for your snowblower against theft or damages while it is being transported. It’s crucial to understand the coverage options available and any limits or deductibles that may apply.

Comprehensive coverage

Within an auto insurance policy, comprehensive coverage can provide protection for your snowblower against theft or damages caused by covered perils, such as accidents, vandalism, or weather events. This coverage can help reimburse you for repair or replacement costs if your snowblower is damaged while in transit.

Coverage for snowblower theft or damage

Auto insurance policies typically provide coverage for both theft and physical damages to your snowblower. If your snowblower is stolen or damaged while in transit, comprehensive coverage can help cover the costs of repairs or replacement. It’s important to review the specifics of your policy to understand the level of coverage and any deductibles that may apply.

Are There Any Insurance Policies That Cover Snowblower Damages?

Policy limits and deductibles

Like other insurance policies, auto insurance policies may have coverage limits and deductibles. Coverage limits dictate the maximum amount the insurance company will pay for a claim, while deductibles represent the portion of the costs you are responsible for paying before insurance coverage kicks in. It’s important to understand the limits and deductibles specified in your auto insurance policy to ensure you have adequate coverage for your snowblower.

Specialty insurance policies

In addition to standard homeowners, renters, condo, and auto insurance policies, there are also specialty insurance policies that can provide coverage specifically tailored to unique needs, such as equipment breakdown insurance, service line coverage, and inland marine insurance.

Equipment breakdown insurance

Equipment breakdown insurance is designed to protect against unexpected damages or breakdowns of equipment, including snowblowers. This type of coverage can provide reimbursement for repair or replacement costs if your snowblower experiences a mechanical failure or other covered equipment breakdown.

Service line coverage

Service line coverage can protect against damages to underground service lines, such as water, sewer, or power lines. While this coverage is not specific to snowblowers, it can provide financial protection in the event that underground service lines are damaged due to snowblower use.

Inland marine insurance

Inland marine insurance is a type of coverage that protects movable property while it is in transit or being stored off-site. While commonly associated with commercial policies, inland marine insurance can also be beneficial for individuals who frequently transport or store their snowblower outside of their primary residence.

Insurance riders and endorsements

In addition to the standard coverage provided by insurance policies, there are also riders and endorsements that can be added to enhance the level of protection for your snowblower. These additional coverage options can be beneficial if you have a particularly valuable snowblower or if you want to increase the coverage limits of your policy.

Scheduled personal property endorsements

Scheduled personal property endorsements allow you to specifically list and insure high-value items, such as a snowblower, for their full appraised or agreed-upon value. This type of endorsement provides broader coverage than the standard policy limits, ensuring that your expensive snowblower is fully protected.

Increased coverage limits

If the standard coverage limits of your homeowners, renters, or condo insurance policy are not sufficient to cover the full value of your snowblower, you may consider increasing your coverage limits. This can provide additional financial protection in the event of damages or losses to your snowblower.

Equipment breakdown endorsements

Some insurance policies may offer equipment breakdown endorsements, which can provide additional coverage specifically for mechanical failures or breakdowns of equipment, such as your snowblower. This endorsement can supplement the coverage provided by standard policies and ensure that you are protected against unexpected equipment failures.

Factors to consider when selecting coverage

When choosing insurance coverage for your snowblower, there are several important factors to consider. These factors can help ensure that you select the policy and coverage options that best meet your needs and provide adequate protection for your investment.

Costs of coverage

The cost of insurance coverage for your snowblower can vary depending on factors such as the type of policy, coverage limits, deductibles, and any additional endorsements or riders you choose to add. It’s important to consider the overall costs of the policy, including premiums and any out-of-pocket expenses, and weigh them against the level of protection provided.

Coverage limits and deductibles

Understanding the coverage limits and deductibles specified in your insurance policy is crucial when selecting coverage for your snowblower. Coverage limits should be sufficient to cover the full value of your snowblower, while deductibles should be affordable in the event of a claim.

Claim process and customer service

Another important factor to consider is the ease and efficiency of the claims process and the quality of customer service provided by the insurance company. It’s important to choose an insurance provider that has a reputation for handling claims promptly and providing excellent customer service, ensuring that any claims you file for snowblower damages are processed smoothly.

Common exclusions and limitations

While insurance coverage can provide valuable protection for your snowblower, it’s important to be aware of common exclusions and limitations that may apply. These exclusions can vary depending on the type of policy and insurance provider, but typically include wear and tear, maintenance-related issues, and improper use or storage.

Wear and tear

Insurance policies generally do not cover damages caused by normal wear and tear. This means that if your snowblower breaks down as a result of regular use or age, you will typically be responsible for the repair or replacement costs.

Maintenance-related issues

Similarly, insurance policies usually exclude damages caused by lack of maintenance or improper maintenance procedures. This means that if you fail to maintain your snowblower according to the manufacturer’s recommendations, any resulting damages may not be covered by your policy.

Improper use or storage

Insurance policies also commonly exclude damages caused by improper use or storage of your snowblower. For example, if you leave your snowblower outside in severe weather conditions and it gets damaged, your insurance may not cover the repairs or replacement.

Steps to take in case of snowblower damage

If your snowblower experiences damages, it’s important to follow a few steps to ensure a smooth claims process and maximize your chances of receiving reimbursement for repairs or replacement.

Document the damage

Before contacting your insurance provider, it’s crucial to document the damages to your snowblower. Take photos or videos of the damage from various angles and make detailed notes of the extent of the damages and any other relevant information. This documentation will serve as evidence for your claim.

Contact your insurance provider

After documenting the damages, contact your insurance provider to report the incident and initiate the claims process. Provide them with all the necessary information, including the photos or videos of the damages and a detailed description of what happened.

File a claim and provide necessary documents

Once you have reported the incident, your insurance provider will guide you through the process of filing a claim. You will need to provide any required documents, such as the photos or videos of the damages, a repair or replacement estimate from a professional, and any other documents requested by the insurance company. It’s important to follow their instructions closely and provide all the necessary information to ensure a timely and successful claim.

In conclusion, while not all insurance policies automatically cover snowblower damages, there are several types of insurance policies available that can provide valuable protection. Homeowners insurance, renters insurance, condo insurance, auto insurance, and specialty insurance policies can all offer coverage for snowblower damages, each with its own coverage limits and exclusions. By understanding your policy, considering additional endorsements or riders, and following the necessary steps in the event of damage, you can ensure that your snowblower is protected and that you have the necessary financial assistance to repair or replace it when needed.

How Do I Decide Between A Push And A Self-propelled Snowblower?

So, you’re standing in front of a pile of snow, staring at it with a mixture of awe and annoyance. The thought of shoveling it all by hand seems daunting, so you’ve decided that a snowblower is your best bet. But now you’re faced with another decision – do you go for a push snowblower or a self-propelled one? It’s a question that many snow-covered souls have pondered, and in this article, we’ll explore the factors to consider when making this snowy dilemma.

How Do I Decide Between A Push And A Self-propelled Snowblower?

1. Cost

1.1 Initial Cost

When considering whether to purchase a push or a self-propelled snowblower, one important factor to take into account is the initial cost. Push snowblowers tend to be more affordable than self-propelled ones, but this is not always the case. The price of a snowblower varies depending on the brand, features, and size. Before making a decision, it’s essential to set a budget and evaluate the options available within that range.

1.2 Maintenance Cost

In addition to the initial cost, it’s crucial to consider the maintenance expenses of a snowblower. Both push and self-propelled snowblowers require regular maintenance to ensure optimal performance and longevity. While push snowblowers tend to have simpler mechanisms and may require fewer repairs, self-propelled models may have additional components that could need maintenance or replacement. It’s important to think about long-term costs and factor in maintenance when making a decision.

2. Size of the Area

The size of the area you need to clear of snow is another significant factor to consider when choosing between a push and a self-propelled snowblower. If you have a smaller area, such as a small driveway or walkway, a push snowblower could be sufficient. Pushing the machine manually can provide you with enough maneuverability and control in tight spaces.

However, if you have a larger area, such as a long driveway or a wide sidewalk, a self-propelled snowblower may be a better choice. The self-propulsion feature allows the machine to move forward on its own, reducing the physical effort required. This can be especially beneficial if you have difficulty pushing heavy machinery or if you need to clear a significant amount of snow in a short amount of time.

3. User Physical Condition

Consider your own physical condition when deciding between a push and a self-propelled snowblower. Push snowblowers require you to exert physical effort to move and operate the machine. If you have physical limitations or health concerns that make it challenging to push heavy equipment, a self-propelled snowblower might be a more suitable option. The self-propulsion feature takes some of the physical strain off the user, making it easier to clear snow without overexertion.

On the other hand, if you are physically fit and capable of pushing and maneuvering a snowblower, a push model could be a cost-effective and efficient choice. Ultimately, it’s essential to consider your own physical abilities and choose a snowblower that accommodates your needs.

How Do I Decide Between A Push And A Self-propelled Snowblower?

4. Snow Conditions and Depth

The type of snow conditions you encounter and the depth of snow you typically need to clear are important factors to consider when deciding between a push and a self-propelled snowblower. Push snowblowers are generally suitable for light to moderate snowfall and smaller accumulations. They are designed to handle regular snow conditions without difficulty.

However, if you frequently experience heavy snowfall or if you need to clear deep snow on a regular basis, a self-propelled snowblower might be a better choice. Self-propelled models usually have more powerful engines and larger augers, allowing them to handle deeper snow with ease. They can save you time and effort when dealing with challenging winter weather conditions.

5. Maneuverability

Maneuverability is an essential aspect to consider when choosing between a push and a self-propelled snowblower. Push snowblowers are generally more maneuverable than self-propelled ones. Their lightweight design and lack of motorized movement allow for greater control and flexibility when navigating around obstacles or tight spaces.

Self-propelled snowblowers, while offering convenience in terms of moving the machine forward, may have limitations in maneuverability. The added weight, coupled with the motorized movement, can make it slightly more challenging to navigate around obstacles or make precise turns. If you have many obstacles or tight spaces in the area you need to clear, a push snowblower might be the better choice for maneuverability.

6. Noise Level

The noise level produced by a snowblower is also a factor to consider, especially if you live in a residential area or have noise restrictions. Push snowblowers tend to be quieter than self-propelled models. Since push snowblowers run solely on mechanical power without an engine, they generate less noise during operation. This can be beneficial if you prefer a quieter snow removal experience or want to avoid disturbing your neighbors.

In contrast, self-propelled snowblowers typically have engines that run on gas or electricity, which contribute to a higher noise level during operation. If noise is a concern for you, it may be worth considering a push snowblower or opting for a self-propelled model with noise reduction features.

7. Effort Required

The amount of effort you are willing or able to exert during snow removal is an important consideration. If you prefer a more hands-on approach and don’t mind putting physical effort into clearing snow, a push snowblower can provide you with the desired level of engagement. Pushing the machine manually allows you to have more control over the speed and direction of snow removal.

On the other hand, if you prefer minimal physical exertion or have physical limitations, a self-propelled snowblower can significantly reduce the effort required. With a self-propelled model, you can simply guide the machine while it does the work of moving forward. This can be advantageous if you have a large area to clear or if you find it challenging to push heavy equipment for extended periods.

8. Accessibility and Storage

Consider the accessibility and storage options available to you when deciding between a push and a self-propelled snowblower. Push snowblowers are generally more compact and lightweight, making them easier to maneuver and store in smaller spaces. If you have limited storage space or need to transport the snowblower frequently, a push model might be a more practical choice.

On the other hand, self-propelled snowblowers tend to be larger and heavier due to their additional components. While they provide convenience and power, they may require more space for storage and maneuvering. If you have ample storage space and don’t need to transport the snowblower frequently, a self-propelled model could be a suitable option.

9. Additional Features

9.1 Electric Start

Some snowblowers, both push and self-propelled, come with the option of an electric start. This feature eliminates the need to manually pull a recoil cord to ignite the engine. Instead, you can start the snowblower easily with the push of a button. If convenience and ease of use are important to you, a snowblower with an electric start feature may be worth considering.

9.2 Chute Control

Chute control is another useful feature to consider when choosing a snowblower. It allows you to adjust the direction in which the snow is thrown. Many snowblowers, especially self-propelled models, have chute control mechanisms that allow for easy adjustment without interrupting the operation. This can be beneficial when clearing snow around parked cars, sidewalks, or other areas where precise control is necessary.

9.3 Clearing Width

The clearing width refers to the width of the snowblower’s auger or cutting path. A wider clearing width means you can clear a larger area in less time. Push snowblowers typically have narrower clearing widths, which can be more suitable for smaller areas or tight spaces. Self-propelled snowblowers often offer wider clearing widths, providing greater efficiency for larger areas or heavy snowfall.

10. Personal Preference

Ultimately, your personal preference plays a significant role in deciding between a push and a self-propelled snowblower. Consider your own preferences, needs, and priorities when making the final decision. Think about which features are most important to you and which factors hold the most weight in your specific circumstances. By evaluating all aspects thoroughly, you can choose the snowblower that will best meet your needs and make your snow removal experience more efficient and enjoyable.

How Do I Calibrate My Snowblower For Optimum Performance?

So you’ve finally bought a snowblower to tackle those pesky snowdrifts and make your life a little easier during the winter season. But now you’re wondering, how do you make sure your snowblower is performing at its best? Calibrating your snowblower is the key to maximizing its efficiency and effectiveness. In this article, we will guide you through the process of calibrating your snowblower for optimum performance, ensuring that it clears snow efficiently and effortlessly.

How Do I Calibrate My Snowblower For Optimum Performance?

Checking and Adjusting the Height and Angle

Checking the Skid Shoes

When it comes to calibrating your snowblower for optimum performance, one of the first things you’ll want to do is check the skid shoes. These are the adjustable plates located on the bottom of the snowblower that determine the height at which the machine operates.

To check the skid shoes, start by turning off the snowblower and allowing the engine to cool down. Then, visually inspect the skid shoes for any signs of wear or damage. If the skid shoes are worn down or uneven, it may be time to replace them.

Adjusting the Skid Shoes

If the skid shoes are in good condition but need adjustment, you can easily do this to ensure proper snowblower performance. First, locate the adjustment mechanism for the skid shoes, which is typically found on the sides of the snowblower.

To adjust the skid shoes, loosen the adjustment mechanism and raise or lower the shoes until they are at the desired height. It’s important to note that the height of the skid shoes should be set according to the surface you’ll be clearing. For example, if you’re clearing a gravel driveway, the skid shoes should be set to a higher position to avoid damaging the surface.

Checking the Scraper Blade

The next step in calibrating your snowblower is to check the scraper blade. This is the rubber or metal strip located at the bottom of the snowblower that comes into contact with the ground. The scraper blade helps remove snow from the surface as the snowblower moves forward.

Inspect the scraper blade for any signs of wear or damage. If the scraper blade is damaged, it should be replaced to ensure optimal performance. Additionally, check the alignment of the scraper blade to make sure it is parallel to the ground.

Adjusting the Scraper Blade

If the scraper blade is in good condition but needs adjustment, you can make the necessary changes to ensure proper operation. To adjust the scraper blade, locate the adjustment mechanism usually found near the bottom of the snowblower.

Loosen the adjustment mechanism and raise or lower the scraper blade until it is at the desired height. Keep in mind that the scraper blade should be set low enough to effectively remove snow, but not so low that it scrapes the surface below, causing damage.

Checking the Auger Height

The auger is the rotating mechanism on the front of the snowblower that collects and moves the snow into the discharge chute. To calibrate your snowblower for optimum performance, it’s important to check the height of the auger.

Visually inspect the auger to ensure it is aligned properly and not making contact with the ground. Look for any signs of wear or damage, such as bent or broken blades. If you notice any issues with the auger, it may need to be repaired or replaced.

Adjusting the Auger Height

To adjust the height of the auger, locate the adjustment mechanism near the back of the snowblower. Loosen the mechanism and raise or lower the auger until it is at the desired height. The height of the auger should be set based on the depth of the snow you’ll be clearing.

Keep in mind that setting the auger too low can cause it to make contact with the ground, leading to damage. On the other hand, if the auger is set too high, it may not effectively collect and move the snow.

Checking the Chute Angle

The chute angle determines the direction in which the snow is discharged from the snowblower. To ensure optimal performance, it’s important to check the chute angle and make any necessary adjustments.

Inspect the chute to ensure it is aligned properly and not clogged with snow or debris. Ensure that the chute rotates smoothly and is not loose or damaged. If there are any issues with the chute, they should be addressed before operating the snowblower.

Adjusting the Chute Angle

To adjust the chute angle, locate the adjustment mechanism near the chute. This mechanism allows you to change the angle at which the snow is discharged. Loosen the adjustment mechanism and rotate the chute to the desired angle.

It’s important to note that the chute angle should be adjusted based on the direction you want the snow to be thrown. Consider factors such as wind direction and the area you want to clear when setting the chute angle.

Inspecting and Replacing the Belts

Locating the Belts

In order to calibrate your snowblower for optimum performance, it’s necessary to inspect the belts and replace them if needed. The belts are an essential component in the operation of the snowblower, as they transfer power from the engine to the auger and impeller.

To locate the belts, refer to your snowblower’s user manual. It will provide instructions on accessing the belt compartment and identifying the different belts used in your specific model.

Inspecting the Belts for Wear

Once you’ve located the belts, it’s important to visually inspect them for any signs of wear or damage. Look for fraying, cracks, or any other visible signs of deterioration. Additionally, check for proper tension in the belts. Over time, belts may become loose, which can negatively impact the snowblower’s performance.

If you notice any significant wear or damage, it’s recommended to replace the belts to ensure optimal performance and prevent unexpected breakdowns during use.

Replacing the Belts

If inspection reveals that the belts need to be replaced, it’s important to follow the manufacturer’s guidelines outlined in the user manual. These guidelines will provide step-by-step instructions on how to safely remove the old belts and install new ones.

When replacing the belts, be sure to use the correct size and type specified by the manufacturer. Using the wrong belts can lead to equipment failure and potential safety hazards. If you’re unsure about the proper size or type of belt, consult a professional or contact the manufacturer for assistance.

Inspecting and Cleaning the Fuel System

Checking the Fuel Tank

To calibrate your snowblower for optimum performance, it’s essential to inspect and maintain the fuel system. Begin by checking the fuel tank for any signs of damage or leaks. Pay attention to the fuel tank cap, ensuring it is tightly sealed and free from cracks or corrosion.

Inspect the fuel lines connecting the tank to the engine for any visible signs of wear, such as cracks or leaks. If you notice any issues with the fuel tank or lines, it’s crucial to address them before operating the snowblower to prevent fuel leaks and potential fire hazards.

Inspecting the Fuel Line

In addition to checking the fuel tank, inspect the fuel line itself for any signs of damage or blockage. A clogged or damaged fuel line can interfere with the flow of fuel to the engine, leading to poor performance or engine failure.

Carefully examine the fuel line for any visible signs of wear, such as cracks, leaks, or brittleness. If you notice any issues, it’s important to replace the fuel line to ensure proper fuel delivery.

Cleaning the Carburetor

The carburetor plays a crucial role in the fuel system of your snowblower, as it mixes the fuel and air before sending it into the engine. Over time, debris, dirt, and stale fuel can accumulate in the carburetor, leading to poor performance or engine malfunctions.

To clean the carburetor, refer to the user manual for specific instructions on your snowblower model. Generally, the process involves removing the carburetor, disassembling it, and thoroughly cleaning each component with carburetor cleaner. Once cleaned, reassemble the carburetor and reinstall it according to the manufacturer’s guidelines.

Adjusting the Carburetor

In addition to cleaning, it may be necessary to adjust the carburetor to optimize fuel and air mixture for proper engine performance. However, it’s important to note that carburetor adjustments can be complex and may require specific tools and expertise.

If you’re unsure about adjusting the carburetor, it’s best to seek professional assistance or consult the user manual. Improper adjustments can lead to engine damage, poor fuel efficiency, and potentially hazardous operating conditions.

Checking and Changing the Spark Plug

Locating the Spark Plug

To ensure optimal performance of your snowblower, it’s important to check and change the spark plug as needed. The spark plug is responsible for igniting the fuel-air mixture within the engine’s combustion chamber.

To locate the spark plug, refer to your snowblower’s user manual. It will provide specific instructions on accessing the spark plug, which is usually positioned on the side or top of the engine.

Removing the Spark Plug

Before removing the spark plug, make sure the engine is turned off and has had time to cool down. This will prevent any potential injuries due to hot components.

Using a spark plug socket wrench, carefully remove the spark plug by turning it counterclockwise. Be cautious not to damage the spark plug or surrounding components during removal.

Inspecting the Spark Plug

Once the spark plug is removed, visually inspect it for any signs of wear or damage. Look for deposits, such as carbon buildup or oil fouling, on the electrodes or insulator.

If the spark plug appears dirty or worn, it’s recommended to clean it with a wire brush or replace it with a new one. A worn or dirty spark plug can result in starting issues, poor fuel efficiency, and reduced engine performance.

Replacing the Spark Plug

If inspection reveals that the spark plug needs to be replaced, it’s important to use the correct type and heat range as specified by the manufacturer. Consult the user manual or contact a professional if you’re unsure about the proper spark plug for your snowblower model.

To install the new spark plug, carefully thread it into the spark plug hole by hand. Once hand-tightened, use the spark plug socket wrench to give it a final turn, ensuring a snug fit without overtightening.

How Do I Calibrate My Snowblower For Optimum Performance?

Checking and Changing the Engine Oil

Locating the Oil Cap and Drain Plug

Regular maintenance of the engine oil is crucial for optimal performance and longevity of your snowblower. Engine oil lubricates the internal components, reducing friction and preventing excessive wear.

To locate the oil cap and drain plug, refer to your snowblower’s user manual. It will provide specific instructions on accessing these components, which are typically located on the side or bottom of the engine.

Checking the Oil Level

Before checking the oil level, make sure the engine is turned off and has had time to cool down. This will ensure accurate oil level readings and prevent any potential injuries.

Remove the oil cap and wipe the dipstick clean with a cloth or paper towel. Reinsert the dipstick fully and remove it again to check the oil level. The dipstick should have markings indicating the proper oil level range. If the oil level is below the recommended range, additional oil should be added.

Changing the Engine Oil

Routine oil changes are necessary to maintain the performance and longevity of your snowblower. Consult your snowblower’s user manual for specific instructions on the oil change procedure, as it may vary depending on the model.

Typically, the process involves draining the old oil by removing the drain plug and allowing it to flow into a suitable container. Once the oil has drained completely, reinstall the drain plug and refill the engine with the recommended type and amount of oil.

Dispose of the old oil properly by taking it to a recycling facility or an authorized collection point that accepts used motor oil.

Inspecting and Lubricating the Moving Parts

Inspecting the Auger

Regular inspection of the moving parts, such as the auger, is essential for maintaining the performance and safety of your snowblower. The auger is responsible for collecting and moving the snow into the discharge chute.

Visually inspect the auger for any signs of damage or excessive wear. Look for bent or broken blades, loose components, or abnormal noises during operation. If you notice any issues with the auger, they should be addressed promptly to prevent further damage or potential safety hazards.

Lubricating the Auger

Proper lubrication of the auger ensures smooth operation and reduces friction between moving parts. Consult your snowblower’s user manual for specific instructions on the lubrication requirements, as they may vary based on the model.

Typically, a suitable lubricant, such as lithium grease, is applied to designated areas of the auger and its components. It’s important to use the correct type and amount of lubricant specified by the manufacturer. Applying too much or the wrong type of lubricant can lead to equipment damage or performance issues.

Inspecting the Impeller

Similar to the auger, the impeller is responsible for collecting and moving the snow through the discharge chute. Regular inspection of the impeller is necessary to ensure proper operation and prevent clogs or malfunctions.

Visually inspect the impeller for any signs of damage or debris accumulation. Check for bent or broken blades, loose components, or obstructions within the impeller housing. If you notice any issues with the impeller, address them promptly to maintain optimal snowblower performance.

Lubricating the Impeller

Proper lubrication of the impeller is crucial for reducing friction and ensuring smooth operation. Refer to your snowblower’s user manual for specific instructions on lubricating the impeller, as it may vary depending on the model.

Apply the recommended lubricant to the designated areas of the impeller and its components. Be sure to use the correct type and amount of lubricant specified by the manufacturer. Incorrect lubrication can cause damage to the impeller or impede its performance.

Inspecting the Cables

The cables on your snowblower play a crucial role in controlling the various functions, such as engaging the auger or adjusting the chute. Regular inspection of the cables is necessary to ensure they are in good condition and properly connected.

Visually inspect the cables for any signs of wear, fraying, or damage. Check for proper tension and ensure that the cables are securely fastened. Replace any damaged or worn cables to maintain precise control of your snowblower.

Lubricating the Cables

Proper lubrication of the cables allows for smooth operation and reduces the risk of binding or seizing. Consult your snowblower’s user manual for specific instructions on lubricating the cables, as it may vary based on the model.

Using a suitable cable lubricant, apply a small amount to the moving points of the cables. Work the lubricant into the cables by manually operating the controls multiple times. Be cautious not to apply excessive lubricant, as it can attract dirt and debris, potentially causing damage.

Inspecting and Adjusting the Tires

Checking the Tire Pressure

The tires of your snowblower play a critical role in its overall performance and maneuverability. Regularly checking the tire pressure is essential to ensure optimal operation on different surfaces and in various weather conditions.

Consult your snowblower’s user manual for the recommended tire pressure, as it may vary depending on the model. Use a tire pressure gauge to measure the existing pressure in each tire. Adjust the pressure as necessary, using an air compressor or by adding or releasing air.

Adjusting the Tire Pressure

To adjust the tire pressure, refer to the recommended pressure provided in your snowblower’s user manual. If the current tire pressure is too high, release air by removing the valve stem cap and gently pressing the valve stem with a small tool or the tip of a tire pressure gauge.

If the current tire pressure is too low, use an air compressor to add air until the desired pressure is reached. Avoid overinflating the tires, as it can negatively impact performance and may cause tire damage.

Checking the Tire Tread

The tread on your snowblower’s tires provides traction and helps maintain stability while operating on different surfaces. Regularly inspecting the tire tread is essential to ensure adequate grip and prevent slipping on icy or slippery terrain.

Visually inspect the tire tread for any signs of excessive wear or unevenness. Check for worn or missing tread elements, as well as any visible signs of damage. If the tread is severely worn or damaged, it’s recommended to replace the tires to maintain safe and efficient snowblower operation.

Adjusting the Tire Tread

Unlike vehicle tires, snowblower tires generally do not have adjustable treads. If the tire tread is worn or damaged beyond repair, replacing the tires with new ones designed for your specific snowblower model is the best solution.

It’s important to use the correct tire size and type as specified by the manufacturer. Using improper tires can affect the snowblower’s performance, stability, and overall safety.

Inspecting and Testing the Electric Start

Checking the Battery

If your snowblower is equipped with an electric start feature, regular maintenance and inspection of the battery are crucial to ensure reliable operation during cold weather conditions. A weak or faulty battery can lead to starting issues and inconvenience when you need to clear snow.

Inspect the battery for any signs of damage, corrosion, or leakage. Check the battery connections to ensure they are secure and free from rust or debris. It’s also important to measure the battery voltage using a multimeter to determine its overall health.

If the battery shows signs of deterioration or has a low voltage reading, it may need to be charged or replaced to ensure proper functioning of the electric start feature.

Inspecting the Starter Motor

The starter motor is responsible for cranking the engine during the starting process, enabling the snowblower to operate. Regular inspection of the starter motor is essential to ensure it is in good condition and functions as intended.

Visually inspect the starter motor for any signs of damage, such as broken or worn-out components. Check the connections to ensure they are secure and free from corrosion.

If you notice any issues with the starter motor, it’s recommended to seek professional assistance or contact the manufacturer for further guidance. Repairing or replacing the starter motor requires expertise and specific tools.

Testing the Electric Start

Before the winter season begins, it’s crucial to test the electric start feature of your snowblower to ensure it’s in working order. This will prevent any unwelcome surprises when you need to start the snowblower during freezing temperatures.

Follow the user manual’s instructions on operating the electric start feature. Typically, this involves connecting the snowblower to a power source, such as an electrical outlet, and engaging the electric start button or switch.

Observe the snowblower’s response when using the electric start. If the engine starts smoothly and without any issues, the electric start is functioning properly. However, if the engine fails to start or experiences any irregularities, further troubleshooting or professional assistance may be necessary.

Cleaning and Storing the Snowblower

Removing Debris and Snow Build-up

Once you’ve completed the necessary inspections and maintenance tasks, it’s important to clean the snowblower to remove any debris or snow build-up. This is especially important before storing the snowblower for an extended period.

Start by turning off the snowblower and allowing the engine to cool down. Remove any snow or ice accumulation on the exterior using a brush or shovel. Pay close attention to the auger and discharge chute, ensuring they are clear of any debris.

Inspect the engine and other components for any traces of debris or oil leaks. If necessary, use a cloth or brush to remove any dirt or grime. Taking the time to clean your snowblower will help maintain its performance and prevent rust or corrosion.

Cleaning the Snowblower

To clean the snowblower more thoroughly, start by disconnecting the spark plug wire from the spark plug. This will prevent accidental engine starts during the cleaning process.

Using a garden hose or pressure washer set to a low pressure setting, carefully rinse off any visible dirt or debris from the snowblower. Avoid spraying directly into the engine or electrical components to prevent damage. Pay attention to hard-to-reach areas and ensure all parts are thoroughly rinsed.

After rinsing, scrub any remaining stains or stubborn dirt with a brush and a mild detergent or snowblower cleaner. Rinse thoroughly once again, ensuring all cleaning solutions are removed.

Allow the snowblower to dry completely before moving on to the next step.

Storing the Snowblower

Proper storage of your snowblower during the off-season is essential to maintain its performance and prevent damage. Follow these steps to store your snowblower safely:

  1. Drain the fuel tank: If you won’t be using the snowblower for an extended period, it’s recommended to drain the fuel tank completely to prevent stale fuel from causing starting issues or engine damage. Consult the user manual for specific instructions on fuel draining.

  2. Remove the spark plug: Remove the spark plug and apply a small amount of oil into the cylinder through the spark plug hole. Gently pull the starter cord a few times to distribute the oil evenly inside the cylinder. This will help prevent rust and ensure smooth engine operation when you’re ready to use the snowblower again.

  3. Clean and lubricate moving parts: Apply a thin layer of lubricant to the auger, impeller, and other moving parts to prevent rust and ensure smooth operation. Wipe off any excess lubricant to avoid attracting dirt and debris.

  4. Store in a dry and secure location: Find a clean and dry storage space to keep your snowblower protected from the elements. Ideally, store it in a covered area, such as a garage or shed, to prevent exposure to moisture and precipitation. If possible, elevate the snowblower off the ground to minimize contact with damp surfaces.

By following these storage guidelines, you can extend the lifespan of your snowblower and be prepared for the next winter season.

Tips and Precautions

Start with the User Manual

When calibrating and maintaining your snowblower, always refer to the user manual provided by the manufacturer. The user manual contains specific instructions and guidelines for your snowblower model, ensuring that you perform the necessary tasks correctly and safely.

Wear Protective Gear

Ensure your safety by wearing appropriate protective gear when operating or performing maintenance on your snowblower. This includes sturdy gloves, eye protection, and non-slip footwear. Additionally, consider wearing hearing protection if your snowblower generates a high level of noise.

Perform Regular Maintenance

Regular maintenance is crucial for keeping your snowblower in optimal condition. Follow the manufacturer’s recommended maintenance schedule, including tasks such as oil changes, filter replacements, and inspections. By staying on top of maintenance, you can prevent unexpected breakdowns and ensure your snowblower operates at its best.

Keep an Eye on Warning Signs

Be attentive to warning signs that indicate potential issues with your snowblower. These may include unusual noises, excessive vibration, poor performance, or difficulty starting. Address any warning signs promptly, as they often indicate the need for maintenance or repairs.

Seek Professional Help if Needed

If you’re unsure about any part of the calibration or maintenance process, it’s always best to seek professional assistance. Don’t hesitate to contact the manufacturer’s customer service or consult a certified technician who specializes in snowblower repairs. They can provide guidance and ensure the proper servicing of your snowblower.

Calibrating your snowblower for optimum performance is a comprehensive process that requires attention to detail and periodic maintenance. By following these guidelines and performing the necessary inspections and adjustments, you can ensure that your snowblower is ready to tackle snow removal efficiently and reliably.

Can I Assemble A Snowblower Myself Or Do I Need Professional Help?

So, you’ve just purchased a shiny new snowblower to tackle the winter weather that’s coming your way. Now, you’re faced with the question: can you assemble it yourself or should you call in the professionals? Well, the good news is that assembling a snowblower is typically not rocket science, but it does require some mechanical know-how and a basic understanding of tools. In this article, we’ll explore whether you can undertake this task solo or if it’s best to seek professional assistance. So, let’s get started and figure out if you’ll be able to conquer the assembly process on your own or if you’ll need a helping hand.

Benefits of Assembling a Snowblower Yourself

Cost savings

One of the primary benefits of assembling a snowblower yourself is the potential for cost savings. When you purchase a snowblower, typically it comes partially assembled, and if you choose to assemble it yourself, you can avoid the additional cost of professional assembly fees. This can be particularly beneficial if you are on a tight budget or simply prefer to save money whenever possible.

Improved understanding of equipment

By assembling a snowblower yourself, you gain a better understanding of how the equipment works. You get to familiarize yourself with each part and component, which can come in handy when it comes to maintenance and troubleshooting in the future. When you have a clear understanding of how your snowblower operates, it becomes easier to identify and fix any issues that may arise.

Sense of accomplishment

There is a sense of pride and accomplishment that comes with successfully assembling a complex machine like a snowblower. It provides a real-world opportunity to put your mechanical skills to the test and see the fruits of your labor. The satisfaction of knowing that you built something functional with your own two hands can be incredibly rewarding.

Considerations Before Assembling a Snowblower Yourself

Level of mechanical expertise

Before deciding to assemble a snowblower yourself, it is crucial to assess your level of mechanical expertise. Assembling a snowblower requires some basic knowledge of tools and mechanics. If you are unfamiliar with these aspects, you may find it challenging to properly assemble the snowblower. It’s important to gauge your comfort level and determine if you have the necessary skills or if professional help may be more suitable.

Availability of tools

Assembling a snowblower requires specific tools to ensure a proper and secure assembly. Before embarking on the project, it is essential to ensure that you have all the necessary tools readily available. Some common tools required for snowblower assembly include a socket set, wrenches, screwdrivers, pliers, hex keys, safety goggles, and gloves. If you do not possess these tools, you may need to invest in them or consider hiring a professional who already has the required equipment.

Time commitment

Assembling a snowblower can be a time-consuming process, especially if you are doing it for the first time. It’s important to consider how much time you are willing to dedicate to the assembly. If you have a busy schedule or limited free time, it might be more convenient to have a professional handle the assembly. However, if you enjoy hands-on projects and have the time to spare, assembling the snowblower yourself can be a worthwhile endeavor.

Can I Assemble A Snowblower Myself Or Do I Need Professional Help?

Required Tools for Snowblower Assembly

To ensure a successful assembly, it is crucial to have the necessary tools readily available. Here are the tools you will typically need for snowblower assembly:

Socket set

A socket set is essential for securing nuts and bolts during the assembly process. It allows for a tight and secure fit, ensuring that the snowblower remains sturdy during operation.

Wrenches

Wrenches are another vital tool for snowblower assembly. They come in various sizes and are used to tighten and loosen different components, such as bolts and nuts.

Screwdrivers

Screwdrivers are necessary for driving screws into place and securing various parts of the snowblower. It is advisable to have a set of both flathead and Phillips head screwdrivers, as different screws may require different types.

Pliers

Pliers are versatile tools that come in handy during snowblower assembly. They can be used for gripping, pulling, and twisting components, ensuring a secure and proper fit.

Hex keys

Hex keys, also known as Allen wrenches, are frequently used in snowblower assembly. They are typically used for tightening hexagonal bolts and screws.

Safety goggles

Safety goggles are essential for protecting your eyes during assembly. They shield your eyes from any flying debris and ensure you can work safely without the risk of eye injuries.

Gloves

Wearing gloves during snowblower assembly is crucial for hand protection. They provide a barrier between your hands and any sharp or rough surfaces, reducing the risk of cuts and bruises.

Step-by-Step Guide to Assembling a Snowblower

Once you have gathered all the necessary tools and considered the factors mentioned above, you can begin the process of assembling your snowblower. This step-by-step guide will help you navigate through the assembly process effectively:

Read the manual

Before you start assembling your snowblower, it is vital to thoroughly read the manufacturer’s manual. The manual provides essential instructions specific to your snowblower model and will guide you through the assembly process.

Prepare the work area

Clear a spacious and well-lit area for assembling your snowblower. Ensure that you have enough room to lay out the parts and move around comfortably. Remove any obstacles or hazards that may hinder the assembly process.

Identify all parts

Take inventory of all the parts included in the snowblower assembly kit. Familiarize yourself with each component and organize them in a logical manner. This will help ensure that you have all the necessary parts and make the assembly process more manageable.

Attach the handlebars

Position the handlebars on the designated attachment points and use the appropriate tools to secure them. Follow the manufacturer’s instructions closely to ensure proper alignment and stability.

Install the chute assembly

Attach the chute assembly to the designated mounting location on the snowblower. Use the provided bolts and nuts to secure it firmly in place. Double-check for proper alignment and adjust as needed.

Mount the engine

Carefully position the engine onto the snowblower frame, lining up the mounting holes with the corresponding slots. Use the recommended tools to secure the engine, ensuring it is tightly fastened to prevent any vibrations during operation.

Connect the controls

Follow the manufacturer’s instructions to connect the controls, such as the throttle and chute control levers, to the appropriate connections on the snowblower. Ensure that all connections are secure and functioning properly.

Check for proper lubrication

Before testing the snowblower, make sure all moving parts are properly lubricated as indicated in the manual. Lubrication is crucial for smooth operation and to prevent premature wear and tear.

Test the snowblower

Once the assembly is complete and lubrication is done, start the snowblower and test its functionality. Pay close attention to the operation of the engine, controls, and moving parts to ensure everything is working correctly. Adjustments or fine-tuning may be necessary before using the snowblower in actual snow conditions.

Can I Assemble A Snowblower Myself Or Do I Need Professional Help?

Common Challenges Faced When Assembling a Snowblower

Misaligned parts

During the snowblower assembly process, misaligned parts can pose a significant challenge. Parts that are not aligned properly may result in difficulty securing them, affecting the overall stability and functionality of the snowblower. Careful attention and patience are required to ensure all parts are aligned correctly according to the manufacturer’s instructions.

Complex engine installation

Mounting the engine can be a complex step in snowblower assembly, especially for those with limited mechanical experience. Aligning the engine with the frame and properly securing it may require careful adjustments and attention to detail. It is crucial to follow the manufacturer’s instructions precisely to ensure a safe and efficient engine installation.

Difficult control connections

Connecting the controls, such as the throttle and chute control levers, can sometimes be challenging. The cables and wires need to be attached correctly, and any misalignment or improper connections can affect the functionality of these controls. It is essential to take your time and refer to the instructions or seek professional help if needed.

Reasons to Seek Professional Help

Limited mechanical knowledge

If you have limited mechanical knowledge or experience, it may be wise to seek professional help. Assembling a snowblower requires a certain level of mechanical expertise to ensure proper assembly and operation. Professional assemblers have the necessary knowledge and skills to complete the assembly accurately and efficiently.

Lack of required tools

Assembling a snowblower often requires specialized tools that you may not have readily available. Professional assemblers typically come equipped with the necessary tools and equipment to handle the job. By hiring a professional, you avoid the need to purchase or borrow tools, saving you time and money.

Time constraints

If you have a busy schedule or limited free time, assembling a snowblower yourself may not be feasible. The assembly process can be time-consuming, especially if you are unfamiliar with the equipment and instructions. Hiring a professional ensures that the assembly is completed in a timely manner, allowing you to focus on other important tasks.

Concerns about warranty

It is important to consider the warranty coverage of your snowblower. Some manufacturers may require professional assembly to maintain the validity of the warranty. If you assemble the snowblower yourself and encounter any issues later on, it could void the warranty. By hiring a professional, you can ensure that the assembly meets the manufacturer’s requirements and protect your warranty coverage.

Benefits of Hiring a Professional to Assemble a Snowblower

Expertise and experience

Professional assemblers have the expertise and experience necessary to assemble a snowblower accurately. They are familiar with different snowblower models and can quickly identify and troubleshoot any issues that may arise during assembly. Their knowledge ensures that your snowblower is assembled to the highest standards.

Faster and efficient assembly

Hiring a professional to assemble your snowblower saves you time and effort. Professionals are well-versed in the assembly process and can complete it quickly and efficiently. Their experience allows them to navigate through the steps smoothly, ensuring that your snowblower is ready for use in no time.

Reduced risk of damage or errors

With professional assembly, the risk of damage or errors is significantly reduced. Professional assemblers are trained to handle assembly tasks carefully and precisely, minimizing the chances of any mistakes that could affect the performance or longevity of your snowblower. By entrusting the assembly to a professional, you can have peace of mind knowing that your equipment is in capable hands.

Warranty assurance

Hiring a professional assembler often comes with the added benefit of warranty assurance. If any issues arise after the assembly, the professional can address them and make any necessary adjustments or repairs without voiding the warranty. This ensures that you are protected in case of any defects or malfunctions with your snowblower.

Factors Affecting the Cost of Professional Assembly

Size and complexity of the snowblower

The size and complexity of the snowblower can impact the cost of professional assembly. Larger and more intricate snowblowers generally require more time and effort to assemble, which may result in higher assembly fees. It is essential to consider the specific requirements of your snowblower model when budgeting for professional assembly.

Geographic location

The geographic location can influence the cost of professional assembly. The cost of living and local market conditions play a role in determining the rates charged by professional assemblers. In areas with higher costs of living or limited availability of assembly services, the rates may be higher. Researching local assembly options and comparing prices can help you find the most competitive rates in your area.

Service provider rates

The rates charged by professional assembly services can vary depending on the provider. Factors such as the company’s reputation, experience, and overhead costs can influence their rates. It is recommended to obtain multiple quotes from different service providers to compare prices and ensure you are getting the best value for your money.

How to Find a Reliable Snowblower Assembly Professional

When looking for a reliable snowblower assembly professional, consider the following steps to ensure you make an informed decision:

Ask for recommendations

Ask friends, family, or neighbors if they have had any positive experiences with snowblower assembly professionals. Personal recommendations are often reliable and can provide insights into the quality and reliability of the service.

Research online reviews

Browse online platforms and review websites to read customer reviews and ratings for different snowblower assembly professionals. Pay attention to the overall satisfaction and any recurring positive or negative comments. This can help you gauge the reputation and reliability of potential service providers.

Check for certifications or licenses

Verify if the snowblower assembly professionals hold any relevant certifications or licenses. Certifications from manufacturers or industry associations can indicate a higher level of expertise and adherence to quality standards. Licensed professionals also provide peace of mind, knowing that they have met specific requirements to perform the assembly.

Get multiple quotes

Contact several snowblower assembly professionals and request quotes for their services. Provide them with detailed information about your snowblower model, its size, and any specific requirements. Comparing multiple quotes will help you determine the most competitive rates and ensure you are getting a fair price for the assembly.

Conclusion

Assembling a snowblower yourself can be a cost-effective option that provides a sense of accomplishment and a better understanding of the equipment. However, it is crucial to consider your mechanical expertise, tool availability, and time commitment before embarking on the assembly process. If you feel uncertain or prefer to leave the assembly to professionals, hiring a reliable snowblower assembly service is a convenient option. The benefits of professional help include expertise, time-saving, reduced risk of errors, and warranty assurance. By considering the factors that affect the cost and finding a reliable professional, you can enjoy a well-assembled snowblower ready to tackle winter’s snowfall.

What Are The Best Practices For Snowblower Safety?

With winter in full swing, it’s time to gear up for the snowy season and make snow removal as safe as possible. But what are the best practices for snowblower safety? When it comes to operating these powerful machines, a few simple precautions can make all the difference between a smooth snow clearing experience and a trip to the emergency room. From wearing protective gear to practicing proper usage techniques, this article will outline the essential steps you need to follow to ensure your safety and the safety of those around you while using a snowblower. So let’s get started and make this winter season accident-free.

Importance of Snowblower Safety

When it comes to operating a snowblower, safety should always be a top priority. Snowblowers are powerful machines that can pose serious risks if not handled correctly. From preventing accidents to protecting yourself from injuries, there are several key considerations to keep in mind. By understanding the risks involved, choosing the right snowblower, practicing proper operation techniques, and implementing safety measures, you can ensure a safe and enjoyable snow removal experience.

Understanding the Risks

Before you start operating a snowblower, it’s important to understand the potential risks involved. One of the main hazards is the rotating auger, which can cause severe injuries if it comes into contact with your body parts, clothing, or other objects. In addition, the discharge chute can expel snow or debris at high speeds, increasing the risk of injury to yourself or those around you. Snowblowers can also be prone to tip over, especially on uneven terrain or slopes, which can lead to accidents or rollovers. By being aware of these risks, you can take the necessary precautions to prevent accidents.

Preventing Accidents

Preventing accidents is crucial when it comes to snowblower safety. One of the first steps you can take is choosing the right snowblower for your needs. Consider the size of the area you need to clear, the type of snow you typically encounter, and your physical capabilities. A snowblower that is too large or too small for your needs can increase the risk of accidents. It’s also essential to check for safety features such as an auger control system, a discharge chute deflector, and an emergency stop button. These features can help minimize the risks and improve overall safety.

What Are The Best Practices For Snowblower Safety?

Protecting Yourself from Injuries

While preventing accidents is important, it’s equally crucial to protect yourself from injuries when operating a snowblower. Dressing appropriately is key to staying safe. Wear warm, layered clothing, sturdy boots with good traction, and protective eyewear. It’s also advisable to wear hearing protection, as snowblowers can be loud. Before starting the machine, carefully review the user manual to familiarize yourself with its specific operation instructions and safety guidelines. Understanding how to properly operate the snowblower will greatly reduce the risk of injuries.

Choosing the Right Snowblower

Choosing the right snowblower is essential for both safety and efficiency. Before making a purchase, consider your needs and preferences. Evaluate the size and type of the area you need to clear, as well as the average snowfall in your region. There are various types of snowblowers available, such as single-stage, two-stage, and three-stage models, each designed for specific snow conditions and terrain. Select a snowblower that suits your needs and abilities, ensuring that it is not too heavy or difficult to maneuver.

Check the safety features on the snowblower you are considering. Look for features such as an auger control system that allows you to easily pause or stop the snowblower’s operation, a discharge chute deflector that lets you control the direction of the expelled snow, and an emergency stop button that provides a quick and easy way to shut off the machine in case of any emergencies. These safety features can greatly reduce the risk of accidents and injuries while operating the snowblower.

Additionally, be sure to review the user manual provided by the manufacturer. The manual will provide important details about the snowblower’s operation and maintenance, as well as specific safety guidelines. Familiarize yourself with all the instructions and warnings in the manual to ensure you operate the snowblower safely and effectively.

Preparation and Maintenance

Proper preparation and maintenance are essential for safe snowblower operation. Before starting the machine, it’s crucial to clear the area of any potential hazards. Remove any loose objects, such as rocks, branches, or toys, that could get caught in the snowblower or be propelled by the discharge chute. This will help prevent damage to the machine and reduce the risk of injuries to you and others.

In addition to clearing the area, it’s important to regularly inspect and maintain the snowblower. Check for any worn-out or damaged parts that may impair the machine’s performance or safety. Replace any faulty parts immediately, following the manufacturer’s guidelines. Regularly lubricate moving parts, such as the auger and chute, to ensure smooth operation. Keep the snowblower clean and free from debris build-up, as this can affect its performance and potentially cause accidents. Proper maintenance will maximize the safety and longevity of your snowblower.

When it comes to fuel safety, follow the manufacturer’s instructions on fuel type and storage. Use only the recommended fuel and avoid mixing gasoline with other substances. Never refuel the snowblower while it is running or still hot. Always refuel in a well-ventilated outdoor area, away from any potential sources of ignition. Proper fuel safety measures will minimize the risk of fire or explosions while operating the snowblower.

What Are The Best Practices For Snowblower Safety?

Proper Operation Techniques

Safe and proper operation techniques are crucial for both your safety and the efficient performance of the snowblower. Dressing appropriately is the first step in ensuring your safety. Wear warm, layered clothing, including a hat and gloves, to protect yourself from the cold. Sturdy boots with good traction will provide stable footing on slippery surfaces. Protective eyewear will shield your eyes from flying debris or snow.

Before starting the snowblower, review the user manual once again to refresh your memory on the proper starting procedures. Familiarize yourself with the location and functions of all the controls, such as the throttle, choke, and auger control system. Follow the step-by-step instructions for starting the machine, ensuring that you are in a safe and stable position.

When operating the snowblower, pay attention to the surface on which you are working. Different types of surfaces, such as concrete, gravel, or grass, may require different settings or adjustments on the machine. Make sure to adjust the height of the snowblower accordingly to prevent unnecessary damage to the surfaces or the machine itself. Always go at a steady pace and avoid sudden movements or jerking motions, as these can destabilize the snowblower and increase the risk of accidents.

Handling Snow and Debris

Properly handling snow and debris is critical to maintaining safety and efficiency while operating a snowblower. Positioning and posture are key factors to consider. Stand in a stable and balanced position, with your feet shoulder-width apart. Keep a firm grip on the snowblower handles at all times, maintaining control of the machine.

Avoiding obstructions is crucial to preventing accidents and damage to the snowblower. Be aware of your surroundings and keep an eye out for any potential obstructions in the snow, such as rocks or sticks. Avoid passing over these obstacles as they can damage the auger or get caught in the machine, potentially causing accidents. Clear any visible debris in the snow before using the snowblower to ensure a smooth and safe operation.

When dealing with heavy snow, it’s important to have effective strategies in place. Clearing heavy snow can put additional strain on the snowblower’s engine and auger. Take slow and steady passes, allowing the machine to effectively break up and remove the snow. If the snow is too deep or heavy, it may be necessary to make multiple passes or adjust the height settings on the snowblower. Clearing heavy snow requires patience and caution, ensuring both your safety and the proper functioning of the snowblower.

Best Practices for Clearing Clogs

Clearing clogs is an important aspect of snowblower safety. The auger can sometimes get clogged with snow, ice, or debris during operation. If this happens, it’s crucial to follow the appropriate procedures to clear the clog safely.

The first step is to shut off the engine and remove the ignition key. This ensures that the snowblower does not accidentally start while you are working on clearing the clog. Never attempt to clear a clog while the engine is running, as this can result in serious injuries.

Use digging tools, such as a broom handle or a snow shovel, to carefully dislodge the clog. Never use your hands, feet, or any other body parts to remove the clog, as the rotating auger can cause severe injuries. Be patient and gentle while clearing the clog, ensuring that you do not damage the machine or its parts.

Handling Emergencies

While operating a snowblower, it’s important to be prepared for emergencies. Two common emergency situations you may encounter are rollovers and machine malfunctions. Knowing how to respond to these emergencies can prevent further injuries and damage.

If the snowblower starts to tip over, do not panic. Immediately release the auger control and engine throttle, and shift your weight away from the tipping side. Do not attempt to stop the machine from tipping with your hands or feet, as this can result in serious injuries. Instead, guide the snowblower to a safe and stable position, ensuring that the engine is shut off. Take extra caution to prevent rollovers by avoiding steep slopes and uneven terrain whenever possible.

In the event of a machine malfunction, such as strange noises, smoke, or loss of power, it is important to respond appropriately. Immediately shut off the engine and remove the ignition key to prevent any further damage. Do not attempt to repair the machine yourself unless you are trained and qualified to do so. Contact a professional for assistance or take the snowblower to a reputable service center for repair.

Knowing the emergency stop procedures for your snowblower is crucial. Familiarize yourself with the location of the emergency stop button and other shut-off mechanisms. In case of any emergencies or situations where immediate shut-off is required, follow the manufacturer’s instructions to quickly and safely stop the machine.

Tips for Safe Storage

Properly storing your snowblower is essential for maintaining its performance and ensuring safety. Before storing the machine, clean it thoroughly to remove any snow, debris, or salt residue. Pay special attention to the auger and chute, as these areas tend to accumulate the most debris.

After cleaning, allow the snowblower to dry completely. Moisture can lead to rust and other damage, reducing the machine’s lifespan. Once dry, apply a thin layer of lubrication to the necessary moving parts to prevent corrosion during storage.

When it comes to fuel safety, always follow the manufacturer’s instructions for proper fuel disposal. Drain the fuel tank or add a fuel stabilizer to prevent fuel deterioration and potential ignition hazards. Dispose of the fuel in accordance with local regulations.

Store the snowblower in a secure and well-ventilated location, away from children and pets. If possible, cover the machine with a protective tarp or use a dedicated storage cover to protect it from dust and debris. Regularly inspect the stored snowblower for any signs of damage or wear and tear that may need to be addressed before the next use.

Safety Considerations for Children

When operating a snowblower, it’s important to take safety considerations for children into account. Children should never be allowed to operate a snowblower or be in close proximity to the machine during operation. The rotating auger and discharge chute can pose serious risks to their safety.

To keep children away from the snowblower, establish clear boundaries and create a safe zone where they are not allowed to enter while it is in operation. Communicate these boundaries and the importance of staying away from the machine. It’s also important to store the snowblower in a secure location, such as a locked shed or garage, to prevent unauthorized access.

Supervision and education play a vital role in children’s safety around snowblowers. If your children are of appropriate age and maturity, teach them about the potential dangers associated with snowblowers and explain the safety rules. Educating children about the risks and emphasizing the importance of staying away from the machine will help promote a safe environment.

Importance of Regular Inspections

Regular inspections are crucial to maintaining the safety and efficiency of your snowblower. Before each use, visually inspect the machine for any signs of wear and tear. Check for loose or damaged parts, such as belts, bolts, or fasteners, and replace them as needed. Pay attention to any leaks, unusual noises, or changes in performance that may indicate a problem.

Regularly clean and lubricate the snowblower as part of your maintenance routine. This helps prevent debris build-up and ensures smooth operation. Follow the manufacturer’s guidelines on maintenance procedures and schedules for your specific model.

In addition to regular inspections, it’s important to have your snowblower professionally serviced on a regular basis. A professional technician can perform a more thorough inspection, identify any potential issues, and make necessary repairs or adjustments. Regular servicing will not only enhance the safety of your snowblower but also prolong its lifespan.

By understanding the importance of snowblower safety, choosing the right machine, practicing proper operation techniques, and implementing safety measures, you can ensure a safe and efficient snow removal experience. Remember to always prioritize safety and follow the manufacturer’s guidelines and recommendations. Stay informed, stay vigilant, and stay safe while operating your snowblower.

How Do I Know When My Snowblower’s Auger Is Worn Out?

So you’ve been using your snowblower for a while now, battling through the snowstorms and keeping your driveway clear. But lately, you’ve noticed that it’s not performing as well as it used to. The snow seems to be piling up rather than getting thrown out, and you’re wondering if it’s time to retire your trusty machine. Well, the answer lies in the condition of your snowblower’s auger, the crucial component that does all the heavy lifting. In this article, we’ll take you through the telltale signs that indicate your auger is worn out and needs replacement, ensuring you’re never left stranded in the snow.

How Do I Know When My Snowblowers Auger Is Worn Out?

Symptoms of a Worn Out Auger

When your snowblower’s auger is worn out, you may notice several symptoms that indicate a need for inspection and potential repairs. These symptoms include reduced performance, excessive vibration, strange noises, uneven snow throwing, and visible auger damage.

Reduced Performance

One of the most obvious signs of a worn-out auger is a noticeable decrease in your snowblower’s performance. The machine may struggle to effectively clear snow, requiring multiple passes over the same area or leaving behind patches of snow. If you find yourself spending more time clearing snow or experiencing difficulty moving the snowblower forward, it may be due to a worn-out auger.

Excessive Vibration

Another symptom of a worn-out auger is excessive vibration during operation. While it’s normal for a snowblower to vibrate to some extent, excessive or abnormal vibrations can indicate an issue with the auger. If you notice the snowblower vibrating more than usual, it’s essential to inspect the auger and its components for any signs of wear or damage.

Strange Noises

Unusual or strange noises coming from your snowblower while it’s in operation can be an indication of a worn-out auger. These noises can range from grinding or scraping sounds to rattling or clanking sounds. If you hear any unfamiliar sounds while using your snowblower, it’s important to stop and inspect the auger to prevent further damage or potential breakdown.

Uneven Snow Throwing

If your snowblower is throwing snow in an uneven or inconsistent pattern, it could be a sign of a worn-out auger. A properly functioning auger should evenly distribute the snow as it throws it out of the chute. However, if you notice clumping, clogging, or uneven snow distribution, it may indicate a problem with the auger blades or other components.

Auger Damage

Visible damage to the auger itself is a clear indication of wear and tear. Inspect the auger closely for signs of cracks, chips, or bending. Additionally, if the auger blades are worn down, broken, or missing, it’s a strong indication that the auger needs attention and potential replacement.

Inspecting the Auger

Regular inspections are crucial to identify any issues with your snowblower’s auger. By inspecting the different components, you can catch any signs of wear and tear early on, preventing further damage and ensuring optimal performance. Here are the key components to inspect:

Checking the Blades

Start by examining the auger blades. Look for any signs of damage, such as chipping or bending. If the blades appear dull or worn, it may be time to replace them. It’s essential to have sharp and intact blades for efficient snow removal.

Examining the Gearbox

Inspect the gearbox for any leaks or signs of rust. Make sure all the gears are in good condition and properly lubricated. A damaged or rusty gearbox can affect the auger’s performance and potentially lead to further damage if not addressed.

Inspecting the Housing

Take a close look at the auger housing for any cracks, dents, or other signs of damage. The housing should be intact and free from any deformities that may impact the auger’s functionality. Repairs or replacement may be necessary if the housing is compromised.

Analyzing the Belt

Check the belt that connects the auger to the engine. Look for any signs of wear or damage, such as fraying or stretching. A loose or damaged belt can significantly impact the auger’s performance, so repair or replacement may be required.

Looking for Shear Pin Damage

Inspect the shear pins that secure the auger blades to the auger shaft. If any pins are missing or visibly damaged, they should be replaced immediately. Shear pins are designed to break under stress, protecting the auger from more severe damage.

Measuring Auger Blade Height

Proper blade height is essential for optimal snowblower performance. If the blades are set too low, they may not effectively scoop up the snow, while blades set too high may not engage properly. Measuring and adjusting the blade height is a straightforward process.

Using a Tape Measure

With the snowblower turned off and the blades disengaged, measure the blade height from the ground to the bottom edge of the blade. Use a tape measure and ensure the measurement is accurate to determine if the blades are set at the recommended height.

Comparing to Recommended Height

Refer to the snowblower’s user manual or manufacturer’s guidelines to find the recommended blade height. Compare the measured height to this recommended height to determine if any adjustments are necessary.

Adjusting Blade Height

If the blade height is not within the recommended range, make the necessary adjustments to raise or lower the blades. Follow the manufacturer’s instructions to safely adjust the blade height. Properly adjusted blades ensure efficient snow removal and reduce strain on the auger and other components.

How Do I Know When My Snowblowers Auger Is Worn Out?

Signs of Auger Wear and Tear

Recognizing the signs of auger wear and tear is crucial in addressing potential issues before they escalate. By being aware of these signs, you can take appropriate action to repair or replace worn-out auger components.

Worn or Damaged Blades

Blades that appear worn, chipped, or bent are clear indicators of wear and tear. Worn-out blades can significantly impact the snowblower’s performance, leading to reduced efficiency and potentially causing further damage to the auger or other components.

Rusted or Broken Gearbox

A rusty or broken gearbox is a sign of significant wear and tear. Rust indicates moisture infiltration, which can lead to corrosion and potential gear failure. A broken gearbox requires immediate attention as it can cause the auger to malfunction or even seize up.

Cracked or Dented Housing

Cracks or dents in the auger housing compromise its structural integrity. This can lead to misalignment of the auger blades or cause debris to enter critical components, resulting in damage. Any noticeable cracks or dents should be addressed promptly to ensure safe and efficient operation.

Loose or Damaged Belt

A loose or damaged auger belt can cause the auger to slip or not engage properly. This can result in reduced snow clearing performance and potential damage to the belt or other components. Inspect the belt for signs of wear or damage, such as fraying or stretching, and replace if necessary.

Missing or Damaged Shear Pins

Shear pins are designed to break under stress to protect the auger from severe damage. If any shear pins are missing or visibly damaged, immediate replacement is necessary. Operating the snowblower without shear pins can lead to costly damage to the auger or other components.

Preventing Excessive Auger Wear

Taking proactive steps to prevent excessive auger wear is key to ensuring the longevity and optimal performance of your snowblower. By following a few maintenance and operational practices, you can minimize wear and tear on the auger.

Regular Maintenance

Perform regular maintenance tasks recommended by the snowblower’s manufacturer. This includes engine oil changes, lubrication of moving parts, and checking for any loose or worn components. Regular maintenance helps identify issues early on and prevents them from escalating into more significant problems.

Proper Operation

Operate the snowblower according to the manufacturer’s instructions. Avoid overloading the machine or forcing it to clear snow beyond its capabilities. Operating the snowblower within its designated capacity helps prevent strain on the auger and other components, reducing wear and tear.

Removing Debris

Clear any debris, such as rocks, sticks, or ice chunks, from the snowblower’s path before operation. These objects can become lodged in the auger and cause damage. Removing debris reduces the risk of auger wear and prolongs the lifespan of the components.

Avoiding Obstacles

Avoid operating the snowblower over uneven terrain or near fixed objects, such as curbs or walls. Prolonged contact with obstacles can cause the auger to strike them, leading to damage or misalignment. Pay attention to the terrain and adjust your snow removal technique accordingly to prevent unnecessary wear on the auger.

Correct Storage

When not in use, store the snowblower in a dry and clean area. Moisture and exposure to the elements can accelerate wear and rust on the auger and other components. Proper storage helps maintain the snowblower’s condition and prevents premature wear.

Repair or Replace?

Determining whether to repair or replace a worn-out auger depends on several factors, including the extent of the damage, cost considerations, and your skills and preferences as a DIYer.

Consulting a Professional

If you’re unsure about the severity of the auger wear or don’t have the necessary skills, it’s best to consult a professional snowblower repair technician. They can thoroughly assess the auger and its components, provide an accurate diagnosis, and recommend the most appropriate course of action.

Assessing the Damage

Consider the extent of the damage and how it affects the overall performance and safety of the snowblower. Minor wear, such as dull blades or a loose belt, can often be addressed through repairs. However, severe damage, such as a cracked housing or broken gearbox, may require replacing the affected components or even replacing the entire auger assembly.

Cost Considerations

Evaluate the cost of repairing versus replacing the worn-out auger. Depending on the extent of the damage, repairs can be a cost-effective solution. However, if the repair costs approach or exceed the cost of a new auger or snowblower, it may be more economical to opt for replacement.

DIY Repair vs. Replacement

Consider your own skills, experience, and comfort level with DIY repairs. Simple maintenance tasks like replacing shear pins or adjusting blade height can often be done by the average homeowner. However, more complex repairs or component replacements may require specialized tools or expertise. Assess your abilities and factor in the time and effort required for the repair before deciding on a DIY repair or replacement.

Safety First

When working on a snowblower’s auger, it’s essential to prioritize safety to prevent accidents and injuries. Follow these safety precautions to ensure a safe working environment.

Shut Off the Snowblower

Before performing any maintenance or inspection, always turn off the snowblower and remove the key, if applicable. This prevents accidental starting or engagement of the auger blades.

Wear Protective Gear

Wear appropriate protective gear, such as safety goggles, gloves, and sturdy footwear. Protective gear helps guard against flying debris and potential injuries during auger inspection and repair.

Disconnect the Spark Plug

To prevent accidental engine start-up, disconnect the spark plug wire before working on the snowblower. This eliminates the risk of the engine firing while you’re inspecting or repairing the auger.

Follow Manufacturer’s Instructions

Read and follow the snowblower’s user manual and the manufacturer’s instructions for safe maintenance and repair procedures. Each snowblower can have specific safety guidelines and steps to follow, so it’s crucial to familiarize yourself with the manufacturer’s recommendations.

Proceed with Caution

Take your time and proceed cautiously when inspecting or working on the auger. Avoid rushing or forcing components, as this can lead to accidents or further damage. Working carefully and attentively minimizes safety risks and ensures proper repairs or adjustments.

Common FAQ

Here are some frequently asked questions regarding worn-out augers and their answers:

How long does an auger typically last?

The lifespan of an auger can vary depending on various factors such as usage frequency, maintenance, and operating conditions. On average, a well-maintained auger can last anywhere from 5 to 10 years before requiring significant repairs or replacement.

Can I continue using my snowblower with a worn-out auger?

While it is possible to continue using a snowblower with a worn-out auger, it is not recommended. A worn-out auger can lead to reduced performance, further damage to components, and even safety hazards. It’s best to inspect and address any issues with the auger promptly to ensure efficient and safe snow removal.

Can I sharpen the auger blades?

Auger blades can be sharpened if they are dull but otherwise in good condition. Use a file or a grinder to remove any nicks or dull edges, ensuring a sharp cutting edge. However, if the blades are already significantly worn, chipped, or bent, it’s recommended to replace them rather than attempting to sharpen them.

How much does it cost to replace an auger?

The cost of replacing an auger can vary depending on the make and model of the snowblower, as well as the specific components that need replacement. Auger replacement costs typically range from $100 to $500, with additional expenses if professional labor is required.

Can I replace just the damaged parts of the auger?

In some cases, it is possible to replace only the damaged components of the auger. For example, if the blades are worn or damaged, they can be replaced individually. However, for more severe damage such as a cracked housing or broken gearbox, it may be more practical and cost-effective to replace the entire auger assembly.

Conclusion

Regular inspection and maintenance of your snowblower’s auger are vital in ensuring optimal performance and preventing further damage. By paying attention to the symptoms of a worn-out auger and conducting thorough inspections, you can identify any issues early on and take the necessary steps to repair or replace worn-out components.

Remember, safety should always be a priority when working on the auger or any other part of the snowblower. Follow the manufacturer’s instructions, wear appropriate protective gear, and proceed with caution.

By prioritizing maintenance, avoiding excessive wear and tear, and addressing any issues promptly, you can prolong the lifespan of your snowblower’s auger and enjoy efficient and reliable snow removal season after season.

Can I Upgrade Parts Of My Snowblower For Better Performance?

If you’re tired of shuffling through piles of snow inch by inch, desperately hoping for a snowblower that can handle the heavy-duty work, you might be wondering if there’s a way to boost its performance. Well, the short answer is yes. You can indeed upgrade certain parts of your snowblower to enhance its overall performance and efficiency. So, let’s take a closer look at the key components that can be upgraded to tackle even the toughest winter conditions with ease. Absolutely! Upgrading certain parts of your snowblower can greatly enhance its performance and efficiency. Let’s explore some key areas where upgrades can make a significant impact.

Can I Upgrade Parts Of My Snowblower For Better Performance?

This image is property of pixabay.com.

1. Engine Upgrades

1.1 Upgrading the Horsepower

One way to boost the power and overall performance of your snowblower is by upgrading its engine horsepower. A higher horsepower engine can increase the machine’s capacity to handle heavier and deeper snow, making your job easier and more efficient. Consult with a professional or refer to your snowblower’s manual to determine the compatible engine horsepower upgrade options for your specific model.

1.2 Installing a High-Performance Air Filter

Another engine upgrade that can improve the performance of your snowblower is installing a high-performance air filter. A quality air filter can enhance the airflow to the engine, allowing for better combustion and increased power output. By preventing dirt and debris from entering the engine, a high-performance air filter also helps prolong the engine’s lifespan.

1.3 Upgrading the Spark Plug

Upgrading to a high-quality spark plug is a simple yet effective way to optimize the performance of your snowblower’s engine. A spark plug with efficient combustion capabilities ensures a smooth and consistent ignition process, leading to improved fuel efficiency and enhanced overall performance. It’s recommended to choose a spark plug specifically designed for snowblower engines to ensure compatibility and optimal results.

1.4 Using a Performance Fuel Additive

Incorporating a performance fuel additive into your snowblower’s fuel system can provide several benefits. These additives are formulated to clean and optimize the fuel system, improving fuel efficiency and maintaining engine performance. Additionally, performance fuel additives can prevent fuel system corrosion, which can extend the lifespan of your snowblower’s engine.

2. Transmission Upgrades

2.1 Upgrading to an Automatic Transmission

If your snowblower currently operates with a manual transmission, upgrading to an automatic transmission can greatly simplify the operation and increase overall efficiency. An automatic transmission allows for seamless gear shifting, eliminating the need for manual intervention. This upgrade is particularly beneficial if you have a large area to clear or if you struggle with physical exertion.

2.2 Installing Synthetic Transmission Fluid

Enhancing the performance of your snowblower’s transmission can be achieved by switching to synthetic transmission fluid. Synthetic fluids offer improved lubrication properties, better heat resistance, and enhanced overall performance compared to conventional transmission fluids. They also contribute to smoother gear shifts and reduced wear and tear on the transmission components, leading to a longer lifespan for your snowblower.

Can I Upgrade Parts Of My Snowblower For Better Performance?

This image is property of pixabay.com.

3. Auger Upgrades

3.1 Upgrading the Auger Blades

The auger blades are essential for effectively cutting and moving snow in your snowblower. Upgrading to high-quality, durable auger blades can significantly improve the performance of your machine. These blades are designed to handle heavy snow accumulation and maintain their sharpness for extended periods, reducing the effort required to clear snow and ensuring a more consistent and efficient operation.

3.2 Installing a Heavy-Duty Auger Belt

The auger belt is responsible for transferring power from the engine to the auger blades. Upgrading to a heavy-duty auger belt can enhance the overall durability and performance of your snowblower. These belts are specifically designed to handle the increased power demands of upgraded engines or harsh operating conditions, minimizing the risk of belt slippage and improving snowblowing efficiency.

4. Chute and Impeller Upgrades

4.1 Upgrading the Chute Control System

The chute control system determines the direction and angle at which the snow is expelled from the snowblower. Upgrading to a more advanced and precise chute control system allows for better control over the snow discharge, increasing the efficiency and accuracy of the snowblowing process. Look for features such as one-touch rotation control and enhanced vertical adjustment to optimize your snowblowing experience.

4.2 Installing a Higher Capacity Impeller

The impeller plays a crucial role in propelling the snow out of the chute. Upgrading to a higher capacity impeller can significantly increase the snowblower’s throwing distance and overall performance, making it more effective in clearing deep or densely packed snow. Consider consulting a professional to determine the compatible impeller upgrade options for your specific snowblower model.

Can I Upgrade Parts Of My Snowblower For Better Performance?

This image is property of pixabay.com.

5. Handle and Controls Upgrades

5.1 Upgrading to Electric Start

Struggling with a manual pull-start system on your snowblower? Upgrading to an electric start system can save you the hassle and physical exertion. With a simple push of a button, you can effortlessly start your snowblower, even in cold weather conditions. Electric start systems are reliable and time-saving, allowing you to focus on clearing snow rather than wrestling with a stubborn pull-start mechanism.

5.2 Installing Heated Handle Grips

Snowblowing in freezing temperatures can take a toll on your hands. Upgrading to snowblower handle grips with built-in heating elements can keep your hands warm and comfortable during prolonged snowblowing sessions. These heated grips provide a cozy and ergonomic grip, reducing fatigue and enhancing your overall snowblowing experience.

6. Tires and Tracks Upgrades

6.1 Upgrading to Snow Tires

If your snowblower uses standard tires, upgrading to snow tires designed specifically for winter conditions can vastly improve its traction and maneuverability. Snow tires have deeper tread patterns, allowing them to grip slippery surfaces more effectively. This upgrade is particularly beneficial if you frequently encounter icy or packed snow surfaces where standard tires may struggle to provide sufficient traction.

6.2 Installing Tracks for Better Traction

For even greater traction in challenging snow conditions, consider installing tracks on your snowblower. Tracks provide superior grip and stability on uneven terrains, allowing you to effortlessly navigate through deep snow, slopes, or icy surfaces. This upgrade is especially valuable if you have a large area to clear or if your property is on uneven terrain.

Can I Upgrade Parts Of My Snowblower For Better Performance?

7. Lighting Upgrades

7.1 Upgrading the Headlights

Snowstorms often bring reduced visibility, making it difficult to navigate your snowblower safely. Upgrading the headlights to brighter, more powerful ones can greatly improve visibility in low light conditions. Choose headlights with a wide beam pattern and adjustable angles to ensure optimal illumination of your working area, keeping you safe and allowing for efficient snow clearing, even during nighttime or early morning hours.

7.2 Installing LED Lights for Better Visibility

In addition to upgrading the headlights, installing LED lights on your snowblower can further enhance visibility and safety. LED lights offer superior brightness, energy efficiency, and longer lifespan compared to traditional incandescent bulbs. With LED lights, you can have clear visibility of both your snowblower’s immediate surroundings and potential obstacles in your path, allowing for a more precise and efficient snow-clearing experience.

8. Belt and Pulley Upgrades

8.1 Installing a Heavy-Duty Belt

The belt-driven components of your snowblower, such as the auger and drive system, are key to its overall performance. Upgrading to a heavy-duty belt can ensure efficient power transfer and prevent slippage, even under extreme operating conditions. Heavy-duty belts are designed to withstand rigorous use, providing enhanced reliability and durability, particularly when paired with upgraded engines or high-performance modifications.

8.2 Upgrading to a Larger Pulley System

Upgrading the pulley system in your snowblower can have a significant impact on its overall performance and efficiency. Installing larger pulleys can increase the speed and power output, resulting in improved snowblowing capabilities. However, it’s essential to consult a professional or refer to your snowblower’s manual to ensure compatibility and safe operation when considering a pulley system upgrade.

Can I Upgrade Parts Of My Snowblower For Better Performance?

9. Blower Housing and Impeller Upgrades

9.1 Upgrading to a Larger Blower Housing

If you frequently deal with heavy or wet snow, upgrading to a larger blower housing can enhance the snowblower’s capacity to intake and clear large volumes of snow effectively. A larger blower housing allows for higher snowblowing rates and greater efficiency, reducing the need for multiple passes to clear a given area. It’s important to ensure that the upgraded blower housing is compatible with your snowblower model and properly installed for optimal performance.

9.2 Installing a High-Efficiency Impeller

The impeller is responsible for drawing in snow and propelling it out of the chute. Installing a high-efficiency impeller can significantly increase the snowblower’s throwing distance and overall performance. High-efficiency impellers are designed to maximize the snowblower’s ability to clear dense or heavy snow quickly and efficiently. Consult with a professional or refer to your snowblower’s manual to determine suitable impeller upgrade options for your specific model.

10. Maintenance and Care for Better Performance

10.1 Regular Cleaning and Lubrication

To ensure optimal performance and longevity of your snowblower, regular cleaning and lubrication are essential. Clean out debris and snow accumulation after each use, paying particular attention to the chute, auger blades, and other moving parts. Applying lubricant to key components, such as the auger shaft and impeller, reduces friction and enhances performance. Follow the manufacturer’s guidelines for proper cleaning and lubrication procedures.

10.2 Proper Storage and Winterization

When the snowblowing season comes to an end, it’s crucial to properly store and winterize your machine. Clean the snowblower thoroughly, removing any residual snow and debris. Drain the fuel tank or add a fuel stabilizer to prevent fuel degradation during storage. Disconnect or remove the spark plug to protect against accidental starts. Store the snowblower in a dry and secure location, following the manufacturer’s instructions for proper storage procedures.

In conclusion, upgrading various parts of your snowblower can significantly enhance its performance, efficiency, and overall snow-clearing capabilities. From engine upgrades and transmission enhancements to auger and impeller improvements, there are numerous options available to optimize your snowblower for the most challenging winter conditions. Remember to consult professionals or refer to the manufacturer’s guidelines when considering any upgrades or modifications to ensure compatibility and safe operation. With the right upgrades and regular maintenance, you can take your snowblower to the next level, making snow removal a breeze.