Tag Archives: Maintenance

What Accessories Are Available For Snowblowers?

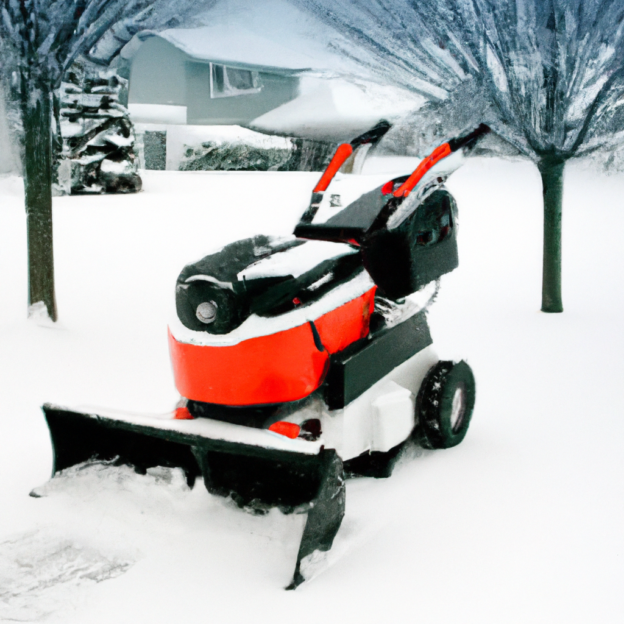
So, you’ve got yourself a snowblower, and you’re ready to conquer the snowy battlefield that is your driveway. But did you know that there’s an abundance of accessories out there that can enhance the performance and efficiency of your trusty snow-clearing machine? From drift cutters to chains, heated handles to snow cabs, the options are endless. In this article, we’ll take a closer look at some of the most popular accessories available for snowblowers, giving you the lowdown on how they can make your winter chore a breeze. Snowblowers are an essential tool for clearing snow from driveways, sidewalks, and other outdoor areas during the winter season. However, there are times when you may need some extra accessories to enhance the efficiency and durability of your snowblower. In this article, we will explore various snowblower accessories that are available to make your snow-clearing tasks easier and more effective.

What Accessories Are Available For Snowblowers?

Snowblower Covers

Universal Snowblower Covers

Universal snowblower covers are designed to fit a wide range of snowblower models. These covers provide protection against the elements and help prevent rust and corrosion. They are typically made of durable materials such as polyester or nylon, which are resistant to water and tears. Universal snowblower covers are easy to install and remove, making them a convenient option for protecting your snowblower when it’s not in use.

Custom Fit Snowblower Covers

If you prefer a snug and tailored fit for your snowblower cover, a custom fit snowblower cover is the way to go. These covers are specifically designed to fit your snowblower model, ensuring a perfect fit and maximum protection. Custom fit snowblower covers are typically made of high-quality materials such as heavy-duty vinyl or polyester, which provide excellent resistance against water, UV rays, and other weather elements. They often come with elastic hems or drawstrings to ensure a secure fit.

Waterproof Snowblower Covers

When it comes to protecting your snowblower from water damage, waterproof snowblower covers are a great choice. These covers are specially designed to repel water and keep your snowblower dry, even during heavy snow or rain. Waterproof snowblower covers are typically made of materials with water-repellent coatings or laminations, such as polyvinyl chloride (PVC) or polyurethane. These covers also provide protection against other elements like dust, dirt, and UV rays.

Snow Cab

Full Snow Cab Enclosure

A full snow cab enclosure offers the ultimate protection from the elements while operating your snowblower. It is a complete enclosure that surrounds the operator and the snow blower, providing a shield against wind, snow, and other inclement weather conditions. Full snow cab enclosures typically feature sturdy frames made of materials like steel or aluminum, along with durable fabric or vinyl panels. They often come with zippered doors and windows for easy access and visibility.

Snow Cab with Vinyl Windshield

If you prefer a more open and unobstructed view while using your snowblower, a snow cab with a vinyl windshield is a great option. This type of snow cab provides protection from wind and snow, while still allowing you to see clearly and maneuver your snowblower effectively. Snow cabs with vinyl windshields are typically made of durable materials like vinyl or polycarbonate, which offer excellent clarity and resistance against impacts and scratches.

Snow Cab with Clear Vinyl Windows

For enhanced visibility and protection, a snow cab with clear vinyl windows is an excellent choice. These snow cabs have transparent windows made of clear vinyl, allowing you to see your surroundings and operate your snowblower with ease. Clear vinyl windows offer excellent visibility while protecting you from wind, snow, and other weather elements. Snow cabs with clear vinyl windows are typically made of durable materials like vinyl or polycarbonate for long-lasting performance.

Snow Tire Chains

Heavy-Duty Snow Tire Chains

When you encounter extremely icy or slippery conditions, heavy-duty snow tire chains can provide the extra traction you need. These tire chains are designed with rugged chains or studs that grip the snow or ice, allowing your snowblower to maneuver safely and effectively. Heavy-duty snow tire chains are typically made of durable materials like steel or hardened alloy, ensuring they can withstand the harsh conditions encountered during snow clearing.

All-Weather Snow Tire Chains

If you want a versatile option that can handle a variety of winter conditions, all-weather snow tire chains are a great choice. These tire chains are designed to provide traction on both snow and ice, making them ideal for areas with unpredictable weather patterns. All-weather snow tire chains are typically made of sturdy materials like stainless steel or reinforced rubber, ensuring they can withstand various weather conditions without compromising performance.

Easy-to-Install Snow Tire Chains

If you’re looking for convenience and ease of use, easy-to-install snow tire chains are a perfect solution. These tire chains are designed for quick and hassle-free installation, allowing you to spend less time fumbling with chains and more time clearing snow. Easy-to-install snow tire chains often feature a simple, intuitive design that can be easily wrapped around the tires without needing additional tools or complicated adjustments.

What Accessories Are Available For Snowblowers?

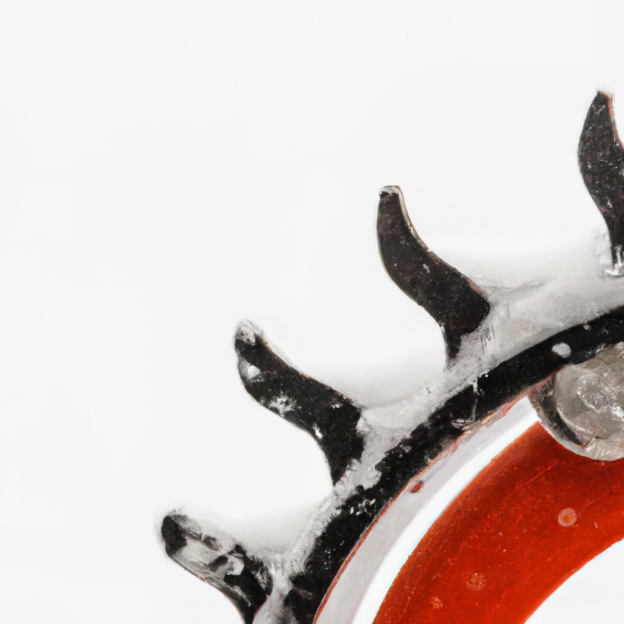
Snow Blower Drift Cutters

Adjustable Drift Cutters

When dealing with deep snow drifts, adjustable drift cutters can help you break through and clear the snow more efficiently. These drift cutters can be adjusted to different heights, allowing you to cut through snowbanks and drifts with precision. Adjustable drift cutters are typically made of durable materials like steel or reinforced plastic, ensuring they can withstand the force exerted by the snow while maintaining sharp cutting edges.

Replaceable Drift Cutters

Over time, drift cutters can wear out due to constant contact with snow and other debris. Replaceable drift cutters offer a cost-effective solution to prolong the lifespan of your snowblower. These drift cutters are designed with replaceable blades or cutting edges, allowing you to easily swap out worn-out parts without replacing the entire drift cutter assembly. Replaceable drift cutters are typically made of durable materials like steel or carbide, ensuring long-lasting performance.

Bolt-On Drift Cutters

For a more permanent solution, bolt-on drift cutters offer a secure and reliable attachment to your snowblower. These drift cutters are designed to be permanently installed on your snowblower, providing consistent and effective snow cutting performance. Bolt-on drift cutters are typically made of sturdy materials like steel or aluminum, which can withstand the force exerted by the snow while maintaining sharp cutting edges. They often come with mounting brackets or hardware for easy installation.

Snowblower Curb Protectors

Rubber Curb Protectors

When clearing snow near curbs or sidewalks, rubber curb protectors can prevent damage to the snowblower and the surfaces you’re working on. These protectors typically attach to the auger housing or the edges of the snowblower and provide a cushion that absorbs impact from hitting curbs or other obstacles. Rubber curb protectors are made of durable and flexible materials like rubber or high-density polyethylene, ensuring they can withstand repeated impacts without cracking or breaking.

Polyurethane Curb Protectors

For enhanced durability and impact resistance, polyurethane curb protectors are an excellent choice. These protectors are made of tough polyurethane material, which provides excellent resistance against impact, abrasion, and harsh weather conditions. Polyurethane curb protectors are typically designed to easily attach to the auger housing or the edges of the snowblower, protecting both the snowblower and the surfaces you’re working on from damage.

Adjustable Curb Protectors

If you often encounter varying curb heights or uneven surfaces, adjustable curb protectors are a convenient option. These protectors feature an adjustable design that allows you to easily modify their height or position to suit different curb heights or surface irregularities. Adjustable curb protectors are typically made of durable materials like plastic or metal, ensuring they can withstand repeated adjustments and impacts without compromising performance.

Snow Blower Lights

LED Snow Blower Lights

When clearing snow in low light conditions or during the early morning or late evening hours, LED snow blower lights can provide enhanced visibility and safety. LED lights are highly energy-efficient and offer bright, white illumination that extends your working hours. LED snow blower lights are typically designed to be mounted on the snowblower’s frame or handlebars, ensuring optimal visibility while operating the machine.

Halogen Snow Blower Lights

For powerful and intense illumination, halogen snow blower lights are a popular choice. These lights produce a bright white light that effectively illuminates your working area, making it easier to navigate and clear snow. Halogen snow blower lights are typically designed to be mounted on the snowblower’s frame or handlebars, providing wide coverage and excellent visibility.

Magnetic Snow Blower Lights

If you prefer a more versatile lighting option that can be easily repositioned as needed, magnetic snow blower lights are an excellent choice. These lights feature magnetic bases that can be quickly attached or detached from the snowblower, allowing you to position them wherever you need additional illumination. Magnetic snow blower lights are typically powered by batteries or rechargeable units, providing reliable and portable lighting solutions.

Snow Blower Skid Shoes

Steel Snow Blower Skid Shoes

Skid shoes are an essential component of a snowblower that helps control the height and direction of the snow discharge. Steel snow blower skid shoes are known for their durability and ability to withstand harsh winter conditions. These skid shoes are typically made of heavy-duty steel, which provides excellent resistance against wear and tear caused by contact with rough surfaces or debris. Steel skid shoes often have adjustable height settings, allowing you to adapt the snowblower’s clearance based on the terrain or depth of snow.

Polyethylene Snow Blower Skid Shoes

For a lightweight and non-marking option, polyethylene snow blower skid shoes are a great choice. These skid shoes are made of durable polyethylene material, which offers excellent resistance against impact, abrasion, and corrosion. Polyethylene skid shoes are typically designed to glide smoothly over various surfaces, reducing friction and preventing damage to driveways or walkways. They are also non-marking, ensuring that no unsightly marks or scratches are left behind.

Slotted Snow Blower Skid Shoes

Slotted snow blower skid shoes offer added versatility and adaptability to different terrain conditions. These skid shoes feature slots or elongated holes that allow you to adjust their position and height, depending on the depth of snow or the type of surface you’re working on. Slotted skid shoes are typically made of durable materials like steel or hardened plastic, ensuring they can withstand the force exerted by the snowblower while maintaining a stable and controlled snow discharge.

Snow Blower Gloves

Insulated Snow Blower Gloves

When operating a snowblower in extremely cold temperatures, insulated snow blower gloves are a must-have accessory. These gloves are designed to provide excellent insulation and warmth, keeping your hands comfortable and protected during extended snow-clearing sessions. Insulated snow blower gloves are typically made of materials like synthetic fibers or natural wool, which offer excellent thermal insulation and moisture-wicking properties.

Waterproof Snow Blower Gloves

If you frequently encounter wet or slushy snow conditions, waterproof snow blower gloves are a great choice. These gloves are specially designed to repel water and keep your hands dry, even when working in wet snow or rain. Waterproof snow blower gloves are typically made of materials with water-resistant coatings or laminates, such as neoprene or nylon. They often feature additional features like adjustable cuffs or reinforced palm areas for enhanced durability and protection.

Heavy-Duty Snow Blower Gloves

For added protection and durability, heavy-duty snow blower gloves are an excellent choice. These gloves are made of tough and rugged materials that can withstand the rigors of snow-clearing tasks. Heavy-duty snow blower gloves are typically reinforced with extra padding or layers in high-wear areas like the palm or fingertips. They often feature additional features like adjustable cuffs, secure closures, or touchscreen compatibility for added convenience and functionality.

Snow Blower Snow Cabs

Foldable Snow Blower Cab

A foldable snow blower cab offers the convenience of easy installation and storage. These snow cabs are designed to be compact and foldable, allowing you to quickly set them up when needed and fold them down for storage or transport. Foldable snow blower cabs typically feature sturdy frames made of materials like steel or aluminum, along with durable fabric or vinyl panels. They often come with zippered doors and windows for easy access and visibility.

All-Season Snow Blower Cab

If you want a snow cab that can withstand various weather conditions throughout the year, an all-season snow blower cab is the way to go. These snow cabs are designed to provide protection from wind, rain, snow, and other elements regardless of the season. All-season snow blower cabs typically feature durable frames made of materials like steel or aluminum, along with weather-resistant fabric or vinyl panels. They often come with zippered doors and windows for easy access and ventilation.

Breathable Snow Blower Cab

When using your snowblower for extended periods, a breathable snow blower cab can provide comfort and prevent condensation buildup. These snow cabs are designed with breathable panels or vents that allow airflow, ensuring proper ventilation inside the cab. Breathable snow blower cabs typically feature sturdy frames made of materials like steel or aluminum, along with breathable fabric or mesh panels. They often come with zippered doors and windows for easy access and ventilation control.

Snow Blower Extension Cords

Heavy-Duty Outdoor Extension Cords

If your snowblower requires an electrical power source, a heavy-duty outdoor extension cord is a must-have accessory. These extension cords are specifically designed for outdoor use, featuring rugged construction and weather-resistant materials. Heavy-duty outdoor extension cords are often made of heavy-gauge wire and have reinforced connectors, ensuring they can withstand the demands of powering your snowblower in harsh weather conditions.

Cold-Weather Extension Cords

In extremely low temperatures, regular extension cords may become stiff or brittle, potentially causing safety hazards or limitations in power transmission. Cold-weather extension cords are designed to remain flexible and reliable even in frigid temperatures. These cords are typically made of materials like heavy-duty rubber or thermoplastic elastomer, which can withstand cold temperatures without compromising performance. Cold-weather extension cords often feature reinforced connectors and insulation for increased durability and safety.

Multiple Outlet Extension Cords

If you need to power multiple devices or accessories simultaneously, a multiple outlet extension cord is a convenient solution. These cords feature multiple outlets or socket ports along the length of the cord, allowing you to connect multiple devices or accessories to a single power source. Multiple outlet extension cords are typically made with heavy-duty materials and reliable internal wiring to handle the increased power demand effectively.

In conclusion, snowblower accessories are varied and versatile, offering numerous options to enhance the performance, protection, and convenience of your snow-clearing tasks. From covers that shield your snowblower from the elements, to lights that improve visibility, to skid shoes that protect surfaces, these accessories cater to different needs and preferences. Whether you’re looking for universal or custom fit covers, all-weather tire chains, or insulated gloves, these accessories provide practical solutions to make your snow-clearing experience more efficient and comfortable. So, equip yourself with the accessories that suit your needs, and conquer the snow and ice with ease!

How Do I Know When My Snowblower’s Auger Is Worn Out?

So you’ve been using your snowblower for a while now, battling through the snowstorms and keeping your driveway clear. But lately, you’ve noticed that it’s not performing as well as it used to. The snow seems to be piling up rather than getting thrown out, and you’re wondering if it’s time to retire your trusty machine. Well, the answer lies in the condition of your snowblower’s auger, the crucial component that does all the heavy lifting. In this article, we’ll take you through the telltale signs that indicate your auger is worn out and needs replacement, ensuring you’re never left stranded in the snow.

How Do I Know When My Snowblowers Auger Is Worn Out?

Symptoms of a Worn Out Auger

When your snowblower’s auger is worn out, you may notice several symptoms that indicate a need for inspection and potential repairs. These symptoms include reduced performance, excessive vibration, strange noises, uneven snow throwing, and visible auger damage.

Reduced Performance

One of the most obvious signs of a worn-out auger is a noticeable decrease in your snowblower’s performance. The machine may struggle to effectively clear snow, requiring multiple passes over the same area or leaving behind patches of snow. If you find yourself spending more time clearing snow or experiencing difficulty moving the snowblower forward, it may be due to a worn-out auger.

Excessive Vibration

Another symptom of a worn-out auger is excessive vibration during operation. While it’s normal for a snowblower to vibrate to some extent, excessive or abnormal vibrations can indicate an issue with the auger. If you notice the snowblower vibrating more than usual, it’s essential to inspect the auger and its components for any signs of wear or damage.

Strange Noises

Unusual or strange noises coming from your snowblower while it’s in operation can be an indication of a worn-out auger. These noises can range from grinding or scraping sounds to rattling or clanking sounds. If you hear any unfamiliar sounds while using your snowblower, it’s important to stop and inspect the auger to prevent further damage or potential breakdown.

Uneven Snow Throwing

If your snowblower is throwing snow in an uneven or inconsistent pattern, it could be a sign of a worn-out auger. A properly functioning auger should evenly distribute the snow as it throws it out of the chute. However, if you notice clumping, clogging, or uneven snow distribution, it may indicate a problem with the auger blades or other components.

Auger Damage

Visible damage to the auger itself is a clear indication of wear and tear. Inspect the auger closely for signs of cracks, chips, or bending. Additionally, if the auger blades are worn down, broken, or missing, it’s a strong indication that the auger needs attention and potential replacement.

Inspecting the Auger

Regular inspections are crucial to identify any issues with your snowblower’s auger. By inspecting the different components, you can catch any signs of wear and tear early on, preventing further damage and ensuring optimal performance. Here are the key components to inspect:

Checking the Blades

Start by examining the auger blades. Look for any signs of damage, such as chipping or bending. If the blades appear dull or worn, it may be time to replace them. It’s essential to have sharp and intact blades for efficient snow removal.

Examining the Gearbox

Inspect the gearbox for any leaks or signs of rust. Make sure all the gears are in good condition and properly lubricated. A damaged or rusty gearbox can affect the auger’s performance and potentially lead to further damage if not addressed.

Inspecting the Housing

Take a close look at the auger housing for any cracks, dents, or other signs of damage. The housing should be intact and free from any deformities that may impact the auger’s functionality. Repairs or replacement may be necessary if the housing is compromised.

Analyzing the Belt

Check the belt that connects the auger to the engine. Look for any signs of wear or damage, such as fraying or stretching. A loose or damaged belt can significantly impact the auger’s performance, so repair or replacement may be required.

Looking for Shear Pin Damage

Inspect the shear pins that secure the auger blades to the auger shaft. If any pins are missing or visibly damaged, they should be replaced immediately. Shear pins are designed to break under stress, protecting the auger from more severe damage.

Measuring Auger Blade Height

Proper blade height is essential for optimal snowblower performance. If the blades are set too low, they may not effectively scoop up the snow, while blades set too high may not engage properly. Measuring and adjusting the blade height is a straightforward process.

Using a Tape Measure

With the snowblower turned off and the blades disengaged, measure the blade height from the ground to the bottom edge of the blade. Use a tape measure and ensure the measurement is accurate to determine if the blades are set at the recommended height.

Comparing to Recommended Height

Refer to the snowblower’s user manual or manufacturer’s guidelines to find the recommended blade height. Compare the measured height to this recommended height to determine if any adjustments are necessary.

Adjusting Blade Height

If the blade height is not within the recommended range, make the necessary adjustments to raise or lower the blades. Follow the manufacturer’s instructions to safely adjust the blade height. Properly adjusted blades ensure efficient snow removal and reduce strain on the auger and other components.

How Do I Know When My Snowblowers Auger Is Worn Out?

Signs of Auger Wear and Tear

Recognizing the signs of auger wear and tear is crucial in addressing potential issues before they escalate. By being aware of these signs, you can take appropriate action to repair or replace worn-out auger components.

Worn or Damaged Blades

Blades that appear worn, chipped, or bent are clear indicators of wear and tear. Worn-out blades can significantly impact the snowblower’s performance, leading to reduced efficiency and potentially causing further damage to the auger or other components.

Rusted or Broken Gearbox

A rusty or broken gearbox is a sign of significant wear and tear. Rust indicates moisture infiltration, which can lead to corrosion and potential gear failure. A broken gearbox requires immediate attention as it can cause the auger to malfunction or even seize up.

Cracked or Dented Housing

Cracks or dents in the auger housing compromise its structural integrity. This can lead to misalignment of the auger blades or cause debris to enter critical components, resulting in damage. Any noticeable cracks or dents should be addressed promptly to ensure safe and efficient operation.

Loose or Damaged Belt

A loose or damaged auger belt can cause the auger to slip or not engage properly. This can result in reduced snow clearing performance and potential damage to the belt or other components. Inspect the belt for signs of wear or damage, such as fraying or stretching, and replace if necessary.

Missing or Damaged Shear Pins

Shear pins are designed to break under stress to protect the auger from severe damage. If any shear pins are missing or visibly damaged, immediate replacement is necessary. Operating the snowblower without shear pins can lead to costly damage to the auger or other components.

Preventing Excessive Auger Wear

Taking proactive steps to prevent excessive auger wear is key to ensuring the longevity and optimal performance of your snowblower. By following a few maintenance and operational practices, you can minimize wear and tear on the auger.

Regular Maintenance

Perform regular maintenance tasks recommended by the snowblower’s manufacturer. This includes engine oil changes, lubrication of moving parts, and checking for any loose or worn components. Regular maintenance helps identify issues early on and prevents them from escalating into more significant problems.

Proper Operation

Operate the snowblower according to the manufacturer’s instructions. Avoid overloading the machine or forcing it to clear snow beyond its capabilities. Operating the snowblower within its designated capacity helps prevent strain on the auger and other components, reducing wear and tear.

Removing Debris

Clear any debris, such as rocks, sticks, or ice chunks, from the snowblower’s path before operation. These objects can become lodged in the auger and cause damage. Removing debris reduces the risk of auger wear and prolongs the lifespan of the components.

Avoiding Obstacles

Avoid operating the snowblower over uneven terrain or near fixed objects, such as curbs or walls. Prolonged contact with obstacles can cause the auger to strike them, leading to damage or misalignment. Pay attention to the terrain and adjust your snow removal technique accordingly to prevent unnecessary wear on the auger.

Correct Storage

When not in use, store the snowblower in a dry and clean area. Moisture and exposure to the elements can accelerate wear and rust on the auger and other components. Proper storage helps maintain the snowblower’s condition and prevents premature wear.

Repair or Replace?

Determining whether to repair or replace a worn-out auger depends on several factors, including the extent of the damage, cost considerations, and your skills and preferences as a DIYer.

Consulting a Professional

If you’re unsure about the severity of the auger wear or don’t have the necessary skills, it’s best to consult a professional snowblower repair technician. They can thoroughly assess the auger and its components, provide an accurate diagnosis, and recommend the most appropriate course of action.

Assessing the Damage

Consider the extent of the damage and how it affects the overall performance and safety of the snowblower. Minor wear, such as dull blades or a loose belt, can often be addressed through repairs. However, severe damage, such as a cracked housing or broken gearbox, may require replacing the affected components or even replacing the entire auger assembly.

Cost Considerations

Evaluate the cost of repairing versus replacing the worn-out auger. Depending on the extent of the damage, repairs can be a cost-effective solution. However, if the repair costs approach or exceed the cost of a new auger or snowblower, it may be more economical to opt for replacement.

DIY Repair vs. Replacement

Consider your own skills, experience, and comfort level with DIY repairs. Simple maintenance tasks like replacing shear pins or adjusting blade height can often be done by the average homeowner. However, more complex repairs or component replacements may require specialized tools or expertise. Assess your abilities and factor in the time and effort required for the repair before deciding on a DIY repair or replacement.

Safety First

When working on a snowblower’s auger, it’s essential to prioritize safety to prevent accidents and injuries. Follow these safety precautions to ensure a safe working environment.

Shut Off the Snowblower

Before performing any maintenance or inspection, always turn off the snowblower and remove the key, if applicable. This prevents accidental starting or engagement of the auger blades.

Wear Protective Gear

Wear appropriate protective gear, such as safety goggles, gloves, and sturdy footwear. Protective gear helps guard against flying debris and potential injuries during auger inspection and repair.

Disconnect the Spark Plug

To prevent accidental engine start-up, disconnect the spark plug wire before working on the snowblower. This eliminates the risk of the engine firing while you’re inspecting or repairing the auger.

Follow Manufacturer’s Instructions

Read and follow the snowblower’s user manual and the manufacturer’s instructions for safe maintenance and repair procedures. Each snowblower can have specific safety guidelines and steps to follow, so it’s crucial to familiarize yourself with the manufacturer’s recommendations.

Proceed with Caution

Take your time and proceed cautiously when inspecting or working on the auger. Avoid rushing or forcing components, as this can lead to accidents or further damage. Working carefully and attentively minimizes safety risks and ensures proper repairs or adjustments.

Common FAQ

Here are some frequently asked questions regarding worn-out augers and their answers:

How long does an auger typically last?

The lifespan of an auger can vary depending on various factors such as usage frequency, maintenance, and operating conditions. On average, a well-maintained auger can last anywhere from 5 to 10 years before requiring significant repairs or replacement.

Can I continue using my snowblower with a worn-out auger?

While it is possible to continue using a snowblower with a worn-out auger, it is not recommended. A worn-out auger can lead to reduced performance, further damage to components, and even safety hazards. It’s best to inspect and address any issues with the auger promptly to ensure efficient and safe snow removal.

Can I sharpen the auger blades?

Auger blades can be sharpened if they are dull but otherwise in good condition. Use a file or a grinder to remove any nicks or dull edges, ensuring a sharp cutting edge. However, if the blades are already significantly worn, chipped, or bent, it’s recommended to replace them rather than attempting to sharpen them.

How much does it cost to replace an auger?

The cost of replacing an auger can vary depending on the make and model of the snowblower, as well as the specific components that need replacement. Auger replacement costs typically range from $100 to $500, with additional expenses if professional labor is required.

Can I replace just the damaged parts of the auger?

In some cases, it is possible to replace only the damaged components of the auger. For example, if the blades are worn or damaged, they can be replaced individually. However, for more severe damage such as a cracked housing or broken gearbox, it may be more practical and cost-effective to replace the entire auger assembly.

Conclusion

Regular inspection and maintenance of your snowblower’s auger are vital in ensuring optimal performance and preventing further damage. By paying attention to the symptoms of a worn-out auger and conducting thorough inspections, you can identify any issues early on and take the necessary steps to repair or replace worn-out components.

Remember, safety should always be a priority when working on the auger or any other part of the snowblower. Follow the manufacturer’s instructions, wear appropriate protective gear, and proceed with caution.

By prioritizing maintenance, avoiding excessive wear and tear, and addressing any issues promptly, you can prolong the lifespan of your snowblower’s auger and enjoy efficient and reliable snow removal season after season.

How Do I Drain Old Fuel From My Snowblower?

So you’ve got a snowblower that’s been sitting in your garage all summer, and now winter is approaching and it’s time to get it up and running again. But before you can start tackling those snow-covered driveways and sidewalks, you realize that the fuel in your snowblower is old and needs to be drained. But how do you go about doing that? In this article, we’ll guide you through the process of draining old fuel from your snowblower, ensuring that it’s ready to take on the winter season.

How Do I Drain Old Fuel From My Snowblower?

Preparing for Fuel Drainage

Gather the necessary tools and materials

Before you begin draining the old fuel from your snowblower, it’s important to gather all the necessary tools and materials. These may include a wrench or socket set, a clean container for fuel, gloves, safety goggles, and a fuel stabilizer (optional). Having everything you need readily available will make the process smoother and more efficient.

Choose an appropriate location

Next, you need to select an appropriate location for the fuel drainage process. Ideally, you should choose a well-ventilated area outdoors to prevent the buildup of potentially harmful fumes. It’s also important to ensure that you have enough space to work comfortably and that the surface is stable and level.

Ensure safety precautions

Before you begin working on your snowblower, it’s crucial to prioritize safety. Make sure the snowblower is turned off and the engine is cool to avoid any burns or accidents. Wear protective gloves and safety goggles to protect your hands and eyes. Additionally, be cautious of any nearby open flames, sparks, or smoking materials, as fuel can be highly flammable.

Identifying the Fuel System

Identify the fuel tank

To begin the fuel drainage process, you first need to locate the fuel tank on your snowblower. Depending on the make and model, the fuel tank may be located either on top of the engine or underneath the snowblower’s body. Consult your snowblower’s manual for the exact location if you’re unsure.

Locate the fuel shut-off valve

Once you’ve identified the fuel tank, you’ll then need to locate the fuel shut-off valve. This valve is typically attached to the fuel line coming from the tank and can be turned to either open or close the fuel flow. By turning off the fuel shut-off valve, you’ll prevent any additional fuel from flowing into the engine during the drainage process.

Check for a fuel filter

In some snowblower models, there may also be a fuel filter installed in the fuel line. The fuel filter helps capture any debris or impurities before the fuel enters the engine. If your snowblower is equipped with a fuel filter, make sure to check its condition and clean or replace it if necessary.

Emptying the Fuel Tank

Turn off the snowblower

Before you can begin emptying the fuel tank, it’s essential to turn off the snowblower and allow the engine to cool. This ensures your safety and prevents any potential accidents during the fuel drainage process.

Locate the fuel line

Once the snowblower is turned off, you can proceed to locate the fuel line connected to the fuel tank. The fuel line is typically a rubber tube that carries fuel from the tank to the engine. It’s important to identify and familiarize yourself with the fuel line to ensure a smooth and efficient drainage process.

Prepare a clean container

To contain the drained fuel, prepare a clean container that is suitable for holding gasoline. Ensure that the container is free from any residues or impurities that could contaminate the fuel. This will help you prevent any potential damage to the snowblower’s engine and make the disposal of the old fuel easier.

Disconnect the fuel line

With the container ready, carefully disconnect the fuel line from the snowblower. To do this, you may need to use a wrench or socket set to loosen any clamps securing the fuel line to the engine. Take your time to ensure that the line is disconnected properly without causing any damage to the snowblower or the fuel line itself.

Drain the fuel into the container

Once the fuel line is disconnected, gently lower it into the clean container to start the fuel drainage process. Allow the fuel to flow freely from the tank into the container, fully emptying the fuel tank. Be patient during this step, as it may take some time for all the fuel to be drained.

How Do I Drain Old Fuel From My Snowblower?

Draining the Carburetor

Locate the carburetor

After emptying the fuel tank, the next step is to locate the carburetor on your snowblower. The carburetor is responsible for mixing air and fuel to create a combustible mixture that powers the engine. It’s usually located near the engine and connected to the fuel line.

Identify the carburetor drain bolt

To drain the fuel from the carburetor, you’ll need to locate the carburetor drain bolt. This bolt is typically located at the bottom of the carburetor and is designed to allow fuel to be released. It’s important to identify the drain bolt to ensure you’re directing the fuel properly during the drainage process.

Place a container beneath the carburetor

To prevent any fuel from spilling onto the ground, place a container beneath the carburetor before attempting to open the drain bolt. This will catch the fuel as it drains out, ensuring a clean and controlled process. Double-check that the container is stable and properly positioned before proceeding.

Loosen the drain bolt to release fuel

Using the appropriate wrench or socket, carefully loosen the carburetor drain bolt. As you do so, fuel from the carburetor will start to flow out into the container. Allow all the fuel to drain completely before moving on to the next step. Take caution not to overtighten or damage the drain bolt during this process.

Removing Old Fuel Completely

Inspect the fuel tank and carburetor

With the fuel tank and carburetor now drained, it’s time to inspect them for any residue or debris. Look closely for any signs of old fuel or sediment that may have settled at the bottom of the tank or carburetor. If you notice any buildup, it’s crucial to remove it before proceeding.

Clean any residue or debris

To clean the fuel tank and carburetor, use a clean cloth or rag to wipe away any residue or debris. If necessary, you can also use a small brush or compressed air to remove stubborn particles. Ensure that both the tank and carburetor are completely clean before moving forward.

Flush the fuel tank with fresh fuel

To eliminate any remaining traces of old fuel, flush the fuel tank with fresh fuel. Pour a small amount of fresh gasoline into the tank and swish it around, allowing it to wash away any residual deposits. Carefully tilt and pour out the fresh fuel into the appropriate container. Repeat this process if needed until the fuel tank is thoroughly cleaned.

Clean the fuel filter (if applicable)

If your snowblower is equipped with a fuel filter, this is a good time to inspect and clean it. Remove the filter, following the instructions in your snowblower’s manual, and rinse it under clean water. Gently tap the filter to dislodge any trapped debris and allow it to dry fully before reinstalling.

Replacing Fuel System Components

Reconnect the fuel line

Now that the fuel tank and carburetor are clean, it’s time to reconnect the fuel line. Carefully attach the fuel line to the appropriate connections on the snowblower, ensuring a secure fit. Use any clamps or fasteners that were previously in place to secure the fuel line properly.

Replace any damaged fuel lines or clamps

While reconnecting the fuel line, take a moment to inspect it for any damage or wear. If you notice any cracks, leaks, or deterioration, it’s crucial to replace the affected sections of the fuel line. Additionally, replace any damaged or worn-out clamps or fasteners to ensure a tight and secure connection.

Reinstall the fuel filter (if applicable)

If you removed the fuel filter during the cleaning process, now is the time to reinstall it. Follow the instructions in your snowblower’s manual to ensure you properly position and secure the filter. Double-check that the fuel filter is correctly aligned with the fuel line connections.

Refilling with Fresh Fuel

Choose the appropriate fuel type

Before refilling your snowblower’s fuel tank, always use the appropriate fuel type recommended by the manufacturer. Consult your snowblower’s manual or check the fuel cap for the correct fuel specifications. Using the wrong fuel can result in poor performance and potential damage to the engine.

Fill the fuel tank with fresh fuel

Using a clean and approved gasoline container, fill the snowblower’s fuel tank with fresh fuel. Take care not to spill any fuel during this process and avoid overfilling the tank. Place the fuel cap back securely once the tank is adequately filled.

Add a fuel stabilizer (optional)

To help preserve the freshness and quality of your snowblower’s fuel, you may choose to add a fuel stabilizer. Fuel stabilizers work by preventing the breakdown of gasoline over time, especially during extended periods of storage. Follow the instructions on the fuel stabilizer’s packaging to add the appropriate amount to the fuel tank.

Performing Maintenance Checks

Inspect spark plugs

After completing the fuel drainage and refilling process, it’s an excellent opportunity to inspect and possibly clean or replace the spark plugs. Remove the spark plugs using a spark plug wrench and check for signs of wear, corrosion, or fouling. If necessary, clean the spark plugs or replace them with new ones for optimal performance.

Check oil levels

In addition to the spark plugs, checking the oil levels in your snowblower’s engine is equally important. Refer to your snowblower’s manual for the correct method of checking oil levels and the recommended oil type. Adjust the oil levels if needed and change the oil as per the manufacturer’s instructions, if necessary.

Clean or replace air filters

The air filters in your snowblower play a crucial role in preventing dust and debris from entering the engine. If the air filters appear dirty or clogged, remove them and clean them thoroughly. Alternatively, replace them with new filters if they are in poor condition. Clean air filters ensure proper engine performance and prolong the life of your snowblower.

Test Starting the Snowblower

Prime the engine (if required)

Depending on your snowblower model, you may need to prime the engine before starting. Consult your snowblower’s manual for the correct priming instructions and follow them accordingly. Priming prepares the engine for starting and ensures smooth operation.

Choke the engine

After priming, if necessary, locate the choke on your snowblower and engage it to start the engine. The choke restricts airflow to the engine, making it easier to start in colder temperatures. Once the engine starts running smoothly, gradually disengage the choke to allow for normal airflow.

Start the snowblower

With the engine primed and the choke engaged, pull the starter cord or press the electric start button to start the snowblower. Listen for the engine to start smoothly and idle consistently. If there are any issues or the engine fails to start, refer to your snowblower’s manual for troubleshooting tips.

Observe for smooth operation

As the snowblower starts and idles, observe its operation for any abnormal sounds, vibrations, or performance issues. Pay attention to how the engine responds when engaging the augers or impellers. Smooth operation indicates that your snowblower is ready for use.

Tips and Precautions

Avoid old fuel accumulation

To prevent fuel-related issues, it’s important to avoid the accumulation of old fuel in your snowblower. Whenever the snowblower will be idle for an extended period, consider draining the fuel tank and running the engine until it stalls to remove any remaining fuel. This helps prevent fuel deposits, clogging, and starting problems in the future.

Dispose of old fuel properly

When disposing of old fuel, it’s crucial to follow proper disposal methods to protect the environment and comply with local regulations. Contact your local waste management facility or designated collection centers for information on how to safely dispose of old fuel. Never dispose of fuel down drains or onto the ground as it can contaminate soil and water sources.

Regularly maintain the fuel system

Regular maintenance of your snowblower’s fuel system is essential for optimal performance and longevity. Follow the manufacturer’s recommended maintenance schedule, which often includes fuel system checks, filter replacements, and fuel stabilizer use during storage. By staying proactive with maintenance, you’ll ensure that your snowblower is always ready when you need it.

In conclusion, draining old fuel from your snowblower is an important maintenance task that ensures its efficient operation. By following the steps outlined above and maintaining a regular maintenance routine, you can keep your snowblower in peak condition season after season. Protect your investment and enjoy hassle-free snow removal with a well-maintained fuel system.

How Do I Replace The Belts On My Snowblower?

So, you’ve found yourself facing the task of replacing the belts on your snowblower, huh? Well, fear not, because we’ve got you covered! In this article, we’ll walk you through the step-by-step process of replacing those worn-out belts and getting your snowblower up and running smoothly again in no time. Whether you’re a seasoned DIY enthusiast or a novice in the world of machine maintenance, we’ve got the tips and tricks you need to tackle this task with confidence. So, let’s get started and make sure you’re well-equipped to handle any snowy surprises that come your way!

How Do I Replace The Belts On My Snowblower?

Preparing for Belt Replacement

Before you embark on replacing the belts on your snowblower, it is important to gather the necessary tools. You will need a socket set or wrench, a belt tension gauge, and possibly a screwdriver or pliers, depending on the model of your snowblower. It’s also a good idea to have a clean cloth or rag on hand to wipe away any dirt or debris you may encounter during the process.

Safety should always be a top priority when working on any machinery, and replacing the belts on your snowblower is no exception. Ensure that the snowblower is turned off and disconnected from the power source before beginning any work. This will prevent any accidental starts or injuries while handling the belts.

Another crucial step in preparing for belt replacement is to identify the belt type and model number. Different snowblowers may require different types of belts, so it is important to know the specific belt size and model number for your particular machine. This information can usually be found in the snowblower’s manual or on the manufacturer’s website. Having this information handy will ensure that you purchase the correct replacement belts for your snowblower.

Removing the Old Belts

Now that you have gathered the necessary tools and taken the appropriate safety precautions, it is time to remove the old belts from your snowblower. Start by turning off the snowblower and disconnecting it from the power source. This will prevent any accidents while working in the belt area.

To access the belt area, you may need to remove any protective covers or panels that are in place. Use a socket set or wrench to carefully remove the screws or bolts that are holding the covers in place. Once the covers are removed, you should have a clear view of the old belts.

To remove the old belts, you will need to loosen and release the tension that is holding them in place. This can usually be done by either adjusting the tensioner pulley or loosening the mounting bolts. Consult your snowblower’s manual or manufacturer’s instructions for specific guidance on how to release the tension and remove the old belts.

Installing the New Belts

With the old belts removed, it is now time to install the new belts onto your snowblower. First and foremost, ensure that you have obtained the correct replacement belts for your particular snowblower model. Using incorrect belts can damage your snowblower and may not provide the proper functioning.

To begin installing the new belts, thread them onto the pulleys in the designated path. Take care to follow the specific routing diagram provided in your snowblower’s manual or manufacturer’s instructions. This will ensure that the belts are correctly aligned and properly engaged with the pulleys.

Once the new belts are threaded onto the pulleys, it is important to tighten them to the appropriate tension. Using a belt tension gauge, check the tension of the new belts and adjust as necessary. Proper belt tension is crucial for optimal performance and longevity of the belts. Additionally, ensure that the belts are properly aligned and centered on the pulleys for smooth operation.

How Do I Replace The Belts On My Snowblower?

Performing Belt Tension Adjustment

After installing the new belts and ensuring proper alignment, it is time to check the tension and make any necessary adjustments. Using a belt tension gauge, measure the tension of the new belts. It is important to refer to your snowblower’s manual for the specific tension requirements, as these can vary depending on the make and model.

If the tension of the belts is not within the specified range, adjustments will need to be made. This can typically be done by adjusting the position of the tensioner pulley or tightening the mounting bolts. Take caution while making adjustments and ensure that the belts are kept aligned and centered on the pulleys.

Proper belt tension is essential for the snowblower’s performance and longevity. It allows for smooth operation and prevents excessive wear and tear on the belts. It is important to regularly check and adjust the belt tension to ensure optimal functioning of your snowblower.

Testing the Snowblower

After replacing the belts and adjusting their tension, it is time to test the snowblower. Reconnect the snowblower to the power source and turn it on. Engage the belts and closely observe their performance. The belts should run smoothly and without any slipping or unnecessary noise.

If you notice any issues during the test, such as slipping or excessive noise, you may need to make final adjustments to the belt tension or alignment. Refer to your snowblower’s manual or manufacturer’s instructions for guidance on how to make these adjustments.

It is important to note that proper belt tension and alignment are crucial for the snowblower’s performance. A misaligned or poorly tensioned belt can lead to decreased snowblowing efficiency and may cause further damage to the snowblower. Take the time to thoroughly test and make any necessary adjustments to ensure optimal functioning.

Troubleshooting Belt Issues

In some cases, even after replacing the belts and making necessary adjustments, issues may arise. It is important to be familiar with common belt problems and how to troubleshoot them.

Some common belt problems include slipping, excessive wear, or breakage. If you encounter any of these issues, it is important to inspect the belt-related components for damage. Check the pulleys for any signs of wear or damage and ensure that they are clean and free from debris.

If you are unsure about the cause of the belt issue or if the problem persists after troubleshooting, it may be necessary to seek professional assistance. A trained technician will have the expertise to diagnose and resolve the problem effectively.

Maintaining Belt Longevity

To ensure the longevity of the belts on your snowblower, it is important to regularly inspect them for wear. Check for any signs of fraying, cracking, or excessive wear. If you notice any damage, it is recommended to replace the belts as soon as possible.

Additionally, it is important to regularly clean the pulleys and remove any debris or buildup that may accumulate over time. Debris can cause the belts to slip or wear unevenly, leading to decreased performance and potential damage.

Proper storage and handling of the snowblower are also crucial for maintaining belt longevity. Store the snowblower in a clean and dry area, away from extreme temperatures or moisture. Avoid placing heavy objects on top of the snowblower or storing it in a way that may cause strain on the belts.

Safety Considerations

When working on your snowblower, always prioritize safety. Use personal protective equipment, such as safety goggles and gloves, to protect yourself from any potential hazards. Additionally, avoid working on a running snowblower to prevent any accidents or injuries. Always follow the manufacturer’s instructions and warnings to ensure safe and proper use of your snowblower.

Common Belt Replacement Mistakes

While replacing the belts on your snowblower, it is important to avoid common mistakes that may negatively impact the performance or longevity of the belts. Some common mistakes include using incorrect belt types or sizes, not applying sufficient tension to the belts, and improper belt alignment.

Using incorrect belt types or sizes can lead to decreased performance and potential damage to the snowblower. Always ensure that you purchase the correct replacement belts for your specific snowblower model.

Insufficient belt tension can cause slipping or improper operation of the snowblower. Be sure to measure and adjust the tension of the belts according to the manufacturer’s specifications to ensure proper functioning.

Improper belt alignment can also negatively affect the snowblower’s performance. Make sure that the belts are properly aligned and centered on the pulleys to prevent any unnecessary wear or damage.

Conclusion

Replacing the belts on your snowblower is a task that can be accomplished with the right tools, knowledge, and safety precautions. By following the steps outlined in this article, you can successfully remove the old belts, install the new ones, adjust the tension, and ensure proper alignment. Regular maintenance and inspection of the belts will help prolong their longevity and keep your snowblower running smoothly. Remember to always prioritize safety and seek professional assistance if needed. With proper care and attention, your snowblower belts will continue to perform effectively, allowing you to conquer the winter weather with ease.

How Do I Troubleshoot Common Snowblower Problems?

So you’re gearing up for winter and getting everything ready to tackle the snow, but you’ve encountered a problem with your trusty snowblower. No need to panic, because in this article, we’ll walk you through some common issues you might face and how to troubleshoot them. From clogged chutes to engines that won’t start, we’ve got you covered. Get ready to take on winter like a pro with these helpful tips and tricks for troubleshooting your snowblower.

1. Engine Won’t Start

If your snowblower’s engine won’t start, there are a few things you should check before calling for professional help.

1.1. Check Fuel Level

The first thing to check is the fuel level. Make sure you have enough fuel in the tank to properly start the engine. If the fuel level is low, refill it with fresh gasoline and try starting the engine again.

1.2. Inspect Spark Plug

A faulty spark plug can prevent the engine from starting. Remove the spark plug and inspect it for any signs of damage or wear. If the spark plug is dirty or the electrode is worn out, replace it with a new one.

1.3. Clean or Replace Carburetor

A clogged carburetor can also cause the engine to not start. Remove the carburetor and clean it thoroughly with carburetor cleaner. If cleaning doesn’t solve the issue, you may need to replace the carburetor.

1.4. Check Ignition System

The ignition system plays a vital role in starting the engine. Inspect the ignition coil, spark plug wire, and ignition switch for any signs of damage. If any components are faulty, they may need to be replaced to ensure proper ignition.

2. Engine Runs Roughly

If your snowblower’s engine is running roughly, it can affect its performance and efficiency. Here are a few troubleshooting steps to address this issue.

2.1. Check Fuel Quality

Poor fuel quality can lead to engine issues. Ensure that you are using fresh gasoline with the correct fuel-to-oil ratio recommended by the manufacturer. If the fuel quality is compromised, drain the old fuel and refill with fresh fuel.

2.2. Clean or Replace Air Filter

A clogged air filter can restrict airflow to the engine, causing it to run roughly. Remove the air filter and clean it with compressed air or replace it with a new one if it is damaged or excessively dirty.

2.3. Adjust Throttle and Choke

Improper throttle and choke settings can affect engine performance. Adjust the throttle to the appropriate position and ensure the choke is adjusted correctly for starting and running conditions.

2.4. Inspect Fuel Line and Filter

A clogged or damaged fuel line or filter can cause fuel supply issues, leading to rough engine performance. Inspect the fuel line for any cracks, leaks, or blockages. Replace the fuel line or filter if necessary.

How Do I Troubleshoot Common Snowblower Problems?

This image is property of cdn-icmob.nitrocdn.com.

3. Auger Not Turning

If the auger on your snowblower is not turning, it will not effectively remove snow. Here’s what you can do to troubleshoot this problem.

3.1. Check Shear Pins and Bolts

Shear pins and bolts secure the auger to the shaft. Check if any shear pins or bolts are broken or missing. Replace them with new ones if necessary. Ensure that the auger is properly attached to the shaft.

3.2. Inspect Drive Belt

A worn or damaged drive belt can cause the auger to stop turning. Inspect the drive belt for any signs of wear or damage. If the belt appears worn or cracked, replace it with a new one as soon as possible.

3.3. Check Auger Control Cable

The auger control cable connects the control handle to the auger. Check if the cable is properly attached and not loose or broken. Adjust or replace the cable if required.

3.4. Inspect Shear Key

The shear key is a small metal piece that connects the auger to the engine shaft. If the shear key is damaged or broken, it will prevent the auger from turning. Inspect the shear key and replace it if necessary.

4. Wheels Not Engaging

If the wheels of your snowblower are not engaging, it can make it difficult to move and operate the machine. Follow these troubleshooting steps to address this issue.

4.1. Check Traction Drive Belt

The traction drive belt connects the engine shaft to the wheels, allowing them to engage. Inspect the traction drive belt for any signs of wear or damage. If the belt is worn or broken, replace it with a new one.

4.2. Inspect Wheel Drive Plate

The wheel drive plate transfers power from the engine to the wheels. Inspect the drive plate for any signs of wear or damage. If the drive plate is worn out, it may need to be replaced.

4.3. Adjust Cable Tension

The cable tension controls the engagement of the wheels. Ensure that the cable is properly tensioned, allowing the wheels to engage when the control lever is activated. Adjust the cable tension as necessary.

4.4. Inspect Wheel Engagement Lever

The wheel engagement lever controls the engagement and disengagement of the wheels. Check if the lever is functioning properly and not stuck or damaged. Lubricate or replace the lever if needed.

How Do I Troubleshoot Common Snowblower Problems?

This image is property of www.weingartz.com.

5. Snow Not Discharged Properly

If your snowblower is not discharging snow properly, it can lead to inefficient snow removal. Follow these troubleshooting steps to address this issue.

5.1. Clear Snow Clogs

Obstructions or clogs in the snow discharge chute can prevent snow from being discharged properly. Clear any snow buildup or debris in the chute to ensure smooth snow discharge.

5.2. Inspect Impeller

The impeller is responsible for throwing snow out of the discharge chute. Inspect the impeller for any damage or obstructions. Remove any debris or replace the impeller if necessary.

5.3. Check Discharge Chute

The discharge chute directs the snow away from the machine. Ensure that the chute is not clogged or misaligned. Adjust or clear the chute as needed to improve snow discharge.

5.4. Adjust Auger Belt Tension

The auger belt transfers power from the engine to the auger. If the belt is loose or worn, it may not be able to properly discharge the snow. Adjust the tension of the auger belt or replace it if necessary.

6. Electric Starter not Working

If the electric starter on your snowblower is not working, you may face difficulties starting the engine. Here are some troubleshooting steps to address this problem.

6.1. Check Power Source

Ensure that the power source supplying the electric starter is functioning. Check if the outlet has power and that any extension cords or connections are secure. If necessary, try a different power source or outlet.

6.2. Inspect Starter Motor

The starter motor is responsible for turning the engine with the help of gears. Inspect the starter motor for any signs of damage or malfunctions. If the starter motor is faulty, it may need to be replaced.

6.3. Test Starter Switch

The starter switch activates the electric starter motor. Test the starter switch to ensure it is functioning properly. If the switch is defective, it may need to be replaced.

6.4. Check Starter Solenoid

The starter solenoid controls the flow of electricity to the starter motor. Check the solenoid for any signs of damage or failure. Replace the solenoid if necessary to ensure proper functioning of the electric starter.

How Do I Troubleshoot Common Snowblower Problems?

This image is property of i.ytimg.com.

7. Handlebar or Controls Malfunctioning

If the handlebar or controls on your snowblower are malfunctioning, it can affect the overall operation of the machine. Here’s how you can address this problem.

7.1. Tighten Loose Connections

Check all connections between the handlebar and the rest of the machine. Tighten any loose bolts, nuts, or screws that may be causing the handlebar or controls to malfunction.

7.2. Inspect Control Cables

Inspect the control cables that connect the handlebar to various components of the snowblower. Ensure that the cables are not frayed, damaged, or stretched. Replace any faulty cables to restore proper functionality.

7.3. Lubricate Mechanisms

Lubricate any moving mechanisms, such as control levers or linkages, to ensure smooth operation. Use a silicone-based lubricant or a lubricant recommended by the manufacturer. Avoid using excessive amounts of lubricant.

7.4. Replace Faulty Components

If the handlebar or controls continue to malfunction, even after ensuring all connections are tight and lubricating the mechanisms, there may be faulty components that require replacement. Consult the manufacturer or a professional for further assistance.

8. Excessive Vibrations

Excessive vibrations during operation can indicate underlying issues with your snowblower. Here are some steps to troubleshoot this problem.

8.1. Check for Loose Bolts or Nuts

Inspect the snowblower for any loose bolts or nuts. Vibration can cause fasteners to become loose over time. Tighten any loose bolts or nuts to reduce excessive vibrations.

8.2. Inspect Auger Bearings

Worn or damaged auger bearings can cause excessive vibrations. Inspect the bearings for any signs of wear, noise, or roughness. Replace any worn or damaged bearings to reduce vibrations.

8.3. Replace Damaged Skid Shoes

Skid shoes help guide the snowblower over the ground. If the skid shoes are worn or damaged, it can lead to excessive vibrations. Replace any damaged or worn skid shoes to improve stability and reduce vibrations.

8.4. Adjust Engine Mounting Bolts

Loose or improperly adjusted engine mounting bolts can contribute to excessive vibrations. Ensure that the engine mounting bolts are secure and properly tightened. Adjust or tighten the bolts as necessary.

How Do I Troubleshoot Common Snowblower Problems?

This image is property of i.ytimg.com.

9. Poor Snow Throwing Distance

If your snowblower is not throwing snow a sufficient distance, it can be frustrating and time-consuming. The following troubleshooting steps can help improve snow throwing distance.

9.1. Check Engine RPM

Insufficient engine RPM can affect the snow throwing distance. Consult the owner’s manual to determine the recommended RPM for your specific snowblower model. Adjust the engine throttle or consult a professional mechanic to ensure the engine is running at the correct RPM.

9.2. Adjust Snow Chute Angle

The snow chute angle determines the direction and distance of the snow being thrown. Adjust the chute angle to optimize the snow throwing distance. Consult the owner’s manual for instructions on adjusting the chute angle for your snowblower model.

9.3. Clear Snow Build-up

Built-up snow or ice can obstruct the snowblower’s chute, impeller, or auger, resulting in poor snow throwing distance. Regularly clear any snow or ice build-up to ensure unobstructed snow discharge and maximize throwing distance.

9.4. Inspect Auger Paddles

Worn or damaged auger paddles can lead to reduced snow throwing distance. Inspect the auger paddles for any signs of wear or damage. Replace any worn or damaged paddles to maintain optimal performance and snow throwing distance.

10. Excessive Fuel Consumption

If your snowblower is consuming an excessive amount of fuel, it can be costly and inefficient. Follow these troubleshooting steps to address this issue.

10.1. Ensure Proper Fuel Mixture

Ensure that you are using the correct fuel-to-oil mixture recommended by the manufacturer. Improper fuel mixture can result in increased fuel consumption. Use a fuel measuring cup to ensure accurate fuel mixing.

10.2. Clean or Replace Fuel Line

A clogged or dirty fuel line can restrict fuel flow, causing the engine to consume more fuel. If the fuel line appears clogged or damaged, clean it thoroughly or replace it with a new one to maintain proper fuel flow.

10.3. Check Fuel Tank Vent

A blocked or improperly functioning fuel tank vent can lead to inefficient fuel consumption. Ensure that the fuel tank vent is clear and allowing proper airflow. Clean or replace the vent if necessary.

10.4. Adjust Carburetor Settings

Incorrect carburetor settings can result in excessive fuel consumption. Consult the owner’s manual for guidance on adjusting the carburetor settings. If you are unsure, it’s best to seek assistance from a professional.

By following these troubleshooting steps, you can address common snowblower problems and keep your machine running smoothly. Remember to consult the owner’s manual or seek professional assistance if you encounter any difficulties during troubleshooting.

How Do I Troubleshoot Common Snowblower Problems?

This image is property of www.thespruce.com.

How Do I Winterize My Snowblower?

So, winter is right around the corner and you’re thinking about how to prepare your trusty snowblower for the season. Well, look no further! In this article, we’ll give you some handy tips and tricks on how to properly winterize your snowblower, ensuring that it’s all set to tackle those snow-filled days ahead. From draining the fuel to properly storing it, we’ve got you covered with all the essential steps. So, sit back, grab a cup of hot cocoa, and let’s get started on winterizing your snowblower like a pro! Winterizing a snowblower is an essential task to ensure its longevity and optimal performance. By following a few simple steps, you can keep your snowblower in top shape and ready to tackle the next winter season. Let’s break down the process of winterizing a snowblower and explore each step in detail.

How Do I Winterize My Snowblower?

Drain the Fuel

The first step in winterizing your snowblower is to drain the fuel from the engine. Start by turning off the engine and allowing it to cool down. Once the engine is cool, remove the fuel cap to access the fuel tank. Place a container below the carburetor to catch the fuel. Next, open the carburetor bowl drain screw to allow the fuel to drain fully from the system. This step is vital as it prevents the fuel from sitting in the engine for an extended period, which can lead to clogging and damage.

Change the Oil

Changing the oil in your snowblower is another crucial step in winterizing the machine. Begin by running the engine for a few minutes to warm the oil. This ensures that the oil flows freely and removes any contaminants. Once the engine is warm, turn it off and locate the oil drain plug. Use a suitable tool to loosen the plug and drain the oil into a container. Don’t forget to replace the oil filter as well. Finally, fill the engine with fresh oil, following the manufacturer’s recommendations. Clean oil helps lubricate the engine and prevents corrosion during the winter months.

Clean the Snowblower

Keeping your snowblower clean is essential for maintaining its performance and preventing rust. Start by removing any snow and ice from all parts of the machine, paying close attention to the chute and auger. Then, remove any debris such as leaves, twigs, or dirt that may have accumulated. Use a brush or cloth to clean the surfaces, ensuring that all components are free from dirt and grime. Taking the time to clean your snowblower not only improves its appearance but also allows for better functionality.

How Do I Winterize My Snowblower?

Inspect and Replace Spark Plugs

The spark plugs play a crucial role in the ignition system of your snowblower. Over time, they can wear out or become damaged, leading to poor engine performance. To inspect the spark plugs, access them by removing the spark plug wire. Examine each plug for signs of wear or damage, such as worn electrodes or excessive rust. If any spark plugs show these signs, it’s best to replace them with new ones. This simple maintenance task ensures that your snowblower starts smoothly when you need it most.

Inspect and Replace Belts

The belts in your snowblower are responsible for transferring power and driving various components. It’s essential to check them for wear or damage regularly. Look for signs such as cracks, fraying, or stretching. If any belts appear worn or damaged, remove and replace them with new ones. Ignoring belt issues can lead to reduced performance and even total failure of the snowblower. Keep your snowblower operating efficiently by ensuring the belts are in good condition.

Check the Skid Shoes

Skid shoes are metal plates located at the bottom of the snowblower housing. They provide clearance between the auger and the ground, preventing damage to the machine and making it easier to maneuver. Regularly check the condition of the skid shoes for signs of wear or damage. Replace any worn or damaged skid shoes to maintain proper functionality and protect your snowblower from unnecessary wear.

Inspect the Shear Pins

Shear pins play a vital role in protecting the auger and the engine. They are designed to break if the auger becomes jammed, preventing more severe damage. Inspect the shear pins for wear or damage and replace any that show signs of fatigue. Ensuring the shear pins are in good condition guarantees that your snowblower can handle heavy snow without risking damage to critical components.

Lubricate Moving Parts

Lubrication is necessary to keep the moving parts of your snowblower operating smoothly. Apply lubricant to the auger shaft and other moving parts, following the manufacturer’s recommendations. This helps prevent rust, reduces friction, and ensures smooth movement of all components. Regular lubrication not only extends the life of your snowblower but also enhances its performance when clearing snow.

Store in a Dry Location

When winter is over, it’s essential to store your snowblower properly. Choose a dry and sheltered storage area to protect the machine from moisture and extreme temperatures. Before storing, clean the snowblower thoroughly to remove any dirt or debris. Additionally, cover the snowblower with a protective tarp to shield it from dust and potential damage. Finally, make sure to keep the snowblower off the ground to prevent moisture buildup, which can lead to rust.

Perform Regular Maintenance

To keep your snowblower in optimal condition, following the manufacturer’s maintenance schedule is vital. Regularly inspect all parts and components for wear or damage. Replace any worn or damaged parts promptly to avoid further problems down the line. By performing regular maintenance, you can address potential issues before they become major problems, ensuring that your snowblower is always ready to tackle the winter weather.

Winterizing your snowblower is a necessary step to protect your investment and ensure its reliability. By following these steps and taking the time to perform regular maintenance, you can extend the life of your snowblower and enjoy hassle-free snow removal for years to come. So, don’t forget to drain the fuel, change the oil, clean the snowblower, inspect and replace spark plugs and belts, check the skid shoes and shear pins, lubricate moving parts, store in a dry location, and perform regular maintenance. With these winterization tips, you’ll be better prepared for the next snowfall, knowing that your snowblower is in excellent shape and ready to take on whatever winter throws your way.

What Do I Do If My Snowblower’s Pull Cord Snaps?

So, you wake up one winter morning to a foot of snow outside and the biting cold creeping through your windows. Determined to conquer the snowdrifts that stand between you and your morning commute, you head out to your trusty snowblower. But just as you grab the pull cord to start it up, disaster strikes – it snaps! Panic sets in, but fear not, because we’ve got you covered. In this article, we’ll walk you through step-by-step instructions on what to do if your snowblower’s pull cord decides to give up on you, leaving you stranded in a sea of snow.

What Do I Do If My Snowblowers Pull Cord Snaps?

Assess the Damage

When your snowblower’s pull cord snaps, the first step is to assess the damage. Take a close look at the pull cord to determine the extent of the breakage. Is it completely severed, or is there still a portion of the cord intact? Inspecting the pull cord will help you understand the type of repair or replacement required. Additionally, while inspecting the pull cord, take the time to check for any other damages such as loose screws, cracks, or worn-out parts. Identifying these issues early on will prevent further damage and ensure a more efficient repair process.

Replace the Snapped Pull Cord

If your snowblower’s pull cord has snapped, don’t worry! You can easily replace it with the right tools and materials. Before starting the replacement process, gather all the required tools and materials. This typically includes a screwdriver, pliers, a new pull cord, and any necessary replacement parts. Once you have everything ready, you can move on to removing the recoil assembly. Carefully detach the old, broken pull cord from the assembly and attach the new pull cord, making sure it is securely fastened. Finally, reinstall the recoil assembly, ensuring all the screws are tightened properly.

Seek Professional Help

If you’re unsure about repairing the pull cord yourself or if you don’t have the necessary tools and expertise, it is best to seek professional help. Contact a certified technician who specializes in snowblower repairs. They will have the knowledge and experience to handle the repair safely and ensure it is done correctly. Another option is to take your snowblower to a repair shop. This way, you can have peace of mind knowing that the repair will be performed by professionals who understand the intricacies of snowblower maintenance and can address any other potential issues that may arise.

What Do I Do If My Snowblowers Pull Cord Snaps?

Preventive Measures

To avoid encountering a snapped pull cord in the future, it is crucial to follow proper preventive measures. Regular maintenance checks play a vital role in keeping your snowblower in good condition. This includes inspecting and cleaning the pull cord, making sure it is not frayed or entangled. Additionally, proper handling and storage are essential to prevent any damage to the pull cord or other parts of the snowblower. Avoid pulling the cord forcefully or yanking it when starting the snowblower, as this can strain the cord and lead to breakage. Finally, store the snowblower in a clean, dry area to protect it from environmental factors that can cause wear and tear.

Replace the Entire Recoil Assembly

In some cases, replacing just the pull cord may not be sufficient, especially if the entire recoil assembly is damaged or worn out. To determine if the recoil assembly needs replacement, assess its condition. Look for signs of corrosion, cracks, or excessive wear. If you notice any of these issues, it’s time to obtain a new recoil assembly. Contact a reputable snowblower parts dealer or the manufacturer to find the exact replacement for your model. Once you have the new assembly, carefully remove the old one and install the new recoil assembly following the manufacturer’s instructions. This comprehensive replacement will ensure a more effective and long-lasting solution.

Use a Temporary Fix

If you find yourself in a situation where you need a quick solution for the snapped pull cord, there are temporary fixes you can try. One option is to knot the snapped ends of the cord together. This may provide a temporary hold, allowing you to start the snowblower and clear the snow. Keep in mind that this is only a temporary solution and may not be as reliable as a complete replacement. Another alternative is to use a grip or handlebar rope as a makeshift pull cord. While not as convenient or durable, it can serve as a short-term fix until a more permanent solution can be implemented.

Troubleshooting Tips

In addition to addressing the pull cord issue, it’s crucial to troubleshoot any other potential problems that may arise with your snowblower. Start by checking the spark plug, which is responsible for igniting the fuel and air mixture within the engine. Inspect it for signs of damage or wear, and replace if necessary. Next, give the carburetor a thorough inspection, ensuring it is clean and free from debris. A clogged carburetor can cause starting issues and hinder the snowblower’s performance. Finally, examine the fuel system, including the fuel filter and lines, for any blockages or leaks. Regularly troubleshooting these components will help keep your snowblower running smoothly.

Safety Precautions

When working on any repair or maintenance task involving a snowblower, it is crucial to prioritize safety. Before performing any repairs on the pull cord or other parts, always disconnect the spark plug to prevent accidental starting. Additionally, wearing protective gloves and eyewear is essential to shield your hands and eyes from any potential injuries. The recoil assembly and other components may have sharp edges or debris that could cause harm. Lastly, make sure to work in a well-ventilated area to avoid inhaling any harmful fumes. Taking these safety precautions will help ensure a safe and successful repair process.

Consider Upgrading to an Electric Start

If you frequently experience issues with the pull cord or want a more convenient option, it may be worth considering upgrading to an electric start system for your snowblower. Electric start systems eliminate the need for pulling a cord and instead rely on a push-button ignition. This feature can significantly simplify the starting process, especially on cold winter days. Additionally, electric start systems tend to be more reliable and require less physical effort. However, it’s important to note that upgrading to an electric start system may involve additional installation steps and costs. Consult the manufacturer or a certified technician for more information.

Learn How to Properly Use the Snowblower

To avoid potential issues with the pull cord or any other parts of your snowblower, it is essential to learn how to operate it correctly. Start by reading the user manual provided by the manufacturer. Familiarize yourself with the specific features, controls, and maintenance instructions for your model. Additionally, follow all safety guidelines outlined in the manual, including proper dress attire, recommended operating procedures, and maintenance schedules. By operating the snowblower correctly, you can minimize the risk of any damage occurring to the pull cord or other components while maximizing the machine’s performance.

In conclusion, a snapped pull cord may seem like a daunting repair, but with the right knowledge and tools, it can be addressed effectively. Whether you choose to replace the cord yourself, seek professional help, or consider alternative solutions, such as upgrading to an electric start system, taking care of a snowblower’s pull cord is essential for efficient operation. By implementing regular maintenance checks, following proper handling and storage practices, and operating the snowblower correctly, you can prevent future issues with the pull cord and enjoy hassle-free snow clearing experiences for years to come.

How Do I Know If My Snowblower Needs A New Drive Belt?

So, you’re geared up and ready to tackle the winter snow with your trusty snowblower. But before you venture into the chilly outdoors, there’s an important question you need to ask yourself: How do I know if my snowblower needs a new drive belt? Whether you’re a seasoned snowblower owner or a rookie trying to figure out the ropes, this article will equip you with some telltale signs to look out for that indicate it might be time for a new drive belt. So, grab a hot cup of cocoa, cozy up by the fire, and let’s dive into the world of snowblower maintenance!

Signs That Indicate a Faulty Drive Belt

When it comes to maintaining your snowblower, one crucial component to keep an eye on is the drive belt. The drive belt is responsible for transferring power from the engine to the wheels or auger, allowing your snowblower to effectively remove snow. Over time, the drive belt can wear out or become damaged, resulting in various signs that indicate it needs replacing. By knowing what to look out for, you can catch any issues early on and prevent further damage or breakdowns.

How Do I Know If My Snowblower Needs A New Drive Belt?

Lack of Traction

One of the clearest signs that your drive belt may be faulty is a lack of traction when operating your snowblower. If your wheels struggle to gain traction even on high gear, it’s a clear indication that the drive belt isn’t effectively transferring power to the wheels. As a result, your snowblower may have difficulty moving forward, especially when faced with challenging terrain or heavy snow. This lack of traction can make snow removal a frustrating and time-consuming task.

Excessive Vibration

Another sign of a faulty drive belt is excessive vibration during operation. If you notice that your snowblower vibrates abnormally or that the handles shake excessively, it could be an indication of a worn or damaged drive belt. Vibrations can not only be uncomfortable to handle, but they can also lead to other parts of your snowblower becoming damaged or loosened over time. Addressing this issue promptly is important to prevent further damage and ensure smooth operation.

Difficulty in Changing Gears

If you find it increasingly challenging to change gears while operating your snowblower, it could be a sign of a worn-out drive belt. Gearing up or down may become more difficult, and you may notice that the shift lever gets stuck or moves roughly. This can greatly impact your ability to maneuver the snowblower efficiently, resulting in frustration and potentially even damage to other components of the machine. If you experience difficulty in changing gears, it’s essential to address the issue promptly to avoid further complications.

How Do I Know If My Snowblower Needs A New Drive Belt?

Strange Noises

Unusual noises are often an indicator that something is wrong with your snowblower, and the drive belt is no exception. If you hear squeaking or squealing sounds coming from your snowblower, it could be a sign that the drive belt is worn or improperly aligned. Additionally, grinding noises may imply that the belt is rubbing against other parts, indicating a potential issue with the tension or alignment. Popping or clicking sounds may also indicate a problem with the drive belt. Paying attention to these noises is crucial in identifying and resolving drive belt issues early on.

Reduced Throwing Distance

Have you noticed that your snow is no longer being ejected as far as it once was? A reduced throwing distance can be a clear indication that your drive belt is underperforming. When the drive belt is worn or damaged, it may not be able to effectively engage the auger, resulting in a decrease in throwing distance. This means that the snow may fall closer to the snowblower, limiting your ability to clear a larger area efficiently. If you notice a significant decrease in throwing distance, it’s time to inspect and potentially replace the drive belt.

Burning Smell

While operating your snowblower, if you notice an unpleasant burning smell, it’s important to investigate the source. A burning smell can often indicate that the drive belt is overheating or grinding against other components. This can be a serious issue that requires immediate attention to prevent further damage or potential safety hazards. If you detect a burning rubber smell while operating your snowblower, it’s recommended to stop using it until the problem is resolved.

Belt Slippage

Belt slippage is a common problem associated with a faulty drive belt. If your belt slips off the pulleys or if you notice the belt skipping or jumping while engaged, it’s a clear indication that the drive belt is not functioning properly. Belt slippage can greatly impact the performance of your snowblower, leading to reduced power output and compromised snow removal capabilities. Addressing this issue promptly is crucial to ensure the efficient operation of your snowblower and prevent further damage.

Physical Inspection

Performing a physical inspection of your drive belt can provide valuable insights into its condition. Start by checking for visible signs of wear and tear on the belt’s surface. Look for cracks, fraying, or any other obvious damage that may affect its performance. Additionally, measure the belt’s width and thickness to ensure it is within the manufacturer’s specifications. A belt that is too worn or incorrect in size may not perform optimally, reducing the efficiency of your snowblower. Finally, inspect the belt for signs of glazing or shining, which can indicate overheating or excessive friction. A thorough physical inspection can help you identify any issues with the drive belt and take appropriate action.

Inadequate Power

If you notice a significant decrease in power output from your snowblower, it could be a sign of a faulty drive belt. The drive belt plays a crucial role in transferring power from the engine to the wheels or auger. When the belt is worn or damaged, it may not be able to effectively transfer the power, resulting in inadequate performance. If you find that your snowblower lacks the power it once had, it’s worth considering the drive belt as a potential culprit.

Age of the Drive Belt

Lastly, it’s essential to consider the age of the drive belt when evaluating its condition. Drive belts have a finite lifespan and will eventually wear out, losing their effectiveness. While the lifespan can vary depending on factors such as usage, environmental conditions, and maintenance, it’s generally recommended to consider replacing the drive belt if it is nearing the end of its expected lifespan. Regularly inspecting and monitoring the age of your drive belt can help you proactively address any issues before they become more severe.

In conclusion, keeping an eye out for signs that indicate a faulty drive belt is essential for the smooth operation of your snowblower. Lack of traction, excessive vibration, difficulty in changing gears, strange noises, reduced throwing distance, burning smell, belt slippage, physical inspection, inadequate power, and age of the drive belt are all key indicators that your drive belt may need replacing. By promptly addressing any issues with the drive belt, you can ensure optimal performance and maintain the efficiency of your snowblower for years to come.

How Do I Deal With A Leaking Snowblower?

So you wake up one morning to find that your trusty snowblower is leaving a trail of oil stains on your garage floor. Frustrating, isn’t it? No need to panic, though! In this article, we’ll walk you through some simple steps to help you deal with a leaking snowblower and get it back to its reliable self in no time. Whether it’s a small drip or a major leakage, we’ve got you covered with practical tips and solutions to keep your snowblower running smoothly and your garage oil-free.

How Do I Deal With A Leaking Snowblower?

Inspecting the Leaking Snowblower

If you find yourself dealing with a leaking snowblower, the first step is to identify the source of the leak. This will help you determine the best course of action to fix the issue. Leaks can come from various components, such as the fuel system, oil system, coolant system, or even damaged gaskets or seals. By inspecting each of these areas, you can narrow down the cause of the leak and proceed with the necessary repairs.

Identify the source of the leak

To identify the source of the leak, start by examining the snowblower closely. Look for any visible signs of fluid pooling or dripping. Take note of the color and consistency of the leaking fluid, as this can provide clues about which system it may be coming from. Common fluids you might find leaking from a snowblower include fuel, oil, or coolant.

Check for gasket or seal damage

Gaskets and seals are essential components of a snowblower’s engine and various systems. Over time, they can become damaged or worn-out, leading to leaks. Inspect these gaskets and seals carefully for any signs of damage or deterioration. If you notice any cracks, tears, or breaks, it’s important to address these issues promptly to prevent further leakage.

Inspect the fuel system

The fuel system of a snowblower consists of components such as fuel lines, fittings, and the carburetor. Start by checking all the fuel fittings to ensure they are tight and properly sealed. If you find any loose fittings, tighten them securely. Next, inspect the fuel lines for any signs of damage or leaks. If you notice any cracks or leaks, it is recommended to replace the damaged fuel lines. Additionally, the fuel tank cap should be cleaned regularly or replaced if it is damaged or not sealing properly. Lastly, consider checking and, if needed, repairing or replacing the carburetor, as this can also be a potential source of fuel leaks.

Examine the oil system

The oil system of a snowblower is responsible for lubricating the engine and its various moving parts. Oil leaks can occur due to damaged or loose components. Begin by checking the oil drain plug to ensure it is tightened securely. If it is loose, tighten it carefully. Additionally, inspect the oil filter for any signs of damage or leaks. If you notice any issues, it is advisable to replace the damaged or worn-out oil filter promptly. Furthermore, gaskets or seals within the oil system may become worn-out over time, leading to leaks. It is important to inspect these gaskets and seals and replace them if needed. If you come across any loose fittings, using thread seal tape or thread locking compound can help prevent leaks.

Look for coolant leaks

Coolant leaks are another common issue with snowblowers, especially in colder climates. Coolant is responsible for regulating the engine’s temperature and preventing it from overheating. Inspect the coolant system by first checking the coolant level. If it is lower than the recommended level, consider topping it up. Next, examine the radiator and hoses for any visible signs of leaks or damage. If you notice any cracks, leaks, or worn-out components, it is crucial to replace them promptly to prevent coolant leaks.

Fixing Fuel System Leaks

If you have determined that the leak is originating from the fuel system, there are several steps you can take to fix the issue and ensure the snowblower operates smoothly.

Tighten loose fuel fittings

Start by carefully inspecting all the fuel fittings in the snowblower. If you notice any loose fittings, use a suitable wrench or tool to tighten them securely. It is important not to overtighten them, as this can cause damage. Finding the appropriate balance between snug and secure is key.

Replace damaged fuel lines

If you find any fuel lines that are cracked, leaking, or damaged in any way, it is crucial to replace them. Fuel lines are essential for transporting gasoline from the tank to the engine. Before replacing the damaged fuel lines, ensure you have the correct replacement parts and follow the manufacturer’s instructions to ensure a proper fit.

Clean or replace the fuel tank cap

The fuel tank cap plays a critical role in keeping the fuel system sealed and preventing leaks. If the fuel tank cap is not sealing properly or is damaged, it should be cleaned thoroughly or replaced. This can help prevent any fuel from spilling or leaking during operation.

Repair or replace the carburetor

The carburetor is a vital component of the fuel system that mixes air and fuel to ensure proper combustion in the engine. If you suspect that the carburetor is the source of the leak, it is advisable to have it inspected by a professional or authorized service center. They can diagnose any issues and either repair or replace the carburetor as needed.

Stopping Oil Leaks

Oil leaks can be messy and harmful to the snowblower’s engine if not addressed promptly. Here are some steps to help you stop oil leaks and maintain the oil system:

Check the oil drain plug

Begin by inspecting the oil drain plug located on the bottom of the engine. Ensure it is tightened securely. Over time, vibrations and engine operation can cause the plug to become loose, leading to oil leaks. If you find the oil drain plug loose, tighten it carefully to prevent any further leakage.

Inspect the oil filter

The oil filter is responsible for removing impurities and contaminants from the engine oil. Inspect the oil filter regularly for any signs of damage or leaks. If you notice any leaks, it is crucial to replace the oil filter promptly to prevent oil from seeping out.

Replace damaged or worn-out gaskets or seals

Gaskets and seals play a crucial role in preventing oil leaks. Over time, these components can become worn-out or damaged, leading to leakage. Inspect the gaskets and seals within the oil system carefully. If you notice any signs of deterioration or damage, it is important to replace them promptly. This will help ensure a proper seal and prevent oil leaks.

Use thread seal tape or thread locking compound on loose fittings

If you come across any loose fittings within the oil system, consider using thread seal tape or thread locking compound to prevent leaks. These products are designed to provide an additional layer of sealing and help secure fittings, preventing oil leaks due to loose connections.

How Do I Deal With A Leaking Snowblower?

Addressing Coolant Leaks

Coolant leaks are a concern, especially during cold weather when the snowblower’s engine needs proper cooling. To address coolant leaks, follow these steps:

Check the coolant level

Start by checking the coolant level in the snowblower’s coolant reservoir. If the level is lower than the recommended amount, consider topping it up. It is essential to use the correct coolant mixture as specified by the manufacturer to ensure optimal performance.

Inspect the radiator and hoses

Inspect the radiator carefully for any signs of leaks, cracks, or damage. Additionally, check the hoses connected to the radiator for any visible damage or leaks. If you notice any issues, including worn-out components or leaks, it is crucial to replace them promptly to prevent coolant leaks.

Replace damaged or worn-out coolant system components

If you encounter any damaged or worn-out components within the coolant system, such as the radiator or hoses, it is important to replace them promptly. These components play a vital role in maintaining the engine’s temperature and preventing overheating. Proper functioning of the coolant system is crucial to prevent coolant leaks and ensure the snowblower operates effectively.

Repairing Gasket or Seal Damage

Gaskets and seals are critical components that prevent leaks in various systems of the snowblower. If you identify any damaged gaskets or seals during your inspection, follow these steps to repair them:

Identify the damaged gasket or seal

Carefully locate the damaged gasket or seal. It may be necessary to disassemble certain components or systems in order to access the damaged gasket or seal.

Clean the area surrounding the damaged gasket or seal

Before applying any adhesive or sealant, it is crucial to clean the surrounding area thoroughly. Use an appropriate cleaning solution and ensure the area is free from any debris, dirt, or oil. This will help create a clean and smooth surface for the adhesive to bond effectively.

Apply a gasket or sealant adhesive

Once the area is clean, apply a suitable gasket or sealant adhesive to the damaged gasket or seal. Follow the manufacturer’s instructions for the specific adhesive you are using. Apply the adhesive evenly and ensure complete coverage. This will help create a strong and reliable seal.

Allow the adhesive to cure

After applying the adhesive, allow it sufficient time to cure. Follow the manufacturer’s instructions regarding curing time. It is important to avoid any stress or pressure on the repaired gasket or seal during the curing process. Once the adhesive has cured, reassemble the components and systems, and perform a thorough check to ensure the leak is resolved.

Preventing Common Leaks

Taking preventive measures can significantly reduce the chances of encountering leaks in your snowblower. Here are some tips to help you prevent common leaks and maintain a reliable machine:

Follow proper maintenance practices

Regularly follow the manufacturer’s recommended maintenance schedule for your snowblower. This includes routine inspections, oil changes, filter replacements, and other necessary maintenance tasks. Proper maintenance can help identify potential issues before they turn into major leaks or failures.

Store the snowblower properly during the offseason

When not in use, it is essential to store your snowblower properly. Choose a dry and secure location to prevent exposure to moisture and ensure the machine is protected from the elements. Proper storage can help prevent rust, corrosion, and other issues that may lead to leaks.

Use the correct fuel mixture

Using the right fuel mixture is crucial for the snowblower’s engine performance and longevity. Follow the manufacturer’s recommendations regarding the appropriate fuel type and fuel-to-oil ratio. Using the wrong fuel mixture can lead to engine issues, including leaks.

Avoid overfilling the oil or coolant

When adding oil or coolant to your snowblower, it is important to avoid overfilling. Overfilling can cause excess pressure within the systems, leading to leaks. Follow the recommended fill levels specified by the manufacturer to prevent this issue.

Seeking Professional Help

If you are unsure about how to address the leak or if you encounter a complex issue, it may be best to seek professional help. Here are a couple of options to consider:

Consult the snowblower’s manual

The snowblower’s manual is an invaluable resource when it comes to understanding its components, systems, and maintenance procedures. Consult the manual for guidance on addressing specific leaks or for troubleshooting steps. It will provide you with accurate information tailored to your snowblower’s make and model.

Contact the manufacturer or authorized service center

If you find yourself unable to resolve the leak or if it requires specialized tools or expertise, it is recommended to contact the manufacturer or an authorized service center for assistance. They have the knowledge and experience to diagnose and repair complex issues properly. Getting professional help can save you time, effort, and potential mistakes.

Maintaining the Snowblower

Regular maintenance is crucial for the longevity and performance of your snowblower. Here are some key maintenance practices to keep in mind:

Regularly inspect and clean the snowblower

Inspect your snowblower regularly, looking for any signs of wear, damage, or leaks. Clean the machine thoroughly, removing any debris or buildup from the various components. This will ensure that the snowblower operates smoothly and minimize the chances of leaks occurring.

Keep the fuel and oil systems well-maintained

Maintaining the fuel and oil systems is essential for avoiding leaks. Regularly check the fuel and oil levels, ensuring they are at the correct levels. Perform routine oil changes and filter replacements as recommended. Properly maintain and store fuel to prevent contamination. These practices will help keep these systems in optimal condition, reducing the risk of leaks.

Check for worn-out parts and replace them

Over time, certain parts of your snowblower may become worn-out or damaged, leading to leaks. Regularly inspect all components, including belts, hoses, filters, and seals, for signs of wear. If you notice any parts that are past their prime, it is important to replace them promptly. This proactive approach will help prevent leaks and ensure the snowblower operates efficiently.

Safety Precautions

When dealing with a leaking snowblower or performing any maintenance or repairs, it is essential to prioritize safety. Keep the following precautions in mind:

Always disconnect the spark plug wire

Before working on the snowblower, always disconnect the spark plug wire to prevent accidental starting. This will ensure your safety while inspecting, diagnosing, or fixing any leaks.

Wear protective gloves and safety glasses

Protective gloves and safety glasses are crucial when working on a snowblower. Gloves will protect your hands from sharp edges and potential chemical exposure, while safety glasses will shield your eyes from debris or splashing fluids.

Work in a well-ventilated area

Whether you are working indoors or outdoors, ensure there is proper ventilation. Exhaust fumes, fuel vapors, or other chemicals can pose health risks if inhaled in closed or poorly ventilated areas. Open windows, use fans or ventilation systems, and prioritize your safety.

Avoid smoking or working near open flames

Working with flammable materials, such as fuel or oil, poses a fire hazard. It is crucial to avoid smoking or working near open flames when inspecting, repairing, or handling the snowblower. Remove any potential ignition sources from the work area to reduce the risk of accidents.

Conclusion

Dealing with a leaking snowblower can be a frustrating experience, but by following the steps outlined in this article, you can identify the source of the leak and address it effectively. Regular inspection, proper maintenance practices, and taking necessary safety precautions are key to preventing and resolving leaks. However, in case of complex issues or if you are unsure about the repair process, do not hesitate to seek professional help. Remember, by properly maintaining your snowblower, you can ensure its optimal performance, longevity, and a leak-free operation season after season.

What Type Of Spark Plug Does My Snowblower Need?

So, you’ve just purchased a brand new snowblower, and now you’re faced with the daunting task of figuring out what type of spark plug it needs. With so many options available on the market, it can be overwhelming to determine the correct one for your specific machine. Don’t worry, though, because in this article, we’ll break down the factors you need to consider when choosing a spark plug for your snowblower. From the size and heat range to the electrode material, we’ve got you covered. So, let’s cut through the confusion and ensure your snowblower keeps running smoothly all winter long.

Why is the spark plug important in a snowblower?

Ignition system overview

The ignition system is a crucial component of a snowblower, as it is responsible for starting the engine and generating the spark needed to ignite the fuel-air mixture. The spark plug plays a vital role in this process by creating the electrical discharge required for combustion to occur. Without a functioning spark plug, the engine would fail to start or run poorly, resulting in inefficient performance, decreased power, and potential damage to other engine components.

The role of the spark plug

The spark plug is a small but critical part of the ignition system in a snowblower. Its primary role is to deliver an electric current from the ignition coil to the combustion chamber, where it ignites the fuel-air mixture. When the spark plug receives the electrical charge, it creates a spark across the gap between its electrodes. This spark ignites the compressed mixture, initiating the combustion process and producing the power needed to operate the snowblower.

Signs of a faulty spark plug

A faulty spark plug can lead to several noticeable symptoms in a snowblower. If you experience difficulty starting the engine, such as multiple attempts or a slow cranking speed, it may indicate a problem with the spark plug. Misfiring or irregular engine operation, including rough idling or poor acceleration, can also be attributed to a faulty spark plug. Additionally, decreased fuel efficiency, increased exhaust emissions, and engine stalling are commonly associated with a spark plug that needs to be replaced. It is important to address these signs promptly to ensure optimal snowblower performance.

Understanding spark plug basics

Composition of a spark plug

Spark plugs consist of several key components, including the center electrode, ground electrode, insulator, shell, and metal housing. The center electrode, made of a durable conductive material such as copper or platinum, extends into the combustion chamber to create the spark. The ground electrode, typically positioned at an angle to expose it to the fuel-air mixture, helps guide the spark and facilitate combustion. The insulator surrounds the center electrode and provides electrical insulation. The shell, often made of steel, connects the spark plug to the engine. Finally, the metal housing protects the internal components and ensures proper heat dissipation.

Heat range

The heat range of a spark plug refers to its ability to dissipate heat generated during combustion. It is a crucial factor in determining the spark plug’s performance and longevity. The heat range is determined by the length and thickness of the insulator, as well as the materials used. A hot spark plug has a longer insulator and transfers less heat from the combustion chamber to the spark plug body. In contrast, a cold spark plug has a shorter insulator and dissipates more heat. It is essential to select the appropriate heat range for your snowblower to prevent overheating or fouling of the spark plug.

Gap size

The gap size of a spark plug refers to the distance between the center electrode and the ground electrode. It plays a critical role in determining the spark plug’s performance and the efficiency of combustion. The ideal gap size for a snowblower spark plug is typically specified by the manufacturer and can vary depending on the engine’s design and specifications. A gap that is too wide can cause misfires and poor combustion, while a gap that is too narrow can lead to difficulty in ignition or increased wear on the spark plug. It is important to check and adjust the gap size when replacing a spark plug.

Thread size

The thread size of a spark plug refers to the diameter and pitch of the threads on the spark plug’s shell. It is essential to ensure that the new spark plug has the correct thread size and is compatible with your snowblower’s engine. Using the wrong thread size can result in improper installation, which may lead to damage to the spark plug or the engine itself. It is crucial to consult the snowblower’s manual or seek professional advice to determine the appropriate thread size for your specific snowblower model.

Types of spark plugs for snowblowers

Standard spark plugs

Standard spark plugs, also known as non-resistor spark plugs, are the most basic and commonly used type. They provide a reliable and cost-effective option for most snowblowers. Standard spark plugs typically have a solid copper core, which offers excellent heat dissipation and reliable ignition. However, they may be more prone to fouling and may not provide long-term durability compared to other spark plug types.

Resistor spark plugs

Resistor spark plugs, as the name suggests, contain a built-in resistor that reduces electrical noise and interference. This makes them suitable for use in snowblowers with electronic ignition systems. The resistor helps prevent radio frequency interference that can interfere with modern electronic components. Resistor spark plugs are generally designed to be more durable and resistant to fouling than standard spark plugs, making them a suitable choice for snowblowers that require reliable performance in various conditions.

Platinum spark plugs

Platinum spark plugs feature a platinum center electrode, which provides several advantages over traditional copper or nickel alloy electrodes. Platinum is more resistant to wear and corrosion, offering improved longevity and consistent performance. These spark plugs tend to have a longer lifespan and provide more efficient combustion, resulting in better fuel economy and reduced emissions. While platinum spark plugs may be more expensive than standard or resistor spark plugs, they can be a worthwhile investment for individuals seeking enhanced snowblower performance.

Iridium spark plugs

Iridium spark plugs are renowned for their exceptional durability, longevity, and high performance. They feature a center electrode made of iridium, which has a higher melting point and is extremely resistant to erosion. Iridium spark plugs offer superior ignitability and reduce the likelihood of misfires, resulting in smoother engine operation and improved overall efficiency. While they are typically the most expensive of the spark plug types, iridium spark plugs are favored by those who prioritize longevity and optimal performance in their snowblower.

Choosing the right spark plug for your snowblower

Manufacturer’s recommendations

To ensure optimal performance and longevity of your snowblower, it is advisable to consult the manufacturer’s recommendations for spark plug selection. The manufacturer’s specifications will typically indicate the specific spark plug type, heat range, gap size, and thread size suitable for your snowblower model. Following these recommendations will help ensure compatibility and enable the spark plug to perform optimally under the intended operating conditions.

Consulting the snowblower’s manual

The snowblower’s manual is a valuable resource when it comes to selecting the right spark plug. It often contains detailed information about the spark plug requirements, including the specific type and specifications recommended by the manufacturer. The manual may also provide step-by-step instructions on spark plug replacement and maintenance, allowing you to properly care for and extend the lifespan of your snowblower’s spark plug.

Considering engine specifications

In certain cases, the engine specifications may influence the choice of spark plug for your snowblower. Engines with modified components, such as high-performance upgrades or alternative fuel systems, may require specific spark plug characteristics to optimize combustion and ensure reliable performance. If you have made modifications to your snowblower’s engine, it is essential to consult with a knowledgeable professional or refer to specialized resources to determine the most suitable spark plug for your specific setup.

Step-by-step guide to replacing snowblower spark plug

Gathering necessary tools

Before replacing the spark plug, gather the necessary tools. These typically include a socket wrench or spark plug socket, a spark plug gap gauge, and a wire brush or spark plug cleaner. It is essential to use the correct socket size to avoid damaging the spark plug or the engine.

Preparing the snowblower

Ensure that the snowblower is turned off and remove the ignition key to prevent accidental starting. Allow the engine to cool down if it has been recently in use to avoid the risk of burns. Locate the spark plug, which is typically positioned on the top or side of the engine cylinder.

Removing the old spark plug

Using a socket wrench or spark plug socket, loosen and remove the old spark plug by turning it counterclockwise. Take care not to damage the spark plug or drop any debris into the spark plug well. Inspect the old spark plug for signs of fouling, such as carbon deposits or worn electrodes, which may indicate performance issues.

Inspecting and cleaning

Examine the new spark plug to ensure it matches the manufacturer’s specifications and is free of any visible defects. With the spark plug gap gauge, check the gap size between the center electrode and the ground electrode. Adjust the gap if necessary using the appropriate tool. Cleaning the spark plug threads with a wire brush or spark plug cleaner can help remove any dirt or debris that may affect the installation.

Installing the new spark plug

Carefully thread the new spark plug into the spark plug well by hand, ensuring it is aligned correctly. Use the socket wrench or spark plug socket to tighten the spark plug snugly, but avoid over-tightening, which can cause damage. Reinstall any protective covers or components that were removed during the process. Finally, reconnect the spark plug wire to the spark plug, ensuring a secure connection.

Maintenance tips for snowblower spark plugs

Regular inspection and cleaning

To maintain optimal performance, it is important to regularly inspect and clean the spark plug. Periodically remove the spark plug and visually inspect it for any signs of fouling or damage. Use a wire brush or spark plug cleaner to gently remove any deposits or debris that may have accumulated on the electrodes. Proper cleaning helps ensure reliable ignition and extends the life of the spark plug.

Replacing spark plugs

While spark plugs are designed to be durable, they will eventually wear out and require replacement. The frequency of spark plug replacement will vary depending on factors such as the snowblower’s usage, operating conditions, and the type of spark plug used. As a general guideline, it is recommended to replace the spark plug every one to two years or as specified by the manufacturer. Regularly inspecting the spark plug can help determine if replacement is necessary.

Using an anti-seize compound

When installing a new spark plug, applying a small amount of anti-seize compound to the spark plug’s threads can help prevent seizing or sticking. The anti-seize compound acts as a lubricant and prevents the spark plug from becoming stuck in the engine. This can be particularly beneficial when replacing spark plugs in older snowblowers or in areas with harsh environmental conditions.

Avoiding over-tightening

When installing a spark plug, it is important to avoid over-tightening. Over-tightening can cause damage to the spark plug or the engine’s threads, potentially leading to costly repairs. Follow the manufacturer’s recommended torque specifications or tighten the spark plug snugly by hand, ensuring it is securely in place without excessive force.

Frequently asked questions about snowblower spark plugs

How often should I replace the spark plug?

The frequency of spark plug replacement depends on various factors such as the snowblower’s usage, operating conditions, and the type of spark plug used. As a general guideline, it is recommended to replace the spark plug every one to two years or as specified by the manufacturer. However, it is important to regularly inspect the spark plug and replace it if signs of fouling, wear, or damage are apparent.

What happens if I use the wrong spark plug?

Using the wrong spark plug can result in poor engine performance, difficulty starting, misfires, increased fuel consumption, or even engine damage. Each snowblower is designed to work optimally with specific spark plug characteristics, including heat range, gap size, and thread size. It is crucial to consult the manufacturer’s recommendations or the snowblower manual to ensure the correct spark plug is selected and installed for your specific snowblower model.

Can I clean and reuse a spark plug?

It is possible to clean a spark plug and reuse it under certain conditions. If the spark plug is only lightly fouled or has minimal wear, cleaning the electrodes with a wire brush or spark plug cleaner can restore its performance. However, heavily fouled or damaged spark plugs may not be salvaged through cleaning alone and should be replaced. Regular inspection and cleaning can help determine if a spark plug is suitable for reuse.

Can colder spark plugs improve performance?

In certain cases, using colder spark plugs may improve engine performance, especially in high-performance or modified snowblowers. Colder spark plugs have a shorter insulator, allowing them to dissipate heat more effectively. This can help prevent pre-ignition and detonation in engines operating under extreme conditions, such as high RPM or increased compression. However, it is important to consult with a knowledgeable professional or refer to specialized resources when considering the use of colder spark plugs, as their suitability depends on the specific snowblower setup and intended use.

Conclusion

The spark plug plays a vital role in the ignition system of a snowblower, ensuring that the engine starts and operates efficiently. Understanding the basics of spark plug composition, heat range, gap size, and thread size is important in selecting the right spark plug for your snowblower. Following manufacturer recommendations, consulting the snowblower manual, and considering engine specifications are essential steps in choosing the most suitable spark plug. By maintaining and replacing spark plugs when necessary, you can ensure optimal snowblower performance and prolong the lifespan of your machine.