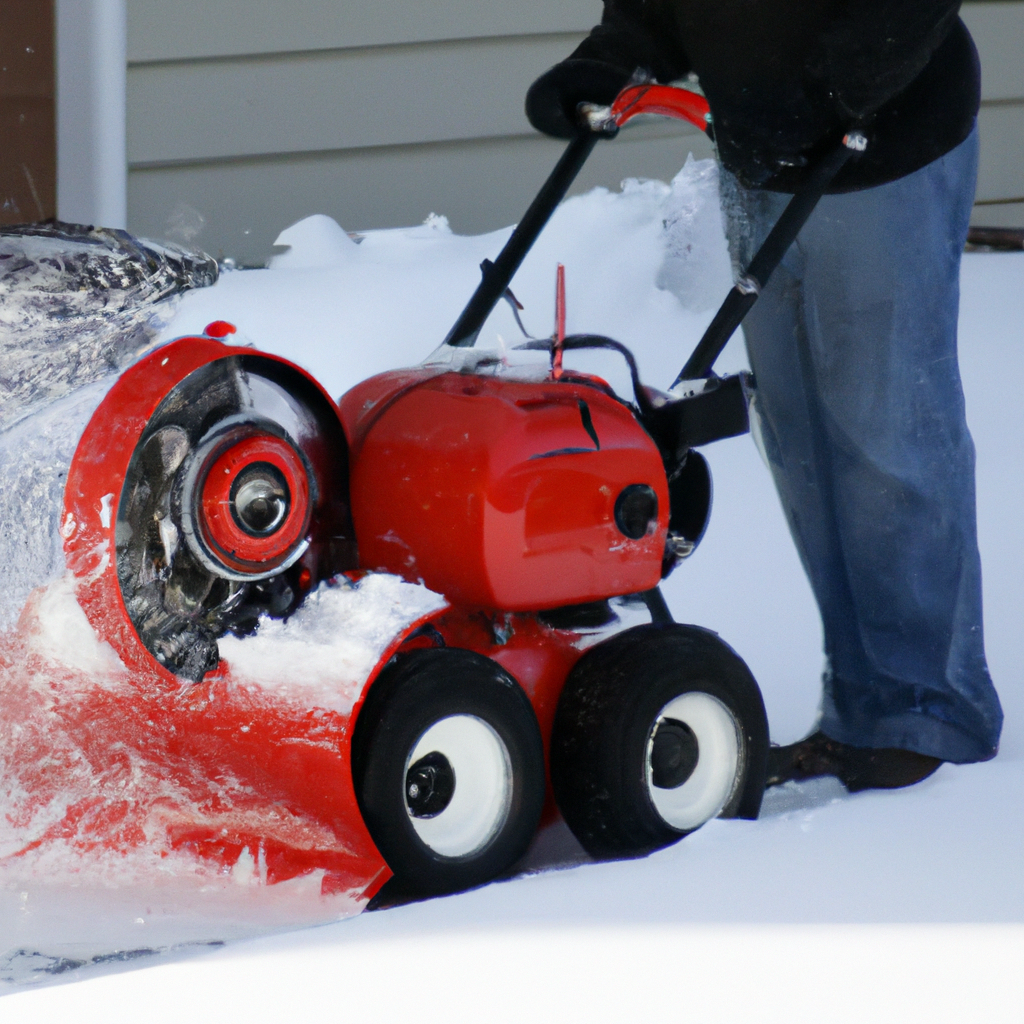
So, you’ve just purchased a shiny new snowblower to tackle the winter weather that’s coming your way. Now, you’re faced with the question: can you assemble it yourself or should you call in the professionals? Well, the good news is that assembling a snowblower is typically not rocket science, but it does require some mechanical know-how and a basic understanding of tools. In this article, we’ll explore whether you can undertake this task solo or if it’s best to seek professional assistance. So, let’s get started and figure out if you’ll be able to conquer the assembly process on your own or if you’ll need a helping hand.
Benefits of Assembling a Snowblower Yourself
Cost savings
One of the primary benefits of assembling a snowblower yourself is the potential for cost savings. When you purchase a snowblower, typically it comes partially assembled, and if you choose to assemble it yourself, you can avoid the additional cost of professional assembly fees. This can be particularly beneficial if you are on a tight budget or simply prefer to save money whenever possible.
Improved understanding of equipment
By assembling a snowblower yourself, you gain a better understanding of how the equipment works. You get to familiarize yourself with each part and component, which can come in handy when it comes to maintenance and troubleshooting in the future. When you have a clear understanding of how your snowblower operates, it becomes easier to identify and fix any issues that may arise.
Sense of accomplishment
There is a sense of pride and accomplishment that comes with successfully assembling a complex machine like a snowblower. It provides a real-world opportunity to put your mechanical skills to the test and see the fruits of your labor. The satisfaction of knowing that you built something functional with your own two hands can be incredibly rewarding.
Considerations Before Assembling a Snowblower Yourself
Level of mechanical expertise
Before deciding to assemble a snowblower yourself, it is crucial to assess your level of mechanical expertise. Assembling a snowblower requires some basic knowledge of tools and mechanics. If you are unfamiliar with these aspects, you may find it challenging to properly assemble the snowblower. It’s important to gauge your comfort level and determine if you have the necessary skills or if professional help may be more suitable.
Availability of tools
Assembling a snowblower requires specific tools to ensure a proper and secure assembly. Before embarking on the project, it is essential to ensure that you have all the necessary tools readily available. Some common tools required for snowblower assembly include a socket set, wrenches, screwdrivers, pliers, hex keys, safety goggles, and gloves. If you do not possess these tools, you may need to invest in them or consider hiring a professional who already has the required equipment.
Time commitment
Assembling a snowblower can be a time-consuming process, especially if you are doing it for the first time. It’s important to consider how much time you are willing to dedicate to the assembly. If you have a busy schedule or limited free time, it might be more convenient to have a professional handle the assembly. However, if you enjoy hands-on projects and have the time to spare, assembling the snowblower yourself can be a worthwhile endeavor.

Required Tools for Snowblower Assembly
To ensure a successful assembly, it is crucial to have the necessary tools readily available. Here are the tools you will typically need for snowblower assembly:
Socket set
A socket set is essential for securing nuts and bolts during the assembly process. It allows for a tight and secure fit, ensuring that the snowblower remains sturdy during operation.
Wrenches
Wrenches are another vital tool for snowblower assembly. They come in various sizes and are used to tighten and loosen different components, such as bolts and nuts.
Screwdrivers
Screwdrivers are necessary for driving screws into place and securing various parts of the snowblower. It is advisable to have a set of both flathead and Phillips head screwdrivers, as different screws may require different types.
Pliers
Pliers are versatile tools that come in handy during snowblower assembly. They can be used for gripping, pulling, and twisting components, ensuring a secure and proper fit.
Hex keys
Hex keys, also known as Allen wrenches, are frequently used in snowblower assembly. They are typically used for tightening hexagonal bolts and screws.
Safety goggles
Safety goggles are essential for protecting your eyes during assembly. They shield your eyes from any flying debris and ensure you can work safely without the risk of eye injuries.
Gloves
Wearing gloves during snowblower assembly is crucial for hand protection. They provide a barrier between your hands and any sharp or rough surfaces, reducing the risk of cuts and bruises.
Step-by-Step Guide to Assembling a Snowblower
Once you have gathered all the necessary tools and considered the factors mentioned above, you can begin the process of assembling your snowblower. This step-by-step guide will help you navigate through the assembly process effectively:
Read the manual
Before you start assembling your snowblower, it is vital to thoroughly read the manufacturer’s manual. The manual provides essential instructions specific to your snowblower model and will guide you through the assembly process.
Prepare the work area
Clear a spacious and well-lit area for assembling your snowblower. Ensure that you have enough room to lay out the parts and move around comfortably. Remove any obstacles or hazards that may hinder the assembly process.
Identify all parts
Take inventory of all the parts included in the snowblower assembly kit. Familiarize yourself with each component and organize them in a logical manner. This will help ensure that you have all the necessary parts and make the assembly process more manageable.
Attach the handlebars
Position the handlebars on the designated attachment points and use the appropriate tools to secure them. Follow the manufacturer’s instructions closely to ensure proper alignment and stability.
Install the chute assembly
Attach the chute assembly to the designated mounting location on the snowblower. Use the provided bolts and nuts to secure it firmly in place. Double-check for proper alignment and adjust as needed.
Mount the engine
Carefully position the engine onto the snowblower frame, lining up the mounting holes with the corresponding slots. Use the recommended tools to secure the engine, ensuring it is tightly fastened to prevent any vibrations during operation.
Connect the controls
Follow the manufacturer’s instructions to connect the controls, such as the throttle and chute control levers, to the appropriate connections on the snowblower. Ensure that all connections are secure and functioning properly.
Check for proper lubrication
Before testing the snowblower, make sure all moving parts are properly lubricated as indicated in the manual. Lubrication is crucial for smooth operation and to prevent premature wear and tear.
Test the snowblower
Once the assembly is complete and lubrication is done, start the snowblower and test its functionality. Pay close attention to the operation of the engine, controls, and moving parts to ensure everything is working correctly. Adjustments or fine-tuning may be necessary before using the snowblower in actual snow conditions.

Common Challenges Faced When Assembling a Snowblower
Misaligned parts
During the snowblower assembly process, misaligned parts can pose a significant challenge. Parts that are not aligned properly may result in difficulty securing them, affecting the overall stability and functionality of the snowblower. Careful attention and patience are required to ensure all parts are aligned correctly according to the manufacturer’s instructions.
Complex engine installation
Mounting the engine can be a complex step in snowblower assembly, especially for those with limited mechanical experience. Aligning the engine with the frame and properly securing it may require careful adjustments and attention to detail. It is crucial to follow the manufacturer’s instructions precisely to ensure a safe and efficient engine installation.
Difficult control connections
Connecting the controls, such as the throttle and chute control levers, can sometimes be challenging. The cables and wires need to be attached correctly, and any misalignment or improper connections can affect the functionality of these controls. It is essential to take your time and refer to the instructions or seek professional help if needed.
Reasons to Seek Professional Help
Limited mechanical knowledge
If you have limited mechanical knowledge or experience, it may be wise to seek professional help. Assembling a snowblower requires a certain level of mechanical expertise to ensure proper assembly and operation. Professional assemblers have the necessary knowledge and skills to complete the assembly accurately and efficiently.
Lack of required tools
Assembling a snowblower often requires specialized tools that you may not have readily available. Professional assemblers typically come equipped with the necessary tools and equipment to handle the job. By hiring a professional, you avoid the need to purchase or borrow tools, saving you time and money.
Time constraints
If you have a busy schedule or limited free time, assembling a snowblower yourself may not be feasible. The assembly process can be time-consuming, especially if you are unfamiliar with the equipment and instructions. Hiring a professional ensures that the assembly is completed in a timely manner, allowing you to focus on other important tasks.
Concerns about warranty
It is important to consider the warranty coverage of your snowblower. Some manufacturers may require professional assembly to maintain the validity of the warranty. If you assemble the snowblower yourself and encounter any issues later on, it could void the warranty. By hiring a professional, you can ensure that the assembly meets the manufacturer’s requirements and protect your warranty coverage.
Benefits of Hiring a Professional to Assemble a Snowblower
Expertise and experience
Professional assemblers have the expertise and experience necessary to assemble a snowblower accurately. They are familiar with different snowblower models and can quickly identify and troubleshoot any issues that may arise during assembly. Their knowledge ensures that your snowblower is assembled to the highest standards.
Faster and efficient assembly
Hiring a professional to assemble your snowblower saves you time and effort. Professionals are well-versed in the assembly process and can complete it quickly and efficiently. Their experience allows them to navigate through the steps smoothly, ensuring that your snowblower is ready for use in no time.
Reduced risk of damage or errors
With professional assembly, the risk of damage or errors is significantly reduced. Professional assemblers are trained to handle assembly tasks carefully and precisely, minimizing the chances of any mistakes that could affect the performance or longevity of your snowblower. By entrusting the assembly to a professional, you can have peace of mind knowing that your equipment is in capable hands.
Warranty assurance
Hiring a professional assembler often comes with the added benefit of warranty assurance. If any issues arise after the assembly, the professional can address them and make any necessary adjustments or repairs without voiding the warranty. This ensures that you are protected in case of any defects or malfunctions with your snowblower.
Factors Affecting the Cost of Professional Assembly
Size and complexity of the snowblower
The size and complexity of the snowblower can impact the cost of professional assembly. Larger and more intricate snowblowers generally require more time and effort to assemble, which may result in higher assembly fees. It is essential to consider the specific requirements of your snowblower model when budgeting for professional assembly.
Geographic location
The geographic location can influence the cost of professional assembly. The cost of living and local market conditions play a role in determining the rates charged by professional assemblers. In areas with higher costs of living or limited availability of assembly services, the rates may be higher. Researching local assembly options and comparing prices can help you find the most competitive rates in your area.
Service provider rates
The rates charged by professional assembly services can vary depending on the provider. Factors such as the company’s reputation, experience, and overhead costs can influence their rates. It is recommended to obtain multiple quotes from different service providers to compare prices and ensure you are getting the best value for your money.
How to Find a Reliable Snowblower Assembly Professional
When looking for a reliable snowblower assembly professional, consider the following steps to ensure you make an informed decision:
Ask for recommendations
Ask friends, family, or neighbors if they have had any positive experiences with snowblower assembly professionals. Personal recommendations are often reliable and can provide insights into the quality and reliability of the service.
Research online reviews
Browse online platforms and review websites to read customer reviews and ratings for different snowblower assembly professionals. Pay attention to the overall satisfaction and any recurring positive or negative comments. This can help you gauge the reputation and reliability of potential service providers.
Check for certifications or licenses
Verify if the snowblower assembly professionals hold any relevant certifications or licenses. Certifications from manufacturers or industry associations can indicate a higher level of expertise and adherence to quality standards. Licensed professionals also provide peace of mind, knowing that they have met specific requirements to perform the assembly.
Get multiple quotes
Contact several snowblower assembly professionals and request quotes for their services. Provide them with detailed information about your snowblower model, its size, and any specific requirements. Comparing multiple quotes will help you determine the most competitive rates and ensure you are getting a fair price for the assembly.
Conclusion
Assembling a snowblower yourself can be a cost-effective option that provides a sense of accomplishment and a better understanding of the equipment. However, it is crucial to consider your mechanical expertise, tool availability, and time commitment before embarking on the assembly process. If you feel uncertain or prefer to leave the assembly to professionals, hiring a reliable snowblower assembly service is a convenient option. The benefits of professional help include expertise, time-saving, reduced risk of errors, and warranty assurance. By considering the factors that affect the cost and finding a reliable professional, you can enjoy a well-assembled snowblower ready to tackle winter’s snowfall.


