Tag Archives: Snow Removal

Are There Snowblower Models Suitable For Elderly Individuals?

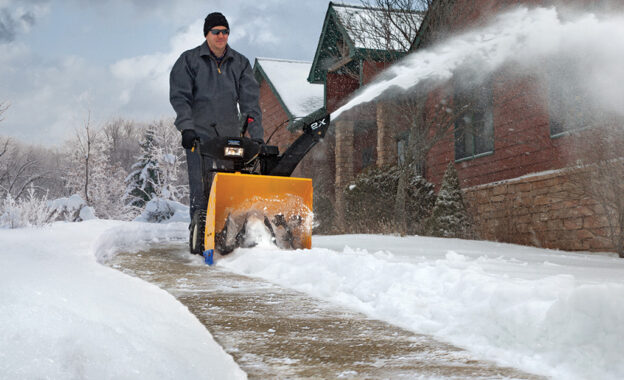
If you’re an elderly individual looking for a solution to tackle the never-ending chore of clearing snow, you might be wondering if there are snowblower models specifically designed for your needs. Well, you’re in luck! In this article, we will explore the world of snowblowers and guide you through some of the best options available that are not only efficient but also user-friendly for seniors. Say goodbye to backaches and hours of manual shoveling, as we uncover the perfect snow-clearing companion for you. Yes, there are snowblower models that are specifically designed to meet the needs of elderly individuals. Snowblowers can be a great tool for clearing snow from driveways and walkways, but it’s important to consider certain factors when choosing the right one for elderly individuals. In this article, we will discuss the factors to consider, the different types of snowblowers available, the features to look for, the best models for elderly individuals, affordability and budget considerations, expert recommendations and reviews, safety tips for using snowblowers, maintenance tips, alternatives to snowblowers, and conclude with a summary of the key considerations for elderly individuals.

Are There Snowblower Models Suitable For Elderly Individuals?

Factors to Consider for Elderly Individuals

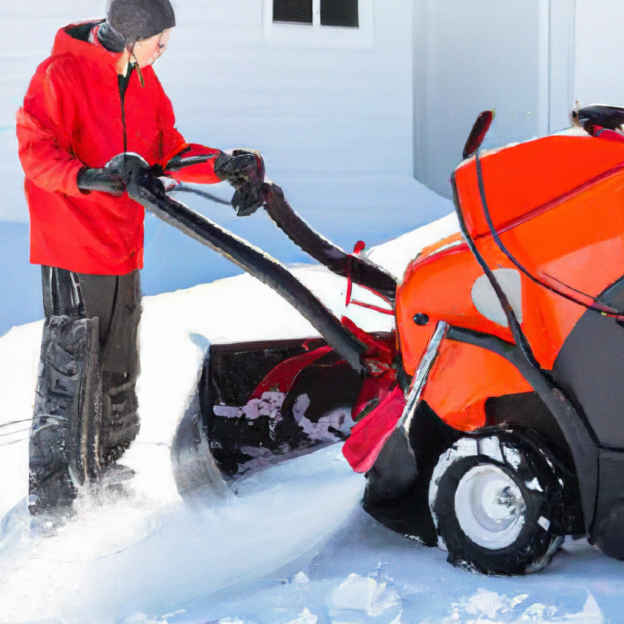
When choosing a snowblower for elderly individuals, it’s crucial to take into account their physical capabilities. This includes their strength and mobility. Some individuals may have limited physical abilities, so it’s important to choose a snowblower that they can easily handle.

Safety features are another important factor to consider. Look for snowblowers that have safety features such as automatic shut-off when the handle is released, safety guards to prevent debris from flying, and headlights for improved visibility in low light conditions.

Ease of use is also a key consideration. Look for snowblowers that have intuitive controls and easy-to-reach buttons or levers. Electric start options can also make it easier for elderly individuals to start the snowblower without having to pull on a cord.

Consider the noise level of the snowblower. Some models can be quite loud, which may be a concern for elderly individuals who are sensitive to noise. Look for snowblowers that have noise-reducing features or quieter engines.

Finally, maintenance requirements should also be taken into account. Elderly individuals may not have the physical ability or desire to perform regular maintenance tasks. Look for snowblowers that require minimal maintenance and are easy to clean and maintain.

Types of Snowblowers

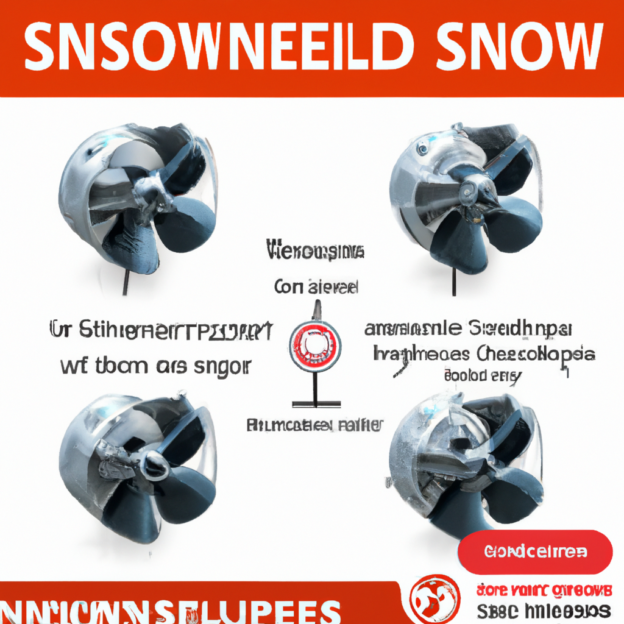
There are several types of snowblowers available on the market. Understanding the differences between these types can help you choose the right one for elderly individuals.

Single-stage snowblowers

Single-stage snowblowers are lightweight and easy to maneuver. They are best for clearing light to moderate snowfall up to around 12 inches deep. These snowblowers use a single auger to scoop up the snow and throw it out the chute.

Two-stage snowblowers

Two-stage snowblowers are more powerful and can handle heavier snowfall. They have an auger that scoops up the snow and a separate impeller that throws the snow out the chute. These snowblowers are typically self-propelled, making them easier to maneuver.

Three-stage snowblowers

Three-stage snowblowers are the most powerful and can handle the heaviest snowfall. They have an additional accelerator that helps break up and move the snow more efficiently. These snowblowers are typically self-propelled and are best for clearing large areas or heavy, wet snow.

Electric snowblowers

Electric snowblowers are lightweight, easy to start, and require minimal maintenance. They are best for clearing light snow and are not recommended for heavy or wet snow.

Cordless snowblowers

Cordless snowblowers are powered by rechargeable batteries, offering the freedom to move around without being restricted by a cord. They are lightweight and quieter than gas-powered models, but they have limited power and run time, making them best for clearing light snow.

Features to Look for in Snowblowers for Seniors

When choosing a snowblower for elderly individuals, there are certain features that can greatly enhance their user experience.

Lightweight design is important as it will make it easier for elderly individuals to maneuver and control the snowblower. Look for models made from lightweight materials such as aluminum or plastic.

Easy maneuverability is another crucial feature. Look for snowblowers with easy-to-use controls and adjustable speed settings. Some models even have power steering, making it easier to turn and navigate the snowblower.

Compact size is also important, especially if storage space is limited. Look for snowblowers with a smaller footprint that can be easily stored in a garage or shed without taking up too much space.

Ergonomic handlebars can greatly improve comfort and reduce strain on the user’s arms and back. Look for models with adjustable handlebars and soft-grip handles for added comfort.

Having an electric start option can make it easier for elderly individuals to start the snowblower. This eliminates the need for pulling on a cord, which can be difficult for those with limited strength or mobility.

Are There Snowblower Models Suitable For Elderly Individuals?

Best Snowblower Models for Elderly Individuals

Now that we have covered the factors to consider and the features to look for, let’s take a look at some of the best snowblower models for elderly individuals.

Toro SnowMaster 724 QXE

The Toro SnowMaster 724 QXE is a single-stage snowblower with a 24-inch clearing width. It features an easy-to-use control panel, a powerful 212cc engine, and an electric start option. The SnowMaster 724 QXE is lightweight and easy to maneuver, making it a great option for elderly individuals.

Honda HS720AS

The Honda HS720AS is a single-stage snowblower with a 20-inch clearing width. It features a reliable Honda GC190 engine, an electric start option, and a variable speed control. The HS720AS is easy to start, easy to maneuver, and has a compact size, making it a great choice for elderly individuals.

Ariens Path-Pro SS21EC

The Ariens Path-Pro SS21EC is a single-stage snowblower with a 21-inch clearing width. It features a powerful 208cc engine, an electric start option, and a foldable handle for easy storage. The Path-Pro SS21EC is lightweight, easy to maneuver, and has a compact design, making it ideal for elderly individuals.

Greenworks PRO 80V

The Greenworks PRO 80V is a cordless snowblower with a 20-inch clearing width. It features an 80V lithium-ion battery, a robust brushless motor, and a 180-degree rotating chute. The PRO 80V is lightweight, quiet, and easy to maneuver, making it a great option for elderly individuals who prefer a cordless snowblower.

Cub Cadet 2X 528 SWE

The Cub Cadet 2X 528 SWE is a two-stage snowblower with a 28-inch clearing width. It features a powerful 277cc engine, electric start, and power steering. The 2X 528 SWE is self-propelled, making it easy to maneuver, and it has a compact size for storage. While it is larger and more powerful than other models on the list, it can still be suitable for elderly individuals who require a higher capacity snowblower.

Affordability and Budget Considerations

When considering the purchase of a snowblower, affordability and budget are important factors to consider. Snowblower prices can vary greatly depending on the type, size, and brand.

Comparing the price range of different snowblower models can help you find one that fits your budget. Single-stage snowblowers tend to be more affordable compared to two-stage or three-stage models. Electric and cordless snowblowers also tend to be more budget-friendly options.

While budget is important, it’s also essential to consider the value for money. A more expensive snowblower may offer additional features and durability, making it a better long-term investment. Consider the overall quality and performance of the snowblower before making a decision solely based on price.

It’s also worth considering the long-term cost of owning a snowblower. This includes maintenance costs such as fuel, oil, replacement parts, and professional tune-ups. Some snowblower models may require more frequent maintenance or have higher maintenance costs, so it’s important to factor this into your budget considerations.

Expert Recommendations and Reviews

When choosing a snowblower for elderly individuals, it can be helpful to read customer reviews and seek expert opinions. Customer reviews can provide insights into the real-life experiences of users, highlighting the pros and cons of different models.

Expert opinions from reputable sources such as consumer product review websites or magazines can also provide valuable information. These experts have tested and evaluated different snowblower models, considering factors such as performance, ease of use, and reliability.

Additionally, comparing the features and specifications of different models can help you make an informed decision. Look for models that align with the needs and preferences of elderly individuals, paying attention to key features such as weight, maneuverability, and ease of use.

Safety Tips for Elderly Individuals Using Snowblowers

Safety should be a top priority when using snowblowers, especially for elderly individuals. Here are some important safety tips to keep in mind:

  1. Read the user manual: Before operating a snowblower, it’s essential to read and understand the user manual. This will help you understand how to properly operate the snowblower and avoid potential hazards.

  2. Wear appropriate clothing: Dress warmly and wear proper footwear with good traction to prevent slips and falls. It’s also important to wear safety goggles, ear protection, and gloves to protect against flying debris and cold temperatures.

  3. Never put hands or feet near moving parts: Keep your hands and feet away from the auger, impeller, and other moving parts of the snowblower, even when the engine is off. It’s easy for accidents to happen if you attempt to clear debris or perform maintenance while the snowblower is still operational.

  4. Be cautious of cord placement: If using an electric or cordless snowblower, be mindful of the cord or battery placement. It’s important to keep the cord or battery away from the auger and other moving parts to prevent damage or accidents.

  5. Clear debris before starting up: Before starting the snowblower, make sure the area is clear of any obstacles such as rocks, branches, or other debris. These can become projectiles and cause damage to the snowblower or injury to the user.

Maintenance Tips for Snowblowers

Proper maintenance is important to ensure the optimal performance and longevity of a snowblower. Here are some maintenance tips for snowblowers:

  1. Regular oil changes: Follow the manufacturer’s recommendations for oil changes. Regularly changing the oil can help maintain the engine’s performance and prevent damage.

  2. Clean and lubricate moving parts: After each use, clean the snowblower and remove any snow or debris that may be stuck in the auger or chute. Lubricate the moving parts as recommended by the manufacturer to avoid rust and ensure smooth operation.

  3. Check and tighten loose bolts: Inspect the snowblower regularly for loose bolts or fasteners. Tighten them if necessary to prevent vibrations and potential damage.

  4. Store properly during off-season: When the snowblower is not in use, store it properly in a clean and dry location. Follow the manufacturer’s instructions for long-term storage to prevent rust and damage.

  5. Schedule professional tune-ups: Consider scheduling professional tune-ups at regular intervals, especially if you’re not comfortable performing maintenance tasks yourself. A professional can inspect and service the snowblower to ensure it’s in optimal working condition.

Alternatives to Snowblowers

While snowblowers can be a helpful tool for clearing snow, there are alternative options available. These alternatives may be more suitable for elderly individuals who prefer not to use a snowblower or have limitations that prevent them from operating one. Here are some alternatives to consider:

Shoveling techniques

Using proper shoveling techniques can help effectively clear snow without the need for a snowblower. Some techniques include lifting with your legs instead of your back, pushing instead of lifting when possible, and taking breaks to prevent overexertion.

Hiring professional snow removal services

If shoveling or using a snowblower is not an option, hiring professional snow removal services can be a convenient alternative. These services typically use plows or specialized equipment to efficiently clear snow from driveways and walkways.

Using snow plows or snow pushers

Snow plows or snow pushers are handheld tools that can be used to push snow off driveways and walkways. These tools are lightweight, easy to use, and can be a good option for elderly individuals who prefer manual snow removal methods.

Utilizing heated driveways or walkways

Installing heated driveways or walkways can eliminate the need for snow removal altogether. These systems use electric heating elements or hot water pipes to melt the snow as it falls, keeping the surfaces clear and safe.

Conclusion

In conclusion, there are snowblower models that are suitable for elderly individuals. When choosing a snowblower, it’s important to consider the physical capabilities, safety features, ease of use, noise level, and maintenance requirements. There are different types of snowblowers available, including single-stage, two-stage, three-stage, electric, and cordless models. Features to look for in snowblowers for seniors include lightweight design, easy maneuverability, compact size, ergonomic handlebars, and an electric start option. Some of the best snowblower models for elderly individuals include the Toro SnowMaster 724 QXE, Honda HS720AS, Ariens Path-Pro SS21EC, Greenworks PRO 80V, and Cub Cadet 2X 528 SWE. Affordability and budget considerations are important, as well as expert recommendations and reviews. Safety tips and maintenance tips should be followed for optimal performance and safety. Alternatives to snowblowers include shoveling techniques, hiring professional snow removal services, using snow plows or snow pushers, and utilizing heated driveways or walkways. By considering all these factors and options, elderly individuals can find the snowblower or alternative method that best suits their needs and preferences, ensuring safe and efficient snow removal.

How Do I Prime My Snowblower Before Starting It?

So, you’ve got your snowblower all set up and ready to tackle the upcoming winter storms. But before you fire it up and get to work, you need to make sure you prime your snowblower properly. Now, I know what you’re thinking – how exactly do I prime my snowblower? Well, don’t worry, because in this article, we’re going to break down the simple steps you need to follow to prime your snowblower before starting it, ensuring it runs smoothly and efficiently when the snow starts falling.

How Do I Prime My Snowblower Before Starting It?

What is Priming a Snowblower?

Priming a snowblower refers to the process of manually delivering fuel to the engine before starting it. This is done by pressing and releasing the primer bulb, which is located on the snowblower’s engine. The purpose of priming is to ensure that there is sufficient fuel in the carburetor to facilitate easy starting. By doing so, you are essentially providing an initial boost of fuel, allowing the engine to fire up smoothly and run efficiently.

Why is Priming Important?

Priming your snowblower is essential because it helps ensure a smooth and hassle-free startup. During the colder months, the fuel in the carburetor can become stagnant and lose its volatile properties. By priming the snowblower, you are circulating fresh fuel into the carburetor, which increases the chances of successful ignition and prevents any sputtering or stalling during operation.

Checking the Fuel Level

Before you begin priming your snowblower, it is crucial to check the fuel level in the tank. Operating the snowblower with a low fuel level can lead to uneven running and potential damage to the engine. Ensure that there is enough fuel in the tank to provide a steady supply to the carburetor throughout the operation. If the fuel level is low, it is advisable to fill up the tank before proceeding with the priming process.

Locating the Primer Bulb

The primer bulb is usually located on the top or side of the snowblower’s engine, depending on the make and model. It is a small, rubber bulb that you can press with your finger. The best way to locate the primer bulb is to consult your snowblower’s user manual, as the exact placement can vary. Once you have identified the primer bulb, you are ready to start priming your snowblower.

How Do I Prime My Snowblower Before Starting It?

Understanding the Primer Bulb

How Does the Primer Bulb Work?

The primer bulb is designed to draw fuel from the fuel tank and into the carburetor. When you press and release the bulb, it creates a vacuum that sucks fuel into the carburetor, replacing any stale fuel that may have been left behind. This process helps to ensure that your snowblower’s engine receives a consistent and sufficient fuel supply for optimal performance.

How Many Times Should I Prime the Snowblower?

The number of times you should prime your snowblower depends on its specific requirements. Generally, it is recommended to prime the snowblower three to five times, but it may vary depending on factors such as temperature and the particular engine model. Consult your snowblower’s user manual to determine the manufacturer’s recommended priming method.

Step-by-Step Guide to Priming a Snowblower

Step 1: Position the Snowblower

Before priming the snowblower, ensure that it is on a flat and stable surface. This will prevent any accidents or instability during the priming process. Make sure the ignition switch is in the off position and that the snowblower is securely parked.

Step 2: Locate the Primer Bulb

Identify the primer bulb by referring to your snowblower’s user manual. It is usually a small, rubber bulb that can be found on the top or side of the engine. Take a moment to familiarize yourself with its location and how it operates.

Step 3: Press and Release the Primer Bulb

Place your finger on the primer bulb and press it down slowly. You should feel some resistance as you press. Once the bulb is fully depressed, release it quickly. This action creates a vacuum, drawing fuel into the carburetor.

Step 4: Repeat the Priming Process

Repeat the pressing and releasing action of the primer bulb two to three more times. This ensures that an ample amount of fuel has been delivered to the carburetor, increasing the likelihood of a smooth startup.

Step 5: Repeat the Priming Process Once More

To be extra cautious, repeat the priming process one final time. This will ensure that the carburetor is adequately fueled for an easy ignition. Once you have completed this step, you are now ready to start your snowblower.

Common Mistakes to Avoid

Over-Priming the Snowblower

One common mistake is over-priming the snowblower. It is important to remember that priming is meant to deliver just enough fuel to the carburetor for a smooth startup. Over-priming can flood the engine and cause excessive fuel consumption, leading to potential starting issues and increased emissions. Follow the manufacturer’s instructions and recommendations for the appropriate number of primer bulb presses.

Under-Priming the Snowblower

On the other hand, under-priming can result in insufficient fuel supply to the carburetor, leading to difficulty in starting the snowblower. It is crucial to perform the recommended number of primer bulb presses, as specified by the manufacturer, to ensure optimal fuel delivery.

Priming the Snowblower with a Full Tank of Fuel

Priming the snowblower with a full tank of fuel is not recommended. When the fuel tank is completely filled, there is already sufficient fuel in the carburetor, and additional priming may flood the engine. It is best to check the fuel level and fill it as needed before priming to avoid any potential issues.

Checking the Primer Bulb for Issues

Cracked or Damaged Bulb

Inspect the primer bulb for any signs of cracking or damage before each use. A cracked or damaged bulb can lead to air leaks, preventing proper fuel delivery. If you notice any issues with the primer bulb, it is important to replace it immediately to ensure smooth operation.

Air Leaks in the Primer Bulb

Air leaks in the primer bulb can occur due to a loose connection or damage to the bulb itself. If you suspect an air leak, you can perform a simple test. Apply some soapy water to the bulb and observe for any bubbles forming. If bubbles appear, it indicates an air leak. If you detect an air leak, it is advisable to have the primer bulb replaced to maintain the snowblower’s optimal performance.

Conclusion

Priming your snowblower is an essential step in ensuring a smooth and efficient startup. By following the steps outlined in this article and avoiding common mistakes, you can ensure that your snowblower is primed correctly for optimal performance. Regularly check the primer bulb for any cracks or damage, and replace it if necessary. Remember to consult your snowblower’s user manual for specific instructions and recommendations. With proper priming, you can confidently tackle the winter snowfall and keep your property clean and safe.

Frequently Asked Questions

How Long Should I Prime the Snowblower?

The duration of priming can vary depending on factors such as the snowblower’s make and model and the outdoor temperature. Generally, priming for 2-4 seconds should be sufficient. However, it is advisable to consult the manufacturer’s instructions for the recommended priming duration.

Do Electric Snowblowers Require Priming?

No, electric snowblowers do not require priming. Electric snowblowers operate differently than gas-powered ones, as they run purely on electricity. Instead of priming, electric snowblowers usually have a simple push-button or switch mechanism for starting.

What Happens If I Don’t Prime My Snowblower?

Not priming your snowblower can result in difficulty starting the engine or even failure to start. Without proper priming, the carburetor may not receive enough fuel to sustain combustion, leading to sputtering or stalling. It is crucial to prime your snowblower before every use to ensure a smooth startup.

Is Priming Necessary Every Time I Start the Snowblower?

In most cases, yes, priming is necessary every time you start the snowblower. It ensures that the carburetor receives a fresh fuel supply and helps prevent starting issues. However, consult your snowblower’s user manual to determine if there are any specific exceptions or recommendations for your particular model.

Are There Rental Services For Snowblowers?

So, you wake up one winter morning, gaze out the window, and find yourself face to face with a thick layer of snow. You know it’s time to pull out the heavy artillery – a snowblower, of course. But wait, do you really want to spend a fortune purchasing one for a snowstorm or two? That’s when you start pondering the idea of rental services for snowblowers. Can you actually rent a reliable snowblower and save yourself from the burden of a hefty investment? Well, you’re about to find out.

Overview

The need for snowblowers

Living in an area with heavy snowfall can be both beautiful and challenging. While fresh snow may create a picturesque winter wonderland, it also means dealing with the tedious task of snow removal. Shoveling snow can be time-consuming, physically demanding, and even hazardous, especially for individuals with health issues or limited mobility. This is where snowblowers come in handy. These machines are designed to efficiently clear snow from driveways, walkways, and other areas with minimal effort. If you find yourself dreading the backbreaking task of shoveling snow every winter, renting a snowblower could be an excellent solution for you.

Renting vs. buying

When it comes to acquiring a snowblower, you have two main options: renting or buying. While purchasing a snowblower may seem like a convenient long-term investment, it may not be the best choice for everyone. Snowblowers can be expensive, especially for high-quality models that can withstand heavy snowfall. Additionally, storage can be an issue in the off-season, especially if you have limited space. On the other hand, renting a snowblower allows you to enjoy the benefits of this equipment without the upfront cost or the hassle of long-term storage. Renting provides flexibility, allowing you to use a snowblower only when you need it and return it once you’re done.

Benefits of renting

Renting a snowblower brings several advantages that make it an appealing option for many individuals. One of the primary benefits is cost-effectiveness. By opting for a rental, you avoid the significant upfront expense associated with purchasing a snowblower. Additionally, maintenance and repair costs are often covered by the rental service, saving you money in the long run. Another advantage is the ability to choose from a wide range of models. Rental services typically offer different types and sizes of snowblowers, allowing you to select the one that best suits your needs. Furthermore, renting provides a convenient solution in situations where you may only need a snowblower for a short period, such as during a particularly harsh winter or while traveling to a snowy location.

Rental Service Providers

National chains

When it comes to renting a snowblower, there are various options to consider. National chains, such as Home Depot, Lowe’s, and Sunbelt Rentals, offer rental services in multiple locations across the country. These chains often have a wide selection of snowblower models available and provide support for customers in terms of maintenance and customer service.

Local equipment rental stores

Supporting local businesses can be a great way to contribute to your community, and when it comes to renting snowblowers, local equipment rental stores are worth considering. These establishments often offer personalized service and may have unique snowblower models or attachments that are not available at national chains. Additionally, renting from a local store can be more convenient if it is located closer to your home.

Online rental platforms

In recent years, the rise of online rental platforms has provided another convenient option for individuals looking to rent snowblowers. Platforms such as RentalHire and Rentuu connect renters with a wide range of equipment, including snowblowers, from local suppliers. These platforms offer the convenience of online booking and allow you to easily compare prices, read customer reviews, and book the equipment that best suits your needs.

Are There Rental Services For Snowblowers?

Rental Costs

Factors influencing rental costs

When considering the cost of renting a snowblower, several factors come into play. The primary factor is the duration of the rental period. Rental rates are typically calculated based on a daily, weekly, or monthly basis. The longer the rental period, the lower the daily rate may be. Furthermore, the size and type of snowblower can also influence the cost. Larger and more powerful snowblowers may have higher rental rates due to their increased effectiveness.

Comparing prices

To ensure you get the best rental deal for your snowblower needs, it’s essential to compare prices from different rental service providers. Take the time to research and reach out to different rental companies, both national chains and local stores, to get quotes. Additionally, online rental platforms make it easy to compare prices from multiple suppliers in your area. Remember to consider any additional fees, such as delivery charges or a deposit, when comparing prices.

Rental Policies

Duration of rental

When renting a snowblower, it’s crucial to understand the rental duration policies of the service provider. Some rental companies may offer flexibility, allowing you to rent a snowblower by the hour, while others have a minimum daily or weekly rental requirement. Consider your specific needs and budget when deciding on the rental duration.

Delivery options

Consider whether the rental service offers delivery and pickup options for the snowblower. Depending on your location and accessibility, having the snowblower delivered directly to your doorstep can save you time and effort. However, be aware that some rental services may charge an additional fee for delivery and pickup services.

Insurance requirements

Before renting a snowblower, inquire about the insurance requirements set by the rental service provider. Some companies may require renters to provide proof of personal insurance coverage, while others offer optional insurance plans that can protect against damages or theft during the rental period. Ensure you fully understand the insurance policies and associated costs to make an informed decision.

Are There Rental Services For Snowblowers?

Availability and Reservation

Peak season demand

Snowblowers are in high demand during the winter months when snowfall is at its peak. It’s important to be aware of this seasonality and understand that availability may be limited during these periods. To guarantee the availability of a snowblower when you need it, it’s advisable to plan ahead and make a reservation in advance.

Booking in advance

To secure a rental snowblower, especially during peak season, it’s recommended to book in advance. Reach out to your preferred rental service provider and make a reservation with them. Booking early not only ensures availability but also allows you to have peace of mind and avoid the last-minute scramble to find equipment when a snowfall is predicted.

Rental duration limits

Rental service providers may have restrictions on the maximum rental duration for snowblowers. While many companies allow longer-term rentals, it’s essential to clarify any specific duration limits when making a reservation. If you anticipate needing the snowblower for an extended period, discuss potential options, such as renewing or extending the rental agreement.

Equipment Maintenance and Support

Condition of rented snowblowers

Before renting a snowblower, inquire about the condition and maintenance practices of the rental equipment. Reputable rental service providers regularly inspect and maintain their snowblower fleet to ensure they are in good working condition. This reduces the likelihood of encountering mechanical problems while using the equipment.

Maintenance responsibilities

As a renter, it’s important to understand your responsibilities regarding snowblower maintenance. While rental service providers typically handle routine maintenance and repairs, renters may be responsible for basic upkeep, such as clearing snow and debris from the machine after each use. Be sure to ask for specific guidelines and maintenance expectations to ensure you properly care for the rented snowblower.

Customer support

When renting a snowblower, it’s essential to consider the level of customer support provided by the rental service. Reputable companies will have knowledgeable staff who can assist you with any questions, provide operating instructions, and troubleshoot any issues that arise during the rental period. Good customer support ensures a smoother rental experience and peace of mind.

Safety Considerations

Safety features

Snowblowers come equipped with various safety features designed to protect users and prevent accidents. When renting a snowblower, ensure that the equipment you choose has essential safety features, such as an emergency shut-off switch, an auger safety guard, and handlebar grips that provide good control and stability during operation.

Operating instructions and training

To ensure safe operation of a rented snowblower, it’s crucial to familiarize yourself with the specific model’s operating instructions. A reputable rental service should provide you with detailed instructions and guidance on how to properly operate the snowblower. If you are new to using a snowblower, consider asking for training or tips from the rental service to ensure you operate the equipment safely and efficiently.

Liability and accident coverage

Accidents can happen even when using equipment correctly and taking necessary precautions. When renting a snowblower, it’s important to understand the liability and accident coverage provided by the rental service. Some rental companies offer liability insurance or accident coverage, while others may require renters to provide their own coverage. Clarify these details before renting to ensure you are adequately protected.

Additional Equipment and Accessories

Attachment options

Snowblowers often have various attachments and accessories available to enhance their functionality. When renting a snowblower, check if the rental service provides additional attachments, such as snow blow shovels, brushes, or tire chains. These attachments can make snow removal more efficient and effective, depending on the type of snow conditions you anticipate.

Fuel and lubricants

Inquire about the fuel and lubricant requirements for the rented snowblower. Some rental services may provide these supplies as part of the rental package, while others may require you to purchase them separately. Ensure you have the necessary fuel and lubricants to operate the snowblower smoothly.

Snow removal accessories

In addition to attachments, consider other snow removal accessories that could be beneficial. For example, having a snow clearing tool or ice melter can complement the use of a snowblower, especially for clearing hard-to-reach areas or for finishing touches. Some rental services may offer these accessories as add-ons, so it’s worth exploring your options.

Customer Reviews and Recommendations

Searching for reviews

Before making a decision on which rental service to choose, it’s wise to search for customer reviews. Online platforms and social media are valuable resources for finding feedback from previous renters. This way, you can get insights into the quality of service, equipment condition, and overall customer satisfaction of various rental service providers.

Asking for recommendations

If you have friends, family, or neighbors who have rented snowblowers in the past, consider asking them for recommendations. Personal recommendations can provide valuable insights and help you make an informed decision when choosing a rental service provider. Ask about their experiences, including the reliability of the equipment, customer service, and any potential issues they encountered.

Customer satisfaction

Understanding overall customer satisfaction levels is crucial when selecting a rental service provider. Look for rental companies that prioritize customer satisfaction and have positive reviews regarding their equipment quality, customer support, and rental process. Opting for a rental service with a proven track record of satisfied customers will increase the likelihood of having a positive rental experience.

Conclusion

Renting snowblowers for convenience

Renting a snowblower offers convenience and flexibility that buying may not provide. It allows you to access high-quality equipment without the upfront cost, storage concerns, or maintenance responsibilities associated with ownership. Whether you face a particularly harsh winter or need a snowblower temporarily, renting allows you to tackle snow removal efficiently.

Evaluating personal needs

When considering renting a snowblower, it’s important to assess your specific needs. Factors such as the area you need to clear, the frequency of heavy snowfall, and your physical capabilities should guide your decision. By understanding your requirements, you can choose the right snowblower model, rental duration, and additional accessories to ensure effective snow removal.

Considerations for future rentals

If you have a positive experience renting a snowblower, it’s worth considering future rentals. Keeping a record of the rental service providers you were satisfied with and maintaining a good relationship with them can simplify and expedite the process in the future. Additionally, by renting from the same provider, you may be able to benefit from loyalty programs or discounts, making future rentals even more cost-effective.

In conclusion, renting a snowblower can be a practical and cost-effective solution for individuals needing to remove snow during the winter months. By understanding the rental process, comparing prices, being aware of rental policies, considering safety, and evaluating additional accessories, you can make an informed decision that meets your snow removal needs. Whether it’s a national chain, a local rental store, or an online platform, choosing a reputable rental service provider and enjoying the convenience of a rented snowblower can make winter snow removal much more manageable.

How Can I Prevent Snow From Sticking To The Chute?

So you’re ready to tackle the winter wonderland and get to work clearing out that snow, but there’s one pesky problem standing in your way: snow sticking to the chute. It’s frustrating, time-consuming, and can put a serious damper on your snow removal plans. But fear not, because in this article, we’re going to dive into some simple yet effective solutions that will keep that snow sliding smoothly and prevent any future sticking mishaps. Say goodbye to snowy roadblocks and hello to efficient snow removal!

Choosing the Right Material for the Chute

When it comes to preventing snow from sticking to the chute of your snowblower, choosing the right material for the chute itself plays a crucial role. There are a few factors to consider in this regard.

Consider the Material’s Texture

To minimize snow sticking to the chute, opt for materials with a smooth texture. Uneven or rough surfaces can provide more friction and give the snow a better grip, leading to accumulation and blockages. Look for chutes made of materials such as metal or plastic with a smooth finish.

Choose a Material with Low Coefficient of Friction

The coefficient of friction is a measure of how resistant two surfaces are to slide against each other. When it comes to preventing snow from sticking to the chute, it’s essential to select a material with a low coefficient of friction. This characteristic reduces the chances of snow clinging to the surface, allowing it to slide off more easily. Consider materials like polyethylene or UHMW (ultra-high-molecular-weight) plastic, known for their low coefficients of friction.

Look for Hydrophobic Coatings

Hydrophobic coatings are designed to repel water and other liquids, making them an excellent choice for preventing snow from sticking to the chute. These coatings create a slippery surface, reducing snow adhesion. Look for chutes that come pre-coated with a hydrophobic material, or consider applying a hydrophobic spray or wax for added protection.

Waxing the Chute

Applying a wax coating to the chute is another effective way to prevent snow from sticking. Wax creates a smooth and slippery surface, allowing snow to slide off more easily. Here’s how you can do it:

Apply a Wax Coating

Start by thoroughly cleaning the chute and removing any existing snow or debris. Once cleaned, apply a layer of wax to the surface. You can use any commercial snowmobile or ski wax, as they are designed to withstand cold temperatures and provide optimal lubrication. Make sure to cover the entire chute evenly.

Regularly Reapply the Wax

Over time, the wax coating may wear off due to the friction and exposure to snow and ice. It’s important to regularly reapply the wax to ensure snow doesn’t start sticking to the chute. Depending on the frequency of use and snow conditions, you may need to wax the chute every few uses or once a season.

Applying a Non-Stick Spray

Using a non-stick spray is another effective method to prevent snow from sticking to the chute. Non-stick sprays create a slippery layer on the surface, minimizing snow adhesion.

Select a Suitable Non-Stick Spray

Choose a non-stick spray specifically designed for use in cold temperatures. Look for products that mention snowblower chute or winter equipment on their labels. These sprays are formulated to withstand freezing conditions and provide optimal lubrication.

Apply the Non-Stick Spray Properly

Before applying the spray, clean the chute to ensure there is no snow or dirt on the surface. Follow the instructions on the spray bottle and apply an even coating to the chute. Allow the spray to dry before operating the snowblower. Remember to reapply the non-stick spray as needed, especially after cleaning the chute or during prolonged use.

Using a Heat Source

Using a heat source is an effective method to prevent snow from sticking to the chute. Heating the surface slightly can melt the snow and create a temporary film of water, preventing further snow buildup.

Use a Heat Gun or Blow Dryer

To apply heat to the chute, you can use a heat gun or a blow dryer. Set the heat source to a low or moderate temperature and direct the airflow towards the chute. Move the heat source back and forth along the surface until the snow starts melting. Be sure to keep a safe distance and avoid overheating the material, as it may cause damage or warping.

Be Cautious with Heat Sources

While using a heat source can be effective, it’s essential to exercise caution. Avoid using high heat settings or leaving the heat source in one spot for too long, as this can lead to material damage or discoloration. Additionally, be mindful of the surroundings and avoid exposing any flammable materials or surfaces to the heat source.

Coating with Silicone

Another option for preventing snow from sticking to the chute is to apply a silicone lubricant. Silicone creates a slippery surface that snow has difficulty adhering to.

Obtain a Silicone Lubricant

Look for a silicone lubricant that is suitable for outdoor use and can withstand low temperatures. Check if the product is explicitly labeled for snowblowers or winter equipment. Silicone lubricants in spray form are convenient to apply and provide an even coating.

Apply Silicone Lubricant to the Chute

Before applying the silicone lubricant, make sure the chute is clean and free of any snow or debris. Spray the lubricant evenly over the surface of the chute, taking care to cover the entire area. Allow the silicone to dry before operating the snowblower. Remember to reapply the silicone lubricant as needed to maintain the anti-stick properties.

Creating a Physical Barrier

Creating a physical barrier between the chute and the snow can be an effective way to prevent snow from sticking. Here are a couple of methods to achieve this:

Cover the Chute with Plastic Sheet or Tarp

Before operating the snowblower, cover the chute with a plastic sheet or tarp. Secure the covering tightly so that it doesn’t interfere with the snowblower’s operation. This barrier prevents direct contact between the chute and the snow, reducing the chances of snow sticking.

Use a Teflon or Plastic Chute Liner

Another option is to install a Teflon or plastic chute liner inside the chute. These liners create a smooth and slippery surface that makes it harder for snow to adhere. Follow the manufacturer’s instructions to properly install the chute liner, ensuring it fits securely.

Adjusting the Chute Angle

The angle of the chute can have an impact on snow discharge and how likely it is for snow to stick. Adjusting the chute angle can help reduce snow buildup.

Increase the Chute’s Angle

By increasing the angle of the chute, you allow the snow to be expelled at a higher trajectory. This increased distance between the chute and the ground can help prevent snow from falling back onto the chute and sticking. Most snowblowers have adjustable chute angles, so consult your snowblower’s manual for instructions on how to adjust it.

Consider the Impact on Snow Discharge

While adjusting the chute angle can reduce snow sticking, it’s important to consider the overall impact on snow discharge. A steep angle may cause the expelled snow to travel too far or in an undesired direction. Find a balance that minimizes snow sticking while still effectively directing the discharged snow away from walkways and driveways.

Regular Maintenance and Cleaning

Regular maintenance and cleaning of the chute are crucial to prevent snow from sticking and ensure optimal performance of your snowblower.

Clean the Chute After Each Use

After each use, take the time to clean the chute thoroughly. Use a brush or scraper to remove any remaining snow or ice. Pay extra attention to corners or crevices where snow may accumulate. Removing any residual snow helps prevent it from solidifying and sticking when the snowblower is not in use.

Remove Accumulated Snow and Ice

If snow or ice has accumulated and frozen inside the chute, it’s important to remove it before using the snowblower again. This can be done by carefully chipping away at the ice or using warm water to melt it. Avoid using sharp objects that may damage the chute or cause injury.

Inspect for Any Damage or Corrosion

Regularly inspect the chute for any signs of damage or corrosion. Damaged areas can lead to irregularities on the surface, providing areas where snow can stick. If you notice any damage, consider repairing or replacing the affected parts to maintain optimal chute performance.

Clearing the Snow with a Shovel

In situations where the snowblower may not be suitable or available, using a traditional shovel can also help prevent snow from sticking to the chute.

Use a Shovel to Remove Snow Buildup

When you notice snow starting to accumulate on the chute during operation, stop the snowblower, and use a shovel to remove the excess snow. Carefully guide the shovel along the chute to clear any obstructions. This manual removal helps prevent further snow buildup and sticking.

Avoid Damaging the Chute with the Shovel

While using a shovel to remove snow buildup from the chute can be helpful, it’s crucial to exercise caution and avoid causing damage. Be mindful of the shovel’s edges and avoid scraping or hitting the chute forcefully. Gentle and controlled movements are key to protecting the chute while effectively clearing the snow.

Proper Operation Techniques

In addition to the preventive measures mentioned earlier, implementing proper operation techniques can also help minimize snow sticking to the chute.

Avoid Overloading the Chute

One common mistake is overloading the chute by trying to clear too much snow at once. This can overwhelm the snowblower’s capacity and cause snow to clog the chute. Clear smaller portions of snow at a time, allowing the snowblower to effectively discharge the snow without overloading the chute.

Utilize the Chute Deflector

Most snowblowers come with a chute deflector, which allows you to adjust the height or distance that the snow is thrown. Properly positioning the deflector ensures that the discharged snow is directed away from areas where it can fall back onto the chute and stick.

Operate the Snowblower at the Correct Speed

Operating the snowblower at the correct speed can also help prevent snow from sticking to the chute. Going too fast can cause the snow to not discharge properly or accumulate on the chute surface. Likewise, going too slow may not provide enough force to effectively discharge the snow. Find a speed that allows for efficient snowblowing while minimizing snow sticking.

By considering the material of the chute, applying coatings, adjusting angles, and utilizing proper techniques, you can significantly reduce the occurrence of snow sticking to the chute. Remember to regularly maintain and clean the chute to ensure optimal performance. With these tips in mind, you’ll be able to tackle snowy conditions more effectively and keep your snowblower running smoothly. Stay proactive and enjoy a snow-free chute all winter long!

Can I Use My Snowblower On A Roof?

Thinking about using your trusty snowblower to clear the snow off your roof? While it may seem like a convenient solution, experts strongly advise against it. Using a snowblower on a roof can be dangerous and potentially damaging to both you and your property. The weight and design of a snowblower make it unsuitable for navigating a sloped surface, increasing the risk of accidents and damage to your roof. In this article, we will explore the reasons why using a snowblower on a roof is not recommended and suggest safer alternatives to keep your roof snow-free. So, before you strap on those goggles and fire up the snowblower, let’s understand why it’s best to leave this task to the professionals. When it comes to removing snow from your roof, it’s important to take certain precautions to ensure both your safety and the well-being of your roof. In this article, we will discuss safety precautions, the suitability of snowblowers for roofs, the benefits of using a snowblower on the roof, different types of snowblowers, considerations for using a snowblower on the roof, a step-by-step guide, alternative methods for snow removal, the pros and cons of using a snowblower on the roof, common mistakes to avoid, and a concluding note on prioritizing safety. So let’s dive in and explore the world of snow removal!

Can I Use My Snowblower On A Roof?

Safety Precautions

Ensure stability of the roof

Before you even think about using a snowblower on your roof, it’s crucial to assess the stability of your roof. If you have any doubts about its structural integrity or if your roof is significantly damaged, it’s best to refrain from using a snowblower and consult a professional instead. Ensuring the stability of the roof is the first step in preventing any potential accidents or further damage.

Wear appropriate safety gear

When operating a snowblower on the roof, it is imperative to prioritize your safety by wearing suitable gear. This includes a helmet, safety goggles, sturdy gloves, and non-slip footwear. These protective measures will help shield you from any flying debris and provide necessary traction on snow-covered surfaces.

Remove any obstacles

Before using the snowblower, it’s important to remove any obstacles or potential hazards from your roof. This includes removing any loose shingles, branches, or objects that could obstruct your path or get caught in the snowblower. Clearing the workspace ensures a smooth and safe snow removal process.

Avoid power lines

One crucial safety precaution to keep in mind while using a snowblower on the roof is to steer clear of any power lines. Always maintain a safe distance from overhead power lines and be aware of their location to avoid any accidents or electrical hazards. It’s better to err on the side of caution and prioritize your safety above all else.

Suitability of Snowblowers for Roof

Type of roof

The type of roof you have plays a significant role in determining the suitability of using a snowblower. Generally, snowblowers are most effective on roofs with asphalt shingles, metal, or tile roofs. However, if you have a flat or low-pitched roof, a snowblower may not be the most suitable option due to its limitations in removing snow from such surfaces.

Roof slope and pitch

Another crucial factor to consider is the slope and pitch of your roof. Snowblowers work best on roofs with a moderate slope as the snow can be easily removed without causing any excessive strain on the machine or risking damage to the roof. Steeper roofs may pose a challenge as the snowblower’s effectiveness and maneuverability can be compromised.

Snow depth on the roof

The depth of snow on your roof is another important consideration before using a snowblower. If the snow depth exceeds the snowblower’s clearing capacity, it may not be the most effective method of snow removal. You may need to consider alternative methods or consult a professional snow removal service to tackle thicker layers of snow on your roof.

Benefits of Using a Snowblower on the Roof

Efficiency

One of the major advantages of using a snowblower on the roof is its efficiency. Snowblowers are designed to quickly and effectively remove snow, saving you time and effort compared to manual methods such as shoveling. With the right snowblower, you can effectively clear your roof in a fraction of the time it would take using other means.

Time-saving

Snowblowers are known for their time-saving capabilities. Instead of spending hours shoveling snow off your roof, a snowblower can handle the task in a much shorter duration. This time-saving aspect is particularly beneficial during heavy snowfalls or when time is of the essence.

Preventing ice dams

Using a snowblower to remove snow from your roof can also help prevent the formation of ice dams. Ice dams occur when melted snow refreezes at the roof edges, potentially causing water damage to your home. By removing the snow promptly with a snowblower, you can minimize the risk of ice dams forming and protect your roof from potential water damage.

Reduced strain on roof

Shoveling snow off your roof can put a significant strain on its structure, leading to potential damage. However, using a snowblower distributes the load evenly, reducing the strain on your roof. This can help prolong the lifespan of your roof and minimize the risk of costly repairs or replacements.

Can I Use My Snowblower On A Roof?

Types of Snowblowers

Single-stage snowblowers

Single-stage snowblowers are the most basic type and are designed for light snowfall. They rely on an auger to both gather and propel the snow out of the chute. While they are suitable for small residential areas and clearing pathways, they may not be the most effective option for removing snow from a roof, especially if the snow is deep or heavy.

Two-stage snowblowers

Two-stage snowblowers are more powerful than single-stage snowblowers and can handle larger volumes of snow. They feature an additional impeller that throws the snow out with more force, allowing for increased clearance capacity. Two-stage snowblowers are generally preferred for residential use and can be suitable for removing snow from the roof, depending on the specific model’s capabilities.

Three-stage snowblowers

Three-stage snowblowers are the most powerful and heavy-duty option available. They feature an accelerator in addition to the auger and impeller, making them highly efficient in tackling deep and heavy snow. With their superior clearing capacity, three-stage snowblowers can be used for removing snow from large roofs or areas with significant snow accumulation.

Considerations for Using a Snowblower on the Roof

Manufacturer’s instructions

Before using a snowblower on your roof, it’s crucial to carefully read and follow the manufacturer’s instructions. Each snowblower model may have specific guidelines and recommendations for safe and effective use. Familiarize yourself with the operating instructions to ensure proper usage and maintenance of your snowblower.

Weight and maneuverability

When selecting a snowblower for roof snow removal, consider the weight and maneuverability of the machine. A lightweight snowblower will be easier to transport and handle on the roof, minimizing the risk of accidents or damage. Additionally, ensure that the snowblower has adequate maneuverability to navigate tight spaces and corners on your roof.

Snow discharge direction

The direction in which snow is discharged by the snowblower is another important factor to consider. Make sure the snow discharge chute can be adjusted to aim away from any high-risk areas such as delicate roof features, windows, or walkways. This ensures the safety of both yourself and your surroundings while using the snowblower.

Step-by-Step Guide to Using a Snowblower on the Roof

Prepare the snowblower

Before venturing onto the roof, ensure that your snowblower is in proper working condition. Check the fuel, oil level, and any necessary maintenance requirements. Clear any ice or snow from the machine and inspect it for any loose or damaged parts. Performing these routine checks will help prevent any issues while using the snowblower on your roof.

Secure the snowblower on the roof

Once you’ve prepared the snowblower, it’s time to safely secure it on the roof. Use sturdy straps or ropes to secure the snowblower to a stable structure, ensuring that it won’t shift or move during operation. This step is crucial in preventing accidents and maintaining stability while you clear the snow.

Clear snow from the roof

Now that your snowblower is securely positioned, you can begin clearing the snow from your roof. Start at one end and work your way systematically across the entire roof. Make sure the snow discharge chute is aimed away from the area you’re clearing to avoid blowing the snow back onto the already cleared sections. Take your time and be mindful of any potential obstacles on the roof.

Clear snow from gutters

In addition to clearing the snow from the roof surface, it’s important to address any snow buildup in the gutters. Use a separate attachment or accessory, if available, to remove the snow from the gutters. Clogged gutters can lead to water damage, so ensure that they are completely cleared before finishing the roof snow removal process.

Alternatives to Snowblowers for Removing Snow from the Roof

Roof rakes

Roof rakes are long-handled tools specifically designed for removing snow from roofs. They are lightweight and easy to use, allowing you to safely clear snow without stepping onto the roof. Roof rakes are particularly useful for roofs with low slopes or when the snow depth is not excessive. However, they may not be as efficient or time-saving as using a snowblower.

Shovels

Using a shovel to manually remove snow from the roof is another alternative method. While it requires physical effort and can be time-consuming, shovels can be effective for smaller areas or limited snow accumulation. Make sure to use a plastic or rubber-edged shovel to minimize the risk of damaging your roof.

Ice melters

Ice melters, such as calcium chloride or rock salt, can be used to melt the snow and ice on your roof. However, they should be used as a preventative measure rather than an immediate solution. Applying ice melters before a snowfall can help prevent the formation of ice dams and make snow removal easier. It’s important to follow the manufacturer’s instructions and consider any potential environmental impact when using ice melters.

Pros and Cons of Using a Snowblower on the Roof

Pros: efficient and time-saving

One of the significant advantages of using a snowblower on the roof is its efficiency and time-saving capabilities. Snowblowers are specifically designed to quickly remove snow, allowing you to clear your roof in less time compared to manual methods such as shoveling. This can be particularly beneficial during heavy snowfall or when time is of the essence.

Cons: potential damage to the roof

While snowblowers can be effective at removing snow, there is a potential risk of damaging the roof if not used properly. Operating the snowblower at an incorrect height or angle, or using excessive force, can lead to shingle damage or cause the snowblower to damage the roof surface. It is essential to carefully follow the manufacturer’s instructions and exercise caution to prevent any unintentional harm to your roof.

Cons: safety risks

Using a snowblower on the roof carries inherent safety risks. Whether it’s navigating a slippery roof surface, being exposed to harsh weather conditions, or the potential for accidents while operating the machine, it is crucial to prioritize your safety at all times. Taking necessary precautions, using appropriate safety gear, and being aware of potential hazards can help minimize the associated risks.

Common Roof Snow Removal Mistakes

Using improper tools

One of the most common mistakes people make when removing snow from the roof is using improper tools. Using tools that are not specifically designed for roof snow removal can lead to damage to the roof surface, shingles, or gutters. It’s important to use the appropriate tools, such as snowblowers, roof rakes, or shovels, that are designed for this purpose to ensure safe and effective snow removal.

Not considering roof condition

Another common mistake is not considering the condition of the roof before attempting snow removal. If the roof is already compromised or structurally unsound, the additional weight of snow removal equipment or the force exerted can further damage the roof’s integrity. Prioritize assessing the stability of your roof and consult a professional if you have any concerns.

Ignoring safety precautions

Neglecting safety precautions is a grave mistake when it comes to removing snow from the roof. Failing to wear appropriate safety gear, not removing obstacles or potential hazards, or ignoring power lines can have serious consequences. It is crucial to abide by safety guidelines, carefully read the manufacturer’s instructions, and prioritize your well-being throughout the entire snow removal process.

Conclusion

Assess the risks and suitability

When considering using a snowblower on your roof, it is essential to assess the risks and suitability based on factors such as roof stability, type of roof, snow depth, and the slope of the roof. Carefully evaluate these aspects to determine whether a snowblower is the right tool for your specific situation, or if alternative methods would be more suitable.

Follow manufacturer’s guidelines

To ensure safe and effective use of a snowblower on your roof, it is crucial to follow the manufacturer’s guidelines. Each snowblower model may have specific instructions for operation and maintenance, which should be carefully read and understood before use. Adhering to these guidelines will help prevent any unnecessary accidents or damage.

Prioritize safety

Above all else, it is paramount to prioritize your safety when removing snow from the roof. Wear suitable safety gear, clear any obstacles, avoid power lines, and exercise caution throughout the process. If you have any doubts about your ability to safely use a snowblower on your roof, consider seeking professional assistance to ensure the task is completed safely and effectively.

What’s The Purpose Of The Drift Cutters On A Snowblower?

If you’ve ever wondered why snowblowers come equipped with those curious-looking blades on the sides, known as drift cutters, you’re not alone. These small, yet mighty tools serve a crucial purpose when it comes to efficiently removing snow. Acting as guides, drift cutters effectively slice through the compacted snow and ice, allowing the snowblower to clear wider paths with greater ease. In this article, we’ll explore how drift cutters work and why they are an indispensable feature for tackling heavy snowdrifts.

Whats The Purpose Of The Drift Cutters On A Snowblower?

1. Function of Drift Cutters

1.1 Clearing Snow Drifts

Snow drifts are a common phenomenon during winter, especially in areas with high snowfall. Drift cutters play a crucial role in tackling these snow drifts by helping to break them apart and clear them efficiently. When snow accumulates and is pushed by the wind, it tends to accumulate in certain areas, creating large drifts that can be challenging to remove. Drift cutters act as specialized tools that cut through these drifts, allowing the snowblower to effectively clear them.

1.2 Preventing Clogging

One of the main challenges when using a snowblower is the clogging of the chute due to the heavy and wet snow. Drift cutters help prevent this issue by breaking up the snow drifts and ensuring a smoother flow of snow into the intake chute. By cutting through the compacted snow, drift cutters allow for improved snow removal and reduce the chances of clogging, which can be time-consuming and frustrating to deal with.

1.3 Enhancing Efficiency

Efficiency is key when it comes to snow removal, and drift cutters play a vital role in enhancing the overall efficiency of a snowblower. By efficiently breaking through snow drifts, drift cutters save both time and effort. They enable the snowblower to evenly distribute the snow throughout the chute, allowing for a consistent and faster clearing process. Additionally, they help prevent the snowblower from getting stuck in deep snow, making the overall snow removal process more efficient and effective.

2. How Do Drift Cutters Work?

2.1 Fixed Position

Drift cutters are usually installed on the sides of the snowblower’s auger housing. They have a fixed position, slightly above the ground, and are designed to catch the edge of the snow drifts. As the snowblower moves forward, the drift cutters cut through the compacted snow, loosening it and making it easier for the auger to break it apart and direct it into the chute. The fixed position of the drift cutters ensures a consistent height and angle, allowing for a precise and controlled cutting action.

2.2 Adjustable Height

Some drift cutters come with adjustable height features, allowing you to customize the cutting depth according to the height of the snow drifts. This flexibility is particularly useful when dealing with varying snow conditions or when you encounter particularly stubborn or deep snow drifts. By adjusting the height, you can ensure that the drift cutters effectively cut through the entire depth of the drifts, providing optimal snow removal capabilities.

2.3 Material and Design

Drift cutters are commonly made of durable materials such as steel or hardened plastic, ensuring their strength and longevity in harsh winter conditions. The design of drift cutters typically consists of a curved or angled blade that efficiently cuts through the snow drifts. The shape and sharpness of the blade are tailored to penetrate and break up the compacted snow, facilitating the snowblower’s clearing process. Some drift cutters may also feature serrated edges for enhanced cutting performance.

3. Benefits of Using Drift Cutters

3.1 Increased Snow Removal Capacity

One of the significant benefits of using drift cutters is the increased snow removal capacity they provide. By effectively breaking up snow drifts, drift cutters allow the snowblower to handle larger volumes of snow. This is especially beneficial in areas with heavy snowfall or when clearing large spaces such as driveways, parking lots, or commercial areas. The enhanced snow removal capacity enables you to clear larger areas more quickly and efficiently.

3.2 Reduced Time and Effort

Drift cutters can significantly reduce the time and effort required for snow removal. By efficiently cutting through snow drifts, they make it easier for the auger and impeller of the snowblower to handle the snow. This reduces the strain on the machine and minimizes the effort required to clear the snow. Moreover, by preventing clogging and ensuring a smoother flow of snow, drift cutters save you from the hassle of frequently stopping to unclog the chute or manually clear the snow. Overall, using drift cutters can make the snow removal process significantly quicker and less physically demanding.

3.3 Safety and Convenience

Safety is always a top priority when operating any equipment, including snowblowers. Drift cutters contribute to safety by breaking down snow drifts and preventing the snowblower from getting stuck or becoming unstable while clearing deep snow. This reduces the risk of accidents and increases overall stability when operating the machine. Furthermore, using drift cutters adds convenience to the snow removal process. By enhancing the snowblower’s efficiency, you spend less time battling with stubborn snow drifts and more time enjoying a clean and snow-free environment.

Whats The Purpose Of The Drift Cutters On A Snowblower?

4. Proper Usage and Maintenance

4.1 Correct Installation

To ensure optimal performance, it is essential to correctly install drift cutters on your snowblower. Follow the manufacturer’s instructions carefully, as the installation process may vary depending on the make and model of your snowblower. Generally, the drift cutters should be securely mounted to the sides of the auger housing, with the cutting edge positioned slightly above the ground. Proper installation ensures that the drift cutters effectively engage with the snow drifts and perform their intended function.

4.2 Regular Inspection and Cleaning

Like any other equipment, drift cutters require regular inspection and cleaning to maintain their efficiency. After each snow removal session, inspect the drift cutters for any signs of damage or wear. Check the mounting hardware to ensure that it is secure and tighten if necessary. Remove any accumulated snow or ice from the blades to prevent them from becoming dull or ineffective. Regular cleaning and maintenance increase the longevity of the drift cutters and ensure their continued performance.

4.3 Replacements and Repairs

Over time, drift cutters may experience wear and tear, especially if used frequently or in particularly challenging snow conditions. If you notice significant damage or if the drift cutters no longer function effectively, it may be time for replacements or repairs. Consult the manufacturer’s guidelines or a professional for guidance on replacing worn-out drift cutters or repairing any damaged components. Keeping your drift cutters in good condition is key to their performance and your overall snow removal experience.

5. Choosing the Right Drift Cutters

5.1 Compatibility with Snowblower

When selecting drift cutters, it is crucial to ensure their compatibility with your snowblower. Consider the make and model of your snowblower and check the specifications provided by the manufacturer. This ensures that the drift cutters will fit and function properly with your specific snowblower. Choosing compatible drift cutters guarantees optimal performance and prevents any compatibility issues.

5.2 Quality and Durability

Investing in high-quality drift cutters is essential to their longevity and performance. Look for drift cutters made from durable materials such as steel or hardened plastic. These materials are designed to withstand the harsh winter conditions and prolonged use. Additionally, consider the overall construction and design of the drift cutters to ensure their durability. Reading customer reviews and seeking recommendations from experienced snow removal professionals can help you choose reliable and long-lasting drift cutters.

5.3 User-Friendly Features

Consider the user-friendly features offered by different drift cutter models. Adjustable height settings, easy installation mechanisms, and simple maintenance requirements are factors to keep in mind. Having the ability to adjust the cutting depth or easily remove and clean the drift cutters can significantly enhance your snow removal experience. Choose drift cutters that offer convenience and user-friendly features that align with your specific needs and preferences.

6. Alternatives to Drift Cutters

6.1 Snow Fences

Snow fences are another option to prevent snow drifts and improve snowblowing efficiency. These fences act as barriers and redirect the flow of wind, consequently reducing the formation of snow drifts. Snow fences are typically installed strategically around properties to protect desired areas from accumulating excessive snow. While not a direct substitute for drift cutters, they complement the snowblowing process by minimizing the formation of large snow drifts.

6.2 Snow Barriers and Windbreaks

Similar to snow fences, snow barriers and windbreaks serve as physical barriers to prevent snow accumulation and drifting. These barriers can be constructed using various materials, such as wooden planks or metal sheets, depending on the desired level of protection. Snow barriers and windbreaks are particularly useful in areas with high wind speeds, as they help create a sheltered space that reduces the likelihood of snow drifts forming.

6.3 Adjusting Blower Technique

While not a physical alternative, adjusting your snowblower technique can also help minimize the formation of snow drifts. By changing the angle and direction of the snowblower chute, you can better distribute the snow during the clearing process. Aim to disperse the snow evenly, rather than concentrating it in a single area, to prevent the build-up of large drifts. Experimenting with different techniques and modifying your blowing patterns can help improve the effectiveness of snow removal, especially in areas prone to drifting.

7. Safety Precautions When Using Drift Cutters

7.1 Awareness of Surroundings

When operating a snowblower with drift cutters, it is crucial to be aware of your surroundings. Watch out for obstacles, such as rocks, curbs, or uneven surfaces, as they can damage the drift cutters or the snowblower itself. Additionally, be mindful of people or animals nearby and ensure they are at a safe distance to prevent any accidents. Being aware of your surroundings helps ensure safe and efficient operation of the snowblower with drift cutters.

7.2 Proper Clothing and Protection

Snow removal can be physically demanding, so it is essential to wear appropriate clothing and protective gear. Dress in layers to stay warm and wear insulated, waterproof boots to keep your feet dry and comfortable. Use gloves to protect your hands and consider wearing safety goggles or a face shield to shield your eyes from flying debris. Additionally, always be cautious of the moving parts of the snowblower and avoid wearing loose clothing or jewelry that could get caught.

7.3 Clearing Obstructions

If you encounter any obstructions or tough-to-clear areas while using drift cutters, exercise caution. Avoid forcing the snowblower or drift cutters through dense or icy snow, as this can strain the machine or potentially cause damage. Instead, clear any blockages manually using a shovel or other appropriate tools. Taking the time to remove obstructions safely and effectively ensures the longevity of both the drift cutters and the snowblower.

8. Frequently Asked Questions (FAQs)

8.1 How often should drift cutters be replaced?

The lifespan of drift cutters can vary depending on factors such as frequency of use, snow conditions, and maintenance. However, on average, drift cutters should be replaced every few seasons or when noticeable wear or damage occurs. Regularly inspect the drift cutters after each snow removal session and consult the manufacturer’s guidelines for specific recommendations on replacement intervals.

8.2 Can drift cutters be installed on any snowblower?

Drift cutters are designed to be compatible with most snowblowers, but it is essential to ensure their compatibility with your specific make and model. Check the manufacturer’s specifications and guidelines to verify that the drift cutters you choose are suitable for your snowblower. Installing incompatible drift cutters may affect the performance of the snowblower or result in suboptimal snow removal.

8.3 Can drift cutters damage the snowblower?

When used correctly and installed properly, drift cutters should not cause damage to the snowblower. However, it is crucial to operate the snowblower with drift cutters with caution and observe proper usage techniques. Avoid pushing the snowblower into dense or icy snow that may strain the machine or cause the drift cutters to become damaged. Following the manufacturer’s guidelines and practicing safe snowblowing techniques will minimize the risk of damage to the snowblower.

9. Conclusion

Drift cutters serve as invaluable tools when it comes to efficient snow removal. By clearing snow drifts, preventing clogging, and enhancing overall efficiency, drift cutters offer numerous benefits for snowblower users. Understanding their function, proper usage, and maintenance will ensure optimal performance and longevity. When choosing drift cutters, consider compatibility with your snowblower, quality, and user-friendly features. While drift cutters are effective, alternatives such as snow fences and adjusting blower techniques can also enhance snow removal efficiency. Remember to always prioritize safety by being aware of your surroundings and wearing appropriate clothing and protection. By utilizing drift cutters effectively, you can conquer those stubborn snow drifts and enjoy a clean and snow-free environment with reduced time and effort.

What’s The Role Of A Snowblower’s Impeller?

Imagine a snowy winter day – the kind where you wake up to find your driveway and walkway buried beneath a thick blanket of snow. As you gear up to tackle the task of clearing it, you may wonder about the mysterious contraption that sits inside your trusty snowblower – the impeller. In this article, we will uncover the crucial role of a snowblower’s impeller, the unsung hero that transforms your snowy woes into a clear and passable path.

What’s The Role Of A Snowblower’s Impeller?

Whats The Role Of A Snowblowers Impeller?

1. Definition of an impeller

An impeller is a crucial component of a snowblower that is responsible for the movement and discharge of snow. It is typically a rotating device with blades or paddles that create a force, allowing the snow to be thrown out of the machine. The impeller is connected to the engine or motor of the snowblower and plays a vital role in effectively clearing snow from driveways, sidewalks, and other surfaces.

2. Function of the impeller

The main function of the impeller is to gather the snow that is collected by the auger and propel it out through the chute. While the auger is responsible for breaking up and collecting the snow, it is the impeller’s task to create the necessary force to propel the snow away from the clearing path. The impeller spins at a high speed, which generates centrifugal force, effectively throwing the snow out of the snowblower. This function is crucial for efficient snow removal and preventing clogging of the machine.

3. Role in snow removal process

The impeller’s role in the snow removal process is vital. After the auger collects the snow, it is transferred to the impeller, which then propels it out through the chute, effectively clearing the path. Without an efficient impeller, the snowblower would struggle to remove the snow effectively and could result in clogs or inefficient operation. The impeller ensures that the snow is thrown a sufficient distance away from the clearing area, minimizing the need for additional passes and enhancing overall efficiency.

Whats The Role Of A Snowblowers Impeller?

4. Impeller design and construction

Impellers are designed with specific considerations in mind, including durability, performance, and debris management. They are constructed with sturdy materials such as steel or heavy-duty composites to withstand the impact of icy or compacted snow. The design incorporates blades or paddles strategically positioned to provide optimal snow movement and discharge. The construction of the impeller ensures that it can withstand the demanding conditions of snow removal without compromising its functionality.

5. Impeller types

There are different types of impellers utilized in snowblowers, including single-stage and two-stage impellers. Single-stage impellers are typically used in smaller, more lightweight snowblowers. They have a single set of blades that rotate at high speeds, allowing for efficient snow discharge. Two-stage impellers, on the other hand, are commonly found in larger, more powerful snowblowers. These impellers have a primary set of blades to collect the snow and a secondary set to effectively propel it through the chute.

6. Impeller size and dimensions

The size and dimensions of the impeller can vary depending on the snowblower’s make and model. Generally, larger snowblowers designed for heavy-duty snow removal will have larger impellers. The size of the impeller directly impacts its snow-clearing capacity, as a larger impeller can generate more force to propel the snow away. However, it’s important to note that a larger impeller may require a more powerful engine or motor to operate effectively.

7. Impeller speed and rotation

The impeller’s speed and rotation play a crucial role in the snowblower’s overall performance. A higher impeller speed allows for greater snow discharge distance, ensuring that the snow is thrown a sufficient distance away from the cleared path. The rotation of the impeller determines the direction in which the snow is thrown. It is crucial to have a well-calibrated impeller speed and rotation to achieve optimal snowblower performance and prevent snow from being discharged in unwanted directions.

8. Impeller material and durability

Impellers are typically constructed from durable materials such as steel or heavy-duty composites. The choice of material ensures that the impeller can withstand the harsh conditions of snow removal. Steel impellers are known for their strength and longevity, while composite impellers offer the advantage of being more lightweight. Regardless of the material used, impellers undergo rigorous testing to ensure their durability and ability to withstand the demanding nature of snowblower operation.

9. Impeller maintenance and care

Proper maintenance and care of the impeller are essential for ensuring its longevity and optimal performance. It is recommended to regularly inspect the impeller for any signs of damage or wear. If any blades are bent or damaged, they should be promptly replaced to maintain the impeller’s effectiveness. Additionally, lubricating the impeller’s moving parts, such as the bearings, can help reduce friction and improve overall performance. Following the manufacturer’s guidelines for impeller maintenance and care will ensure that the snowblower operates smoothly without any impeller-related issues.

10. Impeller troubleshooting

In certain situations, the impeller may encounter issues that require troubleshooting. Common problems with the impeller can include clogging, reduced snow discharge distance, or abnormal noise during operation. If the impeller becomes clogged, it is important to shut off the snowblower and remove the obstruction carefully. Reduced snow discharge distance may indicate a worn or damaged impeller, which may need to be replaced. Abnormal noise could be a result of loose or misaligned impeller blades, which should be adjusted or tightened. Consulting the snowblower’s manual or contacting a professional can help diagnose and resolve impeller troubleshooting issues effectively.

In conclusion, the impeller plays a vital role in the snow removal process of a snowblower. Its function is to gather and propel the snow away from the clearing path, ensuring efficient and effective snow removal. Understanding the impeller’s design, size, speed, and material, along with proper maintenance and troubleshooting, will enhance the snowblower’s performance and ensure its longevity. Next time you use a snowblower, remember the important role that the impeller plays in keeping your driveways and sidewalks free from snow.

How Deep Of Snow Can A Snowblower Handle?

So, you’re gearing up for a snowy winter season and you’ve got your trusty snowblower ready to go. But before you head out to battle the piles of snow, you might be wondering just how deep of a snowfall your snowblower can handle. After all, you don’t want to find yourself stuck in a literal snowstorm, struggling with a machine that’s overwhelmed. In this article, we’ll explore just how deep of snow a snowblower can handle, providing you with some valuable insights to make your winter snow removal a breeze.

Factors that influence the snow depth a snowblower can handle

When it comes to using a snowblower, one of the most important things to consider is the depth of the snow that it can handle. There are several factors that can influence the maximum snow depth a snowblower can handle, including the type of snowblower, the size and power of the snowblower, the type of snow, the terrain and surface conditions, and the environmental factors.

Type of snowblower

The type of snowblower you choose can have a significant impact on the snow depth it can handle. There are three main types of snowblowers: single-stage, two-stage, and three-stage.

Single-stage snowblower

A single-stage snowblower is generally best suited for light and fluffy snowfalls. It uses an auger to gather the snow and propel it out of the chute. These snowblowers are typically smaller and less powerful, making them ideal for clearing smaller driveways and sidewalks.

Two-stage snowblower

A two-stage snowblower is more powerful than a single-stage snowblower and can handle deeper snow. It uses an auger to gather the snow and a separate impeller to propel it out of the chute. The auger breaks up the snow and feeds it to the impeller, making it more effective at handling wet and heavy snow.

Three-stage snowblower

The most powerful type of snowblower is the three-stage snowblower. It features an auger to gather the snow, an accelerator to break it up further, and an impeller to propel it out of the chute. These snowblowers are designed for heavy-duty snow removal and can handle the deepest snowfalls.

Size and power of the snowblower

Another important factor to consider is the size and power of the snowblower. The size of a snowblower is typically determined by its engine displacement, which is measured in cubic centimeters (cc). A larger engine displacement generally indicates a more powerful snowblower that can handle deeper snow.

Engine displacement

The engine displacement of a snowblower plays a crucial role in its capability to handle deep snow. Snowblowers with larger engine displacements, such as 250cc or higher, are generally better equipped to handle deeper snow. However, it’s important to choose an engine displacement that aligns with your specific snow removal needs.

Clearing width

The clearing width of a snowblower refers to the width of the path it can clear with each pass. Snowblowers with wider clearing widths generally have a greater capacity to handle deeper snow. For example, a snowblower with a clearing width of 28 inches can handle deeper snow compared to one with a clearing width of only 20 inches.

Clearing depth

In addition to the clearing width, the clearing depth of a snowblower is also an important consideration. Snowblowers with larger clearing depths can handle deeper snow more effectively. It’s recommended to choose a snowblower with a clearing depth that matches the average snow depth in your area.

Ampere rating

The ampere rating of a snowblower’s motor can also impact its ability to handle deep snow. A higher ampere rating generally indicates a more powerful motor that can handle heavier and deeper snow. Checking the ampere rating can help ensure that the snowblower is equipped to handle the snow depth you anticipate.

Type of snow

The type of snow you’re dealing with is another critical factor in determining the snow depth a snowblower can handle. Different types of snow require different levels of power and clearing techniques.

Light and fluffy snow

Light and fluffy snow is typically the easiest type of snow for a snowblower to handle. Both single-stage and two-stage snowblowers can effectively clear light and fluffy snow without much trouble. However, it’s important to note that the snow depth can still impact the efficiency and speed of the snowblower.

Wet and heavy snow

Wet and heavy snow can pose a greater challenge for snowblowers. Single-stage snowblowers may struggle to clear wet and heavy snow effectively, while two-stage and three-stage snowblowers are better equipped to handle the extra weight. The power and torque provided by these snowblowers enable them to handle wet and heavy snow more efficiently.

Packed or icy snow

Packed or icy snow can be particularly challenging to clear, as it requires more power and force to break up and remove. Two-stage and three-stage snowblowers are better suited for clearing packed or icy snow due to their auger and impeller systems, which can effectively break up and remove these types of snow.

Slush or mixed precipitation

Slush or mixed precipitation, such as a combination of snow and rain, can create challenging conditions for a snowblower. While single-stage snowblowers can handle slushy conditions to some extent, two-stage and three-stage snowblowers are generally more effective at handling slush due to their enhanced power and clearing capabilities.

Terrain and surface conditions

The terrain and surface conditions on which you’ll be using the snowblower can have a significant impact on the snow depth it can handle.

Flat and even surfaces

If you’ll primarily be using the snowblower on flat and even surfaces like driveways or sidewalks, you’ll have more flexibility when it comes to the snow depth. Most snowblowers, even single-stage ones, can handle moderate snow depths of 6 to 8 inches on flat surfaces without much difficulty.

Inclines and slopes

Inclines and slopes present additional challenges for snowblower operation, especially when dealing with deep snow. The added incline can make it more difficult for the snowblower to effectively clear the snow and propel it out of the chute. In such cases, it may be necessary to make several passes to remove the snow completely.

Uneven or bumpy terrain

Uneven or bumpy terrain can also affect the snowblower’s ability to handle deep snow. It may be more challenging for the snowblower to maintain traction and maneuverability on rough surfaces, which can impact its overall performance. Clearing deep snow on uneven terrain may require more effort and time.

Gravel or uneven surfaces

If you have gravel or uneven surfaces in your snow removal area, it’s important to choose a snowblower with adjustable skid shoes. Adjustable skid shoes allow you to raise the auger off the ground slightly, preventing it from picking up gravel or damaging the surface. When clearing gravel or uneven surfaces, it’s recommended to adjust the snowblower height accordingly to avoid potential damage.

Environmental factors

Various environmental factors can also influence the snow depth a snowblower can handle.

Temperature

Extreme temperatures, whether extremely cold or warm, can impact the performance of a snowblower. Extremely cold temperatures can cause the snow to freeze and become harder to remove, while warmer temperatures can lead to wetter and heavier snow. Snowblowers with higher power ratings and efficient snow handling mechanisms are better equipped to handle extreme temperatures and the associated snow conditions.

Humidity

Humidity levels can impact the consistency of the snow, making it lighter or heavier. Higher humidity levels can result in heavy and wet snow, which may require a more powerful snowblower to effectively clear. Lower humidity levels often produce lighter and fluffier snow, which is generally easier for most snowblowers to handle.

Wind speed

Wind speed can significantly impact snow depth by causing drifts and accumulations in certain areas. Snowblowers may face difficulties when clearing drifted snow, as the depth can be unpredictable and uneven. In cases of high wind speeds and drifting snow, additional caution and multiple passes may be necessary to ensure thorough clearing.

Snow density

The density of the snow, which refers to the weight of the snow in a given area, can also affect the snow depth. Heavy, dense snow requires more power to remove compared to lighter, fluffier snow. Snowblowers with higher horsepower or a three-stage mechanism are generally better suited for clearing dense snow effectively.

How Deep Of Snow Can A Snowblower Handle?

This image is property of www.snowblowersdirect.com.

Maximum snow depth for different snowblower types

The maximum snow depth that a snowblower can handle varies depending on the type of snowblower.

Single-stage snowblower

Single-stage snowblowers can typically handle snow depths of up to 8 to 12 inches, depending on the power and size of the machine. However, it’s important to consider the type of snow and other environmental factors, as these can impact the snowblower’s performance.

Two-stage snowblower

Two-stage snowblowers are more powerful and can handle deeper snow than single-stage snowblowers. On average, a two-stage snowblower can handle snow depths of up to 16 to 22 inches, depending on the specific snowblower’s size and power. However, the type of snow and other factors should still be taken into account.

Three-stage snowblower

Three-stage snowblowers are the most powerful and can handle the deepest snow. These snowblowers can typically handle snow depths of up to 20 to 30 inches or more, depending on the model’s specifications. Three-stage snowblowers are specifically designed for heavy-duty snow removal in areas that experience extreme winter conditions.

How Deep Of Snow Can A Snowblower Handle?

This image is property of contentgrid.homedepot-static.com.

Clearing strategies for deep snow

When faced with deep snow, certain clearing strategies can help optimize the snowblower’s performance and efficiency.

Multiple passes

In situations where the snow depth exceeds the snowblower’s recommended maximum, making multiple passes can be an effective approach. By making multiple passes over the same area, you can gradually clear the snow and prevent overexertion on the machine. This strategy may require extra time and effort but can help avoid straining the snowblower or causing potential damage.

Adjusting snowblower height

Adjusting the height of the snowblower can also be helpful when dealing with deep snow. Raising the height of the machine allows it to ride on top of the snow, preventing it from getting overloaded and becoming less effective. However, it’s important to find a balance, as setting the height too high may result in inadequate snow removal.

Clearing in layers

Clearing deep snow in layers can be a practical approach, especially if the snowblower struggles to handle the entire depth in a single pass. By dividing the snow into manageable layers, you can gradually remove it without overwhelming the machine. This technique may require multiple passes and adjustments to the clearing height, depending on the snowblower’s capabilities.

Using accessories or attachments

Certain accessories or attachments can enhance the snowblower’s performance when dealing with deep snow. For example, installing snow chains on the tires can improve traction in slippery conditions, allowing the snowblower to navigate and clear the snow more effectively. Additionally, using a skid shoe accessory can help protect the surface underneath and prevent the auger from picking up debris or damaging the snowblower.

How Deep Of Snow Can A Snowblower Handle?

This image is property of hgtvhome.sndimg.com.

Safety considerations when using a snowblower

While using a snowblower, it’s crucial to prioritize safety to prevent accidents and injuries. Here are some important safety considerations to keep in mind:

Reading the manufacturer’s guidelines

Before operating a snowblower, thoroughly read and understand the manufacturer’s guidelines and operating instructions. Familiarize yourself with the machine’s features, safety precautions, and recommended usage guidelines. Following these instructions will ensure safe and efficient snowblower operation.

Avoiding snowbanks or obstacles

When operating a snowblower, be aware of potential snowbanks, hidden obstacles, and debris in the snow. Snowbanks can contain hidden objects, such as rocks or branches, which can damage the snowblower or cause injury if they are picked up by the auger. Take care to avoid such obstacles and clear areas with hidden obstructions manually if necessary.

Wearing appropriate protective gear

Always wear appropriate protective gear when operating a snowblower. This includes goggles or safety glasses to protect your eyes from flying debris, ear protection to prevent hearing damage from the machine’s noise, and sturdy footwear with good traction to prevent slips or falls. It’s also advisable to wear warm clothing, gloves, and a hat to protect yourself from the cold.

Clearing snow during daylight or with ample lighting

Clearing snow during daylight or in well-lit areas is essential for maintaining visibility and preventing accidents. Adequate lighting ensures that you can see any potential obstacles or hazards in the snow, allowing you to operate the snowblower safely. If necessary, use additional lighting, such as portable floodlights or a headlamp, to improve visibility in darker areas.

Maintaining proper balance and stability

Maintaining proper balance and stability while operating a snowblower is crucial for your safety. Ensure that you have a firm and stable footing by wearing appropriate footwear and taking caution on slippery surfaces. Avoid overreaching or leaning too far while operating the machine, as this can destabilize your stance and increase the risk of falls or accidents.

How Deep Of Snow Can A Snowblower Handle?

This image is property of i.ytimg.com.

Conclusion

Understanding the limitations of a snowblower and considering various factors can help you determine the snow depth it can handle effectively. The type of snowblower, size and power, type of snow, terrain and surface conditions, and environmental factors all play a role in determining the snow depth a snowblower can handle. By choosing the right snowblower for your needs, following safety precautions, and properly maintaining the equipment, you can ensure efficient and safe snow removal during the winter season.

How Deep Of Snow Can A Snowblower Handle?

This image is property of contentgrid.homedepot-static.com.

Is It Worth Getting A Snowblower With Heated Handles?

If you live in a cold climate and are dreading the upcoming winter months filled with snow and icy temperatures, you may be wondering if investing in a snowblower with heated handles is worth it. With winter just around the corner, the thought of clearing your driveway and sidewalks becomes an inevitable chore. But are heated handles the solution that will make this task more bearable? In this article, we will explore the benefits and drawbacks of snowblowers with heated handles, helping you decide if this feature is worth the extra investment for a more comfortable winter snow removal experience.

Is It Worth Getting A Snowblower With Heated Handles?

Advantages of Heated Handles

Increased Comfort

One of the major advantages of snowblowers with heated handles is the increased comfort they provide during snow removal. Cold weather can make clearing snow a miserable and uncomfortable task, especially when you have to grip cold metal handles for an extended period of time. Heated handles help to keep your hands warm and toasty, allowing you to work comfortably even in freezing temperatures. By reducing the discomfort associated with cold hands, heated handles can make snowblowing a more enjoyable experience overall.

Prevention of Frostbite

In addition to increased comfort, heated handles also offer the important benefit of preventing frostbite. Frostbite occurs when the skin and underlying tissues freeze due to exposure to extremely cold temperatures. Exposing your bare hands to freezing metal handles for prolonged periods can put you at risk of developing frostbite. Heated handles help to maintain a comfortable temperature for your hands, reducing the risk of frostbite when using a snowblower in subzero conditions.

Improved Grip

Snow removal can be a slippery task, especially when the snow is wet and compacted. Heated handles can provide an improved grip, making it easier to maneuver the snowblower and maintain control while clearing snow. The warmth from the handles helps to keep your hands dry and sweat-free, preventing them from slipping and allowing you to maintain a firm grip on the machine. With improved grip, you can work more efficiently and effectively, reducing the risk of accidents or mishaps while operating the snowblower.

Efficient Snow Clearing

Another advantage of snowblowers with heated handles is their ability to facilitate efficient snow clearing. When your hands are warm and comfortable, you can work at a faster pace and for longer periods without having to take breaks to warm up your hands. This increased efficiency can be particularly helpful when dealing with heavy snowfall or large areas that need clearing. By minimizing the downtime caused by cold hands, heated handles enable you to clear snow more quickly, saving you time and effort.

Disadvantages of Heated Handles

Higher Cost

One of the main disadvantages of snowblowers with heated handles is their higher cost compared to traditional models without this feature. The addition of heating elements and the necessary electrical components increases the manufacturing cost of the snowblower, which is then passed on to the consumer. As a result, snowblowers with heated handles are generally more expensive than their non-heated counterparts. If you are on a tight budget, the higher cost of a snowblower with heated handles may be a deterrent.

Potential Maintenance Issues

Snowblowers with heated handles may also come with potential maintenance issues. The heating elements and electrical components can be prone to damage or malfunction over time, requiring repairs or replacement. If the heating system fails, you may lose the benefit of the heated handles and have to rely on other means to keep your hands warm while using the snowblower. Additionally, the added complexity of the heating system may require more frequent maintenance and service compared to conventional snowblowers.

Limited Availability

Snowblowers with heated handles may not be as readily available as non-heated models. While more manufacturers are incorporating this feature into their snowblower designs, the selection of snowblowers with heated handles may still be limited. Depending on your location and the specific model you are interested in, it may be more challenging to find a snowblower with heated handles that meets your requirements. Limited availability may require you to compromise on other features or spend more time searching for the right snowblower.

Considerations Before Buying

Climate and Snowfall

Before buying a snowblower with heated handles, consider the climate and average snowfall in your area. If you live in an area with mild winters and occasional snowfall, the benefits of heated handles may not justify the additional cost. However, if you live in an area with harsh winters and heavy snowfall, the comfort and convenience of heated handles may make a significant difference in your snow removal experience.

Frequency of Use

The frequency with which you plan to use the snowblower is another important consideration. If you only need to clear small areas or plan to use the snowblower occasionally, heated handles may not be essential. However, if you regularly clear large driveways or have a significant amount of snow to remove, the added comfort and efficiency provided by heated handles can greatly enhance your snow removal routine.

Budget

Consider your budget before investing in a snowblower with heated handles. As mentioned earlier, these models generally come with a higher price tag compared to non-heated options. Assess your financial situation and determine whether the increased cost is worth the benefits for your specific needs. If budget constraints are a concern, you may want to explore alternative heating options or consider models with other features that are more important to you.

User Preference

Ultimately, your personal preference should also factor into the decision. Some individuals may be more sensitive to cold temperatures and prioritize the comfort and warmth provided by heated handles. Others may not mind the cold as much and may be willing to forego this feature in favor of other aspects, such as durability or power. Consider your own preferences and priorities to determine whether heated handles are the right choice for you.

Is It Worth Getting A Snowblower With Heated Handles?

Alternative Heating Options

Hand Warmers

If you decide not to invest in a snowblower with heated handles, hand warmers can be a convenient alternative. Hand warmers are small pouches or packets that contain chemicals or materials that generate heat when activated. They can be easily placed inside gloves or pockets to provide warmth to your hands while operating a snowblower. Hand warmers are affordable, widely available, and disposable, making them a popular choice for individuals who prefer not to spend extra on a snowblower with heated handles.

Insulated Gloves

Insulated gloves are another option to keep your hands warm during snow removal. These gloves are designed with materials that provide insulation and retain heat effectively. Look for gloves specifically designed for cold weather, with features such as waterproofing, windproofing, and breathability. Insulated gloves can provide a similar level of warmth and comfort as heated handles, allowing you to work comfortably while protecting your hands from the cold.

Proper Layering

Layering your clothing can also go a long way in keeping your hands warm while using a snowblower. By wearing multiple layers on your hands, you can trap heat and create a barrier against the cold. Start with a thin, moisture-wicking base layer to keep your hands dry, followed by a thermal or insulating layer for warmth, and finish with an outer layer that is windproof and waterproof. This layering technique can provide excellent protection from the cold, even without heated handles.

Comparing Heated Handles to Alternatives

Effectiveness

When comparing heated handles to alternative heating options, the effectiveness of keeping your hands warm is an important consideration. Heated handles provide direct heat to your hands, ensuring maximum warmth during snow removal. Hand warmers and insulated gloves, on the other hand, rely on insulation and heat retention properties to keep your hands warm. While they both offer effective solutions, heated handles may provide a more consistent and reliable source of heat.

Convenience

In terms of convenience, heated handles have a clear advantage over alternative heating options. Once the snowblower is turned on, the heated handles automatically warm up, eliminating the need for additional steps or equipment. Hand warmers, on the other hand, require activation and placement inside gloves or pockets. Insulated gloves need to be worn and taken off when not in use. Heated handles offer a hassle-free solution that requires no extra effort or maintenance.

Cost

Cost is an important factor in comparing heated handles to alternative options. Heated handles are generally more expensive upfront due to the added features and technology. Hand warmers are relatively inexpensive and can be purchased in bulk, making them a cost-effective choice. Insulated gloves come at a range of price points, depending on the brand and materials used. Consider your budget and the long-term value when determining the cost-effectiveness of heated handles versus alternative options.

Popular Snowblower Brands with Heated Handles

Brand A

Brand A is renowned for its innovative designs and focus on user comfort. Their snowblowers with heated handles come equipped with advanced heating systems that provide consistent warmth while clearing snow. Customers praise the effectiveness and durability of Brand A’s heated handles, making them a popular choice among those seeking a top-of-the-line snowblower.

Brand B

Brand B is known for its reliability and affordability. Their snowblowers with heated handles offer a great combination of functionality and value for money. Customers appreciate the quality construction and performance of Brand B’s heated handles, making their snowblowers a popular choice for homeowners on a budget.

Brand C

Brand C is a favorite among snow removal professionals. Their snowblowers with heated handles are designed for heavy-duty use and can withstand extreme winters. With a reputation for durability and performance, Brand C’s heated handles are a preferred option for those who rely on their snowblowers day in and day out.

Customer Reviews and Experiences

Positive Feedback

Customers who have used snowblowers with heated handles often rave about the comfort and convenience they provide. Many users express how the heated handles have transformed their snowblowing experience, making it more enjoyable and less physically taxing. Positive reviews often mention the immediate warmth, improved grip, and increased efficiency that come with heated handles, leading customers to highly recommend them for anyone facing cold winters and frequent snow removal.

Negative Feedback

Negative feedback regarding snowblowers with heated handles typically revolves around the higher cost and potential maintenance issues. Some customers feel that the added expense outweighs the benefits provided by heated handles, especially if they already have alternative ways to keep their hands warm. Concerns about the reliability and durability of the heating system are also occasionally mentioned. However, it is important to note that these negative experiences are in the minority, with many users reporting satisfaction with and reliance on their heated handles.

Real-World Experiences

Real-world experiences with snowblowers with heated handles vary depending on individual needs and preferences. Some users find heated handles to be a game-changer, providing unparalleled comfort and warmth during snow removal. Others feel that the benefits are not significant enough to justify the added cost. It is essential to consider your specific circumstances and priorities when evaluating real-world experiences, as what works for one person may not work for another.

Expert Opinions

Snow Removal Professionals

Snow removal professionals often appreciate the advantages of snowblowers with heated handles. The comfort and improved grip they provide can make a significant difference when working long hours in extreme weather conditions. Professionals also appreciate the increased efficiency that comes with heated handles, allowing them to work faster and clear more snow in less time. Their expert opinion reinforces the notion that heated handles are worth considering for those who rely on their snowblowers for professional use.

Product Experts

Product experts agree that heated handles can be a valuable feature, especially for individuals who face harsh winters and frequent snowfall. They point out that the added cost of snowblowers with heated handles is justified by the enhanced comfort and efficiency provided. However, they also emphasize that individual preference, budget, and specific needs should be taken into consideration before making a purchasing decision. Product experts advise assessing your personal circumstances and weighing the pros and cons before investing in a snowblower with heated handles.

Tips for Maintaining Heated Handles

Proper Cleaning

To ensure the longevity and performance of heated handles, proper cleaning is essential. Use a damp cloth or sponge to wipe the handles and remove any dirt, debris, or snow buildup. Avoid using abrasive or harsh cleaning agents that may damage the handles. Additionally, avoid submerging the handles in water or exposing them to excessive moisture, as this can compromise the electrical components.

Storage Tips

When storing a snowblower with heated handles, it is important to take proper precautions. Keep the snowblower in a clean and dry area that is protected from extreme temperatures and moisture. Consider covering the snowblower or using a dedicated storage cover to shield it from dust and debris. Disconnect the snowblower from the power source to prevent unintentional activation of the heated handles. Following these storage tips will help prolong the lifespan of the heated handles and maintain their efficiency.

Troubleshooting

If you encounter any issues with the heated handles, refer to the manufacturer’s troubleshooting guide or contact their customer support. Manufacturers often provide comprehensive resources to assist customers in resolving common issues. Avoid attempting to repair or modify the heated handles yourself, as this can void the warranty or cause further damage. When in doubt, seek professional assistance to preserve the functionality of the heated handles.

Conclusion

Deciding whether getting a snowblower with heated handles is worth it ultimately comes down to personal preference and value for money. The increased comfort, prevention of frostbite, improved grip, and efficient snow clearing offered by heated handles can greatly enhance the snow removal experience. However, the higher cost, potential maintenance issues, and limited availability of snowblowers with heated handles are factors to consider.

Before making a purchase, evaluate the climate and snowfall in your area, the frequency of snowblowing, your budget, and your own preferences. Consider alternative heating options like hand warmers and insulated gloves if heated handles don’t fit within your budget or requirements. Compare the effectiveness, convenience, and cost of heated handles to alternative options to determine which best suits your needs.

Popular snowblower brands with heated handles, such as Brand A, Brand B, and Brand C, offer a range of options to meet different budgets and requirements. Customer reviews and experiences vary, with many expressing satisfaction and others highlighting the potential drawbacks. Pay attention to real-world experiences and expert opinions to gain a well-rounded understanding.

To maintain heated handles, keep them clean, store the snowblower properly, and follow troubleshooting guidelines provided by the manufacturer. Regular maintenance and care will ensure that the heated handles continue to function optimally.

In conclusion, whether getting a snowblower with heated handles is worth it is a personal decision influenced by various factors. Consider the advantages and disadvantages, weigh the alternatives, understand popular brands, and seek expert opinions. Ultimately, find the solution that offers the most value for your money and enhances your snow removal experience.

What Is A Three-stage Snowblower?

So you’ve found yourself in the midst of a snowy winter, constantly battling the never-ending piles of snow that seem to accumulate overnight. You’ve heard about these mythical machines called three-stage snowblowers, but you’re not quite sure what they are or how they differ from your ordinary snow thrower. Well, fear not, because in this article, we’re going to demystify the three-stage snowblower and uncover why it might just be the answer to all your winter woes. A three-stage snowblower is a powerful machine designed to efficiently remove snow from driveways, sidewalks, and other outdoor areas. It is a step up from traditional two-stage snowblowers and offers several advantages in terms of snow clearing capability. By understanding what a three-stage snowblower is and how it works, you can make an informed decision about whether it’s the right choice for your snow removal needs.

What Is A Three-stage Snowblower?

This image is property of www.snowblowersdirect.com.

Definition of a three-stage snowblower

To understand what a three-stage snowblower is, it helps to first explore the general concept of a snowblower. A snowblower is a machine used to remove snow by scooping it up from the ground and then ejecting it through a chute. It helps to speed up the snow clearing process and is often seen as a more efficient alternative to shoveling or using a snowplow.

A three-stage snowblower differs from other snowblower types, such as single-stage or two-stage snowblowers, due to its three distinct stages of snow removal. These stages utilize different mechanisms and components to effectively gather, process, and propel the snow.

How does a three-stage snowblower work?

A three-stage snowblower works through a series of three stages that work together to effectively clear snow. Let’s take a closer look at each stage:

Stage 1: Auger gathers snow

The first stage of a three-stage snowblower involves an auger, which is a rotating helical blade that breaks up and collects the snow. The auger is positioned at the front of the machine and cuts into the snow, scooping it up and directing it towards the center of the snowblower.

Stage 2: Impeller processes the snow

Once the snow is gathered by the auger, it is then fed into the impeller. The impeller is a high-speed fan-like component that further breaks up and processes the snow. It provides an additional level of efficiency and power, ensuring that the snow is properly processed before being propelled out of the machine.

Stage 3: Accelerator propels the snow

After the snow is processed by the impeller, it is propelled out of the machine through the accelerator. The accelerator is responsible for forcefully ejecting the snow through the chute, at a high velocity and distance. This final stage ensures that the cleared snow is effectively thrown away and removed from the desired area.

What Is A Three-stage Snowblower?

This image is property of www.cubcadet.com.

Advantages of using a three-stage snowblower

There are several advantages to using a three-stage snowblower compared to other types of snowblowers. These advantages include:

Increased snow clearing capability

One of the primary advantages of a three-stage snowblower is its increased snow clearing capability. The three-stage design allows for more efficient snow removal, making it well-suited for heavy snowfall or large snow accumulation. It can handle larger amounts of snow without clogging or slowing down, allowing you to clear your driveway or walkway more quickly and effectively.

Effective in heavy, wet, or compacted snow

Another advantage of a three-stage snowblower is its effectiveness in heavy, wet, or compacted snow. The combination of the auger, impeller, and accelerator stages allows the snowblower to break up and process dense snow, making it easier to remove. This is particularly beneficial in regions with frequent snowstorms or where the snow is wet and heavy.

Ability to handle larger areas

Due to its increased snow clearing capability, a three-stage snowblower is ideal for clearing larger areas. Whether you have a long driveway or a commercial property with extensive sidewalk areas, a three-stage snowblower can efficiently handle larger snow removal tasks. It allows you to quickly and effectively clear snow from your entire property, saving you time and effort.

Reduced clearing time

With its powerful design and efficient snow clearing capability, a three-stage snowblower can significantly reduce the time it takes to clear snow. Compared to other snowblower types or manual shoveling, a three-stage snowblower can complete the task in less time. This is especially beneficial when dealing with time-sensitive situations, such as needing to clear snow before work or school in the morning.

Disadvantages of using a three-stage snowblower

Despite its advantages, there are also some disadvantages of using a three-stage snowblower. These include:

Higher cost compared to other snowblower types

One of the main disadvantages of a three-stage snowblower is its higher cost compared to other snowblower types. The additional stages and components involved in the design of a three-stage snowblower contribute to its higher price point. If you are on a tight budget or have limited snow removal needs, a three-stage snowblower may not be the most cost-effective option.

Heavier and bulkier design

Due to its more complex design and additional stages, a three-stage snowblower tends to be heavier and bulkier than other snowblower types. This can make it more difficult to maneuver, especially in tight or narrow spaces. If you have limited storage space or physical limitations, the size and weight of a three-stage snowblower may pose challenges.

Requires significant storage space

As mentioned earlier, the larger size of a three-stage snowblower can make storage a concern. This machine typically requires a considerable amount of storage space, whether it’s in a garage, shed, or other storage area. Before purchasing a three-stage snowblower, ensure that you have enough room to store it properly without it getting in the way of other items or vehicles.

More complex operation and maintenance

Compared to other snowblower types, operating and maintaining a three-stage snowblower can be more complex. The additional stages and components require more attention and care to ensure optimal performance. Regular maintenance tasks, such as inspecting and cleaning the parts, checking and changing oil and spark plugs, and adjusting cables and controls, may be more involved. If you prefer a simpler and less demanding snowblower, a three-stage snowblower may not be the best choice.

What Is A Three-stage Snowblower?

This image is property of www.snowblowersdirect.com.

Features to consider when purchasing a three-stage snowblower

When purchasing a three-stage snowblower, there are several features you should consider to ensure you choose the right one for your needs. These features include:

Clearing width and intake height

The clearing width and intake height refer to the size of the area a snowblower can effectively clear in a single pass. Consider the size of the areas you need to clear and choose a three-stage snowblower with an appropriate clearing width and intake height. A wider clearing width and higher intake height allow you to clear wider paths and handle deeper snow.

Engine power and performance

The engine power and performance of a three-stage snowblower determine how effectively and efficiently it can clear snow. Consider the size of your property and the typical snow conditions in your area when choosing an engine power rating. A more powerful engine can handle heavier snow and larger areas more easily.

Number of forward and reverse speeds

The number of forward and reverse speeds on a three-stage snowblower can impact its ease of use and versatility. Having multiple speed options allows you to adjust the snowblower’s pace according to the conditions and your preference. Look for a snowblower with a range of speeds, including both forward and reverse, to ensure smooth operation.

Adjustable chute and deflector controls

The chute and deflector controls determine the direction and distance at which the snow is thrown. Look for a three-stage snowblower with adjustable chute and deflector controls, as this allows you to direct the expelled snow where you want it to go. This feature provides more control and flexibility during the snow clearing process.

Electric or manual start option

Consider whether you prefer an electric or manual start option for your three-stage snowblower. Electric start snowblowers are easier to start, especially in cold weather, as they require simply pushing a button. Manual start snowblowers, on the other hand, require the use of a pull cord to start the machine. Choose the option that aligns with your preference and convenience.

Single-hand control features

Some three-stage snowblowers come with single-hand control features, which allow you to operate the machine with one hand while keeping the other hand free. This can be particularly useful if you need to adjust the chute or deflector while operating the snowblower. If single-hand control is important to you, look for models that offer this feature.

Headlight and heated handgrips

If you often find yourself clearing snow in low-light conditions or extremely cold weather, consider a three-stage snowblower with a built-in headlight and heated handgrips. The headlight improves visibility, while the heated handgrips keep your hands warm and comfortable during operation.

Wheel or track drive system

Three-stage snowblowers typically come with either a wheel or track drive system. A wheel drive system is suitable for most residential applications, providing good traction and maneuverability. A track drive system, on the other hand, offers enhanced stability and traction, making it ideal for uneven or hilly terrains. Choose the drive system that best suits your specific needs and the conditions in which you will be using the snowblower.

Additional accessories and attachments

Some three-stage snowblowers come with additional accessories and attachments, such as drift cutters, skid shoes, or snow cabs. These can enhance the snowblower’s performance and make it easier to handle specific snow removal tasks. Consider the additional accessories and attachments available for a particular snowblower model and decide if they align with your needs.

Noise levels and emission standards

Lastly, consider the noise levels and emission standards of a three-stage snowblower. Look for models that comply with noise regulations and emission standards in your area. Lower noise levels can help reduce disturbance to yourself and your neighbors, while adherence to emission standards ensures you are using a more environmentally friendly machine.

Maintenance and care for a three-stage snowblower

Proper maintenance and care are essential for keeping your three-stage snowblower in optimal working condition. Here are some key maintenance tasks to keep in mind:

Regular inspections and cleaning

Perform regular inspections of your snowblower to check for any loose or damaged parts. Clean the machine after each use to remove any snow, ice, or debris that may have accumulated. Regular inspections and cleaning help to prevent any issues and ensure that your snowblower is ready to perform when needed.

Checking and changing oil and spark plug

Check the oil levels in your snowblower regularly and top it up as needed. Change the oil according to the manufacturer’s recommendations to maintain the engine’s performance. Additionally, check the spark plug and replace it if necessary to ensure a reliable start and efficient operation.

Replacing or sharpening blades and augers

The blades and augers of a three-stage snowblower can wear down over time, affecting their efficiency. Regularly inspect the blades and augers and replace or sharpen them as needed. This helps to maintain optimal snow clearing performance and prevent unnecessary strain on the machine.

Adjusting and lubricating cables and controls

Regularly inspect the cables and controls of your three-stage snowblower and ensure they are properly adjusted. Lubricate any moving parts, such as cables and control mechanisms, to prevent rust and ensure smooth operation. This helps to maintain the overall performance and lifespan of your snowblower.

Ensuring proper fuel management

Follow the manufacturer’s guidelines for fuel management to ensure your snowblower operates at its best. Always use the recommended fuel type and avoid using stale or contaminated fuel. Proper fuel management helps to prevent engine damage and maintain optimal performance.

Storing the snowblower during off-seasons

When the snowblower is not in use, it’s important to store it properly to prevent damage and extend its lifespan. Follow the manufacturer’s recommendations for storing your three-stage snowblower during off-seasons. This typically involves draining the fuel, providing proper ventilation, and protecting the machine from moisture and extreme temperatures.

What Is A Three-stage Snowblower?

This image is property of www.troybilt.com.

Popular brands of three-stage snowblowers

Several popular brands specialize in manufacturing three-stage snowblowers. Here are a few brands worth considering:

Brand A

Brand A is known for its durable and high-performing three-stage snowblowers. They offer a range of models with various features and specifications to suit different needs and budgets. Brand A snowblowers are often praised for their reliability and ease of use.

Brand B

Brand B is a reputable manufacturer that produces powerful and efficient three-stage snowblowers. Their models are designed for heavy-duty snow clearing and are suitable for both residential and commercial use. Customers often appreciate the durability and performance of Brand B snowblowers.

Brand C

Brand C is a well-established brand that offers a wide selection of three-stage snowblowers. Their models are known for their exceptional clearing capabilities and durability. Brand C snowblowers are often favored by professionals and homeowners who require reliable and efficient snow removal.

Comparing three-stage snowblowers with other types

It’s helpful to compare three-stage snowblowers with other types of snowblowers to determine which one is best suited for your needs. Let’s briefly compare three-stage snowblowers with two-stage snowblowers, single-stage snowblowers, and manual snow removal:

Two-stage snowblower

Two-stage snowblowers are similar to three-stage snowblowers but lack the third stage of snow removal. While both types are effective at clearing snow, a three-stage snowblower provides increased snow clearing capability. The additional stage allows for more efficient processing and propulsion of the snow, making the three-stage option better suited for heavy, wet, or compacted snow.

Single-stage snowblower

Single-stage snowblowers are less powerful than both two-stage and three-stage snowblowers. They rely solely on an auger to gather and process the snow, without the additional stages found in the more advanced models. Single-stage snowblowers are suitable for lighter snowfall and smaller areas. If you frequently experience heavy snowfall or need to clear larger areas, a three-stage snowblower may be a better choice.

Shoveling or manual snow removal

Shoveling or manual snow removal is the most traditional and basic method of removing snow. It involves using a snow shovel to manually lift and throw the snow. While shoveling can be a good form of exercise, it can also be physically demanding and time-consuming, especially for larger snowfalls. If you prefer a more efficient and less labor-intensive option, a three-stage snowblower offers significant advantages.

What Is A Three-stage Snowblower?

This image is property of mobileimages.lowes.com.

Using a three-stage snowblower efficiently

To make the most of your three-stage snowblower, it’s important to use it efficiently. Here are some tips to keep in mind:

Dress appropriately for the conditions

When operating a three-stage snowblower, it’s important to dress appropriately for the conditions. Wear warm and waterproof clothing to protect yourself from the cold and wet snow. Additionally, wear sturdy boots with good traction to prevent slipping and ensure stability while operating the machine.

Be mindful of safety precautions

Prioritize safety while using a three-stage snowblower. Familiarize yourself with the machine’s safety features and follow the manufacturer’s instructions. Keep your hands and feet away from moving parts, and never attempt to clear clogs or obstructions while the snowblower is running. Stay alert and aware of your surroundings to avoid accidents or injuries.

Avoid clearing snow over gravel or rough surfaces

To prevent damage to the snowblower and ensure optimal performance, avoid clearing snow over gravel or rough surfaces. The auger blades can become damaged when in contact with these types of surfaces, resulting in decreased efficiency and potential repairs. Clearing snow over a smooth and even surface is ideal.

Keep pets and children at a safe distance

When operating a three-stage snowblower, it’s important to keep pets and children at a safe distance. The machine’s moving parts and discharged snow can pose a risk, and it’s important to ensure the safety of those around you. Encourage pets and children to remain indoors or in a safe area away from the snowblower while it is in operation.

Regularly check for clogs and obstructions

During operation, regularly check for clogs or obstructions in the chute and auger area of your three-stage snowblower. If you notice any blockages, immediately turn off the machine and carefully clear the debris. Keeping the snowblower free from clogs ensures consistent and efficient snow clearing.

With these tips in mind, you can operate your three-stage snowblower in an efficient and safe manner.

In conclusion, a three-stage snowblower is a powerful machine designed to efficiently remove snow from various outdoor areas. Its three-stage design allows for improved snow clearing capability and effectiveness, especially in heavy or wet snow conditions. While it has advantages such as increased snow clearing capability and reduced clearing time, it also has some disadvantages, including higher cost and more complex maintenance. When purchasing a three-stage snowblower, consider factors such as clearing width, engine power, and adjustable controls. Proper maintenance, such as checking and changing oil, inspecting and sharpening blades, and fuel management, will ensure the longevity and optimal performance of your snowblower. Popular brands of three-stage snowblowers include Brand A, Brand B, and Brand C. Comparing three-stage snowblowers with other types, such as two-stage snowblowers or manual snow removal, will help you determine the best option for your needs. By operating your three-stage snowblower efficiently and following safety precautions, you can effectively clear snow from your property and make the winter season more manageable.