Tag Archives: Snowblower maintenance

How Do I Clean The Carburetor Of My Snowblower?

So you’ve got a snowblower and it’s not running as smoothly as it used to? Well, one possible culprit could be a dirty carburetor. While it may seem like a daunting task to tackle, cleaning the carburetor of your snowblower doesn’t have to be rocket science. In this article, we’ll walk you through the steps to effectively clean the carburetor and get your snowblower back in tip-top shape for the winter season. Say goodbye to sputtering engines and hello to efficient snow clearing!
How Do I Clean The Carburetor Of My Snowblower?

Preparing for Carburetor Cleaning

Before you start cleaning the carburetor of your snowblower, it’s important to gather all the necessary tools. You’ll need a socket set, screwdrivers (both Phillips and flathead), pliers, a carburetor cleaner, compressed air canister, safety gloves, and safety goggles. Having all these tools at hand will make the cleaning process much smoother and efficient.

Next, you’ll want to disconnect the spark plug of your snowblower. This is an important safety precaution to prevent accidental starting of the engine while you’re working on the carburetor. Locate the spark plug wire and gently pull it off the spark plug. Keep it safely away from the spark plug to avoid any contact.

To ensure your snowblower stays in place while you work on the carburetor, it’s essential to secure it. You can use wooden blocks or sturdy clamps to keep it stable. This will prevent any accidental movement or tipping over during the cleaning process.

Locating the Carburetor

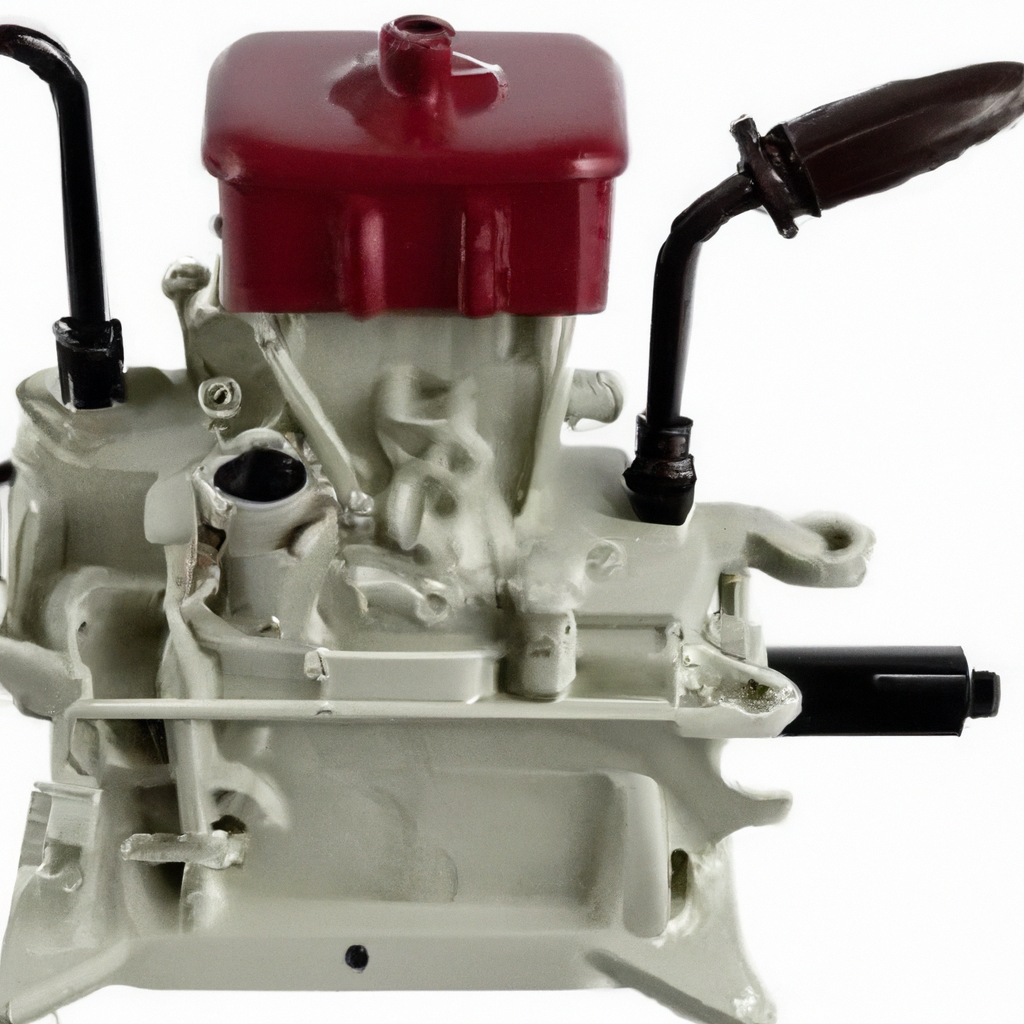
To clean the carburetor effectively, you need to locate it first. The carburetor is typically positioned near the engine, often on the side or top. Consult your snowblower’s user manual if you’re unsure about its exact location. Familiarizing yourself with the carburetor’s position will make it easier for you to proceed with the cleaning process.

Once you’ve found the carburetor, you’ll need to remove the air filter assembly to access it. The air filter assembly is usually held in place by a couple of screws or clips. Use the appropriate tool to remove them and carefully take off the assembly. Set it aside in a safe spot so you can put it back later.

Removing the Carburetor from the Snowblower

The first step in removing the carburetor is to drain the fuel system. Locate the fuel shut-off valve (if applicable) and turn it to the “Off” position. This will prevent fuel from leaking out during the removal process. Next, place a container or a cloth underneath the carburetor to catch any fuel that might still be in the system.

To disconnect the fuel line from the carburetor, you’ll need to use pliers to loosen the clamps that secure it. Once the clamps are loose, carefully pull the fuel line off the carburetor. Take your time and ensure that no fuel spills in the process.

Depending on your snowblower model, there may be several attachments connected to the carburetor, such as throttle cables or linkages. Take note of their positions and quickly snap a photo if needed. Carefully disconnect these attachments, ensuring you remember how they were connected for reassembly later.

Now that the fuel line and attachments are disconnected, you can proceed to unbolt the carburetor itself. Using the appropriate socket or wrench, remove the bolts securing the carburetor to the snowblower. Keep track of the bolts to ensure you don’t misplace them.

Disassembling the Carburetor

With the carburetor removed, it’s time to disassemble it for thorough cleaning. Start by removing the carburetor bowl, which is the bottom part of the carburetor. This is usually held in place by one or more screws. Loosen the screws and carefully take off the bowl. Be cautious, as there might be residual fuel present.

Next, you’ll need to take apart the float assembly. The float assembly controls the fuel flow within the carburetor. Locate the hinge pin that connects the float to the carburetor body and carefully remove it. Gently lift the float and needle valve out of the carburetor. Take note of the position and orientation of the float and needle valve.

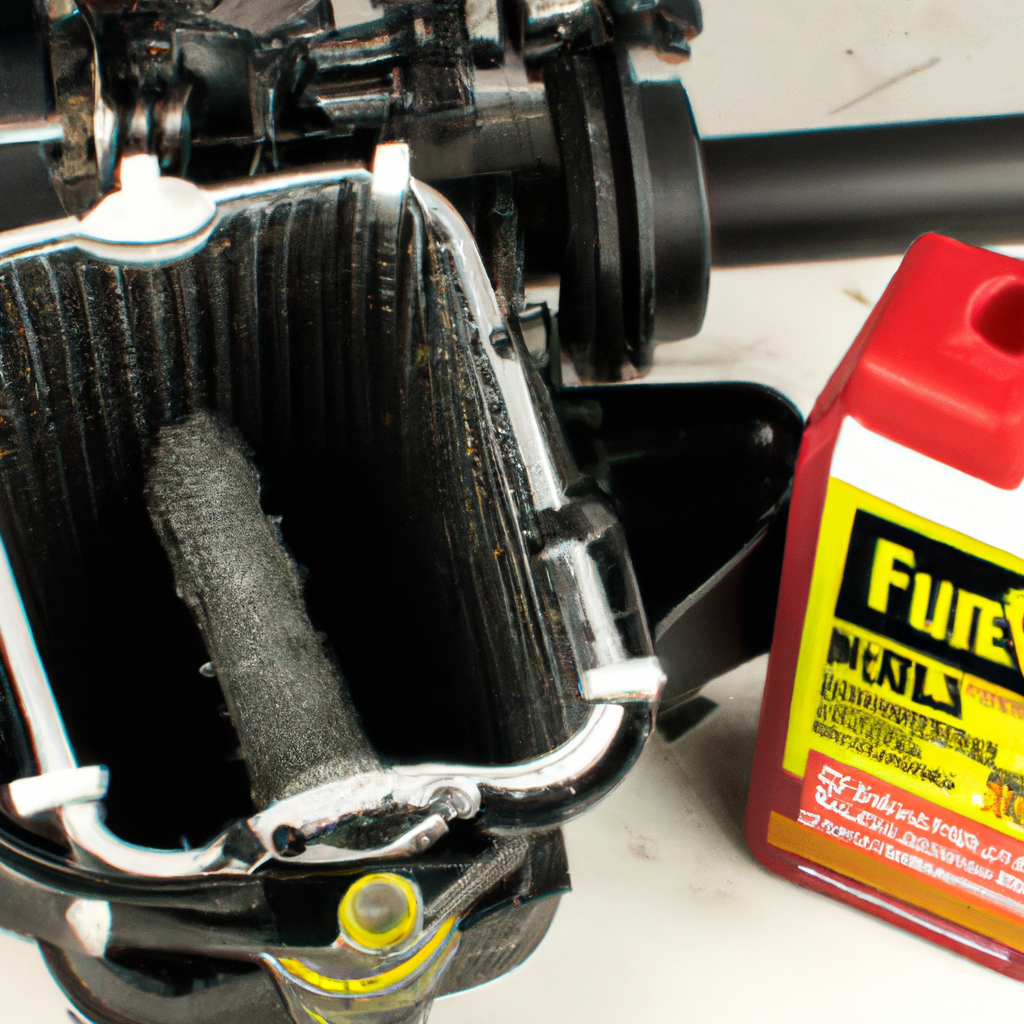
With the float assembly removed, you can now focus on cleaning the jets and passages of the carburetor. These small orifices can easily get clogged with debris, affecting the carburetor’s performance. Use a carburetor cleaner and a small cleaning brush to thoroughly clean the jets and passages. Ensure that no blockages remain before moving on to the next step.

How Do I Clean The Carburetor Of My Snowblower?

Cleaning the Carburetor Components

To clean the carburetor components effectively, you can start by soaking the disassembled parts in a carburetor cleaner. Follow the instructions on the cleaner packaging for the appropriate soaking time. This will help break down any residual fuel or dirt in the parts, making it easier to remove.

After soaking, use compressed air to blow out any remaining debris from the carburetor components. Pay close attention to the jets, passages, and any crevices where dirt may accumulate. The compressed air should dislodge and remove any stubborn particles, ensuring a thorough cleaning.

While cleaning the carburetor bowl, make sure to remove any gunk or buildup. Scrub it gently with a cleaning brush, ensuring all the surfaces are clean. Rinse it with water to remove any remaining cleaner solution and pat it dry with a cloth.

Similarly, clean the float assembly, ensuring there is no dirt or residue left on the float or needle valve. Check for any signs of wear or damage to these components. If necessary, you may need to replace them with new ones to ensure optimal carburetor performance.

Inspecting and Replacing Carburetor Parts

Before reassembling the carburetor, it’s important to inspect the diaphragm and gaskets for any signs of wear or damage. These components play a crucial role in the functioning of the carburetor. If you notice any tears, cracks, or deterioration, it’s recommended to replace them with new ones. Using damaged or worn-out parts can result in poor carburetor performance.

Ensure that you have the correct replacement parts for your specific carburetor model. Consult your snowblower’s user manual or contact a professional for guidance if needed. Replacing the diaphragm and gaskets will help maintain the carburetor’s efficiency and prevent future issues.

Reassembling the Carburetor

After inspecting and replacing any necessary parts, it’s time to reassemble the carburetor. Start by reattaching the float assembly to the carburetor body. Carefully insert the needle valve and align the float properly. Insert the hinge pin and ensure that the float moves freely without any obstructions or binding.

Now, you can install the carburetor bowl back onto the carburetor body. Align it correctly and tighten the screws securely. Ensure that the bowl is firmly attached and there are no leaks when reassembled. A properly sealed carburetor bowl is essential for the carburetor’s optimal performance.

Once the carburetor is reassembled, it’s time to secure it back onto the snowblower. Use the previously removed bolts and tighten them to secure the carburetor in place. Double-check that all the attachments and connections are properly aligned before proceeding to the next step.

Reconnecting the Fuel Line and Attachments

To restore the fuel supply to the carburetor, it’s essential to reconnect the fuel line. Slide the fuel line back onto the carburetor and use pliers to tighten the clamps securely. Ensure that the fuel line is properly seated and there are no fuel leaks.

Reattach any attachments that were disconnected earlier, such as throttle cables or linkages. Refer to the photo you took before disassembling, if necessary, to ensure the correct reconnection. Double-check each attachment to make sure it is securely and correctly in place.

Refilling the Fuel System

With the carburetor successfully reconnected, it’s time to refill the fuel system. Use clean fuel that is recommended for your snowblower model. Avoid using old or stale fuel, as it can degrade the carburetor’s performance. Fill the fuel tank to the appropriate level, following the manufacturer’s guidelines.

Testing the Carburetor

Before you consider the carburetor cleaning process complete, it’s crucial to test the snowblower to ensure proper functioning. Start by reconnecting the spark plug wire to the spark plug. Make sure it is securely and firmly in place, and double-check that you haven’t overlooked this crucial step.

Now, it’s time to start the snowblower. Follow the instructions in the user manual for starting the engine. Crank the engine and listen for smooth and steady operation. Pay attention to any unusual noises, vibrations, or issues with starting or running. Allow the snowblower to run for a few minutes to ensure everything is functioning as expected.

If you encounter any problems or notice any abnormalities, it’s recommended to consult a professional for further assistance. They can help identify any underlying issues or provide additional guidance for resolving the problem.

In conclusion, cleaning the carburetor of your snowblower is a task that can greatly improve its performance and longevity. By following the steps outlined in this guide and taking the necessary precautions, you can effectively clean the carburetor and ensure optimal functioning of your snowblower. Regular maintenance and cleaning of the carburetor will contribute to a smooth and hassle-free snowblowing experience.

How Often Should I Replace The Fuel Filter On My Snowblower?

If you rely on a snowblower to tackle those icy winter days, then it’s crucial to keep it in tip-top shape. One component that requires regular attention is the fuel filter. But how often should you replace it? The answer to this question depends on various factors, such as the frequency of use and the quality of the fuel you’re using. In this article, we’ll explore the importance of a clean fuel filter and provide some guidelines to help you determine when it’s time for a replacement. With this knowledge, you can ensure your snowblower keeps running smoothly, no matter how much snow Mother Nature throws your way.

How Often Should I Replace The Fuel Filter On My Snowblower?

This image is property of pixabay.com.

Factors affecting fuel filter replacement frequency

Frequency is affected by how often the snowblower is used

The frequency at which you need to replace the fuel filter in your snowblower is directly impacted by how often you use it. If you only use your snowblower occasionally during the winter season, you may be able to get away with replacing the fuel filter less frequently. However, if you heavily rely on your snowblower and use it frequently, it is important to replace the fuel filter more often to ensure optimal performance and prevent any potential issues.

Type of fuel used can impact replacement frequency

The type of fuel you use in your snowblower also plays a role in determining how often you should replace the fuel filter. If you use high-quality fuel that is free of impurities, the filter may last longer before needing replacement. On the other hand, if you use low-quality or contaminated fuel, the filter will become clogged more quickly, resulting in decreased performance. It’s important to use clean and high-quality fuel to extend the lifespan of your fuel filter and minimize the need for frequent replacements.

Maintenance and storage practices can influence replacement frequency

The way you maintain and store your snowblower can have a direct impact on the frequency of fuel filter replacements. Regular maintenance, such as cleaning and inspecting the filter, can help prolong its lifespan and ensure proper functionality. Additionally, proper storage of the snowblower during the offseason, such as storing it in a clean and dry environment, can prevent the filter from becoming clogged due to dust or moisture. By adhering to proper maintenance and storage practices, you can minimize the need for frequent fuel filter replacements.

Signs that indicate the fuel filter needs replacement

Decreased engine performance or power

One of the key signs that your fuel filter needs replacement is a noticeable decrease in engine performance or power. If you find that your snowblower is not as efficient as it used to be and struggles to clear snow effectively, it may be due to a clogged or dirty fuel filter. As the filter becomes blocked, it restricts the flow of fuel to the engine, resulting in reduced power and performance.

Difficulty starting or frequent stalling

Another indication that your fuel filter needs replacement is difficulty starting the snowblower or frequent stalling during operation. If you have trouble starting the engine or it frequently stalls while in use, it could be a sign of a clogged fuel filter. A clogged filter restricts the fuel flow, making it difficult for the engine to start or continue running smoothly.

Visible signs of debris or clogs in the filter

Inspecting the fuel filter regularly can help you identify visible signs of debris or clogs. If you notice any particles, dirt, or other foreign objects in the filter, it is a clear indication that it needs to be replaced. A clogged filter not only affects the performance of your snowblower but also puts additional strain on the engine, potentially leading to costly repairs if not addressed promptly.

Unusual fuel smells or discoloration

If you detect unusual fuel smells or notice a change in fuel color, it could be a sign that your fuel filter needs replacement. A clogged or deteriorating filter can cause the fuel to become contaminated, leading to foul odors or discoloration. Ignoring these signs and continuing to use the snowblower without replacing the filter can potentially damage the engine and result in expensive repairs.

How Often Should I Replace The Fuel Filter On My Snowblower?

This image is property of pixabay.com.

Manufacturer’s recommendations

Review the user manual for specific guidelines

To determine the recommended fuel filter replacement frequency for your snowblower, it is essential to refer to the user manual provided by the manufacturer. The user manual will provide specific guidelines tailored to your snowblower model, taking into account various factors such as engine type, fuel capacity, and usage patterns. By following the manufacturer’s recommendations, you can ensure that your snowblower operates at its best and avoid any potential issues caused by neglected fuel filter maintenance.

Follow the maintenance schedule provided by the manufacturer

In addition to fuel filter replacement frequency, the manufacturer’s user manual will outline a maintenance schedule that should be followed to keep your snowblower in optimal condition. This maintenance schedule may include regular inspections, oil changes, and other maintenance tasks that help prolong the lifespan of various components, including the fuel filter. By adhering to the maintenance schedule recommended by the manufacturer, you can ensure that your snowblower continues to perform reliably and efficiently.

General guidelines for fuel filter replacement

Replace the filter annually

As a general guideline, it is recommended to replace the fuel filter in your snowblower annually. By replacing it at least once a year, you can ensure that the filter remains free from clogs and debris, allowing for proper fuel flow to the engine. However, it is important to note that this is a general guideline, and your specific snowblower model and usage patterns should be taken into consideration for more accurate replacement intervals.

Replace the filter after every 50 to 100 hours of use

Another general guideline to consider is replacing the fuel filter after every 50 to 100 hours of use. This guideline accounts for the fact that prolonged usage can result in the accumulation of dirt, debris, and contaminants in the filter, reducing its effectiveness. By replacing the filter within this time frame, you can ensure that your snowblower continues to operate at its best, even during extended periods of use.

Consider more frequent replacements in harsh conditions

If you frequently operate your snowblower in particularly harsh conditions, such as extremely cold temperatures or dusty environments, it may be necessary to replace the fuel filter more frequently. These harsh conditions can accelerate the accumulation of dirt and debris in the filter, leading to clogs and reduced performance. Regularly inspecting the filter in these conditions and replacing it as needed can help prevent any issues and maintain optimal snowblower performance.

How Often Should I Replace The Fuel Filter On My Snowblower?

This image is property of pixabay.com.

Tips for maintaining the fuel filter

Inspect the filter regularly for debris or clogs

To ensure that your fuel filter remains in good condition, it is important to inspect it regularly for any signs of debris or clogs. This can be done by removing the filter from the snowblower and visually examining it for any particles or blockages. Regular inspections allow you to identify potential issues before they escalate and ensure that the filter is functioning effectively.

Clean or replace the filter if necessary

If during your inspection you find that the fuel filter is dirty, clogged, or damaged, it is crucial to either clean or replace it. In some cases, a simple cleaning may be sufficient to remove any debris and restore the filter’s functionality. However, if the filter is severely clogged or damaged, it is recommended to replace it to ensure optimal performance and avoid any potential engine issues.

Use clean and high-quality fuel

Using clean and high-quality fuel is essential for maintaining the performance and longevity of your snowblower’s fuel filter. Impurities, such as dirt or water, can quickly clog the filter and lead to engine issues. Therefore, it is important to purchase fuel from reputable sources and ensure that it is free from contaminants. Additionally, avoiding the use of stale or old fuel can further prevent damage to the filter and the engine.

Ensure proper storage of the snowblower during offseason

Proper storage of your snowblower during the offseason is equally important for fuel filter maintenance. If the snowblower is not stored correctly, dust, moisture, and other contaminants can find their way into the fuel system and eventually clog the filter. To prevent this, ensure that the snowblower is stored in a clean and dry location, preferably with a fuel stabilizer added to the tank to prevent fuel deterioration. Following proper storage practices can significantly extend the lifespan of your fuel filter.

Importance of fuel filter replacement

Prevents engine damage from contaminated fuel

Regularly replacing the fuel filter in your snowblower is crucial to prevent engine damage caused by contaminated fuel. The filter acts as a barrier, capturing dirt, debris, and other contaminants present in the fuel before it reaches the engine. Over time, these contaminants can accumulate and restrict fuel flow, leading to poor engine performance, reduced power, and potential engine damage. By replacing the fuel filter as recommended, you can protect your snowblower’s engine from the harmful effects of contaminated fuel.

Optimizes engine performance and efficiency

A clean and properly functioning fuel filter is essential for optimizing the performance and efficiency of your snowblower’s engine. When the fuel filter is clogged or dirty, the flow of fuel to the engine is restricted, resulting in decreased power and efficiency. By regularly replacing the fuel filter, you ensure that fuel flow remains unobstructed, allowing the engine to operate at peak performance and achieve optimal fuel efficiency.

Increases the lifespan of the snowblower

Regular fuel filter replacement is not only beneficial for the engine but also for the overall lifespan of your snowblower. By maintaining a clean and efficient fuel system, you reduce the risk of engine damage and other issues that can significantly decrease the lifespan of the snowblower. The relatively simple task of replacing the fuel filter can greatly contribute to the longevity of your equipment, saving you money in potential repairs or premature replacements.

How Often Should I Replace The Fuel Filter On My Snowblower?

Potential consequences of neglecting fuel filter replacement

Clogged fuel lines and carburetor

Neglecting fuel filter replacement can have severe consequences, starting with clogged fuel lines and carburetor. When a fuel filter becomes clogged, it prevents the proper flow of fuel through the system, resulting in the accumulation of debris in the fuel lines and carburetor. This can lead to blockages, affecting the fuel-to-air ratio necessary for combustion and causing poor engine performance, stalling, or even failure to start.

Engine misfires or failure

Continuing to use a clogged or damaged fuel filter can result in engine misfires or even complete failure. A clogged filter restricts the flow of fuel to the engine, leading to an inadequate supply of fuel during combustion. This can cause misfires, uneven engine operation, and in severe cases, complete engine failure. To avoid these costly and potentially dangerous consequences, it is crucial to replace the fuel filter as recommended by the manufacturer.

Reduced power and fuel economy

A neglected fuel filter can have a direct impact on the power and fuel economy of your snowblower. A filter that is clogged or full of debris restricts the flow of fuel to the engine, diminishing its power output. This reduced power not only affects the snowblower’s ability to effectively clear snow but also causes it to consume more fuel to compensate for the lack of power. By neglecting fuel filter replacement, you may experience decreased fuel economy and find yourself refilling the tank more frequently.

Consulting a professional

Seek professional help if unsure about replacement intervals

If you are unsure about the appropriate fuel filter replacement intervals for your snowblower, it is always best to seek professional help. A snowblower technician or an authorized service center can provide expert advice based on your specific snowblower model and usage patterns. They can offer guidance on the recommended replacement intervals and any other maintenance tasks necessary to keep your snowblower running smoothly.

Expert advice can ensure proper maintenance

Relying on expert advice can help ensure that you are properly maintaining your snowblower’s fuel filter, as well as other components of the fuel system. Professionals with knowledge and experience in snowblower maintenance can guide you through the necessary steps to inspect, clean, and replace the filter, helping you avoid potential issues and maximizing the lifespan of your equipment.

How Often Should I Replace The Fuel Filter On My Snowblower?

Conclusion

Regular fuel filter replacement is crucial for maintaining optimal performance and longevity of your snowblower. Factors such as usage frequency, fuel quality, and maintenance practices all influence the frequency of fuel filter replacement. Signs that indicate the need for replacement include decreased engine performance, difficulty starting or frequent stalling, visible debris or clogs in the filter, and unusual fuel smells or discoloration. By following the manufacturer’s recommendations, inspecting the filter regularly, and practicing proper maintenance and storage, you can ensure that your snowblower performs at its best. Neglecting fuel filter replacement can result in clogged fuel lines, engine misfires or failure, and reduced power and fuel economy. Seeking professional help and following expert advice are essential to ensure proper maintenance and maximize the lifespan of your snowblower. Remember, a clean and functioning fuel filter is key to a well-performing snowblower, so don’t overlook this important aspect of maintenance.

What’s The Role Of A Snowblower’s Impeller?

Imagine a snowy winter day – the kind where you wake up to find your driveway and walkway buried beneath a thick blanket of snow. As you gear up to tackle the task of clearing it, you may wonder about the mysterious contraption that sits inside your trusty snowblower – the impeller. In this article, we will uncover the crucial role of a snowblower’s impeller, the unsung hero that transforms your snowy woes into a clear and passable path.

What’s The Role Of A Snowblower’s Impeller?

Whats The Role Of A Snowblowers Impeller?

1. Definition of an impeller

An impeller is a crucial component of a snowblower that is responsible for the movement and discharge of snow. It is typically a rotating device with blades or paddles that create a force, allowing the snow to be thrown out of the machine. The impeller is connected to the engine or motor of the snowblower and plays a vital role in effectively clearing snow from driveways, sidewalks, and other surfaces.

2. Function of the impeller

The main function of the impeller is to gather the snow that is collected by the auger and propel it out through the chute. While the auger is responsible for breaking up and collecting the snow, it is the impeller’s task to create the necessary force to propel the snow away from the clearing path. The impeller spins at a high speed, which generates centrifugal force, effectively throwing the snow out of the snowblower. This function is crucial for efficient snow removal and preventing clogging of the machine.

3. Role in snow removal process

The impeller’s role in the snow removal process is vital. After the auger collects the snow, it is transferred to the impeller, which then propels it out through the chute, effectively clearing the path. Without an efficient impeller, the snowblower would struggle to remove the snow effectively and could result in clogs or inefficient operation. The impeller ensures that the snow is thrown a sufficient distance away from the clearing area, minimizing the need for additional passes and enhancing overall efficiency.

Whats The Role Of A Snowblowers Impeller?

4. Impeller design and construction

Impellers are designed with specific considerations in mind, including durability, performance, and debris management. They are constructed with sturdy materials such as steel or heavy-duty composites to withstand the impact of icy or compacted snow. The design incorporates blades or paddles strategically positioned to provide optimal snow movement and discharge. The construction of the impeller ensures that it can withstand the demanding conditions of snow removal without compromising its functionality.

5. Impeller types

There are different types of impellers utilized in snowblowers, including single-stage and two-stage impellers. Single-stage impellers are typically used in smaller, more lightweight snowblowers. They have a single set of blades that rotate at high speeds, allowing for efficient snow discharge. Two-stage impellers, on the other hand, are commonly found in larger, more powerful snowblowers. These impellers have a primary set of blades to collect the snow and a secondary set to effectively propel it through the chute.

6. Impeller size and dimensions

The size and dimensions of the impeller can vary depending on the snowblower’s make and model. Generally, larger snowblowers designed for heavy-duty snow removal will have larger impellers. The size of the impeller directly impacts its snow-clearing capacity, as a larger impeller can generate more force to propel the snow away. However, it’s important to note that a larger impeller may require a more powerful engine or motor to operate effectively.

7. Impeller speed and rotation

The impeller’s speed and rotation play a crucial role in the snowblower’s overall performance. A higher impeller speed allows for greater snow discharge distance, ensuring that the snow is thrown a sufficient distance away from the cleared path. The rotation of the impeller determines the direction in which the snow is thrown. It is crucial to have a well-calibrated impeller speed and rotation to achieve optimal snowblower performance and prevent snow from being discharged in unwanted directions.

8. Impeller material and durability

Impellers are typically constructed from durable materials such as steel or heavy-duty composites. The choice of material ensures that the impeller can withstand the harsh conditions of snow removal. Steel impellers are known for their strength and longevity, while composite impellers offer the advantage of being more lightweight. Regardless of the material used, impellers undergo rigorous testing to ensure their durability and ability to withstand the demanding nature of snowblower operation.

9. Impeller maintenance and care

Proper maintenance and care of the impeller are essential for ensuring its longevity and optimal performance. It is recommended to regularly inspect the impeller for any signs of damage or wear. If any blades are bent or damaged, they should be promptly replaced to maintain the impeller’s effectiveness. Additionally, lubricating the impeller’s moving parts, such as the bearings, can help reduce friction and improve overall performance. Following the manufacturer’s guidelines for impeller maintenance and care will ensure that the snowblower operates smoothly without any impeller-related issues.

10. Impeller troubleshooting

In certain situations, the impeller may encounter issues that require troubleshooting. Common problems with the impeller can include clogging, reduced snow discharge distance, or abnormal noise during operation. If the impeller becomes clogged, it is important to shut off the snowblower and remove the obstruction carefully. Reduced snow discharge distance may indicate a worn or damaged impeller, which may need to be replaced. Abnormal noise could be a result of loose or misaligned impeller blades, which should be adjusted or tightened. Consulting the snowblower’s manual or contacting a professional can help diagnose and resolve impeller troubleshooting issues effectively.

In conclusion, the impeller plays a vital role in the snow removal process of a snowblower. Its function is to gather and propel the snow away from the clearing path, ensuring efficient and effective snow removal. Understanding the impeller’s design, size, speed, and material, along with proper maintenance and troubleshooting, will enhance the snowblower’s performance and ensure its longevity. Next time you use a snowblower, remember the important role that the impeller plays in keeping your driveways and sidewalks free from snow.

What Can I Add To Old Gas In My Snowblower?

Have you ever wondered what you can do with the old gas in your snowblower? Well, we have just the solution for you! Presenting our incredible product – “What Can I Add To Old Gas In My Snowblower?” This innovative solution is designed to revitalize your old gas and ensure your snowblower runs smoothly all winter long. Say goodbye to the frustration of stale fuel and hello to a powerful snow-clearing machine. Discover the secret ingredient that will breathe new life into your snowblower, and say hello to hassle-free snow removal!

Reasons for Using Old Gas in a Snowblower

Difficulty Starting the Snowblower

One of the main reasons why someone might choose to use old gas in their snowblower is the difficulty in starting the machine. When the snowblower has been sitting unused for an extended period of time, the fuel in the tank can deteriorate, making it harder to ignite. By using up old gas, you can minimize the chances of experiencing starting issues and ensure that your snowblower will be ready for use when you need it.

Cost Saving

Another compelling reason to use old gas in a snowblower is the potential for cost savings. Gasoline prices can fluctuate, and if you have a significant amount of old gas sitting in a container, it can save you money by not having to purchase new fuel. This is especially beneficial for those who don’t use their snowblower frequently or have access to affordable gasoline.

Environmental Impact

Using up old gas in a snowblower is also an environmentally friendly practice. Instead of discarding the old fuel and contributing to pollution, you can use it in your snowblower, making use of a resource that might otherwise go to waste. This reduces the consumption and production of new gasoline, which in turn helps to reduce carbon emissions and minimize the overall environmental impact.

Risks and Problems with Old Gas in a Snowblower

Fuel Degradation

One of the potential risks of using old gas in a snowblower is fuel degradation. Over time, gasoline can break down, and the chemical composition can change. This can lead to fuel that is less stable and less efficient, resulting in poor performance of the snowblower. The degraded fuel may not combust properly, leading to sputtering, lack of power, and even stalling of the snowblower.

Reduced Performance

Using old gas in a snowblower can result in reduced performance. As the fuel degrades, it may not provide the same level of power and efficiency as fresh gasoline. The snowblower may struggle to clear snow effectively, and it may take longer to complete the task at hand. This can be frustrating and may lead to the need for additional maintenance or repairs.

Potential Engine Damage

Perhaps the most significant risk of using old gas in a snowblower is the potential for engine damage. If the fuel has degraded significantly, it can leave behind residue and deposits that can clog the fuel system, carburetor, and other engine components. This can lead to engine malfunctions, reduced lifespan, and costly repairs. It’s essential to consider the risks carefully before deciding to use old gas in your snowblower.

What Can I Add To Old Gas In My Snowblower?

This image is property of www.lawnmowerfixed.com.

Additives to Improve Old Gas in a Snowblower

Fuel Stabilizers

Fuel stabilizers are additives specifically designed to combat fuel degradation. They work by slowing down the chemical reactions that occur in old gas, helping to maintain its quality and stability for a longer period of time. Adding a fuel stabilizer to old gas can increase its chances of igniting properly and minimize the risks associated with using degraded fuel in a snowblower. It’s important to follow the instructions provided by the manufacturer when using fuel stabilizers.

Ethanol Treatment

Ethanol treatment additives are commonly used to address issues related to ethanol-blended gasoline. Ethanol can absorb moisture from the atmosphere, leading to water contamination in the fuel, which can be detrimental to the snowblower’s performance. Ethanol treatment additives help to reduce the negative effects of ethanol, minimize water absorption, and improve overall fuel quality. By using these additives, you can enhance the performance of old gas in your snowblower.

Octane Boosters

Octane boosters are additives that increase the octane rating of gasoline. Higher octane fuels typically ignite more easily and burn more efficiently, resulting in improved engine performance. By adding an octane booster to old gas, you can enhance its combustibility and reduce the chances of ignition issues or poor performance in your snowblower. Ensure that you choose an octane booster suitable for your snowblower and follow the recommended dosage.

Fuel Mixing Ratios for Old Gas in a Snowblower

Using Fresh Gasoline

The best way to ensure optimal performance and minimize any potential risks is to use fresh gasoline in your snowblower whenever possible. Fresh gasoline has a higher octane rating and is less prone to fuel degradation. By using a higher percentage of fresh gasoline and adding a smaller amount of old gas, you can reduce the likelihood of experiencing starting issues or reduced performance.

Using Fuel Additives

If you choose to use old gas in your snowblower, it’s important to consider using fuel additives to improve its quality. By following the instructions for the specific additive you’re using, you can enhance the effectiveness of the old gas and increase its chances of igniting properly. This can help mitigate any potential risks and ensure that your snowblower performs at its best.

Using Proper Ratios

When mixing old gas and fresh gasoline, it’s crucial to use the proper ratios for optimal performance. The ideal ratio will depend on factors such as the extent of fuel degradation, the condition of the snowblower, and the specific additives being used. Consulting the snowblower’s manual or seeking guidance from a professional can help you determine the most suitable mixing ratio to ensure the best results.

What Can I Add To Old Gas In My Snowblower?

This image is property of www.lawnmowerfixed.com.

Professional Maintenance Solutions for Old Gas in a Snowblower

Drain and Clean the Fuel System

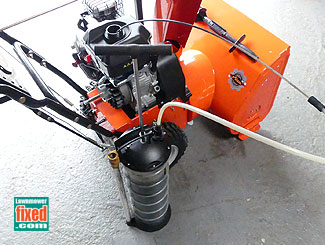
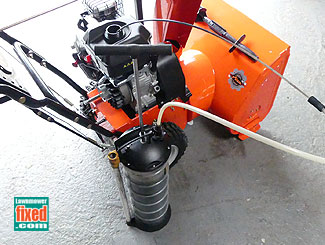
If you’re experiencing issues with old gas in your snowblower, it may be necessary to drain and clean the fuel system. This process involves removing the old gas from the fuel tank, flushing it with fresh gasoline, and cleaning any components that have been impacted by the degraded fuel. It’s a comprehensive solution that can help restore optimal performance and prevent further damage to the snowblower’s engine.

Carburetor Cleaning

The carburetor is an essential component of the snowblower’s fuel system, and it can be particularly susceptible to clogs and buildup caused by old gas. Cleaning the carburetor can help remove any residues and deposits that may be affecting its functionality. This can improve fuel flow, enhance combustion, and ultimately restore the snowblower’s performance. It’s recommended to have a professional technician perform carburetor cleaning to avoid causing any damage.

Fuel Filter Replacement

In cases where old gas has caused significant damage to the snowblower’s fuel system, it may be necessary to replace the fuel filter. The fuel filter is responsible for trapping impurities and debris that can enter the system and affect performance. If the filter becomes clogged or damaged due to the use of old gas, it may need to be replaced with a new one. This will help ensure that the fuel being supplied to the engine is clean and free from contaminants.

Safe Handling and Storage Practices for Old Gasoline in a Snowblower

Use Gasoline within One Month

To minimize the risks associated with using old gas in a snowblower, it’s best to use gasoline within one month of purchase. Gasoline can start to deteriorate after this period, which can lead to the issues mentioned earlier. By using the fuel within a month, you can ensure that you’re using gasoline at its highest quality and reduce the chances of encountering problems with your snowblower.

Store Gasoline Properly

Proper storage of gasoline is crucial to maintain its quality and stability. When storing gasoline for future use in a snowblower, it’s important to use a tightly sealed and approved container to prevent evaporation and moisture absorption. The container should be stored in a cool, dry, and well-ventilated area, away from direct sunlight or any potential ignition sources. Following these storage practices will help preserve the fuel’s integrity and reduce the risks associated with using old gas in your snowblower.

Dispose of Old Gasoline Safely

If you have old gasoline that you no longer intend to use in your snowblower, it’s essential to dispose of it properly. Old gas should never be poured down drains, on the ground, or into bodies of water, as it can be harmful to the environment. Instead, take the gasoline to a designated hazardous waste facility or contact your local waste management authority for guidance on safe disposal methods. By disposing of old gasoline responsibly, you can contribute to the protection of the environment.

What Can I Add To Old Gas In My Snowblower?

This image is property of www.mtdparts.ca.

Preventive Measures to Avoid Using Old Gasoline in a Snowblower

Empty the Fuel Tank Before Storage

A simple preventive measure to avoid using old gasoline in a snowblower is to empty the fuel tank before storing the machine for an extended period. By draining the fuel tank completely, you can eliminate the risks associated with fuel degradation and ensure that only fresh gasoline is used when you’re ready to operate the snowblower again. This practice can help maintain the snowblower’s performance and reduce the need for additional maintenance.

Use Fresh Gasoline Regularly

To minimize the chances of having old gasoline in your snowblower, it’s advisable to use fresh gasoline regularly. By using up the fuel within a reasonable amount of time, you can prevent it from deteriorating and becoming less effective. This will help ensure that your snowblower starts easily and performs optimally whenever you need it, without the need to resort to using old gas.

Avoid Overfilling the Tank

Overfilling the fuel tank can lead to fuel spillage and waste, as well as potential damage to the snowblower’s engine. It’s essential to follow the manufacturer’s guidelines and recommendations when refueling the snowblower. By avoiding overfilling, you can prevent fuel overflow and decrease the likelihood of having excess gasoline that may become old and unusable. Proper fueling practices play a significant role in the long-term performance and efficiency of your snowblower.

In conclusion, while there are reasons to consider using old gas in a snowblower such as difficulty starting the machine, cost savings, and environmental impact, there are also risks and problems associated with using degraded fuel. Fuel degradation, reduced performance, and potential engine damage are all issues that can arise from using old gas in a snowblower. However, with the use of additives such as fuel stabilizers, ethanol treatment, and octane boosters, the quality of old gas can be improved. It’s important to use proper fuel mixing ratios and consider professional maintenance solutions like draining and cleaning the fuel system, carburetor cleaning, and fuel filter replacement when dealing with old gas in a snowblower. Safe handling and storage practices, such as using gasoline within one month, proper storage, and safe disposal, should also be followed. To prevent the use of old gasoline in a snowblower, emptying the fuel tank before storage, using fresh gasoline regularly, and avoiding overfilling the tank are recommended. By considering these factors and taking appropriate measures, you can ensure optimal performance and longevity of your snowblower while minimizing the risks associated with using old gas.

How Often Should I Change The Spark Plug In My Snowblower?

In this article, we will discuss the importance of regularly changing the spark plug in your snowblower. We will provide you with useful information on how often you should do this maintenance task to ensure your snowblower runs smoothly. By the end of this article, you will have a clear understanding of the recommended frequency for changing the spark plug in your snowblower, helping you maintain its optimal performance. So, let’s get started and learn how to keep your snowblower running efficiently throughout the winter season.

Importance of Spark Plugs in Snowblowers

In order to maintain proper snowblower performance, it is crucial to understand the importance of spark plugs and their role in the functioning of snowblowers. Spark plugs play a vital role in creating the spark that ignites the fuel mixture in the combustion chamber of an engine. This ignition is what allows the engine to start and run effectively. Without a properly functioning spark plug, the snowblower may experience a range of performance issues.

Role of Spark Plugs in Snowblowers

Spark plugs are responsible for creating the spark that ignites the air and fuel mixture in the engine’s combustion chamber. When the piston moves to the top of its stroke, the spark plug provides an electric spark that ignites the compressed air-fuel mixture, resulting in the combustion process that powers the engine and propels the snowblower forward.

Effects of Worn-out Spark Plugs on Snowblower Performance

As spark plugs wear out over time, their performance degrades. Worn-out spark plugs may struggle to provide a strong, consistent spark, which can lead to poor ignition and misfires. This can result in a snowblower that is difficult to start, runs rough, experiences a loss of power, or runs less efficiently.

Factors Affecting Spark Plug Lifespan

Several factors can affect the lifespan of spark plugs in snowblowers. Understanding these factors can help determine how often spark plugs should be replaced.

Quality and Type of Spark Plug Used

The quality and type of spark plug used in a snowblower can significantly impact its lifespan. Premium, high-quality spark plugs will generally last longer than lower-quality alternatives. Additionally, using the correct type of spark plug recommended by the snowblower manufacturer is essential for optimal performance and longevity.

Operating Conditions and Frequency of Use

Operating conditions and frequency of use also play a role in determining how often spark plugs should be replaced. Snowblowers used in heavy snowfall areas or for prolonged periods may require more frequent spark plug replacements due to the increased strain on the engine. Similarly, snowblowers that are not used frequently may still require more frequent spark plug replacements due to the potential for corrosion and buildup over time.

How Often Should I Change The Spark Plug In My Snowblower?

This image is property of www.lawnmowerfixed.com.

Recommended Spark Plug Replacement Frequency

To ensure your snowblower continues to run smoothly and efficiently, it is recommended to follow the manufacturer’s guidelines for spark plug replacement. These guidelines can typically be found in the snowblower’s manual and are based on the specific model and engine type. It is important to note that these guidelines are general recommendations, and certain operating conditions may warrant more frequent spark plug replacements.

Signs Indicating the Need for Spark Plug Replacement

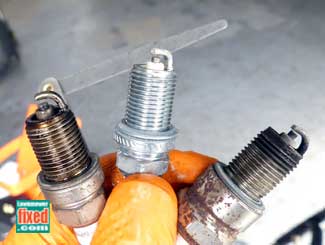
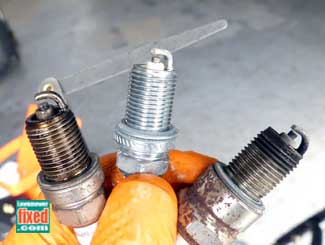
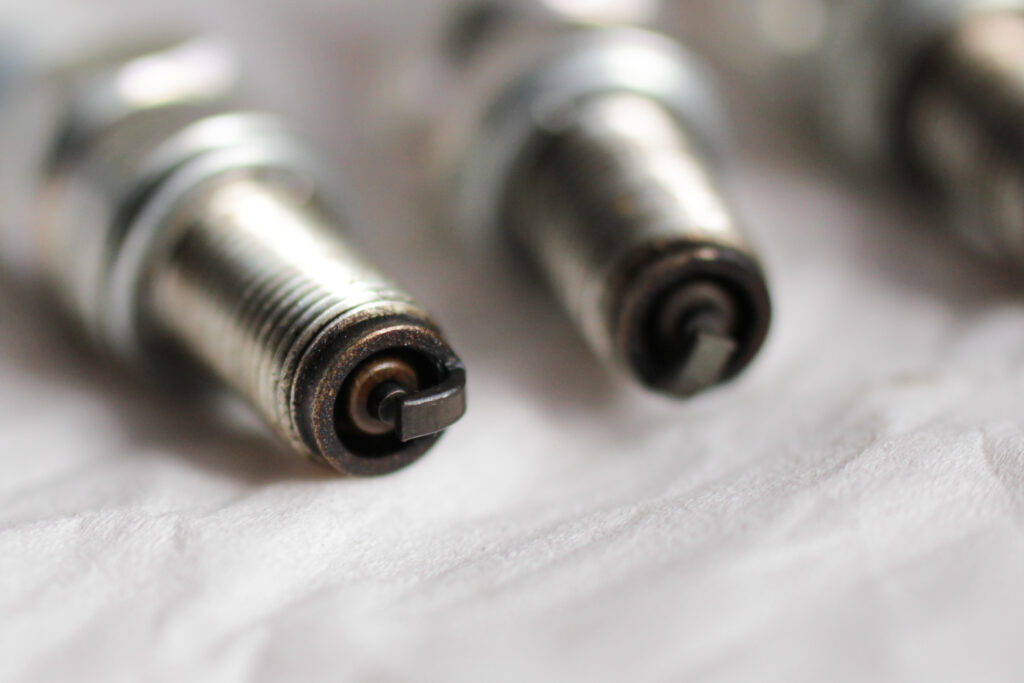
Aside from following the manufacturer’s guidelines, there are certain signs to look out for that may indicate the need for spark plug replacement. If the snowblower is becoming increasingly difficult to start, running rough, experiencing a loss of power, or showing signs of poor fuel efficiency, it may be time to check and replace the spark plug. Additionally, if the spark plug appears visibly worn, corroded, or damaged, replacement is necessary.

Steps to Replace Spark Plug in a Snowblower

Replacing a spark plug in a snowblower is a relatively simple process that can be done with a few basic tools and minimal technical knowledge. Follow these steps to replace the spark plug in your snowblower:

Gather Necessary Tools and Materials

Before starting, gather the necessary tools and materials, which typically include a spark plug socket, socket wrench, and a new spark plug that matches the specifications recommended by the snowblower manufacturer. Refer to the snowblower’s manual for the specific socket size and other details.

Locate the Spark Plug in the Snowblower

The spark plug is usually located on top of the engine, near the cylinder head. It may be covered by a spark plug wire or boot that needs to be removed to access the spark plug.

Disconnect Spark Plug Wire

The spark plug wire is connected to the spark plug with a boot or connector. Gently grasp the boot or connector and pull it away from the spark plug to disconnect it. Be careful not to pull on the wire itself, as this may damage it.

Remove the Old Spark Plug

Using the spark plug socket and socket wrench, loosen and remove the old spark plug by turning it counterclockwise. Once loose, carefully lift the spark plug out of the engine.

Inspect and Clean the Spark Plug Area

With the old spark plug removed, inspect the area around it for any debris, carbon buildup, or other contaminants. Use a soft brush or compressed air to clean the area if necessary, taking care not to let any debris fall into the spark plug hole.

Install the New Spark Plug

Before installing the new spark plug, check the gap to ensure it matches the specifications recommended by the snowblower manufacturer. The gap can usually be adjusted by gently bending the ground electrode. Once the gap is correct, carefully insert the new spark plug into the spark plug hole and hand-tighten it clockwise. Use the spark plug socket and socket wrench to tighten the spark plug further, but be cautious not to overtighten it.

Reconnect Spark Plug Wire

Once the new spark plug is securely in place, reconnect the spark plug wire by pushing the boot or connector onto the spark plug until it clicks into position.

Test the Snowblower’s Performance

With the spark plug successfully replaced, start the snowblower and observe its performance. If it starts easily, runs smoothly, and exhibits improved power and fuel efficiency, the spark plug replacement was successful.

How Often Should I Change The Spark Plug In My Snowblower?

This image is property of www.lawnmowerfixed.com.

Choosing the Right Spark Plug for Your Snowblower

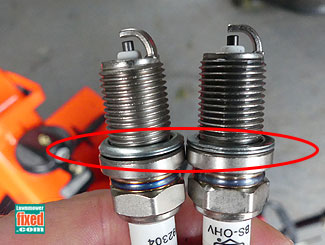
When selecting a new spark plug for your snowblower, it is important to ensure that you choose the correct type and size. There are various types and sizes of spark plugs available, and using the wrong one can have a negative impact on performance and potentially damage the engine.

Different Types and Sizes of Spark Plugs

Snowblowers may require different types and sizes of spark plugs depending on the engine specifications. Common types include standard plugs, resistor plugs, and platinum plugs. It is crucial to consult the snowblower’s manual or contact the manufacturer to determine the exact spark plug requirements.

Considerations for Selecting the Correct Spark Plug

When choosing the correct spark plug for your snowblower, consider factors such as the engine size, spark plug heat range, and electrode design. These factors directly impact the spark plug’s ability to ignite the air and fuel mixture effectively and maintain proper engine performance. It is always best to use the spark plug recommended by the snowblower manufacturer to ensure compatibility and optimal performance.

Maintenance Tips for Spark Plugs in Snowblowers

Regular maintenance of spark plugs in snowblowers can significantly extend their lifespan and ensure proper engine performance. Consider the following tips to keep your spark plugs in optimal condition:

Regular Cleaning and Inspection

Periodically remove the spark plug and visually inspect it for wear, damage, or corrosion. Use a soft brush or compressed air to clean any debris or carbon buildup around the spark plug and the surrounding area. Regular cleaning and inspection can prevent fouling and ensure optimal spark plug performance.

Proper Gap Adjustment

Check and adjust the spark plug gap as recommended by the snowblower manufacturer. The correct gap ensures the spark plug’s ability to effectively ignite the air and fuel mixture. Use a spark plug gap tool or feeler gauge to measure and adjust the gap if necessary.

Preventing Fouling and Carbon Buildup

To prevent fouling and carbon buildup on spark plugs, it is essential to use high-quality fuel and regularly change the oil and air filters. Additionally, avoid prolonged idling or low-speed operation, as this can lead to incomplete combustion and carbon deposits on the spark plug electrodes.

How Often Should I Change The Spark Plug In My Snowblower?

This image is property of www.lawnmowerfixed.com.

Common Spark Plug Problems in Snowblowers

Understanding common spark plug problems in snowblowers can help identify issues and take appropriate action to rectify them. Some common spark plug problems include:

Misfiring or Failure to Start

If a snowblower is misfiring or fails to start altogether, it may be due to a faulty spark plug. A worn-out or dirty spark plug can result in weak or no spark, which prevents proper ignition and combustion. In such cases, the spark plug should be inspected and replaced if necessary.

Poor Fuel Efficiency

A snowblower that is experiencing decreased fuel efficiency may have a spark plug problem. A faulty or inefficient spark plug can lead to incomplete combustion, resulting in wasted fuel and decreased overall efficiency. Regular spark plug maintenance can help improve fuel efficiency and optimize snowblower performance.

Engine Performance Issues

Spark plug problems can also manifest as engine performance issues, such as rough running, a loss of power, or stalling. These issues may be caused by a spark plug that is not providing a consistent, strong spark. In such cases, checking and replacing the spark plug can help resolve the engine performance issues.

Benefits of Timely Spark Plug Replacement in Snowblowers

Timely spark plug replacement in snowblowers offers several benefits that impact both performance and longevity. Some of these benefits include:

Improved Engine Performance and Fuel Efficiency

By replacing worn-out or faulty spark plugs, the snowblower’s engine performance and fuel efficiency can be significantly improved. A properly functioning spark plug ensures a strong, consistent spark that leads to efficient combustion and optimal power output.

Prevention of Bigger Snowblower Problems

Failing to replace spark plugs at the recommended intervals can lead to more significant snowblower problems down the line. Ignoring spark plug maintenance can result in engine damage, decreased fuel efficiency, and costly repairs. Regular spark plug replacement can help prevent these issues and extend the overall lifespan of the snowblower.

How Often Should I Change The Spark Plug In My Snowblower?

This image is property of img.ehowcdn.com.

Spark Plug Replacement Services

When it comes to spark plug replacement, snowblower owners have two options: DIY replacement or professional servicing. The choice between the two depends on the individual’s mechanical skills, comfort level, and access to tools. DIY spark plug replacement can save money and be relatively straightforward for those familiar with snowblower maintenance. However, if unsure or inexperienced, it may be best to seek professional servicing to ensure the spark plug is replaced correctly and to avoid any potential damage to the snowblower.

Conclusion

In conclusion, the spark plug plays a crucial role in the overall performance and longevity of a snowblower. It is important to understand the significance of spark plug maintenance and replacement to ensure optimal engine performance and fuel efficiency. By following the manufacturer’s guidelines for replacement frequency and practicing regular spark plug maintenance, snowblower owners can enjoy a well-functioning machine that is ready to tackle any winter storm.

How Often Should I Change The Spark Plug In My Snowblower?

This image is property of i.ytimg.com.

Can A Snowblower Be Left Outside In Winter?

Hello there! We’re here to answer that question for you. In this article, we’ll be discussing whether it’s okay to leave your snowblower outside during the winter months. We’ll talk about the potential risks and damages that may occur and provide you with some helpful tips to keep your snowblower in tip-top shape. So, if you’re wondering whether you can just leave your snowblower out in the cold, keep on reading!

Leaving your snowblower outside during winter can be a convenient option for some, but it’s important to consider the potential consequences. The cold temperatures, moisture, and exposure to the elements can lead to rust, damage to the engine, and other issues that may affect its performance. However, if you have no other choice but to leave your snowblower outside, there are some precautions you can take to minimize the risks. We’ll discuss these precautions in the second paragraph, so stay with us!

Why it is important to protect your snowblower

When winter arrives and the snow starts falling, having a snowblower at your disposal can be a game-changer. However, many people wonder whether it is safe to leave their snowblower outside during the winter months. In this article, we will explore the potential damage that can be caused by exposing your snowblower to the elements, the safety concerns involved, and the effects of rust and corrosion.

Potential damage from exposure to the elements

Snowblowers are designed to tackle heavy snowfall and endure harsh winter conditions. However, leaving your snowblower outside for extended periods can lead to various types of damage. The moisture from snow and rain can seep into the internal components of the snowblower, causing rust and corrosion. The extreme cold temperatures can also lead to freezing of essential components, such as the engine, fuel lines, and cables. These issues can result in the snowblower not starting or malfunctioning, requiring costly repairs.

Safety concerns

Leaving your snowblower outside also poses safety risks. Snowblowers have sharp blades and moving parts that can cause serious injuries if mishandled. When left outside, they are exposed to potential tampering and accidents. Children or unauthorized individuals may attempt to operate the snowblower without proper knowledge or understanding of its operation, leading to accidents and injuries. Additionally, a snowblower left outside can be a tempting target for thieves, especially if it is not securely stored.

Effects of rust and corrosion

Rust and corrosion can significantly affect the performance and longevity of your snowblower. When moisture penetrates the internal components, it can cause rust to form on metal surfaces. This corrosion weakens the parts and can lead to malfunctioning. Rust can also inhibit the movement of various components, reducing the overall efficiency of the snowblower. Over time, if not properly cared for, rust and corrosion can cause irreversible damage and render the snowblower unusable.

Covering and storing your snowblower

To protect your snowblower from the potential damage caused by exposure to the elements, it is essential to cover and store it appropriately during the winter months. Here are some steps you can take to ensure the safety and longevity of your snowblower.

Using a waterproof cover

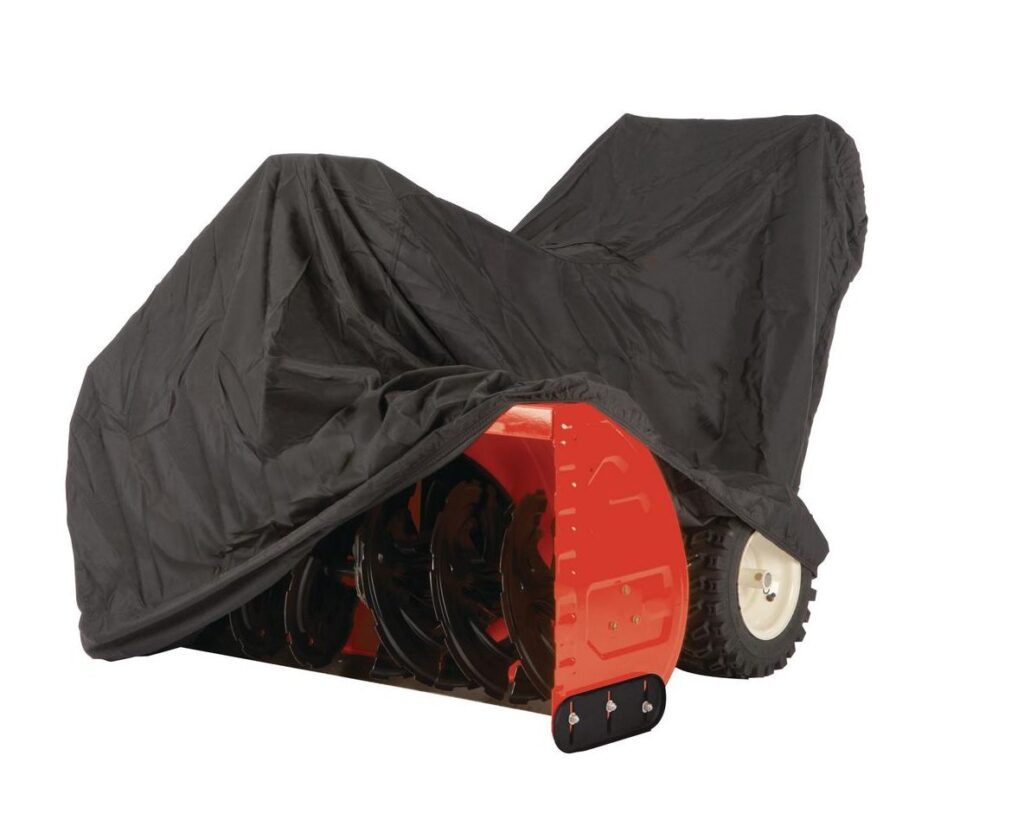
Investing in a high-quality, waterproof cover is an excellent way to shield your snowblower from snow, rain, and other forms of moisture. Be sure to choose a cover that fits your snowblower properly, covering all the essential components. A waterproof cover will help prevent water from seeping into the exposed parts and reduce the risk of rust and corrosion.

Choosing an appropriate storage location

When it comes to storing your snowblower, it is crucial to select a suitable location. Ideally, storing your snowblower indoors is the best option, as it provides the most protection against the elements. If indoor storage is not possible due to limited space, consider other alternatives such as sheds, storage units, or custom-built snowblower enclosures. These options provide some level of protection against the elements and deter unauthorized access.

Preparing the snowblower for storage

Before storing your snowblower, it is important to take a few extra steps to ensure its proper maintenance. Start by cleaning the snowblower thoroughly, removing any debris, snow, or ice. This will prevent the accumulation of moisture and potential damage to the internal components. Next, drain the fuel and fluids from the snowblower, as leaving them inside can lead to fuel degradation and damage. Finally, lubricate all the moving parts to prevent rust and corrosion during storage.

Can A Snowblower Be Left Outside In Winter?

This image is property of globalnews.ca.

Benefits of storing your snowblower indoors

Storing your snowblower indoors offers several advantages that can help preserve its performance and extend its lifespan.

Protection against extreme cold

One of the main benefits of storing your snowblower indoors is protecting it from extreme cold temperatures. Cold weather can cause fluids to thicken, making it difficult for the snowblower to start and function properly. By storing it indoors, you can keep the snowblower at a more stable and moderate temperature, ensuring it is ready to tackle the snow when needed.

Reducing the risk of theft

Storing your snowblower indoors significantly reduces the risk of theft. Snowblowers can be valuable pieces of equipment, and leaving them outside unattended makes them an attractive target for thieves. By keeping your snowblower indoors, you can minimize the chances of it being stolen and ensure its availability when you need it the most.

Maintaining optimal performance

Storing your snowblower indoors also helps maintain its optimal performance. Free from exposure to the elements, the snowblower’s moving parts and internal components will be better protected from rust, corrosion, and other forms of damage. When stored properly, your snowblower will be in better condition to perform at its best, ensuring efficient snow removal during the winter months.

Alternatives for outdoor storage

In some cases, storing your snowblower indoors may not be feasible due to space limitations or other constraints. In such instances, there are alternative outdoor storage solutions available.

Sheds and storage units

If you have sufficient outdoor space, consider investing in a shed or storage unit specifically designed for storing equipment like snowblowers. These structures provide protection from the elements and offer a secure and organized storage solution.

Custom-built snowblower enclosures

Another option for outdoor storage is to have a custom-built snowblower enclosure. These enclosures are designed to withstand winter weather conditions and provide a dedicated space for storing your snowblower. They offer protection from snow, rain, and other elements and can be customized to fit your specific needs.

In-ground snowblower pits

For those looking for a more unique storage solution, in-ground snowblower pits can be an option. These pits are dug into the ground and provide a concealed storage space for your snowblower. While this option requires initial investment and construction, it offers excellent protection and keeps your snowblower out of sight when not in use.

Can A Snowblower Be Left Outside In Winter?

This image is property of www.gardentoolexpert.com.

Steps to winterize your snowblower if left outside

If storing your snowblower outdoors is unavoidable, it is essential to take proper steps to winterize and protect it from potential damage.

Draining fuel and fluids

Before leaving your snowblower outside for an extended period, ensure that you drain all the fuel and fluids from the machine. Leaving fuel and fluids inside can lead to degradation and damage to the snowblower’s engine.

Lubricating moving parts

To prevent rust and corrosion, it is crucial to lubricate all the moving parts of your snowblower. Apply a protective lubricant to key areas such as the axles, bearings, auger, and impeller. This will help maintain the integrity of the snowblower’s components and ensure smooth operation when you need to use it.

Cleaning the snowblower

Thoroughly clean your snowblower before storing it outside. Remove all snow, ice, and debris from the machine to prevent moisture buildup and damage. Pay special attention to the chute, auger, and impeller, ensuring they are clear of any obstructions.

Common problems caused by leaving a snowblower outside

Leaving your snowblower outside during winter can lead to various issues that may affect its operation and overall performance.

Freezing of essential components

Cold temperatures can cause water and moisture to freeze within your snowblower’s engine, fuel lines, and other vital parts. This freezing can prevent the snowblower from starting or cause it to operate poorly. Freezing can also lead to cracking or damage to the internal components, resulting in expensive repairs.

Moisture damage

Moisture is one of the biggest enemies of any mechanical equipment, and snowblowers are no exception. When left outside, snow, rain, and condensation can infiltrate the snowblower, causing rust, corrosion, and electrical issues. Moisture damage can compromise the snowblower’s performance and, if not addressed, result in irreparable damage.

Mechanical issues due to lack of maintenance

Leaving your snowblower outside without proper maintenance can lead to a range of mechanical problems. The exposure to the elements combined with neglect can cause parts to seize, belts to become brittle, and cables to degrade. These issues can significantly impact the snowblower’s performance and may require extensive repairs or replacement of parts.

Can A Snowblower Be Left Outside In Winter?

This image is property of www.cubesmart.com.

Tips for maintaining your snowblower during winter

To ensure that your snowblower performs optimally throughout the winter season, it is crucial to follow a few maintenance tips.

Regular cleaning and inspection

Regularly clean your snowblower after each use, removing any snow, ice, or debris that may have accumulated. Inspect the machine for any signs of damage or wear, and address any issues promptly. This includes checking the belts, spark plugs, and other key components.

Checking for loose or damaged parts

Before each use, check for loose screws, bolts, or other fasteners. These can become loose over time due to vibrations and may need tightening. Also, inspect for any damaged or worn parts that may need to be replaced.

Using appropriate fuel and oil

Ensure that you are using the correct fuel and oil for your snowblower. Refer to the manufacturer’s instructions for the recommended fuel type and oil specifications. Using the wrong fuel or oil can lead to poor performance and potential damage to the engine.

Safety precautions when using a snowblower

Snowblowers are powerful machines, and it is essential to follow proper safety precautions when operating them.

Proper handling to prevent injuries

Always read and familiarize yourself with the snowblower’s instruction manual before use. Wear appropriate protective gear, such as goggles, gloves, and sturdy footwear. Use caution when handling the machine and be aware of your surroundings, ensuring that others are a safe distance away.

Avoiding accidents caused by equipment malfunctions

Regularly inspect your snowblower for any signs of malfunctions or potential hazards. If you notice any issues or abnormalities, address them immediately before using the snowblower. This will help prevent accidents and ensure safe operation.

Working in well-ventilated areas to prevent carbon monoxide poisoning

When using a snowblower indoors, such as in a garage or shed, ensure that the area is well-ventilated. Carbon monoxide can quickly accumulate in enclosed spaces and pose a serious health risk. Always operate the snowblower in an area with proper ventilation to prevent carbon monoxide poisoning.

Can A Snowblower Be Left Outside In Winter?

This image is property of assets.searshomeservices.com.

Advantages of investing in a snowblower cover

Investing in a high-quality snowblower cover offers several advantages that can safeguard your equipment and extend its lifespan.

Shielding against snow, ice, and debris

A snowblower cover shields your equipment from snow, ice, and debris. It prevents these elements from accumulating on the machine, reducing the risk of moisture buildup and potential damage. Additionally, a cover keeps the snowblower clean, making it easier to maintain and ensuring smooth operation.

Extended lifespan of your equipment

A cover helps protect your snowblower from the damaging effects of the elements, such as rust, corrosion, and UV rays. By shielding your equipment from these hazards, you can significantly extend its lifespan, saving you money on repairs or premature replacement.

Protection against UV rays and fading

Exposure to sunlight and UV rays can cause fading and deterioration of the snowblower’s components. A cover provides a barrier against these harmful rays, preserving the machine’s appearance and structural integrity.

Conclusion

Taking proper care of your snowblower is essential for its longevity and performance. Leaving your snowblower outside during the winter months can expose it to potential damage, safety concerns, and issues caused by rust and corrosion. Storing your snowblower indoors or using suitable outdoor storage solutions, along with proper winterizing and maintenance procedures, will help protect your investment and ensure optimal operation when the snow starts falling. By following these steps and precautions, you can enjoy the benefits of a well-maintained snowblower and confidently tackle any winter storm that comes your way.

Can A Snowblower Be Left Outside In Winter?

This image is property of www.snowblowersdirect.com.