So, you wake up one morning to find your driveway covered in a thick layer of snow. The winter magic is beautiful, but it’s definitely not fun to shovel it all by hand. Luckily, you’ve got a gas-powered snowblower ready to save the day. The only problem is, you have no clue how to start it. Don’t worry, we’ve got you covered. In this article, we will guide you through the simple steps of starting a gas-powered snowblower, so you can make clearing snow a breeze.

Preparing Your Snowblower
Before you can start your gas-powered snowblower, there are a few important steps you need to take to ensure that it is in good working condition and ready to tackle the snow. This preparation not only ensures your safety but also helps to prolong the life of your snowblower. Let’s go through each step in detail.
Ensure Your Safety
Safety should always be your top priority when operating any type of machinery, including a snowblower. Before you start working on your snowblower, make sure you are wearing the appropriate safety gear, which includes goggles or safety glasses, gloves, and sturdy footwear. It’s also a good idea to wear hearing protection, as snowblowers can be quite loud.
Check Fuel Level
The first thing you should do when preparing your snowblower is to check the fuel level. Without enough fuel, your snowblower won’t be able to start or run properly. Look for the fuel tank, which is usually located near the back of the snowblower. Check the fuel gauge or simply open the fuel cap to visually inspect the level of fuel. If it is low, you will need to fill it up with fresh gasoline before attempting to start the snowblower.
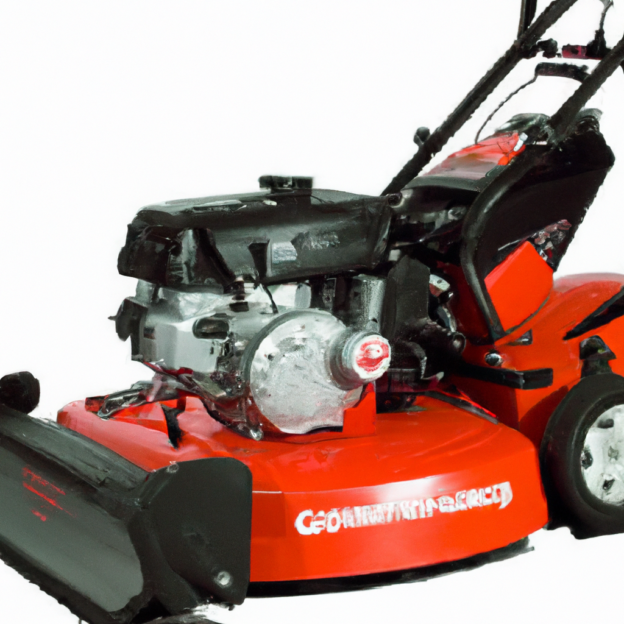
Inspect the Spark Plug
The spark plug is a crucial component of your snowblower’s engine. It ignites the fuel and air mixture, allowing the engine to start. Before starting your snowblower, it’s important to inspect the spark plug to ensure it is in good condition. Locate the spark plug, usually found on the side of the engine. Remove the spark plug wire and use a spark plug wrench to remove the plug. Check the electrode for any signs of wear or damage. A worn-out or damaged spark plug should be replaced with a new one.
Check the Oil Level
Just like a car, a snowblower requires oil to lubricate its engine and prevent friction. Before starting your snowblower, check the oil level to ensure it is at the appropriate level. Locate the oil dipstick, usually located near the engine or on top of the oil cap. Remove the dipstick, wipe it clean, and reinsert it. Then, remove it again and check the oil level. It should be within the designated range. If it is low, add the appropriate type and amount of oil specified in your snowblower’s manual.
Adjust the Choke
The choke helps to regulate the air and fuel mixture in the engine during startup. Before starting your snowblower, it’s important to adjust the choke to the correct position. Locate the choke lever, usually located near the engine. The choke has three positions: open, closed, and halfway. If the engine is cold, set the choke lever to the closed position. If the engine is warm, set the choke lever to the open position. Adjusting the choke correctly will help ensure a smooth and hassle-free start.
Priming the Engine
Once you’ve gone through the necessary preparations, it’s time to prime the engine. Priming helps to introduce fuel into the engine, making it easier to start. Here’s a step-by-step guide on how to prime your snowblower’s engine.
Locate the Primer Bulb
The primer bulb is a small, rubber bulb that is usually located near the carburetor or fuel tank. Its purpose is to draw fuel into the engine. Take a moment to locate the primer bulb on your snowblower. It is typically red or black in color and may have a small plastic button on top.
Press the Primer Bulb
To prime the engine, press and release the primer bulb several times. Each press creates pressure that forces fuel into the engine. The number of times you need to press the primer bulb will vary depending on your snowblower’s model and the temperature outside. Refer to your snowblower’s manual for the recommended number of primer bulb presses.
Repeat the Priming Process
After pressing the primer bulb the recommended number of times, it’s a good idea to repeat the priming process once more. This ensures that enough fuel is present in the engine for a successful start. It may take a few tries to find the optimal number of primer bulb presses for your specific snowblower, but with practice, you’ll become more familiar with the process.
Setting the Throttle and Choke
Now that the engine is primed, it’s time to set the throttle and choke to the appropriate positions. The throttle controls the engine speed, while the choke regulates the air and fuel mixture during startup. Let’s walk through the steps of setting these controls correctly.
Find the Throttle Lever
The throttle lever is usually located on the handlebars of the snowblower. It may be a lever or a knob that can be easily adjusted. Take a moment to locate the throttle lever on your snowblower.
Adjust the Throttle
To set the throttle, start by moving the lever or knob to the “Fast” or “Full” position. This increases the amount of fuel flowing to the engine, allowing it to run at a higher speed. However, if you anticipate encountering heavy or wet snow, it may be beneficial to set the throttle to a lower speed to prevent overworking the engine.
Locate the Choke Lever
The choke lever is usually located near the engine, close to the carburetor. It may be a separate lever or combined with the throttle lever. Locate the choke lever on your snowblower.
Set the Choke Position
When starting a cold engine, set the choke lever to the closed or halfway position. This restricts the air intake, allowing for a richer fuel mixture. If the engine is warm or has been running for a while, set the choke lever to the open position. Adjusting the choke correctly ensures that the engine starts smoothly and runs efficiently.

Using the Electric Starter
Some snowblowers come equipped with an electric starter, which eliminates the need for manual pulling. Using the electric starter is convenient and can save you time and effort. Here’s how to use it effectively.
Locate the Electric Starter
The electric starter is usually located near the engine or on the handlebars of the snowblower. It may consist of a small button or switch, or it may be in the form of a key ignition. Locate the electric starter on your snowblower.
Connect the Electric Starter
If your snowblower has a key ignition, insert and turn the key to the “On” position. If your snowblower has a button or switch, simply press or toggle it into the “Start” position. This connects the electric starter to the engine, allowing it to start with a push of a button or turn of a key.
Start the Electric Starter
Once the electric starter is connected, press the button or turn the key. The starter motor will engage and spin the engine, initiating the combustion process. The engine should start within a few seconds. If it fails to start, refer to the troubleshooting section in your snowblower’s manual for guidance.
Using the Recoil Starter
If your snowblower does not have an electric starter or if the electric starter fails, you can rely on the recoil starter to start the engine manually. The recoil starter uses a pull rope and handle to crank the engine. Here’s how to use it effectively.
Find the Recoil Starter Handle
The recoil starter handle is usually located on the side of the engine. It is a small, plastic handle attached to a pull rope. Locate the recoil starter handle on your snowblower.
Position Yourself Correctly
Before pulling the recoil starter handle, make sure you are in a stable position with your feet properly planted on the ground. Ensure that there is enough clearance around you to safely operate the snowblower. Maintaining a steady grip on the handlebars will help you maintain control during startup.
Pull the Recoil Starter Handle
To start the engine, firmly grasp the recoil starter handle and pull it upward with a quick, smooth motion. The pull rope will engage the engine’s flywheel, causing it to rotate and create the necessary combustion to start the engine. Repeat this motion until the engine starts. If the engine fails to start after several attempts, refer to the troubleshooting section in your snowblower’s manual for guidance.
Starting the Snowblower
With the engine primed and the throttle and choke properly set, it’s time to start the snowblower. Whether using the electric starter or the recoil starter, the starting process is relatively straightforward.
Hold the Starter Handle Firmly
If you are using the recoil starter, make sure you have a firm grip on the starter handle before starting the engine. This ensures that you have proper control and minimizes the risk of injury.
Begin Pulling the Starter Rope
If using the recoil starter, pull the starter rope with a quick, smooth motion. The engine should start within a few pulls. Be prepared for a sudden jolt as the engine comes to life. If the engine fails to start, refer to the troubleshooting section in your snowblower’s manual for guidance.
Repeat Until Engine Starts
Continue pulling the starter rope or activating the electric starter until the engine starts. This may require a few attempts, especially if the engine is cold. Once the engine starts, you can move on to adjusting the controls and preparing to clear the snow.
Adjusting Controls
After starting the snowblower’s engine, it’s important to make a few additional adjustments to ensure optimal performance. These adjustments include releasing the choke, adjusting the throttle, and engaging the auger and drive controls.
Release the Choke
Once the engine has warmed up and is running smoothly, it’s time to release the choke. Locate the choke lever, which should be set to the closed or halfway position. Move the lever to the open position to allow for normal air intake. Running the engine with the choke closed for an extended period can cause damage or poor performance.
Adjust the Throttle
Depending on the snow conditions and the intensity of the snowfall, you may need to adjust the throttle to control the engine speed. If you are dealing with heavy, wet snow, it may be beneficial to increase the throttle to a higher speed. Conversely, if the snow is light or you want more precise control, you can decrease the throttle to a lower speed.
Engage the Auger and Drive Controls
To start clearing the snow, engage the auger and drive controls. The auger is the rotating mechanism responsible for collecting and throwing snow, while the drive controls allow you to move the snowblower forward or backward. Familiarize yourself with the location and operation of these controls, as they may vary depending on your snowblower’s model.
Clearing Snow with the Snowblower
Now that your snowblower is running and the controls are properly adjusted, it’s time to start clearing snow. Proper technique and positioning are crucial for an efficient and effective snow removal process. Here’s how to do it:
Properly Position the Snowblower
Position the snowblower at the edge of the snow-covered area you want to clear. Make sure you have a clear path to walk or follow behind the machine. You should also be aware of any obstacles or hazards in the area, such as rocks, tree branches, or uneven terrain.
Engage the Auger and Drive Controls
With the snowblower in position, engage the auger and drive controls. This allows the auger to collect the snow and the drive controls to propel the snowblower forward. Different models may have different methods for engaging these controls, so refer to your snowblower’s manual for specific instructions.
Push the Snowblower Forward
As you walk behind the snowblower, gently push it forward. The rotating augers will scoop up the snow and throw it out through the chute, clearing a path as you go. Maintain a steady pace and avoid rushing, as this can lead to clogs or uneven clearing. Continue pushing the snowblower forward until you have cleared the desired area.
Maintenance and Troubleshooting
To keep your snowblower in optimal condition and ensure smooth operation, it’s important to perform regular maintenance tasks and address any issues that may arise. Here are some maintenance and troubleshooting tips to help you keep your snowblower in top shape.
Regularly Check and Change Oil
Regular oil checks and changes are essential for maintaining the performance and longevity of your snowblower’s engine. Follow the manufacturer’s guidelines for oil type and change frequency. Typically, oil should be checked before each use and changed annually or after a certain number of hours of operation.
Clean or Replace the Spark Plug
The spark plug plays a vital role in the engine’s ignition process. Over time, it can become fouled with carbon deposits or wear out. Regularly inspect the spark plug and clean or replace it as necessary. Refer to your snowblower’s manual for specific instructions on spark plug maintenance.
Inspect and Tighten Loose Parts
After each use, take a few moments to inspect your snowblower for any loose or damaged parts. Check for loose bolts or screws, damaged belts, or any abnormalities in the machine’s operation. Tighten or repair any loose parts to prevent further damage and ensure safe operation.
Clear Clogs and Debris
During use, snowblowers can sometimes experience clogs or blockages caused by chunks of snow or other debris. If you notice a decrease in performance or the machine becomes jammed, turn off the snowblower and disconnect the spark plug wire. Carefully remove any clogs or debris, taking extra caution not to damage any internal components.
Safety Precautions
Operating a snowblower can be a potentially hazardous task, so it’s essential to follow certain safety precautions to protect yourself and others around you. Always prioritize safety when using your snowblower by following these guidelines.
Wear Safety Gear
Before starting your snowblower, make sure you are wearing the appropriate safety gear. This includes safety goggles or glasses to protect your eyes from flying debris, gloves to protect your hands, and sturdy footwear with good traction to prevent slipping. If your snowblower is particularly noisy, consider wearing hearing protection as well.
Keep Hands and Feet Clear
When operating a snowblower, it’s important to keep your hands and feet clear of any moving parts. Be cautious of the rotating auger and other mechanisms, and never attempt to clear a clog or remove debris while the engine is running. Always turn off the snowblower and disconnect the spark plug wire before attempting any maintenance tasks.
Operate in Well-Ventilated Areas
Snowblowers emit exhaust fumes that can be harmful if inhaled in large quantities. To ensure you are operating in a safe environment, always use your snowblower outside or in a well-ventilated area. Avoid using it indoors, in enclosed spaces, or in areas with poor ventilation.
Avoid Fuel Spills
When refueling your snowblower, be careful not to spill gasoline. Gasoline is highly flammable, and any spills can pose a fire hazard. Ensure the fuel cap is securely tightened and use a funnel to prevent spills. If any fuel does spill, clean it up immediately and dispose of it properly.
Store Properly
When you have finished using your snowblower, store it in a safe and secure location. This includes keeping it out of reach of children and pets, as well as protecting it from the elements. Store your snowblower in a dry area, away from flammable materials, and follow manufacturer guidelines for long-term storage.
In conclusion, starting and operating a gas-powered snowblower requires careful preparation, proper adjustments, and adherence to safety guidelines. By following the steps outlined in this comprehensive guide, you can ensure that your snowblower starts smoothly, operates efficiently, and helps you tackle the most challenging snow removal tasks. Remember to prioritize safety at all times, and don’t hesitate to consult your snowblower’s manual or seek professional assistance if needed. Stay safe and enjoy the convenience of a well-maintained snowblower during the winter season.