Tag Archives: Snowblower

What Happens If I Put Diesel In My Snowblower By Mistake?

So you had a momentary lapse in judgment and accidentally filled up your snowblower with diesel instead of gasoline. Now you’re probably wondering what kind of disastrous consequences this little mix-up might have. Well, fear not, because in this article, we’ll explore exactly what happens when you put diesel in your snowblower by mistake, and how you can rectify the situation without causing any irreparable damage. Don’t fret, we’ve got you covered!

What Happens If I Put Diesel In My Snowblower By Mistake?

Overview of the issue

Putting diesel in your snowblower by mistake can lead to numerous problems and potential consequences. Diesel fuel is not designed for use in small engines like those found in snowblowers, and its chemical composition is significantly different from gasoline. This can result in engine performance issues, potential damage to the snowblower, and the need for immediate action to rectify the situation.

Understanding the potential consequences

When diesel fuel is used in a snowblower engine, it can cause a variety of issues that affect its overall performance. These consequences can include difficulties in starting the engine, reduced power output, increased smoke emissions, and a loss of engine efficiency. These consequences can not only impact the snowblower’s ability to effectively remove snow but can also lead to long-term damage if not addressed promptly.

Why diesel can cause problems in a snowblower

Diesel fuel is formulated differently from gasoline, and its properties make it incompatible with snowblower engines. One of the main reasons diesel causes problems in snowblowers is its higher ignition point. Diesel requires more heat to ignite compared to gasoline, which can make starting the engine a challenging task. Additionally, diesel burns at a slower rate, leading to reduced power output and overall engine inefficiency.

Effects on snowblower engine performance

Engine starting issues

Due to diesel’s higher ignition point, using it in a snowblower can result in difficulties starting the engine. This can be frustrating and time-consuming, especially during cold weather conditions when rapid snow removal is essential.

Reduced power output

The slower burning rate of diesel fuel can lead to a reduction in the snowblower engine’s power output. This can cause a decrease in the machine’s effectiveness in clearing snow, requiring more passes and resulting in a slower snow removal process.

Increased smoke emissions

Using diesel fuel in a snowblower can also lead to increased smoke emissions. Diesel combustion generates more visible smoke compared to gasoline, which can be both unsightly and potentially harmful to the environment.

Loss of engine efficiency

The chemical composition and combustion properties of diesel fuel can result in a loss of engine efficiency in a snowblower. This means that the engine may not convert fuel into mechanical energy as effectively, wasting fuel and potentially leading to increased operating costs.

Potential damage to the snowblower

In addition to affecting engine performance, using diesel in a snowblower can also cause damage to various components of the machine.

Clogging of fuel system

Due to the differences in the chemical composition of diesel and gasoline, using diesel fuel can lead to the clogging of the fuel system. Diesel may leave behind residue and deposits, which can obstruct the fuel lines and filters, preventing proper fuel flow.

Damage to fuel lines and injectors

The distinct properties of diesel fuel can also cause damage to the snowblower’s fuel lines and injectors. Diesel’s chemical makeup and slower combustion rate can result in increased wear and tear on these components, potentially leading to leaks or even failure.

Corrosion of metal components

Diesel fuel contains higher levels of sulfur compared to gasoline, which can lead to increased corrosion of metal components within the snowblower. This corrosion can further contribute to the degradation and malfunctioning of various parts, reducing the overall lifespan of the machine.

Impacts on carburetor and spark plugs

Using diesel in a snowblower can also have negative effects on the carburetor and spark plugs. Diesel fuel does not vaporize as easily as gasoline, leading to a higher likelihood of carburetor clogging. Additionally, the higher ignition temperature of diesel can result in fouling of the spark plugs, further hindering engine performance.

Immediate actions to take

If you have accidentally filled your snowblower with diesel fuel, there are several immediate actions you should take to minimize any potential damage and get the machine back up and running smoothly.

Stop using the snowblower

First and foremost, it’s essential to stop using the snowblower once you realize diesel has been added to the fuel tank. Continuing to operate the machine can exacerbate the issues and potentially cause further damage.
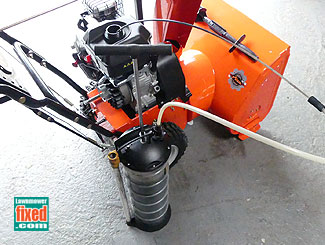
Drain the fuel tank

Next, drain the fuel tank completely to remove the diesel fuel. This can be done by using a siphon or disconnecting the fuel line, allowing the diesel to drain into a suitable container. Proper disposal of the diesel fuel is crucial to minimize environmental impact.

Flush the fuel system

After draining the fuel tank, it is necessary to flush the entire fuel system to eliminate any remaining traces of diesel. This can be done by adding fresh gasoline to the tank and running the engine for a short period, allowing it to circulate through the system.

Replace the fuel filter

Since diesel fuel can leave residue and deposits, it is advisable to replace the fuel filter after flushing the fuel system. This will ensure that any potential contaminants from the diesel are removed, allowing for clean fuel flow.

Clean or replace spark plugs

Lastly, it is essential to clean or replace the spark plugs to ensure proper ignition. Diesel fuel’s slower combustion rate can foul the spark plugs, hindering engine performance. Cleaning or replacing them will help restore the snowblower’s functionality.

Professional assistance

If you are unsure about how to proceed or if the snowblower has already experienced significant issues due to the diesel fuel, it may be wise to seek professional assistance.

Consulting a snowblower technician

Consulting a snowblower technician can provide valuable guidance in assessing the damage and determining the necessary repairs or replacements. They have the expertise to diagnose the extent of the damage and can recommend suitable solutions.

Seeking specialized mechanical help

If the damage caused by the diesel fuel is severe or involves intricate mechanical components, seeking specialized mechanical help may be necessary. These professionals have the skills and tools required to handle complex repairs and ensure the snowblower is restored to its optimal condition.

Getting a professional inspection

Even if you have resolved the immediate issues, it may still be beneficial to have a professional inspect the snowblower to ensure there are no underlying problems. They can identify any hidden damage or potential future issues, enabling you to address them before they escalate.

Preventing mistakes in fueling

To avoid the mistake of using diesel fuel in your snowblower in the future, it is crucial to take certain precautions when fueling the machine.

Understanding the fuel requirements

Always familiarize yourself with the manufacturer’s guidelines regarding the appropriate fuel type for your specific snowblower model. Understanding the fuel requirements will help you avoid using incompatible fuels and protect the engine.

Using proper fuel labeling

Ensure that you use proper labeling for all fuel containers. Clearly mark containers that contain gasoline or diesel to avoid any mix-ups or accidental fueling errors.

Maintaining clear fuel containers

Regularly clean and maintain your fuel containers to prevent any residue or debris from contaminating the fuel. Keeping the containers clean will help ensure the fuel remains pure and suitable for use in your snowblower.

Double-checking before fueling

Before fueling your snowblower, always double-check that you have the correct fuel type on hand. Take a moment to verify the label on the container and confirm that it aligns with the fuel requirements of your snowblower.

Potential solutions for minor issues

If you encounter minor issues with your snowblower after accidentally using diesel fuel, there are potential solutions you can try.

Cleaning or replacing clogged filters

If the fuel system or air filters become clogged due to the diesel fuel, you can attempt to clean them using appropriate cleaning solutions. However, if cleaning is not sufficient, it may be necessary to replace the filters to ensure proper fuel and air flow.

Flushing the fuel system

Flushing the fuel system, as previously mentioned, can be an effective solution for minor issues caused by the diesel fuel. This process helps remove any remaining traces of diesel and allows for clean fuel circulation.

Repairing or replacing damaged parts

In some cases, certain components of the snowblower may sustain minor damage due to the diesel fuel. Depending on the extent of the damage, repairing or replacing these parts can resolve the issues and restore the machine’s functionality.

Addressing severe damage

In situations where the snowblower has suffered severe damage as a result of using diesel fuel, more significant actions may be required.

Replacement of major components

If critical components like the engine, fuel lines, or carburetor have been extensively damaged, replacing them may be necessary. This can be a costly endeavor, but it may be the only way to restore the snowblower to full working condition.

Extensive engine repair

Severe damage caused by diesel fuel may require extensive engine repair. This can involve rebuilding the engine or replacing several internal components to ensure proper functioning. Engine repair should only be attempted by experienced professionals to avoid further complications.

Avoiding warranty complications

Using diesel fuel in your snowblower can potentially void any existing warranty, making it essential to take certain steps to avoid warranty complications.

Checking the manufacturer’s guidelines

Before performing any maintenance or repairs on your snowblower, consult the manufacturer’s guidelines and warranty information. This will provide you with a clear understanding of what actions may void the warranty and what steps you should take to maintain its validity.

Contacting the manufacturer or dealer

If you accidentally used diesel fuel in your snowblower and it is still under warranty, it is advisable to contact the manufacturer or dealer for guidance. They can advise you on the best course of action and provide assistance in rectifying the situation without voiding the warranty.

Learning from the mistake

Making the mistake of using diesel fuel in your snowblower can be a valuable learning experience. Use this opportunity to take necessary precautions and increase awareness about correct fueling practices.

Taking necessary precautions

Learn from the mistake and implement necessary precautions to prevent it from happening in the future. Follow the manufacturer’s guidelines, double-check fuel labels, and maintain clear fuel containers to ensure you always use the correct fuel.

Increasing awareness about correct fueling

Share your experience with others to increase awareness about the importance of using the proper fuel for snowblowers and other small engines. Educating others about the potential consequences and the right fueling practices can help prevent similar mistakes.

Regular maintenance and inspections

Finally, prioritize regular maintenance and inspections of your snowblower to identify any potential issues before they worsen. By keeping your machine in good working condition, you can minimize the risk of encountering fuel-related problems and ensure reliable snow removal when you need it most.

In conclusion, using diesel fuel in a snowblower can result in various adverse effects on engine performance, potential damage to the machine, and the need for immediate action. It is crucial to understand the consequences, take appropriate steps to rectify the situation, and prevent future fueling mistakes. By following the proper fueling practices and maintaining regular maintenance, you can keep your snowblower in optimal condition and ensure efficient snow removal year after year.

Is There A Maximum Slope Or Incline Recommended For Snowblower Use?

When it comes to clearing snow with a snowblower, it’s important to know if there is a maximum slope or incline that is recommended for safe and effective use. After all, the last thing you want is to take your snowblower up a steep slope, only to lose control and risk damage to yourself or your equipment. In this article, we will explore whether there is a maximum slope or incline that is recommended for snowblower use and provide some insights to help you navigate your snowy terrain with confidence.

Is There A Maximum Slope Or Incline Recommended For Snowblower Use?

Factors to Consider

When it comes to using a snowblower on a slope, there are several important factors to consider to ensure that you are able to operate the machine safely and effectively. These factors include the terrain, snow conditions, and the type of snowblower you are using.

Terrain

The terrain of your slope is a crucial factor to take into account before using a snowblower. Steep slopes can pose challenges and increase the risk of accidents. It’s important to assess the angle and condition of the slope to determine if it is suitable for snowblowing. If the slope is too steep or uneven, it may be safer to consider alternative snow removal methods.

Snow Conditions

The condition of the snow on your slope is another vital consideration. Wet and heavy snow can make the slope more slippery and difficult to navigate with a snowblower. Additionally, if the snow has frozen or formed ice, it can increase the risk of losing control while operating the machine. Understanding the type of snow you are dealing with will help you prepare and adapt your snowblowing technique accordingly.

Snowblower Type

Different snowblower types have varying capabilities when it comes to handling slopes. Single-stage snowblowers are generally not recommended for use on steep slopes, as they lack the necessary power and traction. Two-stage or three-stage snowblowers are better equipped to handle slopes due to their auger and impeller systems, which provide greater throwing distance and traction. It’s essential to choose a snowblower that is specifically designed for sloped terrain to ensure safe and efficient operation.

Understanding the Slope or Incline

Before venturing out with your snowblower on a slope, it’s important to have a clear understanding of what constitutes a slope or incline and how to measure it accurately. This knowledge will help you make informed decisions about the suitability of a slope for snowblower use.

Definition

A slope or incline refers to a surface that deviates from being completely flat. In the context of snowblower use, it typically involves a gradual or steep upward or downward angle. It’s important to note that even a seemingly mild slope can present challenges for snowblowing, depending on other factors such as snow conditions and the operator’s experience.

Measurement Methods

To accurately measure the slope or incline of your terrain, a variety of tools and methods can be utilized. Some common options include using a digital or analog inclinometer, a smartphone app with inclinometer functionality, or manual measurements using a level and ruler. Whichever method you prefer, it’s essential to ensure accurate measurements before determining the suitability of a slope for snowblowing.

Is There A Maximum Slope Or Incline Recommended For Snowblower Use?

Potential Risks and Dangers

While snowblowers can be highly effective tools for snow removal, using them on slopes poses certain risks and dangers. Being aware of these potential hazards will help you take appropriate precautions and minimize the likelihood of accidents or damage.

Tipping over

One of the significant risks associated with snowblowing on slopes is the potential for the machine to tip over. The combination of a sloped surface, uneven terrain, and the weight of the snowblower can make it prone to tipping. This can not only damage the equipment but also pose a risk to the operator if they are caught underneath. Understanding the limitations of your snowblower and exercising caution when maneuvering on a slope can help prevent tipping incidents.

Losing control

Operating a snowblower on a slope requires skill and control. The risk of losing control increases when facing steep slopes or challenging snow conditions. Losing control can lead to accidents, including being pulled down the slope, colliding with obstacles, or even injuring oneself. It is crucial to maintain a steady and focused approach, adjusting the speed and direction of the snowblower as needed to maintain control on the slope.

Snowblower damage

Using a snowblower on a slope can put additional strain and stress on the machine. The weight of the snow, the angle of the slope, and potential encounters with debris can all contribute to the risk of damaging the snowblower. It’s important to consider the durability and capabilities of your snowblower model and avoid pushing it beyond its limits on challenging slopes.

Personal safety

Lastly, personal safety should always be a top priority when using a snowblower on slopes. Falling, slipping, or getting entangled in moving parts can cause severe injuries. Wearing appropriate safety gear, such as sturdy footwear, goggles, and gloves, can help protect you from potential hazards. It is also important to avoid operating the snowblower while fatigued or in unfavorable weather conditions, as these factors can compromise your ability to navigate the slope safely.

Manufacturer Recommendations

Manufacturers of snowblowers typically provide detailed instructions and guidelines for safe use, including specific recommendations related to slopes and inclines. These recommendations should be consulted thoroughly to ensure that you are following the manufacturer’s intended usage and adhering to safety standards.

Consulting the manual

The snowblower manual is an essential resource for understanding the capabilities and limitations of your machine. It will often include information regarding recommended maximum slopes or inclines for safe operation. The manual may also provide additional tips and insights tailored to the specific model you own. Familiarizing yourself with this information will help you use the snowblower safely and effectively.

Safety guidelines

In addition to slope recommendations, the manufacturer’s manual will likely feature a section devoted to general safety guidelines. These guidelines cover various aspects of snowblower operation, including best practices for using the machine on slopes. It is crucial to read and adhere to these guidelines to minimize the risk of accidents or damage.

Common Slope Limits for Snowblower Use

While specific slope limits may vary depending on the manufacturer and model, there are some general guidelines that can help you determine if your slope is suitable for snowblowing. These slope limits are typically categorized based on the type of snowblower—residential-use or professional-grade.

Residential-use snowblowers

Residential-use snowblowers are typically designed for lighter snow removal tasks and may have limitations on the maximum slope they can handle. In general, slopes with angles of more than 15-20 degrees are considered steep and may exceed the capabilities of residential-use snowblowers. It’s important to consult the manufacturer’s recommendations to determine the specific slope limits for your machine.

Professional-grade snowblowers

Professional-grade snowblowers are designed to handle more demanding snow removal tasks and are generally equipped to handle steeper slopes. These models often have enhanced features such as more powerful engines, wider augers, and improved traction. While they can handle slopes greater than those recommended for residential-use snowblowers, it is still vital to review the manufacturer’s guidelines to ensure safe operation.

Tips for Safe Snowblowing on Slopes

If you have determined that your slope is suitable for snowblower use and you are comfortable operating the machine, there are several tips that can help you ensure a safe and effective snow removal experience.

Clearing the path

Before starting the snowblower, it’s crucial to clear the path of any obstacles or debris that could pose a risk during operation. This includes rocks, tree branches, and any other objects that could get caught in the snowblower or cause it to lose control. Ensuring a clear and obstacle-free path will help prevent accidents and damage to the machine.

Taking it slow and steady

When operating a snowblower on a slope, it’s important to maintain a controlled and steady pace. Avoid sudden acceleration or deceleration, as these can lead to loss of control. Gradually move the snowblower up or down the slope, taking care to adjust the speed and direction as needed to maintain stability. Taking it slow and steady will help you maintain control and reduce the risk of accidents.

Wearing appropriate gear

Personal protective gear is a crucial aspect of safe snowblowing on slopes. Ensure that you are dressed appropriately for the weather conditions, wearing warm clothing that allows for freedom of movement. Sturdy footwear with good traction is essential for maintaining a firm grip on the slope. Additionally, wearing goggles or safety glasses will protect your eyes from flying debris, and gloves will provide added grip and protection.

Alternative Options

If you find that using a snowblower on your slope is not feasible or safe, there are alternative options you can consider for snow removal.

Hand shoveling

Hand shoveling can be an effective and safe method for removing snow on slopes. While it may require more physical effort and time compared to using a snowblower, it provides greater control and reduces the risk of accidents. Choose a sturdy shovel and be mindful of your body mechanics to avoid strain or injury while shoveling on slopes.

Contracting a professional

If the slope is particularly challenging or you prefer to leave snow removal to the experts, contracting a professional snow removal service is a viable option. Professional snow removal companies have the necessary experience, equipment, and expertise to safely and efficiently clear snow on slopes. They can ensure that the snow is removed without causing damage and without putting you or your property at risk.

Using a snow plow attachment

If you own a vehicle with a plow attachment or have access to one, it can be an effective alternative for snow removal on slopes. Plow attachments are specifically designed for clearing snow and are typically more robust than residential-use snowblowers. However, operating a plow attachment still requires caution and skill, so be sure to assess your ability and comfort level before attempting this method.

Conclusion

Snowblowing on slopes can be a challenging task that requires careful consideration of various factors. By assessing the terrain, snow conditions, and choosing the right snowblower type, you can increase the chances of successful and safe snow removal. It is crucial to understand the potential risks and dangers associated with snowblowing on slopes, as well as following the manufacturer’s recommendations and guidelines for safe operation. If your slope exceeds the safe limits or you prefer alternative options, hand shoveling, contracting a professional, or using a snow plow attachment are viable solutions. Remember to prioritize personal safety, take necessary precautions, and use the appropriate gear when operating a snowblower on slopes. With proper planning and careful execution, you can safely and effectively remove snow, ensuring a clear and safe pathway for yourself and others.

How Do I Clean The Fuel Tank Of My Snowblower?

So you’ve noticed that your trusty snowblower isn’t running as smoothly as it used to, and you suspect that a dirty fuel tank might be to blame. Don’t worry, you’re not alone in this predicament. Many snowblower owners have faced the same issue and successfully cleaned their fuel tanks to restore their machine’s performance. In this article, we will guide you through the process of cleaning the fuel tank of your snowblower, ensuring that it runs like a dream in clearing away that pesky winter snow.

How Do I Clean The Fuel Tank Of My Snowblower?

This image is property of www.lawnmowerfixed.com.

Inspecting the Fuel Tank

When it comes to cleaning the fuel tank of your snowblower, the first step is to thoroughly inspect its condition. This is important as it allows you to identify any potential issues that may need to be addressed before proceeding with the cleaning process.

Checking for Fuel Contamination

One of the things you should look out for during the inspection is fuel contamination. Over time, dirt, debris, and water can find their way into the fuel tank, causing the fuel to become contaminated. This can lead to a variety of issues, such as engine misfires or poor performance.

To check for fuel contamination, start by removing the fuel cap and visually inspecting the fuel. If you notice any discoloration, presence of dirt or debris, or separation of water from the fuel, it is a clear indication that the fuel has been contaminated.

Examining for Rust or Corrosion

Another crucial aspect of inspecting the fuel tank is examining it for any signs of rust or corrosion. Snowblowers often operate in harsh weather conditions, which can cause the fuel tank to develop rust or corrosion over time. These issues can compromise the integrity of the tank and lead to leaks or fuel system malfunctions.

To examine for rust or corrosion, carefully inspect the interior and exterior of the fuel tank. Look for any areas where the paint may have chipped or peeled off, as these can be potential spots for rust to develop. Additionally, check for any signs of discoloration, pitting, or flaking on the tank’s surface.

Inspecting for Leaks or Cracks

Lastly, don’t forget to inspect the fuel tank for any leaks or cracks. Even the smallest cracks can result in fuel leakage, which can be dangerous and affect the performance of your snowblower. Carefully examine the tank for any visible signs of leaks, such as stains or dampness around the tank or fuel lines.

To conduct a more thorough inspection for leaks, you can also perform a pressure test. This involves pressurizing the fuel tank and checking if there is any loss in pressure over time. If you notice any abnormal pressure loss or fuel seepage, it is an indication that there may be leaks present.

Preparing for Fuel Tank Cleaning

Now that you have completed the inspection of the fuel tank and identified any potential issues, it’s time to prepare for the actual cleaning process. Proper preparation ensures that the cleaning goes smoothly and helps minimize the risk of accidents or damage to your snowblower.

Gathering Necessary Tools and Materials

Before you begin cleaning, gather all the necessary tools and materials. This will save you time and make the process much more efficient. Some of the essential items you will need include:

  • Safety goggles and gloves: These will protect your eyes and hands from any potential splashes of fuel or cleaning agents.

  • Screwdrivers or wrenches: These tools will be required for disconnecting fuel lines and detaching the fuel tank.

  • Cleaning solutions: Choose a suitable cleaning solution specifically designed for fuel tanks. Avoid using harsh chemicals that may damage the tank or its components.

  • Scrub brush or cloth: Use a non-abrasive scrub brush or cloth to clean the interior of the fuel tank.

  • Water source: You will need access to a water source for rinsing the tank. A hose or bucket of water can be used for this purpose.

Ensuring Safety Measures

Safety should always be a top priority when working with fuel and cleaning chemicals. Before you start the cleaning process, take the necessary safety precautions to protect yourself and prevent accidents. Here are a few safety measures to keep in mind:

  • Perform the cleaning process in a well-ventilated area to avoid inhaling any fumes or vapors.

  • Ensure that there are no open flames or sources of ignition near the working area.

  • Avoid smoking or using any electronic devices that could spark.

  • Keep a fire extinguisher nearby in case of emergencies.

  • Follow the instructions and warnings provided by the manufacturer of the cleaning solutions and fuel.

By taking these safety measures, you can ensure a safe and hassle-free fuel tank cleaning process.

How Do I Clean The Fuel Tank Of My Snowblower?

This image is property of www.lawnmowerfixed.com.

Emptying the Fuel Tank

Before you can proceed with cleaning the fuel tank, you need to empty it completely. This will allow you to work with an empty tank and prevent any fuel spillage or accidents during the cleaning process.

Locating the Fuel Tank Drain

The first step in emptying the fuel tank is to locate the fuel tank drain. The drain is a small valve or plug located at the bottom of the fuel tank. It allows you to release the fuel from the tank and drain it out completely.

Consult your snowblower’s manual or refer to the manufacturer’s instructions to find the exact location of the fuel tank drain. In most cases, it is situated near the base of the fuel tank, usually at the rear or side of the machine.

Removing Fuel from the Tank

Once you have located the fuel tank drain, place a suitable container or fuel-safe receptacle beneath it to catch the fuel. Ensure that the container has sufficient capacity to hold the entire contents of the fuel tank.

Using a wrench or screwdriver, loosen the valve or plug and allow the fuel to drain out completely. It may take some time for all the fuel to drain, so be patient and ensure that no fuel spills onto the ground or your surroundings.

Draining the Remaining Fuel

After draining the fuel using the tank drain, there may still be some residual fuel remaining in the tank. To remove this remaining fuel, you can either tilt the snowblower or use a hand pump or syringe to suction out the remaining fuel.

Ensure that you have a suitable container to transfer the fuel from the snowblower to avoid any spillage. Take caution while tilting the snowblower to prevent any damage or injury.

Once you have emptied the fuel tank as much as possible, you are ready to move on to the next step of the cleaning process.

Removing the Fuel Tank

Now that the fuel tank is empty, it’s time to remove it from your snowblower. Removing the fuel tank allows for better access during the cleaning process and ensures that you can clean it thoroughly.

Disconnecting Fuel Lines

Before you can remove the fuel tank, you need to disconnect the fuel lines that connect it to the snowblower’s engine. These fuel lines carry fuel from the tank to the engine, and they need to be detached to remove the tank.

Locate the connections where the fuel lines are attached to the fuel tank. Depending on your snowblower model, you may need to use a wrench or screwdriver to loosen the fittings. Be careful not to damage the fuel lines while disconnecting them.

Detaching the Fuel Tank

Once the fuel lines are disconnected, you can proceed to detach the fuel tank from the snowblower. The tank may be secured to the snowblower using bolts, screws, or mounting brackets. Use the appropriate tools to remove these fasteners and detach the tank.

Take note of the tank’s position and orientation as you remove it. This will be important when it comes time to reattach the fuel tank later on.

With the fuel tank successfully removed, you are now ready to thoroughly clean it.

How Do I Clean The Fuel Tank Of My Snowblower?

This image is property of www.lawnmowerfixed.com.

Cleaning the Fuel Tank

Cleaning the fuel tank is a crucial step in maintaining the performance and longevity of your snowblower. Over time, debris, sediment, and other contaminants can accumulate inside the tank, affecting the fuel system’s efficiency.

Removing Debris and Sediments

Start the cleaning process by removing any visible debris or sediments from the fuel tank. You can do this by shaking the tank vigorously to dislodge loose particles. Once dislodged, carefully pour out the debris and sediment from the tank. Dispose of them properly and refrain from disposing of them in your regular garbage.

Using Cleaning Solutions

After removing the debris, it’s time to use cleaning solutions specifically designed for fuel tank cleaning. These solutions are designed to break down and remove stubborn contaminants, such as sludge or varnish that may have formed inside the tank.

Follow the instructions provided by the manufacturer of the cleaning solution to ensure safe and effective usage. In most cases, you will need to mix the cleaning solution with water before applying it to the tank.

Scrubbing the Tank Interior

With the cleaning solution applied, use a non-abrasive scrub brush or cloth to scrub the interior of the fuel tank. Pay extra attention to any areas where the debris or sediments were particularly stubborn.

Scrub in a circular motion, ensuring that you cover all areas inside the tank. The gentle scrubbing action helps to dislodge any remaining contaminants and ensures a thorough cleaning.

Cleaning the Tank Cap and Filter

While cleaning the fuel tank, don’t forget to pay attention to the tank cap and filter. These components can also accumulate dirt and debris over time, affecting their functionality.

Remove the tank cap and filter and clean them separately. You can use a combination of mild detergent and water to clean these components. Ensure that you rinse them thoroughly and allow them to dry completely before reattaching them.

Rinsing and Drying the Fuel Tank

After scrubbing the tank interior and cleaning the cap and filter, it is essential to rinse the fuel tank thoroughly to remove any leftover cleaning solution or residue.

Flushing the Tank with Water

Using a hose or bucket of clean water, thoroughly rinse the interior of the fuel tank. Allow the water to flow freely through the tank to flush out any remaining cleaning solution or loosened contaminants.

While rinsing, pay close attention to the tank’s drain or outlet to ensure that no debris or sediment gets lodged there. Continue rinsing until the water coming out of the tank is clear and free from any residue.

Allowing the Tank to Dry Completely

Once the tank has been thoroughly rinsed, it is crucial to allow it to dry completely before reattaching it to the snowblower. Moisture can promote the growth of bacteria or cause rust to develop inside the tank, compromising its integrity.

To facilitate drying, place the fuel tank in a well-ventilated area and allow it to air dry naturally. Avoid using any heat sources or accelerants to speed up the drying process, as this can be dangerous and potentially damage the tank.

How Do I Clean The Fuel Tank Of My Snowblower?

This image is property of www.lawnmowerfixed.com.

Inspecting and Replacing Fuel Tank Components

With the fuel tank clean and dry, it’s time to inspect its components for any signs of wear or damage. This step ensures that your snowblower’s fuel system is in optimal condition and helps prevent future issues.

Inspecting Fuel Lines

Carefully examine the fuel lines for any signs of cracks, leaks, or deterioration. Flex the lines gently to check for any brittleness or stiffness, which can indicate the need for replacement.

If you notice any issues with the fuel lines, it is recommended to replace them to avoid potential fuel leaks or disruptions in fuel flow.

Checking and Replacing Filters

Inspect the fuel filter for any signs of clogging or damage. A clogged fuel filter can restrict fuel flow, leading to poor engine performance.

If the fuel filter appears dirty or clogged, it is advisable to replace it with a new one. This ensures that the fuel entering the engine is free from contaminants and allows for optimal performance.

Examining Tank Cap

Lastly, examine the tank cap for any signs of damage, such as cracks or worn-out seals. A faulty tank cap can allow dirt, water, or debris to enter the fuel tank, leading to contamination.

If you notice any issues with the tank cap, it is essential to replace it to maintain the integrity of the fuel tank and prevent further contamination.

Reattaching the Fuel Tank

After inspecting and replacing any necessary components, it’s time to reattach the fuel tank to your snowblower. Properly securing the fuel tank ensures that it stays in place during operation and prevents any potential fuel leaks.

Connecting Fuel Lines

Begin by reconnecting the fuel lines to the fuel tank. Align the fittings and tighten them properly using the appropriate tool. Ensure that the fuel lines are securely attached to prevent any fuel leaks or disruptions in fuel flow.

Securing the Fuel Tank

Once the fuel lines are connected, it’s time to secure the fuel tank back onto the snowblower. Align the tank with the mounting brackets or fastening points and insert the bolts or screws to hold it in place.

Use the necessary tools to tighten the fasteners securely, but be careful not to overtighten and risk damaging the tank or its mounting points. Take note of the tank’s proper alignment based on its original position and orientation during removal.

How Do I Clean The Fuel Tank Of My Snowblower?

This image is property of www.lawnmowerfixed.com.

Refilling the Fuel Tank

With the fuel tank securely reattached to your snowblower, it’s time to refill it with the appropriate fuel. Choosing the right fuel type is crucial for optimal performance and to prevent potential engine damage.

Choosing the Right Fuel Type

Refer to your snowblower’s manual for the recommended fuel type. Typically, snowblowers run on unleaded gasoline with an octane rating of 87 or higher. Avoid using ethanol-blended fuels, as they can cause corrosion and other issues in the long run.

Ensure that the fuel you use is fresh and free from any contaminants or water. Store fuel in a clean, approved container to maintain its quality.

Pouring Fuel into the Tank

Carefully pour the fuel into the fuel tank, ensuring that you do not spill any fuel on your snowblower or its surroundings. Avoid overfilling the tank to prevent fuel overflow and spills.

Once the fuel tank is filled, securely tighten the tank cap to prevent any fuel leakage or evaporation. Make sure the cap’s seal is intact and functioning properly.

Final Checks and Testing

Before you start using your snowblower again, it is crucial to perform a few final checks to ensure everything is in order and ready for operation.

Checking for Fuel Leaks

Inspect the fuel tank and the fuel lines for any signs of leaks. Look for any drips, stains, or puddles of fuel that may indicate a leak. If you notice any leaks, immediately address the issue before using your snowblower.

Testing the Snowblower

Once you have completed all the necessary steps to clean the fuel tank and reassemble the snowblower, it’s time to test it. Start the snowblower and let it run for a few minutes to ensure that the fuel flows smoothly and the engine operates correctly.

Listen for any unusual sounds or vibrations that may indicate an issue. Additionally, pay attention to the snowblower’s performance and make sure it is operating at its optimal level.

By following these comprehensive steps, you can effectively clean the fuel tank of your snowblower and ensure its optimal performance. Regular maintenance and cleaning of the fuel tank will not only prolong the life of your snowblower but also help you avoid costly repairs and inconvenience in the long run.

Can I Use Car Oil In My Snowblower?

So you’re wondering if it’s safe to use car oil in your snowblower, huh? Well, let’s cut to the chase. The short answer is no, you shouldn’t use car oil in your snowblower. While it may seem like a convenient solution, using car oil in a snowblower can cause serious damage to the engine and overall performance. Why, you ask? Well, buckle up and let’s dive into the reasons why car oil is a big no-no for your trusty snow-clearing companion.

Can I Use Car Oil In My Snowblower?

Types of Oil

When it comes to maintaining and servicing outdoor equipment like snowblowers, using the right type of oil is crucial. Two common types of oil that are often used in different engines are car oil and snowblower oil. While they may appear similar, there are significant differences between the two that should be taken into consideration. In this article, we will explore the distinctions between car oil and snowblower oil, the effects of using the wrong oil in a snowblower, factors to consider when choosing oil, the benefits of using snowblower oil, availability and cost comparison, proper steps to change snowblower oil, safe disposal of used oil, and answer some frequently asked questions.

Differences Between Car Oil and Snowblower Oil

Viscosity

One of the primary differences between car oil and snowblower oil is their viscosity. Viscosity refers to the thickness and flowability of the oil. Snowblower oil is specifically formulated to have a lower viscosity, which allows it to perform optimally in cold temperatures. Car oil, on the other hand, is designed to work within a broader range of temperatures, including higher temperatures experienced in car engines. Using car oil in a snowblower can lead to issues with oil flow and may hinder proper lubrication, especially in freezing conditions.

Additives

Another significant difference between car oil and snowblower oil is the specific additives they contain. Snowblower oil typically includes additives that enhance cold weather performance and provide better protection against moisture. These additives help prevent the formation of sludge and varnish, which is crucial for the longevity and performance of a snowblower engine. Car oil, on the other hand, may contain additives that are not necessarily suitable or necessary for a snowblower engine.

Temperature Range

Since snowblowers are primarily used in colder climates or during winter seasons, the temperature range at which they operate is typically lower than that of car engines. Snowblower oil is designed to withstand these colder temperatures without becoming too thick and compromising oil flow. Car oil, on the other hand, is formulated to work in a broader temperature range, including higher temperatures. Using car oil in a snowblower can result in poor performance and potential engine damage, especially during extremely cold weather conditions.

Usage Considerations

When it comes to the intended usage, snowblower oil is specifically formulated for the unique requirements of snowblower engines. Snowblowers often run at higher RPMs than car engines, meaning they require an oil that can withstand these demanding conditions. Additionally, snowblower engines are typically air-cooled, unlike car engines that have a cooling system. Snowblower oil takes into account these factors and ensures proper lubrication and cooling for the engine. Using car oil in a snowblower may lead to inefficient performance and potential damage to the engine.

Effects of Using Car Oil in a Snowblower

Performance Issues

Using car oil in a snowblower can result in performance issues. Since car oil is not designed for the specific demands of a snowblower engine, it may not provide adequate lubrication in extremely cold temperatures. This can lead to increased friction, wear, and inefficient operation of the snowblower. Reduced performance can translate to slower clearing capabilities, decreased throwing distance, and overall diminished efficiency when using a snowblower.

Engine Damage

Perhaps the most concerning effect of using car oil in a snowblower is the potential for engine damage. Snowblower engines are made to endure harsh winter conditions, but using the wrong type of oil can compromise their durability. Car oil may not have the necessary additives and viscosity to protect the engine from extreme cold weather, leading to increased wear, corrosion, and potential engine failure. It is essential to use the correct oil to ensure the longevity and reliability of a snowblower engine.

Warranty Considerations

Using car oil in a snowblower can also have implications for the warranty. Manufacturers often specify the recommended oil type for their snowblower engines. If car oil is used instead, it could void the warranty, leaving the owner responsible for any repairs or replacements that may be needed. It is crucial to follow the manufacturer’s guidelines and use the recommended oil to maintain warranty coverage and protect your investment.

Factors to Consider when Choosing Oil

When selecting oil for your snowblower, several factors should be taken into consideration to ensure optimal engine performance and longevity.

Manufacturer Recommendations

First and foremost, it is crucial to follow the manufacturer’s recommendations regarding oil type and viscosity. Manufacturers have extensive knowledge of their engines and understand the specific requirements for optimal performance and durability. Consult the owner’s manual or contact the manufacturer directly to determine the recommended oil type for your snowblower.

Climate and Temperature

The climate and temperature of your area play a significant role in the selection of the right oil for your snowblower. If you live in an area with extremely cold temperatures, it is essential to choose an oil that can withstand these conditions without becoming too thick. On the other hand, if you live in a region with milder winters, you may have more flexibility in terms of oil selection.

Oil Viscosity

Another crucial factor to consider is oil viscosity. As mentioned earlier, viscosity determines the thickness and flowability of the oil. For colder temperatures, a lower viscosity oil is recommended to ensure proper lubrication and oil flow. Higher viscosity oils may become sluggish in cold weather, leading to inadequate lubrication and potential engine damage.

Additive Requirements

Pay attention to the specific additive requirements of your snowblower engine. Different engines may have different needs when it comes to additives. Ensure that the oil you choose contains the necessary additives to protect against moisture, sludge, and varnish formation, as well as provide optimal engine performance.

Storage Conditions

Consider the storage conditions of your snowblower when selecting oil. If you store your snowblower in an unheated area, it is important to use an oil that can withstand lower temperatures without solidifying or becoming too thick. Opting for an oil specifically formulated for cold weather storage can help prevent potential issues when starting your snowblower after a period of inactivity.

Benefits of Using Snowblower Oil

Now that we have explored the differences and potential consequences of using the wrong oil in a snowblower, let’s highlight the benefits of using snowblower oil.

Optimal Performance

Using snowblower oil that is specifically formulated for the engine’s requirements ensures optimal performance. Snowblowers are designed to operate in cold weather conditions, and using the correct oil allows the engine to start smoothly, run efficiently, and provide maximum power. Proper lubrication is crucial for the overall performance of the snowblower, and snowblower oil is designed to meet these unique demands.

Engine Protection

Snowblower oil is specially formulated to provide superior engine protection in extreme weather conditions. The additives in snowblower oil help prevent engine wear, inhibit moisture damage, and minimize the formation of harmful deposits. This protection is essential for extending the life of the snowblower engine and maintaining its reliability, even in the harshest winter environments.

Longevity

Using the correct oil for your snowblower can significantly contribute to the longevity of your equipment. Snowblower engines are designed to endure intense usage during winter seasons. By using snowblower oil, you are providing the necessary lubrication and protection for the engine, reducing the risk of premature wear and potential breakdown. Investing in the right oil can save you money in the long run by avoiding costly repairs or replacements.

Warranty Compliance

Using the recommended snowblower oil is crucial to maintaining warranty coverage. Most manufacturers require the use of specific oil types to ensure the engine’s proper functioning and protection. By adhering to the manufacturer’s guidelines, you can rest assured that you are complying with warranty requirements and safeguarding yourself against any potential costs associated with engine damage or failure.

Availability and Cost Comparison

When it comes to the availability of oil, car oil is generally more widely accessible than snowblower oil. Car oil can be found in various retail stores, mechanic shops, and online platforms. On the other hand, snowblower oil may have more limited availability and may require visiting a specialized outdoor power equipment store or contacting the snowblower’s manufacturer directly. However, the availability of snowblower oil should not deter you from using the correct oil for your snowblower’s engine.

In terms of cost, snowblower oil may be slightly more expensive than car oil due to its specific formulation and additives. However, considering the potential consequences of using the wrong oil in a snowblower, the slightly higher cost is a worthwhile investment in the longevity and reliability of your equipment.

Steps to Properly Change Snowblower Oil

Regularly changing the oil in your snowblower is essential for maintaining its performance and prolonging its lifespan. Here are the steps to properly change the oil in your snowblower:

Draining the Old Oil

  1. Before starting any maintenance work, make sure the snowblower is turned off and all moving parts have come to a complete stop.
  2. Locate the oil drain plug, which is usually located on the bottom of the engine or near the oil reservoir.
  3. Place a suitable container beneath the oil drain plug to catch the oil.
  4. Unscrew the oil drain plug and allow the old oil to drain completely.
  5. Once all the oil has drained, securely fasten the oil drain plug back in place.

Replacing the Oil Filter

  1. If your snowblower is equipped with an oil filter, it is recommended to replace it during an oil change.
  2. Locate the oil filter, which is typically near the oil reservoir or on the side of the engine.
  3. Use an appropriate tool to remove the old oil filter.
  4. Lubricate the rubber gasket on the new oil filter with a small amount of fresh oil.
  5. Screw the new oil filter into place, taking care not to overtighten.

Adding the New Oil

  1. Consult the owner’s manual or manufacturer’s recommendations to determine the appropriate type and amount of oil for your snowblower.
  2. Locate the oil filler cap or dipstick, which is usually labeled and easy to access.
  3. Slowly pour the new oil into the oil reservoir, taking care not to overfill.
  4. Check the oil level using the dipstick, ensuring it is within the recommended range.
  5. Securely fasten the oil filler cap or reinstall the dipstick.

Properly disposing of the old oil is crucial for environmental protection. Make sure to follow local regulations and guidelines for oil disposal to prevent contamination.

Safe Disposal of Used Snowblower Oil

Once you have drained the old oil from your snowblower, it is important to dispose of it properly. Here are some guidelines to ensure safe disposal:

Local Regulations

Check your local regulations regarding used oil disposal. Many areas have specific guidelines and recycling programs in place to prevent environmental contamination. Contact your local waste management authority or visit their website for information on authorized collection centers or recycling facilities.

Environmentally Friendly Options

If there are no designated collection centers in your area, you can also consider recycling the used snowblower oil yourself. Some automotive stores or recycling centers accept used oil for recycling. Ensure that the oil is stored in an appropriate, leak-proof container and transport it safely to the recycling facility.

Never dispose of used oil by dumping it on the ground, pouring it down the drain, or mixing it with other household waste. Improper disposal can have severe consequences for the environment and human health.

Frequently Asked Questions

Can I mix car oil with snowblower oil?

It is generally not recommended to mix car oil with snowblower oil. The specific formulations and additives in each type of oil are tailored to meet the unique requirements of their respective engines. Mixing them together could result in an oil blend that does not provide adequate lubrication or protection for either engine. It is best to stick to the manufacturer’s recommendations and use the appropriate oil for your snowblower.

What happens if I don’t change the oil in my snowblower?

Failure to change the oil in your snowblower regularly can have detrimental effects on its performance and longevity. Over time, the oil can become contaminated with dirt, debris, and sludge, reducing its effectiveness as a lubricant. This can lead to increased engine wear, decreased performance, and potentially costly engine damage. Regular oil changes are crucial for maintaining optimal snowblower performance and extending its lifespan.

How often should I change the oil in my snowblower?

The frequency of oil changes in a snowblower can vary depending on factors such as usage, operating conditions, and the specific recommendations of the manufacturer. As a general guideline, it is recommended to change the oil in your snowblower at least once a season or after every 25 hours of use. However, always refer to the manufacturer’s guidelines in the owner’s manual for the most accurate and reliable information.

Can I use synthetic oil in my snowblower?

Using synthetic oil in a snowblower is generally acceptable and may provide some benefits. Synthetic oils are known for their superior performance in extreme temperatures and their ability to resist breakdown over time. They also tend to offer better protection against wear and deposits. However, it is crucial to consult the owner’s manual or contact the manufacturer to ensure that using synthetic oil does not void the warranty and is compatible with your specific snowblower model.

Can I use two-cycle oil in a four-cycle snowblower?

No, two-cycle oil is specifically formulated for two-stroke engines, while four-cycle snowblowers are designed to use four-cycle oils. Two-cycle oil does not have the necessary additives for proper lubrication and protection in four-stroke engines. Using the wrong type of oil can lead to engine damage and decreased performance. It is essential to use the correct oil recommended by the manufacturer for your particular snowblower model.

Conclusion

Using the correct oil in your snowblower is crucial for maintaining optimal performance, protecting the engine, and ensuring the longevity of your equipment. While it may be tempting to use car oil as a substitute, the differences in viscosity, additives, temperature range, and usage considerations make it clear that car oil is not suitable for snowblower engines.

By understanding the distinctions between car oil and snowblower oil, the potential effects of using the wrong oil, and the factors to consider when choosing oil, you can make an informed decision to ensure the best possible maintenance for your snowblower. Using the correct oil will not only optimize the performance and protect your investment but also comply with warranty requirements.

Remember to follow the proper steps for changing snowblower oil and dispose of used oil responsibly. By taking these measures, you can keep your snowblower running smoothly and efficiently, ensuring it is always ready to tackle the winter weather.

Can A Snowblower Operate In Sub-zero Temperatures?

Imagine waking up to a winter wonderland, with snowflakes gently falling from the sky, and a thick blanket of snow covering the ground. As you sip your warm cup of coffee, a question pops into your mind: can a snowblower handle the freezing cold temperatures? After all, it’s not uncommon for temperatures to plummet well below zero during the winter months. In this article, we will explore whether a snowblower can brave the sub-zero temperatures and save you from the backbreaking task of shoveling snow by hand.

Factors That Affect Snowblower Performance in Sub-zero Temperatures

Can A Snowblower Operate In Sub-zero Temperatures?

Engine Design and Fuel

The design of the engine and the type of fuel used can greatly impact the performance of a snowblower in sub-zero temperatures. The material used in the construction of the engine can determine its ability to withstand extreme cold. Engines with materials such as cast iron or aluminum tend to have better cold weather performance compared to engines made of other materials.

Snowblowers are available with both carburetor and fuel-injected engines. Carbureted engines may have difficulty starting in extremely cold temperatures due to the need for precise fuel-air mixture. Fuel-injected engines, on the other hand, tend to have better cold weather performance as they can automatically adjust the air-fuel mixture for optimal combustion.

The combustion efficiency of the engine is another important factor to consider. Snowblowers with high combustion efficiency are able to generate more power and maintain performance even in sub-zero temperatures. Additionally, the octane rating of the fuel used can affect the engine’s performance. Higher octane fuels can provide better ignition and combustion, resulting in improved snowblower performance in cold weather conditions.

Battery Operated Snowblowers

Battery-operated snowblowers have become increasingly popular in recent years. These machines offer a cordless and environmentally friendly alternative to traditional gas-powered snowblowers. However, their performance in sub-zero temperatures can be affected by several factors.

The performance of the battery itself can be impacted by extreme cold. Batteries, especially lithium-ion batteries commonly used in snowblowers, can experience decreased capacity and power output in cold temperatures. It is important to consider the estimated run-time of the battery in colder conditions to ensure it will meet your snow clearing needs.

Charging time can also be affected by cold temperatures. It may take longer for the battery to fully charge when exposed to extreme cold. Additionally, maintaining the battery’s charge during storage in cold weather conditions is crucial to ensure optimum performance when needed.

Battery power loss is another factor to consider. In extremely cold temperatures, the battery may not be able to supply enough power to the snowblower, resulting in reduced performance. It is important to monitor battery levels and recharge as needed, especially when operating in sub-zero temperatures.

Cold Weather Starters

Starting a snowblower in sub-zero temperatures can be challenging. Cold weather starters are designed to assist in starting engines in extreme cold conditions. There are different types of cold weather starters available, such as manual chokes and electric starters.

Manual chokes allow the operator to manually adjust the air/fuel mixture, making it easier to start the engine in cold weather. Electric starters, on the other hand, provide a convenient push-button start. These starters often utilize a battery or a power cord, enabling the engine to start without the need for manual priming or pulling.

Efficiency of cold weather starters can vary depending on the specific model and conditions. Some starters may perform better in extremely cold temperatures compared to others. It is important to choose a snowblower with a reliable cold weather starter to ensure easy and quick starts in sub-zero temperatures.

Preventing starter malfunctions is crucial for snowblower performance in cold weather. Regular maintenance, such as keeping the starter clean and lubricated, can help prevent freezing or damage. Ensuring proper fuel and oil levels is also important for smooth starting in extreme cold.

Can A Snowblower Operate In Sub-zero Temperatures?

Oil Viscosity

Using the proper oil viscosity is vital for snowblower performance in sub-zero temperatures. Oil viscosity refers to the thickness or flow resistance of the oil at different temperatures. In colder climates, it is important to use oil with a lower viscosity to ensure proper lubrication of the engine.

Cold weather rated oils are specifically designed to provide optimal consistency in cold temperatures. These oils have additives that allow them to maintain their viscosity, ensuring proper lubrication even in sub-zero conditions. It is important to consult the manufacturer’s recommendations and use the recommended oil viscosity for your snowblower.

Using oil with the incorrect viscosity can lead to poor lubrication, increased wear on engine components, and reduced snowblower performance in cold temperatures. It is recommended to change the oil regularly and use the correct viscosity oil for your specific snowblower model.

Fuel Line Freezing

Fuel line freezing is a common issue in extremely cold temperatures. When the fuel line freezes, it can restrict or completely block the flow of fuel to the engine, resulting in poor snowblower performance or engine stalling.

There are several factors that can cause fuel line freezing, including low-quality fuels, moisture in the fuel tank, and inadequate fuel line insulation. To prevent fuel line freezing, it is important to use high-quality fuel that is specifically formulated for cold weather conditions. Removing any moisture or contaminants from the fuel tank can also help prevent freezing.

Proper insulation of the fuel line is crucial to prevent freezing. Insulating the fuel line with foam or heat tape can help maintain the fuel temperature and prevent freezing. Regular inspections and maintenance of the fuel line system can help identify and address any potential issues before they cause freezing.

Use of Synthetic Oil

Using synthetic oil in your snowblower can provide several benefits when operating in sub-zero temperatures. Synthetic oils have a lower pour point compared to conventional oils, meaning they can flow more freely in extremely cold temperatures. This allows for easier engine starts and better lubrication, even in sub-zero conditions.

Synthetic oils also offer better viscosity stability, meaning they do not thin out as much in cold temperatures. This allows the oil to maintain its viscosity and provide consistent lubrication to critical engine components. The use of synthetic oil can help reduce wear and extend the life of your snowblower’s engine, even in extreme cold weather.

However, it is important to ensure that the synthetic oil used is compatible with your snowblower’s engine design. Consult the manufacturer’s recommendations and use oil specifically formulated for your particular model.

Electric Start Systems

Electric start systems can be a convenient feature in sub-zero temperatures, providing an easy and quick way to start the snowblower’s engine. These systems typically utilize a starter motor powered by a battery to initiate the engine’s combustion process.

The effectiveness of electric start systems in sub-zero temperatures can vary depending on the specific model and battery power. It is important to ensure the battery is sufficiently charged and in good condition to provide the necessary power for starting the engine in extreme cold.

Battery power requirements for electric start systems may increase in very low temperatures, as the cold can decrease the efficiency of the battery. Regularly testing and maintaining the battery’s charge is important to ensure reliable starts, especially in sub-zero conditions.

Snow Accumulation

The amount of snow accumulation can directly impact the performance of a snowblower. When faced with heavy snow, the blower’s capacity to clear the snow efficiently can be a determining factor in its overall performance.

Different snowblower models have varying snow clearing capacities, which are often measured in pounds per minute or tons per hour. It is important to choose a snowblower with a capacity that matches the average snow accumulation in your area, especially if you frequently experience heavy snowfall.

Blade and auger design also play a significant role in snowblower performance. The shape and size of the blades and augers can impact their ability to effectively gather and throw snow. It is advisable to select a model with well-designed blades and augers that can handle the specific snow conditions you will encounter.

Icing and Frozen Particles

In extremely cold temperatures, snow can become compacted and turn into ice, making it more challenging to clear. Icing can affect the performance of a snowblower, as the blades and augers may struggle to break through the ice and move it effectively.

Frozen particles, such as chunks of ice or hard-packed snow, can also pose a challenge for snowblower performance. These particles can clog the chute and prevent efficient snow discharge. Clearing these clogs manually can be time-consuming and physically demanding.

To minimize the impact of icing and frozen particles, using a snowblower with robust blades and augers is important. Models with features such as serrated blades or augers can be more effective in breaking through ice and hard-packed snow. Additionally, applying a non-stick coating to the blades and augers can help prevent snow from sticking and accumulating.

Operational Limitations

Operating a snowblower in sub-zero temperatures can come with certain limitations and safety concerns. Extreme cold weather poses risks of frostbite and hypothermia, especially when exposed to the elements for an extended period.

It is important to dress appropriately with warm clothing and cover exposed skin to prevent frostbite. Taking regular breaks and staying hydrated can also help prevent cold-related injuries.

Efficiency of snowblowers can be reduced in very low temperatures. Engine performance may be compromised, and moving parts may become less responsive. It is advisable to regularly check and maintain the snowblower, ensuring all parts are in good working condition.

Operating a snowblower in extreme cold may also require additional maintenance and precautionary measures. Following the manufacturer’s guidelines for cold weather operation and storage can help ensure reliable performance and extend the lifespan of the snowblower.

In conclusion, several factors can affect the performance of a snowblower in sub-zero temperatures. Engine design and fuel, battery performance, cold weather starters, oil viscosity, fuel line freezing, use of synthetic oil, electric start systems, snow accumulation, icing and frozen particles, and operational limitations all play a role in determining how well a snowblower will perform in extreme cold. By understanding these factors and selecting a snowblower that excels in these areas, you can ensure efficient snow clearing even in the coldest of winters.

How Do I Replace The Ignition Coil On My Snowblower?

So, you’ve found yourself in a bit of a sticky situation with your snowblower. The ignition coil has gone awry and now you’re stuck with a machine that won’t start. But fear not, because in this article, we’re going to walk you through the process of replacing that pesky ignition coil. Whether you’re a seasoned handyman or a novice when it comes to snowblowers, we’ve got you covered. By the end of this, you’ll be equipped with all the knowledge you need to get your snowblower up and running again.

How Do I Replace The Ignition Coil On My Snowblower?

Preparing for Replacement

Before you start replacing the ignition coil on your snowblower, it is important to gather all the necessary tools and materials. This will ensure that you have everything you need within reach, making the process smoother and more efficient. Some of the tools you may need include a wrench set, screwdrivers, and possibly a socket set. Additionally, you will need a replacement ignition coil that matches the specifications of your snowblower.

Once you have gathered all the necessary tools and materials, the first step is to turn off the snowblower and disconnect the spark plug. This is a crucial safety measure as it ensures that there is no power running through the machine while you work on it. By disconnecting the spark plug, you eliminate the risk of accidentally starting the snowblower during the replacement process.

The next step is to locate the ignition coil on your snowblower. This can usually be found close to the engine and is responsible for generating the electrical spark that ignites the fuel in the combustion chamber. Take a moment to locate the ignition coil and familiarize yourself with its position before proceeding to the next step.

Removing the Old Ignition Coil

To remove the old ignition coil, you may need to remove any protective covers or panels that are covering it. These covers are typically secured with screws or bolts, so use the appropriate tool to carefully remove them. Once the covers are removed, you will have clear access to the ignition coil.

Now, it’s time to disconnect the wires from the old ignition coil. These wires are usually connected to the coil using small connectors or screws. Carefully detach the wires by either unscrewing the connectors or removing the screws, taking note of the order in which the wires are connected.

With the wires disconnected, you can now unscrew and remove the mounting bolts that hold the old ignition coil in place. Keep track of these bolts as you will need them later when installing the new ignition coil.

Once the mounting bolts are removed, you can take out the old ignition coil from its position. Be gentle while removing it to avoid causing any damage to surrounding components. Set the old ignition coil aside, as it will need to be properly disposed of later.

How Do I Replace The Ignition Coil On My Snowblower?

Installing the New Ignition Coil

With the old ignition coil out of the way, it’s time to install the new one. Begin by positioning the new ignition coil in its designated place on the snowblower. Make sure the coil is aligned correctly and be careful not to force it into position.

Once the new ignition coil is properly positioned, secure it in place by tightening the mounting bolts. It is important to ensure that the coil is tightly secured, as any loose connections may lead to malfunction or poor performance.

Next, it’s time to connect the wires to the new ignition coil. Refer to the notes you made earlier when disconnecting the old ignition coil to correctly attach each wire to its respective connector or screw. Double-check that all the connections are secure and tight.

After the new ignition coil is securely in place and the wires are connected, you can now replace any protective covers or panels that were removed earlier. These covers help protect the ignition coil from debris and ensure its longevity and proper functioning.

Completing the Replacement Process

With the new ignition coil installed and all the wires connected, it is time to wrap up the replacement process. Reconnect the spark plug that was previously disconnected, ensuring it is securely attached. By reconnecting the spark plug, you are preparing the snowblower to be started and tested for functionality.

Before starting the snowblower, it is important to double-check all the connections and bolts you have worked with during the replacement process. Make sure that everything is tightened and in its proper place. This step ensures the safety and effectiveness of the ignition coil replacement.

Now, it’s time to test the snowblower’s functionality. Start the machine and observe how it runs. Pay attention to any unusual noises or behavior that may indicate a problem with the ignition coil installation. If everything seems to be running smoothly, congratulations! You have successfully replaced the ignition coil on your snowblower.

Tips and Precautions

When replacing the ignition coil on your snowblower, it is always helpful to refer to the snowblower’s manual for specific instructions. The manual may provide detailed steps and illustrations that are specific to your make and model of snowblower, ensuring a successful replacement.

It is crucial to ensure that the replacement ignition coil matches the specifications of your snowblower. Ignition coils come in different sizes, voltages, and configurations, so it is essential to choose one that is compatible with your snowblower’s engine.

If you are unsure about replacing the ignition coil yourself or if you encounter any difficulties during the process, consider seeking professional assistance. A trained technician will have the expertise and experience to safely and efficiently replace the ignition coil on your snowblower.

Lastly, it is important to dispose of the old ignition coil properly. Some local regulations may require specific disposal methods for electronic components. Check with your local waste management authorities or recycling facilities to ensure that you dispose of the old ignition coil in an environmentally responsible manner.

In conclusion, replacing the ignition coil on your snowblower may seem daunting at first, but by following these step-by-step instructions and taking the necessary precautions, you can successfully complete the process. Remember to gather all the necessary tools and materials, turn off the snowblower and disconnect the spark plug, remove the old ignition coil, install the new ignition coil, and double-check all connections and bolts. With proper preparation and care, you can ensure the continued functionality and performance of your snowblower.

Are There Any Snowblowers With Joystick Chute Controls?

If you’ve ever endured the tedious task of clearing snow from your driveway, you’re probably familiar with the hassle of navigating cumbersome snowblowers. The constant bending down to adjust the chute direction can quickly become back-breaking work. But what if there was a way to effortlessly control the chute with a simple joystick? In this article, we explore the possibility of snowblowers equipped with joystick chute controls and whether they exist to make your snow-clearing chores a breeze.

Are There Any Snowblowers With Joystick Chute Controls?

Snowblowers with Joystick Chute Controls

Introduction

Snowblowers with joystick chute controls offer a convenient and user-friendly option for clearing snow from your pathways and driveways. Unlike traditional snowblowers that require manual adjustments of the chute direction, these innovative machines allow you to effortlessly control the direction and distance of the snow with just a simple movement of a joystick. In this article, we will explore the advantages and disadvantages of snowblowers with joystick chute controls, top brands and models available in the market, key features to consider, maintenance tips, and where to buy them.

Advantages of Joystick Chute Controls

One of the key advantages of snowblowers with joystick chute controls is the ease of operation. With traditional snowblowers, changing the chute direction involves stopping the machine, manually adjusting the chute, and restarting the snowblower. However, with joystick chute controls, you can conveniently change the chute direction on the go without interrupting your snow clearing process.

Another advantage is the precise control over the throwing distance. Joystick chute controls allow you to adjust the angle of the chute with precision, enabling you to throw the snow exactly where you want it. This feature is particularly useful when dealing with tight spaces or when you need to avoid certain areas, such as windows or delicate plants.

Additionally, joystick chute controls enhance maneuverability. By using the joystick, you can easily maneuver the snowblower and direct the snow in any desired direction, making it easier to navigate through narrow pathways or tackle challenging snow removal tasks.

Disadvantages of Joystick Chute Controls

While snowblowers with joystick chute controls offer numerous advantages, they also come with certain disadvantages. One of the main concerns is the potential complexity of the control system. Some users may find it challenging to operate the joystick chute controls, especially if they are not familiar with similar control mechanisms. It may take some time and practice to get used to the joystick control and effectively utilize its full potential.

Another disadvantage is the possibility of mechanical failures or malfunctions in the joystick chute control system. As with any mechanical component, there is a risk of the joystick or its associated parts experiencing issues over time. This could lead to difficulties in controlling the chute direction or may even require costly repairs.

Furthermore, snowblowers with joystick chute controls tend to be more expensive compared to their traditional counterparts. If you are on a tight budget, the added cost of the joystick chute control system may be a deterrent, especially if you do not prioritize the convenience it offers.

Top Brands of Snowblowers with Joystick Chute Controls

Brand 1

Brand 1 offers a range of snowblowers with joystick chute controls that are known for their durability and performance. These snowblowers come in various sizes and power options to suit different snow clearing needs. With their joystick chute controls, Brand 1 snowblowers provide easy and precise maneuverability, making snow removal a breeze.

Brand 2

Brand 2 is a reputable manufacturer that specializes in snowblowers with joystick chute controls. Their models are designed for both residential and commercial use, boasting powerful engines and efficient auger systems. Brand 2 snowblowers are known for their user-friendly design, combining the convenience of joystick chute controls with reliable performance.

Brand 3

Brand 3 is another top contender in the market of snowblowers with joystick chute controls. Their products offer a great balance between power, functionality, and affordability. With a range of clearing widths and throwing distances, Brand 3 snowblowers cater to different snow removal needs. The joystick chute controls of their models provide intuitive operation and seamless control over the snow discharge.

Features to Consider in Snowblowers with Joystick Chute Controls

Power Source

Snowblowers with joystick chute controls are available in various power options, including gas-powered, electric, and battery-operated models. Consider your specific needs and preferences to choose the appropriate power source that suits your snow clearing requirements.

Clearing Width

The clearing width determines the amount of snow that can be cleared in a single pass. For larger areas or heavy snowfall regions, opting for a snowblower with a wider clearing width can help you tackle the snow removal process more efficiently.

Throwing Distance

The throwing distance refers to how far the snow can be thrown by the snowblower. Different models offer different throwing distances, so consider the size of your property and the distance you need the snow to be thrown when selecting a snowblower with joystick chute controls.

Chute Rotation

Check if the joystick chute control system allows for easy and smooth rotation of the chute. The ability to adjust the chute rotation without any hitches or delays ensures quick and efficient snow clearing.

Control Panel

Examine the layout and accessibility of the control panel. A well-designed control panel will make it easier to operate the joystick chute controls and other functions of the snowblower, enhancing the overall user experience.

Auger System

The auger system is responsible for loosening and collecting the snow before it is discharged. Look for snowblowers with robust auger systems that can effectively handle different types of snow, including wet and heavy snow.

Additional Features

Consider any additional features or accessories that may enhance the functionality and convenience of the snowblower. These can include adjustable handlebars, headlights for improved visibility, heated hand grips for comfort, and easy-to-use speed controls.

Are There Any Snowblowers With Joystick Chute Controls?

Top Models of Snowblowers with Joystick Chute Controls

Model 1

Model 1 from Brand 1 is a highly rated snowblower with joystick chute controls. It offers a powerful engine, a wide clearing width, and an efficient auger system. The joystick chute controls on Model 1 provide precise control over the snow discharge, enabling you to clear snow with ease.

Model 2

Brand 2’s Model 2 is a popular choice among residential snowblower users. It features a compact design, making it ideal for smaller properties. Model 2 is equipped with joystick chute controls that allow for effortless maneuverability and precise snow placement.

Model 3

Model 3 from Brand 3 combines affordability with reliable performance. With its user-friendly joystick chute controls, Model 3 offers seamless operation and effective snow clearing. It is suitable for both residential and light commercial use.

Comparing Snowblowers with Joystick Chute Controls

Price

Snowblowers with joystick chute controls can vary significantly in price. Compare the prices of different models and brands to find one that fits your budget without compromising on the features and quality you require.

Size and Weight

Consider the size and weight of the snowblower, especially if you have limited storage space or if you need to transport it frequently. Opting for a compact and lightweight model can provide easier storage and maneuverability.

Power and Performance

Check the power rating and performance capabilities of the snowblower. Look for models that offer sufficient power to handle the typical snow conditions in your area. Consider the throwing distance, clearing width, and auger system to determine the snowblower’s performance.

Ease of Use

Evaluate the user-friendliness of the joystick chute controls and other operational features. Look for intuitive controls, easy-to-read display panels, and ergonomic design elements that enhance ease of use. Models with adjustable handlebars and comfortable grip options can further improve the user experience.

Durability

Snowblowers with joystick chute controls should be built to withstand harsh winter conditions. Look for models made with durable materials that can withstand the rigors of snow clearing. Reading customer reviews and checking for warranties can provide insights into the durability of the snowblower.

Warranty

Consider the warranty offered by the manufacturer. A longer warranty period indicates the manufacturer’s confidence in their product’s quality and durability. It also provides peace of mind against any potential defects or issues that may arise.

Maintenance Tips for Snowblowers with Joystick Chute Controls

General Maintenance

Regularly inspect and clean your snowblower to remove any debris or snow buildup. Check and replace any worn-out parts, such as belts and blades, as necessary. Follow the manufacturer’s instructions for oil changes and other routine maintenance tasks.

Chute Control Maintenance

Keep the joystick chute controls clean and free from any obstructions, such as ice or snow. Lubricate the control mechanism as recommended by the manufacturer to ensure smooth operation. Regularly check for any signs of wear or damage in the joystick and related components.

Engine Maintenance

Follow the recommended maintenance schedule for the engine. This may include oil changes, spark plug replacements, and air filter cleaning or replacement. Properly store the snowblower during the off-season to prevent fuel system issues and ensure its longevity.

Where to Buy Snowblowers with Joystick Chute Controls

Local Retailers

Visit local home improvement stores, outdoor equipment retailers, or specialized snowblower dealerships to explore a variety of snowblowers with joystick chute controls. Discuss your specific needs with knowledgeable staff who can provide recommendations and assist you in making an informed purchase.

Online Stores

Online marketplaces and retail websites offer a wide range of snowblowers with joystick chute controls. Browse through different models, compare prices, and read customer reviews to make an informed decision. Ensure that the online store has a reliable return policy and warranty coverage.

Conclusion

Snowblowers with joystick chute controls offer a convenient and efficient way to clear snow from your property. With the ability to control the chute direction and throwing distance effortlessly, these machines provide enhanced maneuverability and precise snow placement. Consider the advantages and disadvantages, top brands and models, important features, and maintenance tips discussed in this article to make an informed decision when purchasing a snowblower with joystick chute controls. Stay prepared for the winter season and keep your pathways and driveways clear of snow with this innovative snow-clearing solution.

FAQs about Snowblowers with Joystick Chute Controls

Are snowblowers with joystick chute controls more expensive?

Yes, snowblowers with joystick chute controls tend to be more expensive compared to traditional snowblowers. The added convenience and advanced control features contribute to the higher cost.

Can I install joystick chute controls on my existing snowblower?

It is unlikely that you can install joystick chute controls on an existing snowblower unless it was specifically designed to accommodate such modifications. It is best to consult with the manufacturer or a qualified technician for any retrofitting possibilities.

Do snowblowers with joystick chute controls require special maintenance?

Snowblowers with joystick chute controls require similar maintenance procedures as traditional snowblowers. This includes regular cleaning, inspection, and routine maintenance tasks such as oil changes and filter replacements. Additionally, you will need to ensure the joystick chute controls are kept clean and in good working condition.

Are snowblowers with joystick chute controls suitable for residential use?

Yes, snowblowers with joystick chute controls are suitable for residential use. They offer convenience, ease of use, and improved maneuverability, making them a practical choice for clearing snow from residential driveways and pathways.

Can I adjust the throwing distance with joystick chute controls?

Yes, the joystick chute controls allow you to adjust the throwing distance of the snow. You can precisely control the angle and direction of the chute, enabling you to throw the snow at your desired distance.

How Can I Recycle My Old Snowblower?

So, you’re looking to get rid of your old snowblower and do the right thing by recycling it. Well, you’ve come to the right place! In this article, we’ll explore various ways for you to responsibly dispose of your snowblower and give it a second life. Whether you’re looking to donate it, take it to a recycling facility, or even repurpose it yourself, we’ve got you covered. So let’s roll up our sleeves and find the best way to give your old snowblower a sustainable farewell!

How Can I Recycle My Old Snowblower?

This image is property of pixabay.com.

Considerations before recycling

Before jumping into the process of recycling your old snowblower, there are a few important considerations to keep in mind. Firstly, think about whether the snowblower can be repaired or reused. If it’s a minor issue that can be fixed with a little maintenance or repair work, it might be worth trying to breathe new life into it. This not only saves you money but also reduces the demand for new products.

Another crucial step is to research local recycling options. Not all areas have the same recycling programs or facilities, so it’s essential to understand what options are available in your locality. Look for recycling centers that accept snowblowers or other similar equipment. Also, check if there are any specific guidelines or requirements for recycling snowblowers in your area.

Lastly, consult the manufacturer’s recommendations. The manufacturer may have specific instructions on how to dispose of their products or provide information on local recycling centers that they work with. By following their recommendations, you can ensure that the snowblower is recycled in the most responsible and efficient way possible.

Preparing for recycling

Before you can take your snowblower to a recycling center, it’s important to properly prepare it for recycling. Here are a few steps to follow:

  1. Clean the snowblower: Remove any dirt, debris, or snow from the machine. This helps make the recycling process easier and ensures that all the parts are visible.

  2. Drain fuel and oil: Before recycling, it’s crucial to drain any fuel or oil from the snowblower. These substances can be hazardous, and recycling centers often have specific procedures for handling them. Make sure to dispose of the fuel and oil responsibly, following local regulations or guidelines.

  3. Disconnect spark plug: To avoid any accidental starts or sparks, disconnect the spark plug. This step ensures your safety and the safety of those handling the snowblower during the recycling process.

How Can I Recycle My Old Snowblower?

This image is property of pixabay.com.

Donate or sell the snowblower

If your snowblower is still in good working condition, consider donating or selling it instead of recycling. By giving it a new home, you extend its lifespan and reduce waste. Here are a couple of options to explore:

  1. Donate to a charity or non-profit organization: Many organizations accept donations of used snowblowers or other equipment. These organizations may redistribute them to those in need or use them for community projects. Research local charities or non-profits in your area and check if they accept such donations.

  2. Sell it online or at a garage sale: If your snowblower is still functional, you can sell it online through platforms like Craigslist or eBay. Alternatively, you can organize a garage sale to find a local buyer. Selling the snowblower not only gives it a second life but also puts some money back in your pocket.

Find a local recycling center

When the snowblower is beyond repair or reuse, it’s time to find a local recycling center. Here are a few ways you can locate one:

  1. Contact local waste management: Get in touch with your local waste management authority or recycling center to inquire about snowblower recycling. They can provide information on specific recycling centers in your area or advise you on the best course of action.

  2. Search online directories: There are various online directories and databases dedicated to recycling facilities. Use these resources to find recycling centers nearby that accept snowblowers. Some directories even provide ratings and reviews, giving you an idea of the facility’s reputation.

  3. Inquire at home improvement stores: Reach out to home improvement stores, such as hardware stores or garden centers, and ask if they have any recommendations for snowblower recycling. They often have connections with recycling centers and can guide you in the right direction.

How Can I Recycle My Old Snowblower?

This image is property of pixabay.com.

Disassemble the snowblower

Before recycling the snowblower, it’s important to disassemble it properly. This allows for a more efficient recycling process and ensures that different parts are recycled appropriately. Follow these steps for disassembly:

  1. Refer to the user manual: The user manual provides specific instructions on how to disassemble the snowblower safely. It’s important to follow these instructions to avoid any damage to the machine or harm to yourself.

  2. Use necessary tools and safety equipment: Gather the tools specified in the manual for disassembling the snowblower. Additionally, don’t forget to wear appropriate safety equipment like gloves, goggles, and protective clothing. Safety should always be a top priority during the disassembly process.

  3. Sort and separate the parts: As you disassemble the snowblower, separate the different components into categories, such as metal, plastic, rubber, and engine/motor parts. This sorting makes it easier to recycle each type of material properly and reduces the chances of confusion during the recycling process.

Recycling the various components

Once you have disassembled the snowblower and sorted the parts, it’s time to recycle each component appropriately. Here’s a breakdown of how to recycle different materials:

  1. Metal components: Metals like steel and aluminum can usually be recycled at local metal recycling centers. Check with your local recycling facility to confirm whether they accept metal parts from snowblowers. Be sure to remove any non-metal attachments or components before recycling.

  2. Plastic components: Plastics can be recycled, but not all plastic types are accepted by every recycling center. Look for recycling centers that specifically mention accepting plastic snowblower parts. If you’re unsure about the plastic type, check for any recycling symbols or consult the recycling center for guidance.

  3. Rubber components: Rubber parts such as tires or belts may not be recyclable in standard recycling programs. Check if there are any specialized recycling centers or programs that accept rubber. If recycling is not an option, consider repurposing the rubber parts for other projects or contacting local tire shops for proper disposal.

  4. Engine and motor: The engine and motor of the snowblower may contain valuable materials like copper or aluminum, making them suitable for recycling. Look for recycling centers that accept small engines or electronic components. Make sure to drain any remaining fluids and safely remove any hazardous materials before recycling.

How Can I Recycle My Old Snowblower?

Proper disposal of hazardous materials

When recycling a snowblower, it’s crucial to handle hazardous materials correctly. Here’s how to dispose of two common hazardous materials:

  1. Dispose of fuel and oil: Fuel and oil should never be poured down the drain or thrown in the trash. Contact your local hazardous waste disposal facility and inquire about their procedures for fuel and oil disposal. They may have specific guidelines for these substances to ensure their safe handling and disposal.

  2. Recycle or dispose of the battery properly: If your snowblower has a battery, it should be recycled separately. Batteries contain toxic substances and should not end up in landfills. Look for battery recycling programs or drop-off locations in your area. Many hardware stores or electronics retailers offer battery recycling services.

Transporting the snowblower

Transporting a disassembled snowblower requires careful attention to ensure safety and prevent damage. Here’s how to go about it:

  1. Secure the disassembled parts: Use appropriate packaging or containers to secure and protect the disassembled snowblower parts during transport. This prevents any pieces from shifting or getting damaged during the journey.

  2. Use a pickup truck or trailer: If you have access to a pickup truck or trailer, use it to transport the snowblower. Make sure the vehicle is large enough to accommodate all the disassembled parts and secure them properly to avoid any accidents or damage during transit.

  3. Ask for assistance if needed: Transporting a disassembled snowblower can sometimes be a challenging task, especially if it’s bulky or heavy. Don’t hesitate to ask for assistance from friends, family, or neighbors. Their help can make the process smoother, safer, and more efficient.

Recycling alternatives

Besides traditional recycling methods, there are a couple of additional options to consider:

  1. Trade-in programs: Some snowblower manufacturers or retailers offer trade-in programs. These programs allow you to exchange your old snowblower for a discount on a new one. This ensures the old snowblower is recycled responsibly while also providing you with a cost-saving opportunity.

  2. Manufacturer take-back programs: Certain manufacturers have take-back programs in place, where they accept their products for recycling at the end of their life cycle. Contact the snowblower’s manufacturer to inquire about any available take-back programs. These programs often involve returning the product to the manufacturer or an authorized recycling center.

Recycling benefits and impact

Recycling an old snowblower has several positive impacts on the environment and reduces landfill waste. Here’s why recycling is beneficial:

  1. Environmental benefits: Recycling helps conserve natural resources by recovering valuable materials from old snowblowers. The extraction and production of these materials usually have significant environmental impacts. By recycling, you reduce the need for new resource extraction, conserve energy, and lower greenhouse gas emissions.

  2. Reduction of landfill waste: Snowblowers that end up in landfills contribute to the accumulation of electronic waste and other non-biodegradable materials. By recycling, you divert these products from landfills, extending their lifespan in the form of recycled materials. This reduces the strain on landfill space and prevents the potential release of hazardous substances into the environment.

In conclusion, recycling your old snowblower is a responsible and sustainable way to dispose of it. Before recycling, consider if the snowblower can be repaired or donated. Research local recycling options and consult the manufacturer’s recommendations. Properly prepare the snowblower for recycling, disassemble it, and sort the different components. Recycle each material separately, ensuring the correct disposal of hazardous substances. Transport the disassembled parts securely and explore alternative recycling options like trade-in or manufacturer take-back programs. By recycling your old snowblower, you not only contribute to a cleaner environment but also promote resource conservation and reduce landfill waste.

What Should I Do If My Snowblower Starts Smoking?

So, picture this: You wake up to find a fresh layer of snow outside. You grab your trusty snowblower and confidently make your way to clear the driveway. But suddenly, you notice something alarming – your snowblower starts smoking! Panic sets in as you wonder what you should do in this situation. Before you start envisioning costly repairs or a ruined winter season, take a deep breath. In this article, we’ll guide you through the steps to take if your snowblower starts smoking, so you can quickly get back to conquering the snow-covered streets.

What Should I Do If My Snowblower Starts Smoking?

Causes of Smoking Snowblower

When your snowblower starts smoking, it’s important to first understand the potential causes so that you can effectively troubleshoot and resolve the issue. Here are some common reasons why a snowblower might smoke:

1. Oil or fuel leak

One of the main causes of a smoking snowblower is an oil or fuel leak. If there is a leakage in the fuel line or from the engine, it can result in the production of smoke. It’s important to inspect the area around the fuel tank and engine for any signs of leakage, such as puddles or a strong odor.

2. Clogged engine or air filter

A clogged engine or air filter can also lead to a smoking snowblower. When the engine or air filter becomes blocked with debris, it can restrict the flow of air and cause the engine to overheat, resulting in smoke. Regular cleaning and maintenance of the engine and air filter can prevent this issue.

3. Excessive oil in the engine

If there is too much oil in the engine, it can cause the snowblower to smoke. This usually happens when the user overfills the oil reservoir or fails to drain old oil properly before adding new oil. It’s essential to follow the manufacturer’s instructions regarding the correct oil level for your specific snowblower model.

4. Blocked muffler or exhaust system

A blocked muffler or exhaust system can restrict the flow of exhaust gases, leading to a smoking snowblower. Debris, such as snow or ice, can accumulate in the muffler or exhaust pipe, causing smoke to escape. Regularly checking and cleaning the muffler and exhaust system can help prevent this issue.

5. Overheating engine

If the engine of your snowblower becomes overheated, it can generate smoke. This can occur due to various reasons, such as the accumulation of debris, low oil levels, or improper fuel mixture. Ensuring proper maintenance and monitoring the engine’s temperature can help prevent overheating and subsequent smoking.

Safety Precautions

Before you begin troubleshooting the issue with your smoking snowblower, it’s essential to prioritize your safety. Here are some safety precautions to follow:

1. Turn it off immediately

As soon as you notice your snowblower smoking, the first step is to turn it off immediately. This will help prevent any further damage or potential safety hazards.

2. Move to a well-ventilated area

Once the snowblower is turned off, move it to a well-ventilated area. Operating the machine in an open, outdoor space will help minimize the risk of inhaling harmful smoke and fumes.

3. Allow the snowblower to cool down

After moving the snowblower to a safe location, allow it to cool down completely. This will prevent any potential burns or injuries when working on the machine.

4. Put on protective gear

Before you start troubleshooting the smoking snowblower, it’s crucial to put on protective gear. This may include safety goggles, gloves, and ear protection to safeguard yourself from any potential hazards.

What Should I Do If My Snowblower Starts Smoking?

Steps to Troubleshoot Smoking Snowblower

Now that you’ve taken the necessary safety precautions, you can proceed with troubleshooting the smoking snowblower. Here are the steps to follow:

1. Inspect for oil or fuel leaks

Carefully inspect the snowblower for any signs of oil or fuel leaks. Look for puddles or stains around the fuel tank and engine. If you detect a leak, it’s important to fix it before further using the snowblower.

2. Check the engine air filter

Remove the air filter and inspect it for any clogs or dirt. A dirty or clogged air filter can restrict airflow, leading to smoke production. Clean or replace the air filter if necessary, following the manufacturer’s instructions.

3. Ensure correct oil level

Check the oil level in your snowblower’s engine. If it exceeds the recommended level, carefully drain the excess oil according to the manufacturer’s instructions. Make sure to use the correct type of oil as specified in the user manual.

4. Clean the muffler and exhaust system

Inspect the muffler and exhaust system for any blockages. Remove any snow, ice, or debris that may have accumulated in these areas, using a cloth or brush. It’s essential to clean these components regularly to promote proper exhaust flow.

5. Check for signs of overheating

Examine the engine for signs of overheating, such as discoloration, strong fuel odor, or unusual noises. If you suspect overheating, investigate the cause, which could be a result of low oil levels, improper fuel mixture, or other mechanical issues.

Solutions When You Find a Problem

After troubleshooting your smoking snowblower, you may come across specific issues that need to be addressed. Here are some solutions for common problems:

1. Fix leaks and replace damaged parts

If you discover any leaks or damaged parts during the inspection, it’s vital to fix them promptly. Replace any faulty components, such as fuel lines or gaskets, and ensure everything is properly sealed.

2. Clean or replace the engine air filter

If the air filter is dirty or clogged, clean it thoroughly or replace it with a new one. A clean air filter promotes better airflow and prevents smoke production.

3. Adjust oil level if necessary

If you find that the oil level exceeds the recommended amount, carefully drain the excess oil according to the manufacturer’s instructions. Maintaining the correct oil level helps prevent smoke and engine damage.

4. Clear any blockages in the muffler or exhaust

If the muffler or exhaust was blocked, clean it thoroughly to remove any obstructions. Regularly inspecting and cleaning these components will ensure proper exhaust flow and minimize smoke production.

5. Identify and fix the cause of overheating

If your snowblower was overheating, identify the underlying cause and address it accordingly. This may involve checking for proper oil levels, verifying the fuel mixture, or seeking professional assistance for more complex mechanical issues.

When to Seek Professional Help

While many smoking snowblower issues can be resolved through troubleshooting, there are situations where professional help is necessary. Here are some scenarios in which you should consider seeking assistance:

1. Lack of experience or knowledge

If you’re unsure about how to troubleshoot or fix the smoking snowblower issue, it’s best to leave it to a professional. Lack of experience or knowledge can potentially lead to further damage.

2. Extensive damage or mechanical issues

If you discover extensive damage or complex mechanical issues during your troubleshooting process, it’s advisable to consult a professional technician. They will have the expertise and tools to address these problems effectively.

3. Persistent smoking after troubleshooting

If your snowblower continues to smoke even after following the troubleshooting steps, it indicates a more significant underlying problem. In such cases, it’s essential to seek professional help to prevent further damage and ensure your safety.

Regular Maintenance to Prevent Smoking

To avoid encountering a smoking snowblower in the future, it’s important to prioritize regular maintenance. Here are some maintenance tips to help prevent smoke-related issues:

1. Clean and inspect the snowblower regularly

Regularly cleaning your snowblower, including the engine, air filter, and exhaust system, will prevent the accumulation of debris, which can lead to smoking. Perform visual inspections to identify any potential problems before they escalate.

2. Change fuel and oil as recommended

Follow the manufacturer’s guidelines for fuel and oil changes. Using fresh fuel and changing the oil at the recommended intervals ensures optimal performance and reduces the likelihood of smoking.

3. Keep the engine well-lubricated

Proper lubrication of the snowblower’s engine is crucial to prevent overheating and smoking. Regularly lubricate moving parts according to the manufacturer’s instructions to keep the engine running smoothly.

4. Avoid overworking the machine

Avoid overworking your snowblower by adhering to its limitations and recommended usage guidelines. Overworking the machine can strain the engine and lead to excessive smoke production.

5. Store the snowblower properly

During the off-season, store your snowblower in a clean, dry area to prevent moisture and rust buildup. Follow the manufacturer’s instructions for proper storage, including fuel and oil removal if necessary.

By following these regular maintenance practices, you can minimize the chances of encountering a smoking snowblower and ensure its longevity and optimum performance.

In conclusion, when your snowblower starts smoking, it’s important to promptly address the issue to prevent further damage and potential safety hazards. Understanding the potential causes, taking necessary safety precautions, and following the troubleshooting steps can help you identify and resolve the problem. If needed, don’t hesitate to seek professional assistance for more complex issues. Finally, prioritizing regular maintenance practices will help prevent smoking and ensure the efficient operation of your snowblower.

How Can I Reduce The Noise Level Of My Snowblower?

If you’ve ever operated a snowblower, you know the deafening noise it can create, making it a less-than-pleasant experience for both you and your neighbors. But fear not, there are ways to hush that noisy snow-clearing machine! In this article, we’ll walk you through some practical tips and tricks that will help you reduce the noise level of your snowblower, ensuring a quieter and more enjoyable snow removal process for everyone involved. So get ready to tackle that winter wonderland without waking up the entire neighborhood!

How Can I Reduce The Noise Level Of My Snowblower?

Regular Maintenance

Oil Change

One of the most important steps in reducing the noise level of your snowblower is to perform regular oil changes. Over time, the oil in your snowblower can become dirty and lose its effectiveness, leading to increased noise and vibrations. By changing the oil at the recommended intervals, you can ensure that your snowblower’s engine runs smoothly and quietly.

Air Filter Cleaning

A clean air filter is crucial for the proper operation of your snowblower and can also contribute to reducing noise levels. Over time, the air filter can become clogged with dirt, debris, and dust, restricting airflow and causing the engine to work harder. By regularly cleaning or replacing the air filter, you can maintain optimal engine performance and minimize noise.

Spark Plug Replacement

Worn-out spark plugs can cause your snowblower engine to misfire, resulting in increased noise levels. By replacing the spark plugs at the recommended intervals, usually annually or after a certain number of operating hours, you can ensure that your snowblower runs smoothly and quietly.

Belts and Pulleys Check

Loose or worn-out belts and pulleys can not only affect the performance of your snowblower but also contribute to increased noise levels. Regularly inspecting and tightening the belts, as well as checking for signs of wear on the pulleys, can help minimize noise and vibrations.

Tighten Loose Bolts

Over time, the vibrations and constant use of a snowblower can cause bolts to become loose. Loose bolts can create additional noise and may even compromise the overall stability of the machine. By taking the time to inspect and tighten all the bolts regularly, you can reduce unnecessary noise and ensure safe operation.

Proper Operation Practices

Avoid High Speeds

Operating your snowblower at high speeds can significantly increase noise levels. Instead of rushing through the snow-clearing process, try adjusting your pace to a slower speed. Not only will this help reduce noise, but it will also allow the snowblower to work more efficiently.

Use Proper Technique

Using the correct technique while operating your snowblower can also make a difference in noise levels. Instead of forcing the machine through heavy snow, let the snowblower do the work by allowing it to move forward at its own pace. This will not only reduce noise but also prevent unnecessary strain on the engine.

Avoid Overly Dry or Wet Snow

Operating your snowblower in extremely dry or wet snow conditions can increase noise levels. Dry snow can clog the auger and force the machine to work harder, while wet snow can put extra strain on the engine and lead to increased noise. Wait for the snow to reach a desirable moisture level before using your snowblower to reduce noise levels.

Avoid Overloading the Machine

While it may be tempting to push your snowblower to its limits, overloading the machine can cause excessive noise and decrease its lifespan. If the snowfall is particularly heavy, consider making multiple passes instead of trying to remove all the snow in one go. This will not only reduce noise but also ensure the longevity of your snowblower.

Noise Reduction Accessories

Muffler Upgrade

Upgrading the muffler on your snowblower can significantly reduce noise levels. Look for a high-quality muffler specifically designed for your snowblower model. With a properly functioning muffler, the exhaust noise can be greatly reduced, making your snowblower quieter and more enjoyable to use.

Noise Reduction Pads

Another effective way to reduce noise is by using noise reduction pads on your snowblower. These pads are designed to absorb vibrations and dampen the overall noise produced by the machine. Simply attach them to the areas where noise is most prominent, such as the engine assembly or the body of the snowblower, to enjoy a quieter snow-clearing experience.

Insulated Snow Cab

If noise reduction is a top priority for you, consider investing in an insulated snow cab. These cabs provide a shielded enclosure for the operator, effectively reducing noise levels and keeping you protected from wind and snow. Not only will an insulated snow cab make your snowblower quieter, but it will also provide added comfort during those long winter days.

Vibration Dampening

Excessive vibrations can contribute to the overall noise levels of your snowblower. To reduce vibrations and subsequently reduce noise, consider attaching vibration dampening pads to key areas of the machine. These pads absorb vibrations and create a smoother operation, resulting in a quieter and more pleasant snow-clearing experience.

How Can I Reduce The Noise Level Of My Snowblower?

Choose a Quieter Snowblower Model

Compare Noise Levels

When shopping for a snowblower, it is important to compare noise levels between different models. Look for models that are specifically designed for noise reduction and have lower decibel ratings. Manufacturers often provide noise level information in the product specifications or user manuals, allowing you to make an informed decision.

Consider Electric Snowblowers

Electric snowblowers tend to be quieter than their gas-powered counterparts. Since electric snowblowers do not have an internal combustion engine, they produce less noise and vibration. Consider switching to an electric snowblower to enjoy a quieter snow-clearing experience without compromising performance.

Look for Rubber Auger Paddles

Some snowblower models come with rubber auger paddles instead of metal ones. Rubber auger paddles not only provide superior performance in terms of clearing snow but also contribute to noise reduction. As they make contact with the ground and the snow, they produce less noise compared to metal auger paddles.

Check for Noise-reducing Technologies

Certain snowblower models feature noise-reducing technologies that can greatly minimize noise levels. These technologies might include advanced muffler designs, sound-dampening materials, or innovative engine configurations. Look for snowblowers that incorporate such noise-reducing technologies to achieve a quieter snow-clearing experience.

Snowblower Placement and Surroundings

Positioning the Snowblower

Where you position your snowblower during operation can impact noise levels. Whenever possible, try placing your snowblower away from areas where noise could be amplified, such as walls or structures that can reflect sound waves. Opting for an open and spacious area can help dissipate noise effectively.

Use Noise Barriers

To minimize the noise that reaches your surroundings, consider using noise barriers around your snowblower. Constructing a makeshift barrier using materials such as plywood, blankets, or foam panels can help absorb and block some of the noise. By strategically placing these barriers, you can help reduce noise pollution for both yourself and your neighbors.

Distance from Neighbors

When using your snowblower in a residential area, be mindful of the distance between your machine and your neighbors’ properties. Aim to keep a respectful distance to ensure that the noise disturbance is minimized. By showing consideration for the peace and quiet of those around you, you can maintain positive relationships with your neighbors.

Avoid Snowblowing at Inappropriate Times

Check Local Ordinances

Before firing up your snowblower, make sure to check local ordinances or noise regulations in your area. Some municipalities have specific rules regarding noise levels and times when powered machinery, including snowblowers, can be used. By familiarizing yourself with these regulations, you can avoid any potential legal issues and keep noise levels in check.

Respect Quiet Hours

Even if there are no specific noise regulations in your area, it is always important to be considerate of others. Respect designated quiet hours, typically during early mornings, late evenings, or overnight, to avoid causing unnecessary noise disturbances. Being a good neighbor and mindful of others’ peace and tranquility can go a long way in fostering positive relationships within your community.

Consider Noise-cancelling Ear Protection

Earplugs

In addition to taking steps to reduce noise levels from the snowblower itself, it’s also essential to protect your own hearing. Wearing earplugs specifically designed for noise cancellation can greatly reduce the impact of loud noises on your ears. Invest in a high-quality pair of earplugs that provide adequate protection without compromising your ability to hear important sounds and warnings.

Ear Muffs

If earplugs don’t suit your comfort or preference, consider using ear muffs designed for noise reduction. These over-ear devices provide excellent protection from loud noises, including the noise generated by your snowblower. Look for ear muffs that have a high noise reduction rating (NRR) to ensure maximum hearing protection and comfort.

Regularly Inspect and Maintain the Silencer

Clean the Silencer

The silencer, or the exhaust system, plays a vital role in reducing the noise emitted by your snowblower’s engine. Regularly inspect the silencer for any blockages or buildup that could restrict airflow and increase noise levels. Clean the silencer as needed, following the manufacturer’s instructions, to ensure optimal performance and noise reduction.

Replace Worn-out Parts

Over time, the silencer and its components, including gaskets and seals, may wear out and lose their effectiveness in reducing noise. Inspect these parts regularly and replace any worn-out or damaged components. By keeping the silencer in good condition, you can ensure that it continues to perform its noise-reduction function effectively.

Consult a Professional

Seek Expert Advice

If you’ve tried various methods to reduce the noise of your snowblower without success, it may be time to seek expert advice. Consult with a professional snowblower technician or a knowledgeable dealer who can provide guidance on specific noise reduction techniques or recommend advanced solutions tailored to your snowblower model.

Explore Soundproofing Options

For those who require the utmost peace and quiet while operating their snowblower, it may be worth exploring soundproofing options. Soundproofing materials, such as acoustic foam or mass-loaded vinyl, can effectively reduce noise levels when applied to the walls, floor, or ceiling of a dedicated snowblower storage area. Consult a professional specializing in soundproofing to determine the best options for your specific needs.

Additional Tips

Use Snowblower Covers

When not in use, consider using a snowblower cover to protect and reduce noise from your machine. A cover can help muffle the sound and prevent dust, debris, or moisture from entering your snowblower, ensuring that it remains in good working condition and ready for use.

Try Soundproofing the Surrounding Area

If noise reduction is a top priority, consider soundproofing the surrounding area where you operate your snowblower. This could include adding insulation to walls and doors, installing sound-absorbing panels, or even constructing a dedicated enclosure. By minimizing sound reflections and dampening noise, you can create a quieter environment for both yourself and those around you.

In conclusion, reducing the noise level of your snowblower requires a combination of regular maintenance, proper operation practices, noise reduction accessories, strategic placement, and consideration for others. By implementing these tips and techniques, you can enjoy a quieter snow-clearing experience while maintaining positive relationships with your neighbors. Remember to prioritize your safety and protect your hearing by using appropriate ear protection. If all else fails, consult with professionals who can provide expert advice and explore advanced soundproofing options.