Tag Archives: Snowblower

How Do I Drain Old Fuel From My Snowblower?

So you’ve got a snowblower that’s been sitting in your garage all summer, and now winter is approaching and it’s time to get it up and running again. But before you can start tackling those snow-covered driveways and sidewalks, you realize that the fuel in your snowblower is old and needs to be drained. But how do you go about doing that? In this article, we’ll guide you through the process of draining old fuel from your snowblower, ensuring that it’s ready to take on the winter season.

How Do I Drain Old Fuel From My Snowblower?

Preparing for Fuel Drainage

Gather the necessary tools and materials

Before you begin draining the old fuel from your snowblower, it’s important to gather all the necessary tools and materials. These may include a wrench or socket set, a clean container for fuel, gloves, safety goggles, and a fuel stabilizer (optional). Having everything you need readily available will make the process smoother and more efficient.

Choose an appropriate location

Next, you need to select an appropriate location for the fuel drainage process. Ideally, you should choose a well-ventilated area outdoors to prevent the buildup of potentially harmful fumes. It’s also important to ensure that you have enough space to work comfortably and that the surface is stable and level.

Ensure safety precautions

Before you begin working on your snowblower, it’s crucial to prioritize safety. Make sure the snowblower is turned off and the engine is cool to avoid any burns or accidents. Wear protective gloves and safety goggles to protect your hands and eyes. Additionally, be cautious of any nearby open flames, sparks, or smoking materials, as fuel can be highly flammable.

Identifying the Fuel System

Identify the fuel tank

To begin the fuel drainage process, you first need to locate the fuel tank on your snowblower. Depending on the make and model, the fuel tank may be located either on top of the engine or underneath the snowblower’s body. Consult your snowblower’s manual for the exact location if you’re unsure.

Locate the fuel shut-off valve

Once you’ve identified the fuel tank, you’ll then need to locate the fuel shut-off valve. This valve is typically attached to the fuel line coming from the tank and can be turned to either open or close the fuel flow. By turning off the fuel shut-off valve, you’ll prevent any additional fuel from flowing into the engine during the drainage process.

Check for a fuel filter

In some snowblower models, there may also be a fuel filter installed in the fuel line. The fuel filter helps capture any debris or impurities before the fuel enters the engine. If your snowblower is equipped with a fuel filter, make sure to check its condition and clean or replace it if necessary.

Emptying the Fuel Tank

Turn off the snowblower

Before you can begin emptying the fuel tank, it’s essential to turn off the snowblower and allow the engine to cool. This ensures your safety and prevents any potential accidents during the fuel drainage process.

Locate the fuel line

Once the snowblower is turned off, you can proceed to locate the fuel line connected to the fuel tank. The fuel line is typically a rubber tube that carries fuel from the tank to the engine. It’s important to identify and familiarize yourself with the fuel line to ensure a smooth and efficient drainage process.

Prepare a clean container

To contain the drained fuel, prepare a clean container that is suitable for holding gasoline. Ensure that the container is free from any residues or impurities that could contaminate the fuel. This will help you prevent any potential damage to the snowblower’s engine and make the disposal of the old fuel easier.

Disconnect the fuel line

With the container ready, carefully disconnect the fuel line from the snowblower. To do this, you may need to use a wrench or socket set to loosen any clamps securing the fuel line to the engine. Take your time to ensure that the line is disconnected properly without causing any damage to the snowblower or the fuel line itself.

Drain the fuel into the container

Once the fuel line is disconnected, gently lower it into the clean container to start the fuel drainage process. Allow the fuel to flow freely from the tank into the container, fully emptying the fuel tank. Be patient during this step, as it may take some time for all the fuel to be drained.

How Do I Drain Old Fuel From My Snowblower?

Draining the Carburetor

Locate the carburetor

After emptying the fuel tank, the next step is to locate the carburetor on your snowblower. The carburetor is responsible for mixing air and fuel to create a combustible mixture that powers the engine. It’s usually located near the engine and connected to the fuel line.

Identify the carburetor drain bolt

To drain the fuel from the carburetor, you’ll need to locate the carburetor drain bolt. This bolt is typically located at the bottom of the carburetor and is designed to allow fuel to be released. It’s important to identify the drain bolt to ensure you’re directing the fuel properly during the drainage process.

Place a container beneath the carburetor

To prevent any fuel from spilling onto the ground, place a container beneath the carburetor before attempting to open the drain bolt. This will catch the fuel as it drains out, ensuring a clean and controlled process. Double-check that the container is stable and properly positioned before proceeding.

Loosen the drain bolt to release fuel

Using the appropriate wrench or socket, carefully loosen the carburetor drain bolt. As you do so, fuel from the carburetor will start to flow out into the container. Allow all the fuel to drain completely before moving on to the next step. Take caution not to overtighten or damage the drain bolt during this process.

Removing Old Fuel Completely

Inspect the fuel tank and carburetor

With the fuel tank and carburetor now drained, it’s time to inspect them for any residue or debris. Look closely for any signs of old fuel or sediment that may have settled at the bottom of the tank or carburetor. If you notice any buildup, it’s crucial to remove it before proceeding.

Clean any residue or debris

To clean the fuel tank and carburetor, use a clean cloth or rag to wipe away any residue or debris. If necessary, you can also use a small brush or compressed air to remove stubborn particles. Ensure that both the tank and carburetor are completely clean before moving forward.

Flush the fuel tank with fresh fuel

To eliminate any remaining traces of old fuel, flush the fuel tank with fresh fuel. Pour a small amount of fresh gasoline into the tank and swish it around, allowing it to wash away any residual deposits. Carefully tilt and pour out the fresh fuel into the appropriate container. Repeat this process if needed until the fuel tank is thoroughly cleaned.

Clean the fuel filter (if applicable)

If your snowblower is equipped with a fuel filter, this is a good time to inspect and clean it. Remove the filter, following the instructions in your snowblower’s manual, and rinse it under clean water. Gently tap the filter to dislodge any trapped debris and allow it to dry fully before reinstalling.

Replacing Fuel System Components

Reconnect the fuel line

Now that the fuel tank and carburetor are clean, it’s time to reconnect the fuel line. Carefully attach the fuel line to the appropriate connections on the snowblower, ensuring a secure fit. Use any clamps or fasteners that were previously in place to secure the fuel line properly.

Replace any damaged fuel lines or clamps

While reconnecting the fuel line, take a moment to inspect it for any damage or wear. If you notice any cracks, leaks, or deterioration, it’s crucial to replace the affected sections of the fuel line. Additionally, replace any damaged or worn-out clamps or fasteners to ensure a tight and secure connection.

Reinstall the fuel filter (if applicable)

If you removed the fuel filter during the cleaning process, now is the time to reinstall it. Follow the instructions in your snowblower’s manual to ensure you properly position and secure the filter. Double-check that the fuel filter is correctly aligned with the fuel line connections.

Refilling with Fresh Fuel

Choose the appropriate fuel type

Before refilling your snowblower’s fuel tank, always use the appropriate fuel type recommended by the manufacturer. Consult your snowblower’s manual or check the fuel cap for the correct fuel specifications. Using the wrong fuel can result in poor performance and potential damage to the engine.

Fill the fuel tank with fresh fuel

Using a clean and approved gasoline container, fill the snowblower’s fuel tank with fresh fuel. Take care not to spill any fuel during this process and avoid overfilling the tank. Place the fuel cap back securely once the tank is adequately filled.

Add a fuel stabilizer (optional)

To help preserve the freshness and quality of your snowblower’s fuel, you may choose to add a fuel stabilizer. Fuel stabilizers work by preventing the breakdown of gasoline over time, especially during extended periods of storage. Follow the instructions on the fuel stabilizer’s packaging to add the appropriate amount to the fuel tank.

Performing Maintenance Checks

Inspect spark plugs

After completing the fuel drainage and refilling process, it’s an excellent opportunity to inspect and possibly clean or replace the spark plugs. Remove the spark plugs using a spark plug wrench and check for signs of wear, corrosion, or fouling. If necessary, clean the spark plugs or replace them with new ones for optimal performance.

Check oil levels

In addition to the spark plugs, checking the oil levels in your snowblower’s engine is equally important. Refer to your snowblower’s manual for the correct method of checking oil levels and the recommended oil type. Adjust the oil levels if needed and change the oil as per the manufacturer’s instructions, if necessary.

Clean or replace air filters

The air filters in your snowblower play a crucial role in preventing dust and debris from entering the engine. If the air filters appear dirty or clogged, remove them and clean them thoroughly. Alternatively, replace them with new filters if they are in poor condition. Clean air filters ensure proper engine performance and prolong the life of your snowblower.

Test Starting the Snowblower

Prime the engine (if required)

Depending on your snowblower model, you may need to prime the engine before starting. Consult your snowblower’s manual for the correct priming instructions and follow them accordingly. Priming prepares the engine for starting and ensures smooth operation.

Choke the engine

After priming, if necessary, locate the choke on your snowblower and engage it to start the engine. The choke restricts airflow to the engine, making it easier to start in colder temperatures. Once the engine starts running smoothly, gradually disengage the choke to allow for normal airflow.

Start the snowblower

With the engine primed and the choke engaged, pull the starter cord or press the electric start button to start the snowblower. Listen for the engine to start smoothly and idle consistently. If there are any issues or the engine fails to start, refer to your snowblower’s manual for troubleshooting tips.

Observe for smooth operation

As the snowblower starts and idles, observe its operation for any abnormal sounds, vibrations, or performance issues. Pay attention to how the engine responds when engaging the augers or impellers. Smooth operation indicates that your snowblower is ready for use.

Tips and Precautions

Avoid old fuel accumulation

To prevent fuel-related issues, it’s important to avoid the accumulation of old fuel in your snowblower. Whenever the snowblower will be idle for an extended period, consider draining the fuel tank and running the engine until it stalls to remove any remaining fuel. This helps prevent fuel deposits, clogging, and starting problems in the future.

Dispose of old fuel properly

When disposing of old fuel, it’s crucial to follow proper disposal methods to protect the environment and comply with local regulations. Contact your local waste management facility or designated collection centers for information on how to safely dispose of old fuel. Never dispose of fuel down drains or onto the ground as it can contaminate soil and water sources.

Regularly maintain the fuel system

Regular maintenance of your snowblower’s fuel system is essential for optimal performance and longevity. Follow the manufacturer’s recommended maintenance schedule, which often includes fuel system checks, filter replacements, and fuel stabilizer use during storage. By staying proactive with maintenance, you’ll ensure that your snowblower is always ready when you need it.

In conclusion, draining old fuel from your snowblower is an important maintenance task that ensures its efficient operation. By following the steps outlined above and maintaining a regular maintenance routine, you can keep your snowblower in peak condition season after season. Protect your investment and enjoy hassle-free snow removal with a well-maintained fuel system.

Are There Snowblowers With Remote Start Features?

So you wake up to a fresh blanket of snow covering your driveway, and the last thing you want to do is brave the cold to start up your snowblower. But what if you could start it from the comfort of your warm home? Well, you’ll be glad to know that snowblowers with remote start features do exist! Gone are the days of manual cranking and struggling with a stubborn machine. With a simple push of a button, you can start up your snowblower and get to work clearing away that snow in no time. Say goodbye to frozen fingers and hello to a hassle-free winter. Yes, there are snowblowers with remote start features, and they offer several benefits for users. In this article, we will explore the convenience, safety, and efficiency that these snowblowers provide. We will also discuss the different types of snowblowers with remote start, important features to consider when purchasing one, popular brands, factors to consider before making a purchase, the installation and setup process, where to buy them, maintenance tips, and common troubleshooting issues. So, let’s dive in and explore the world of snowblowers with remote start!

Are There Snowblowers With Remote Start Features?

Benefits of Snowblowers with Remote Start Features

Convenience

One of the key benefits of snowblowers with remote start features is the convenience they offer. With just a push of a button on the remote, you can start your snowblower from the comfort of your home. This means no more braving the cold weather to manually start your machine, saving you time and effort. Whether you’re in a hurry to clear your driveway before work or want to avoid spending too much time outside in freezing temperatures, the remote start feature makes the snow-clearing process much more convenient.

Safety

Snowblowers with remote start features also offer enhanced safety compared to traditional models. With a remote start, you can start the machine without being physically present near it. This eliminates the need to bend down and pull a recoil cord, reducing the risk of strain or injury. Additionally, remote start allows you to assess the snow conditions and make adjustments from a safe distance, minimizing the chances of accidents or incidents while operating the snowblower.

Efficiency

Another advantage of snowblowers with remote start features is their efficiency in clearing snow. Remote start allows you to start the snowblower before even stepping outside, giving it time to warm up and be ready for action. This means you can immediately begin clearing snow as soon as you reach your driveway or walkway. By eliminating the start-up time and ensuring optimal performance, these snowblowers can cut down on the total time it takes to clear snow, allowing you to accomplish the task more efficiently.

Types of Snowblowers with Remote Start Features

Gas-Powered Snowblowers

Gas-powered snowblowers with remote start features are a popular choice for homeowners with larger areas to clear or areas without access to electrical outlets. These snowblowers typically have powerful engines that can handle heavy snowfalls and challenging terrain. The remote start feature allows you to start the snowblower without needing to manually prime the engine or pull the recoil cord, making them more user-friendly and convenient.

Electric Snowblowers

Electric snowblowers with remote start features are ideal for smaller properties and areas with access to electrical outlets. These snowblowers are typically lighter and more compact than gas-powered models, making them easier to maneuver and store. The remote start feature allows you to instantly start the snowblower without the hassle of finding an electrical cord or starting it manually. Electric snowblowers with remote start are also generally quieter and emit zero emissions, making them more environmentally friendly.

Battery-Powered Snowblowers

Battery-powered snowblowers with remote start features offer a cordless and convenient snow-clearing solution. These snowblowers are powered by rechargeable batteries and are often lighter and quieter than gas-powered models. The remote start feature allows you to start the snowblower without the need for a power cord or manually starting the engine. While battery-powered snowblowers may have limited run times depending on the battery capacity, they are a great option for smaller properties or areas with lighter snowfalls.

Features to Consider when Choosing a Snowblower with Remote Start

Range

When selecting a snowblower with remote start, consider the range of the remote control. A longer range will allow you to start the snowblower from a greater distance, giving you more flexibility and convenience. This can be particularly useful if you want to start the snowblower while still indoors or when you have a large property to clear.

Communication Technology

The communication technology used in the remote control is an important consideration. Some snowblowers use radio frequency (RF) signals, while others use Bluetooth technology. RF signals tend to have a longer range but may be more prone to interference. On the other hand, Bluetooth technology offers a shorter range but can provide a more reliable and secure connection.

Ease of Use

Consider the overall ease of use of the snowblower and its remote start feature. Look for intuitive controls and a user-friendly interface on both the snowblower and the remote. The buttons or controls should be well-labeled and easy to understand. Additionally, ensure that the remote start feature is straightforward and doesn’t require complicated programming or setup.

Reliability

Reliability is crucial when it comes to snowblowers with remote start features. You want a snowblower that starts reliably every time, especially in cold weather conditions. Read reviews from other users to get an idea of the snowblower’s reliability and durability. Look for models with a reputation for reliability and consider choosing a reputable brand known for their quality and customer satisfaction.

Additional Features

Some snowblowers with remote start offer additional features that can enhance your snow clearing experience. Examples include adjustable chute direction and angle, heated handles, LED headlights for improved visibility, and variable speed settings. Consider which additional features are important to you and choose a snowblower that offers the ones that best suit your needs.

Popular Snowblower Brands with Remote Start Features

Now that we’ve discussed the types of snowblowers with remote start features and key considerations when choosing one, let’s explore a few popular brands that offer these models:

1. Brand A

Brand A is a well-known manufacturer in the snowblower industry, offering a range of gas-powered, electric, and battery-powered snowblowers. They have models with remote start features that are known for their reliability and performance. Brand A’s snowblowers are often praised for their durability and ease of use.

2. Brand B

Brand B is another reputable brand that produces high-quality snowblowers with remote start capabilities. They offer a variety of gas-powered and electric models that cater to different needs and budgets. Brand B’s snowblowers are known for their powerful engines, efficient snow clearing ability, and user-friendly features.

3. Brand C

Brand C is a trusted name in the snowblower market and has a range of snowblowers with remote start features. They specialize in battery-powered snowblowers and are well-regarded for their innovation and reliability. Brand C’s snowblowers are often praised for their quiet operation, ease of use, and eco-friendly nature.

When considering different brands, take the time to research each one’s reputation, customer reviews, and warranty policies. This will help you make an informed decision and choose a brand that aligns with your needs and preferences.

Are There Snowblowers With Remote Start Features?

Factors to Consider before Purchasing a Snowblower with Remote Start

Before investing in a snowblower with remote start, there are several factors to consider that can affect your overall buying decision. Let’s explore these factors:

Climate and Snow Conditions

Consider the climate and typical snow conditions in your area. If you experience heavy snowfalls or wet, compacted snow, you may need a more powerful snowblower with remote start. On the other hand, if you have light snowfalls or live in an area with milder winters, a less powerful snowblower may be sufficient. Understanding your local snow conditions will help you determine the appropriate size and type of snowblower to purchase.

Budget

Set a budget for your snowblower purchase. Snowblowers with remote start features may come at a higher price compared to their non-remote start counterparts. Determine how much you are willing to spend and identify the features that are essential for your needs. Consider the long-term value and performance of the snowblower to make an informed decision within your budget.

Maintenance Requirements

Different snowblowers have varying maintenance requirements. Consider factors such as oil changes, spark plug replacements, and general upkeep. Gas-powered snowblowers typically require more maintenance compared to electric or battery-powered models. Assess your comfort level and availability for maintaining your snowblower to ensure you choose a model that aligns with your maintenance capabilities.

Available Storage Space

Snowblowers can take up a significant amount of space when not in use. Consider the available storage space you have, such as a garage or shed, to ensure the snowblower can be stored safely and securely. Measure the dimensions of the snowblower, including any additional attachments or accessories, to ensure it will fit comfortably in your storage area.

Noise Level

Snowblowers, especially gas-powered models, can be noisy during operation. If noise is a concern for you, consider electric or battery-powered snowblowers, as they tend to be quieter. Check the manufacturers’ specifications or read customer reviews to get an idea of the noise level produced by different models. Remember, quieter models may come at a slightly higher price, so factor that into your decision-making process.

By considering these factors before purchasing a snowblower with remote start, you can ensure that you choose the right model that aligns with your needs, preferences, and budget.

Installation and Setup Process of Snowblowers with Remote Start

Once you’ve purchased a snowblower with remote start, you’ll need to go through the installation and setup process. Here are the general steps involved:

1. Unboxing and Assembling

Start by unboxing the snowblower and ensuring that all the necessary parts and accessories are included. Follow the manufacturer’s instructions to assemble the unit properly. Pay attention to any safety precautions and take your time to ensure everything is correctly put together.

2. Checking for Necessary Accessories

Check if your snowblower requires any additional accessories for remote start functionality. This may include batteries for the remote control, cables, or connectors. Ensure that you have all the necessary accessories before proceeding to the next steps.

3. Connecting the Remote Start System

Refer to the user manual provided by the manufacturer to connect the remote start system. This typically involves locating the receiver unit on the snowblower and connecting it to the appropriate connectors or ports. Follow the step-by-step instructions carefully to ensure a proper connection.
4. Programming the Remote

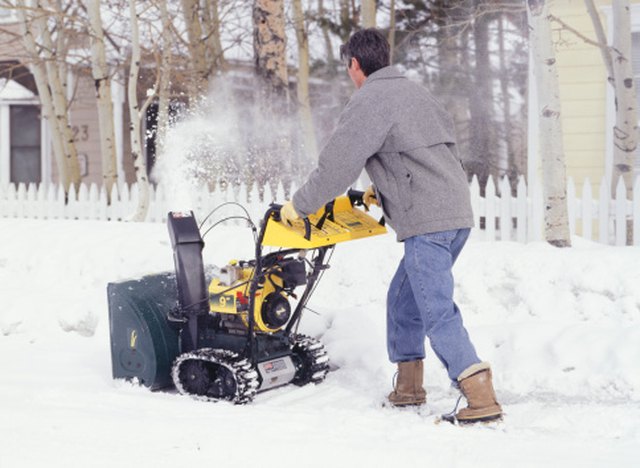
Once the remote start system is connected, you may need to program the remote control according to the manufacturer’s instructions. This could involve setting the remote frequency, pairing it with the receiver unit, and configuring any additional settings or options. Take your time to understand the programming process and follow the instructions accurately.

5. Testing the Remote Start Feature

After completing the installation and programming, it’s essential to test the remote start feature to ensure it functions correctly. Ensure that the snowblower is in a safe and open area, away from any obstacles, before activating the remote start. Press the designated button on the remote control and observe the snowblower’s response. If everything is functioning as expected, you’re ready to start using your snowblower with remote start!

Where to Buy Snowblowers with Remote Start Features

Snowblowers with remote start features can be purchased from various retailers, both locally and online. Here are a few places where you can find these snowblowers:

Local Outdoor Equipment Stores

Visit your local outdoor equipment stores, such as home improvement centers or specialized lawn and garden stores. These establishments often carry a wide range of snowblowers, and some may have models with remote start features. In-store, you can get expert advice, ask questions, and physically inspect the snowblowers before making a purchase.

Online Retailers

Online retailers like Amazon, Home Depot, or Lowe’s offer a vast selection of snowblowers with remote start features. You can browse through different models, read customer reviews, compare prices, and have the snowblower delivered straight to your doorstep. Online shopping provides the convenience of researching and purchasing from the comfort of your home.

Used Equipment Markets

Consider checking out used equipment markets, such as classified ads or online marketplaces like Craigslist or Facebook Marketplace. Sometimes, individuals sell their snowblowers with remote start features, allowing you to potentially get a good deal. Ensure that you carefully inspect the condition of the snowblower and negotiate a fair price before making a purchase.

Regardless of where you choose to buy your snowblower with remote start, ensure that the retailer or individual is reputable, offers warranty or return policies, and provides adequate customer support.

Maintenance Tips for Snowblowers with Remote Start

To keep your snowblower with remote start in optimal condition, regular maintenance is essential. Here are some maintenance tips to consider:

Regularly Change and Check Oil Levels

For gas-powered snowblowers, it’s important to regularly change the oil and check oil levels according to the manufacturer’s recommendations. This helps ensure proper lubrication and prevents engine damage. Follow the correct oil type and frequency for oil changes as specified in the user manual.

Inspect and Clean the Starter Motor

Regularly inspect the starter motor for any signs of wear or damage. Clean the starter motor to remove any debris or buildup that may affect its performance. This will help ensure that the remote start feature functions reliably.

Keep the Remote and Battery in Good Condition

Check the remote control for any signs of damage or malfunction. Replace the batteries as needed and clean the remote to prevent dirt or debris from interfering with the buttons or connections. Keeping the remote and battery in good condition ensures that the remote start feature is always ready for use.

Clean and Lubricate Auger and Chute

Remove any snow or debris from the auger and chute after each use. This prevents clogging and ensures optimal performance. Lubricate the auger and chute as per the manufacturer’s recommendations to maintain smooth operation. Regular cleaning and lubrication help prevent damage and increase the lifespan of the snowblower.

Store Properly in Off-Season

When the snowblower is not in use, it’s important to store it properly. Clean off any accumulated snow or debris, and ensure that all fuel is drained or stabilized to prevent damage to the engine. Store the snowblower in a clean, dry area, away from any potential moisture or pests. Following proper storage practices will help prolong the life of your snowblower.

By following these maintenance tips, you can ensure that your snowblower with remote start stays in excellent condition and continues to operate efficiently season after season.

Common Troubleshooting Issues with Snowblowers with Remote Start

Like any mechanical device, snowblowers with remote start may encounter some troubleshooting issues. Here are a few common problems you may come across:

Battery-Related Problems

If the remote control or the snowblower’s battery fails to hold a charge, it may result in starting issues or a non-functional remote start feature. Check the batteries in both the remote and the snowblower and replace them if necessary. Ensure that the battery contacts are clean and free from corrosion.

Communication Issues

In some cases, the remote control may not communicate properly with the snowblower due to signal interference or a weak connection. Make sure there are no obstructions between the remote and the snowblower. If possible, try repositioning or moving closer to the snowblower to establish a better connection.

Starting Problems

If the snowblower does not start when using the remote start feature, check that the snowblower’s fuel tank is filled with fresh fuel and that the fuel valve is in the correct position. Confirm that the snowblower’s engine is properly primed and that all safety switches or levers are in the correct position. If the issue persists, refer to the user manual or contact the manufacturer’s customer support for assistance.

Mechanical Malfunctions

Mechanical malfunctions can occur with any mechanical device, including snowblowers. If you encounter mechanical issues, such as the auger not turning or the chute not rotating, consult the user manual for troubleshooting steps. In some cases, professional repair or assistance may be required to fix the issue.

Remote Malfunction

If the remote control stops working or malfunctions, check the batteries for any signs of leakage or damage. Replace them if necessary. If the problem persists, contact the manufacturer’s customer support or refer to the warranty information for assistance or potential repair options.

If you experience any troubleshooting issues with your snowblower with remote start, remember to follow the manufacturer’s instructions and safety guidelines. Consulting the user manual and reaching out to customer support can often help resolve the issue efficiently.

Conclusion

Snowblowers with remote start features bring convenience, safety, and efficiency to the snow-clearing process. They allow you to start the snowblower from a distance, reducing strain and providing instant access to snow-clearing without having to be physically near the machine. When choosing a snowblower with remote start, consider factors such as range, communication technology, ease of use, reliability, and additional features.

Popular brands such as Brand A, Brand B, and Brand C offer a variety of snowblowers with remote start features, catering to different preferences and needs. Before making a purchase, consider factors like climate and snow conditions, budget, maintenance requirements, available storage space, and noise level.

The installation and setup process of snowblowers with remote start typically involves unboxing, assembling, connecting the remote start system, programming the remote, and testing the feature. Local outdoor equipment stores, online retailers, and used equipment markets are all great options for purchasing a snowblower with remote start.

To ensure optimal performance and longevity, follow maintenance tips such as regularly changing and checking oil levels, inspecting and cleaning the starter motor, keeping the remote and battery in good condition, and cleaning and lubricating the auger and chute. If you encounter any troubleshooting issues, address battery-related problems, communication issues, starting problems, mechanical malfunctions, or remote malfunctions accordingly.

In conclusion, snowblowers with remote start features offer a convenient and efficient solution for clearing snow. Consider the benefits, factors, tips, and troubleshooting information provided in this article to make an informed decision and enjoy the convenience of a snowblower with remote start. Stay warm and stay safe as you navigate through the snowy winter!

How Often Should I Clean My Snowblower’s Air Filter?

So you’ve got a trusty snowblower to help you battle through those frosty winter days. But have you ever wondered how often you should be giving your snowblower’s air filter a good clean? Well, look no further for answers. In this article, we’ll uncover the importance of maintaining a clean air filter, the signs that suggest it’s time for a cleaning, and provide helpful tips on how frequently you should be tackling this task. So sit back, relax, and let’s get your snowblower ready to take on winter’s snowy onslaught!

Factors Affecting Air Filter Cleaning Frequency

Maintaining a clean air filter is crucial for the optimal performance and longevity of your snowblower. Several factors can affect how frequently you should clean your snowblower’s air filter.

Frequency of Use

The frequency with which you use your snowblower plays a significant role in determining how often you should clean the air filter. If you use your snowblower frequently, especially during heavy snowfall or in large areas, the air filter may accumulate dirt and debris more quickly. In such cases, it is advisable to clean the air filter more frequently to ensure uninterrupted performance.

Conditions of Use

The conditions in which you operate your snowblower also impact the cleaning frequency of the air filter. If you use your snowblower in dusty or dirty environments, such as areas with loose gravel or construction sites, the air filter is more likely to become clogged with debris. Similarly, operating the snowblower in wet or humid conditions can lead to the accumulation of moisture in the air filter, which may require more frequent cleaning.

Air Quality

The air quality in your location can have a significant impact on how often you should clean your snowblower’s air filter. If you live in an area with high levels of airborne pollutants, such as dust, pollen, or industrial emissions, the air filter is likely to become dirty faster. Regular cleaning is necessary to prevent the filter from becoming clogged, as a clogged filter can reduce the snowblower’s performance and potentially cause engine damage.

Type of Fuel Used

The type of fuel you use in your snowblower can also affect the cleaning frequency of the air filter. Some fuels, such as ethanol-blended gasoline, can leave behind residue that can accumulate on the air filter. This residue can restrict airflow and decrease the efficiency of the snowblower. If you consistently use fuels that are known to leave residue, you may need to clean the air filter more often to maintain optimal performance.

Signs That Your Snowblower’s Air Filter Needs Cleaning

Cleaning the air filter of your snowblower is essential to ensure its smooth operation. However, it can be challenging to determine exactly when the air filter needs cleaning. Here are some signs that indicate it’s time to clean your snowblower’s air filter:

Reduced Power and Performance

If you notice a decrease in the power and performance of your snowblower, it might be an indication that the air filter is dirty. A clogged air filter restricts airflow, which can lead to reduced engine power and diminished overall performance. Cleaning or replacing the air filter can help restore the snowblower’s power and efficiency.

Difficulty Starting

A dirty air filter can make it difficult for the snowblower to start. If you experience issues with starting your snowblower, particularly if it used to start easily before, the air filter may be clogged. Cleaning the air filter can remove any obstructions and improve the starting process.

Excessive Fuel Consumption

If your snowblower is consuming fuel at a faster rate than usual, it could be a sign of a dirty air filter. A clogged air filter restricts the airflow, causing the engine to run inefficiently and consume more fuel to generate the required power. Cleaning or replacing the air filter can help restore normal fuel consumption.

Dirty or Clogged Filter

A visual inspection of the air filter can also give you an indication of its cleanliness. If the filter appears dirty, clogged, or covered in debris, it is a clear sign that it needs cleaning. Removing the filter and cleaning it thoroughly can prevent further issues and ensure optimal performance.

How Often Should I Clean My Snowblowers Air Filter?

Recommended Cleaning Schedule for Snowblower Air Filter

To ensure that your snowblower operates at its best, it is important to follow a regular cleaning schedule for the air filter. Here are some guidelines to help you establish a cleaning routine:

Manufacturer’s Recommendations

The manufacturer of your snowblower is the best source of information when it comes to maintenance recommendations, including cleaning the air filter. Read the owner’s manual or consult the manufacturer’s website to determine their specific recommendations regarding the cleaning frequency of the air filter.

Every 10 Hours of Use

As a general rule of thumb, it is recommended to clean your snowblower’s air filter every 10 hours of use. This interval provides a balance between ensuring optimal performance and avoiding excessive cleaning. Regular cleaning at this interval can help prevent debris accumulation and maintain the snowblower’s efficiency.

Monthly Inspection

In addition to the periodic cleaning every 10 hours of use, it is also advisable to inspect the air filter monthly. This visual check allows you to identify any signs of dirt or damage that may require immediate attention. Regular inspections can help catch issues early on and prevent major problems down the line.

Regular Visual Check

Make it a habit to visually inspect the air filter before each use of your snowblower. Look for any visible dirt, debris, or damage, and clean or replace the filter as needed. Regular visual checks ensure that the air filter is clean and in good condition, promoting optimal performance.

Step-by-Step Guide: How to Clean a Snowblower’s Air Filter

Cleaning the air filter of your snowblower is a relatively simple process that can be done at home. Follow these step-by-step instructions to clean your snowblower’s air filter effectively:

Step 1: Gather Required Tools

Before you begin, gather the necessary tools and supplies. You will need protective gloves, safety eyewear, a clean cloth or brush, and compressed air (optional). Having these tools easily accessible will make the cleaning process efficient and safe.

Step 2: Turn off the Snowblower

Ensure that the snowblower is turned off and the engine is cool before attempting to clean the air filter. This step is crucial to prevent any accidental injuries or damage to the snowblower.

Step 3: Remove the Air Filter Cover

Locate the air filter cover on your snowblower. It is usually located near the engine and can be identified by its distinctive shape and design. Remove the cover carefully by unscrewing or unclipping it, depending on the model of your snowblower.

Step 4: Inspect the Air Filter

Once the cover is removed, visually inspect the air filter for dirt, dust, or debris accumulation. Shake the filter gently to dislodge any loose particles. If the filter is excessively dirty or damaged, it may need to be replaced instead of cleaned.

Step 5: Clean the Air Filter

If the air filter is relatively clean, you can proceed with cleaning it. Use a clean cloth or brush to remove the visible dirt and debris from both sides of the filter. Ensure that all the dirt is removed, but be careful not to damage the filter material in the process.

Step 6: Reinstall the Air Filter

After cleaning the air filter, carefully place it back in position. Ensure that it fits snugly and is correctly aligned with the filter housing. If the filter requires any special installation or alignment, refer to the manufacturer’s instructions.

Step 7: Replace the Air Filter if Necessary

If the air filter is heavily damaged, excessively dirty, or cannot be adequately cleaned, it is recommended to replace it with a new filter. Check the owner’s manual or consult the manufacturer to ensure you purchase the correct replacement filter for your specific snowblower model.

How Often Should I Clean My Snowblowers Air Filter?

Precautions to Take When Cleaning a Snowblower’s Air Filter

While cleaning the air filter of your snowblower is a relatively straightforward task, it is essential to take certain precautions to ensure your safety and avoid damage to the equipment.

Wearing Protective Gloves and Eyewear

Before you start the cleaning process, put on protective gloves and safety eyewear. This will protect your hands and eyes from any dirt, debris, or harmful particles that may be present on the air filter or within the snowblower.

Cleaning in a Well-Ventilated Area

Ensure that you clean the air filter in a well-ventilated area. This will prevent the inhalation of any dust or particles that may be released during the cleaning process. Cleaning in a well-ventilated space also helps minimize the exposure to cleaning solvents or compressed air fumes if used.

Avoiding Damage to the Air Filter

Take care not to damage the air filter while cleaning it. Use gentle, sweeping motions with a cloth or brush to remove dirt and debris. Avoid excessive force that may tear or distort the filter material. Damaged filters may not provide adequate filtration and can compromise the performance of your snowblower.

Using Compressed Air Carefully

If you choose to use compressed air to clean the air filter, use caution. High-pressure air can damage or dislodge delicate filter material. Hold the compressed air nozzle several inches away from the filter and blow air in short bursts. This will help remove any stubborn debris without causing damage.

Other Maintenance Tips for Keeping Your Snowblower in Top Condition

In addition to regular air filter maintenance, there are several other essential maintenance tasks to keep your snowblower in top condition. Incorporating these tasks into your overall maintenance routine will ensure that your snowblower operates reliably and efficiently:

Regular Oil Changes

Regularly changing the oil in your snowblower is crucial for maintaining its smooth operation. Consult the owner’s manual for the recommended oil change intervals and use the appropriate oil specified by the manufacturer. Clean oil lubricates the engine and keeps it running smoothly, reducing wear and tear.

Inspecting and Adjusting Drive Belt Tension

Inspecting and adjusting the drive belt tension is necessary to ensure proper traction and power transfer in your snowblower. Over time, the drive belt can become loose or stretched, leading to reduced efficiency. Regularly inspect the drive belt and adjust the tension as recommended by the manufacturer.

Checking and Replacing Spark Plugs

Spark plugs play a vital role in the ignition process of your snowblower’s engine. Regularly inspecting and cleaning spark plugs can help maintain efficient combustion and prevent issues like misfires or difficulty starting. If the spark plug is excessively worn or damaged, it should be replaced with a new one.

Cleaning the Carburetor

A clean carburetor is essential for proper fuel delivery and combustion in the snowblower’s engine. Over time, the carburetor can become clogged with dirt, debris, or fuel deposits. Regularly cleaning the carburetor or using a fuel additive can prevent clogging and ensure optimal engine performance.

Benefits of Cleaning Your Snowblower’s Air Filter Regularly

Regularly cleaning your snowblower’s air filter offers a range of benefits that positively impact its performance and longevity.

Improved Performance and Efficiency

A clean air filter allows for optimal airflow, ensuring efficient combustion within the snowblower’s engine. This leads to improved performance and enhanced fuel efficiency. By removing any dirt or debris that may restrict airflow, you can ensure that your snowblower operates at its best during the winter season.

Longer Lifespan of Engine

A clogged or dirty air filter can negatively impact the lifespan of your snowblower’s engine. Restricted airflow can cause the engine to work harder, potentially leading to overheating or premature wear and tear. Cleaning the air filter regularly reduces strain on the engine and helps prolong its lifespan.

Reduced Risk of Damage and Costly Repairs

A clean air filter prevents debris and dirt from reaching the internal components of the engine. By keeping the engine free from contaminants, you reduce the risk of damage to critical parts, such as the piston or cylinder. This reduces the likelihood of costly repairs and extends the overall lifespan of your snowblower.

Enhanced Safety and Reliability

A properly maintained air filter contributes to the overall safety and reliability of your snowblower. By ensuring optimal engine performance, you minimize the chances of unexpected breakdowns or malfunctions while operating the snowblower. This allows you to clear snow from your property with confidence and peace of mind.

Different Types of Air Filters for Snowblowers

Snowblowers can utilize various types of air filters, each with its own characteristics and benefits. Understanding the different types can help you choose the most suitable filter for your snowblower:

Foam Filters

Foam filters are commonly used in snowblowers due to their excellent filtration capabilities. They are designed to trap fine particles and debris effectively while allowing free airflow. Foam filters are generally washable and reusable, making them a cost-effective option in the long run.

Paper Filters

Paper filters are another common type used in snowblowers. They are typically disposable and offer good filtration performance. Paper filters can effectively trap larger particles and debris, providing adequate protection to the engine. Regular replacement is necessary to ensure optimal performance and maintain the snowblower’s efficiency.

Mesh Filters

Mesh filters, often made of metal or synthetic materials, are known for their durability and resistance to damage. They offer good filtration performance and are capable of capturing larger debris effectively. Mesh filters are generally washable and reusable, making them a suitable option for those looking for a more sustainable choice.

Cone Filters

Cone filters, also known as high-performance filters, are designed to provide superior filtration and airflow. They feature a cone-shaped design that maximizes surface area, allowing for increased filtration capacity. Cone filters are often made of high-quality materials and can offer enhanced performance in challenging operating conditions.

When to Replace Your Snowblower’s Air Filter

While regular cleaning is essential to maintain the air filter’s performance, there are instances where replacement becomes necessary. Here are some signs that indicate it’s time to replace your snowblower’s air filter:

Signs of Irreparable Damage

If the air filter is damaged beyond repair, such as tears, holes, or significant deformation, it is crucial to replace it immediately. A damaged filter cannot effectively filter the incoming air, putting the engine at risk of damage.

Excessive Wear and Tear

Over time, air filters can experience wear and tear, affecting their filtration and airflow capabilities. If you notice signs of significant deterioration, such as worn-out filter material or reduced structural integrity, it is advisable to replace the air filter.

Manufacturer’s Recommendations

Always refer to the manufacturer’s recommendations regarding the replacement intervals for your snowblower’s air filter. Filters should be replaced according to the guidelines provided by the manufacturer to ensure optimal engine performance and reliability.

Lack of Efficiency despite Cleaning

If you have thoroughly cleaned the air filter and it still does not exhibit proper filtration or airflow, it may be time to replace it. A filter that cannot be adequately cleaned or shows no improvement in performance after cleaning indicates that it has exceeded its useful life.

Conclusion

Regular maintenance and cleaning of your snowblower’s air filter are vital to ensure its optimal performance and longevity. By understanding the factors affecting air filter cleaning frequency, identifying signs that indicate the need for cleaning, and following a recommended cleaning schedule, you can keep your snowblower operating at its best.

Taking precautions when cleaning the air filter, such as wearing protective gear and working in a well-ventilated area, is essential for safety and effectiveness. Additionally, incorporating other maintenance tasks, such as regular oil changes and inspecting critical components, helps keep your snowblower in top condition.

By cleaning your snowblower’s air filter regularly, you can benefit from improved performance, extended engine lifespan, reduced risk of damage, and enhanced safety and reliability. Be aware of the different types of air filters available and know when it’s time to replace the filter to maintain optimal filtration and airflow.

As a responsible snowblower owner, taking care of your equipment through proper air filter maintenance and overall maintenance routine ensures long-term benefits, efficient snow clearing, and peace of mind throughout the winter season.

How Do I Prime My Snowblower Before Starting It?

So, you’ve got your snowblower all set up and ready to tackle the upcoming winter storms. But before you fire it up and get to work, you need to make sure you prime your snowblower properly. Now, I know what you’re thinking – how exactly do I prime my snowblower? Well, don’t worry, because in this article, we’re going to break down the simple steps you need to follow to prime your snowblower before starting it, ensuring it runs smoothly and efficiently when the snow starts falling.

How Do I Prime My Snowblower Before Starting It?

What is Priming a Snowblower?

Priming a snowblower refers to the process of manually delivering fuel to the engine before starting it. This is done by pressing and releasing the primer bulb, which is located on the snowblower’s engine. The purpose of priming is to ensure that there is sufficient fuel in the carburetor to facilitate easy starting. By doing so, you are essentially providing an initial boost of fuel, allowing the engine to fire up smoothly and run efficiently.

Why is Priming Important?

Priming your snowblower is essential because it helps ensure a smooth and hassle-free startup. During the colder months, the fuel in the carburetor can become stagnant and lose its volatile properties. By priming the snowblower, you are circulating fresh fuel into the carburetor, which increases the chances of successful ignition and prevents any sputtering or stalling during operation.

Checking the Fuel Level

Before you begin priming your snowblower, it is crucial to check the fuel level in the tank. Operating the snowblower with a low fuel level can lead to uneven running and potential damage to the engine. Ensure that there is enough fuel in the tank to provide a steady supply to the carburetor throughout the operation. If the fuel level is low, it is advisable to fill up the tank before proceeding with the priming process.

Locating the Primer Bulb

The primer bulb is usually located on the top or side of the snowblower’s engine, depending on the make and model. It is a small, rubber bulb that you can press with your finger. The best way to locate the primer bulb is to consult your snowblower’s user manual, as the exact placement can vary. Once you have identified the primer bulb, you are ready to start priming your snowblower.

How Do I Prime My Snowblower Before Starting It?

Understanding the Primer Bulb

How Does the Primer Bulb Work?

The primer bulb is designed to draw fuel from the fuel tank and into the carburetor. When you press and release the bulb, it creates a vacuum that sucks fuel into the carburetor, replacing any stale fuel that may have been left behind. This process helps to ensure that your snowblower’s engine receives a consistent and sufficient fuel supply for optimal performance.

How Many Times Should I Prime the Snowblower?

The number of times you should prime your snowblower depends on its specific requirements. Generally, it is recommended to prime the snowblower three to five times, but it may vary depending on factors such as temperature and the particular engine model. Consult your snowblower’s user manual to determine the manufacturer’s recommended priming method.

Step-by-Step Guide to Priming a Snowblower

Step 1: Position the Snowblower

Before priming the snowblower, ensure that it is on a flat and stable surface. This will prevent any accidents or instability during the priming process. Make sure the ignition switch is in the off position and that the snowblower is securely parked.

Step 2: Locate the Primer Bulb

Identify the primer bulb by referring to your snowblower’s user manual. It is usually a small, rubber bulb that can be found on the top or side of the engine. Take a moment to familiarize yourself with its location and how it operates.

Step 3: Press and Release the Primer Bulb

Place your finger on the primer bulb and press it down slowly. You should feel some resistance as you press. Once the bulb is fully depressed, release it quickly. This action creates a vacuum, drawing fuel into the carburetor.

Step 4: Repeat the Priming Process

Repeat the pressing and releasing action of the primer bulb two to three more times. This ensures that an ample amount of fuel has been delivered to the carburetor, increasing the likelihood of a smooth startup.

Step 5: Repeat the Priming Process Once More

To be extra cautious, repeat the priming process one final time. This will ensure that the carburetor is adequately fueled for an easy ignition. Once you have completed this step, you are now ready to start your snowblower.

Common Mistakes to Avoid

Over-Priming the Snowblower

One common mistake is over-priming the snowblower. It is important to remember that priming is meant to deliver just enough fuel to the carburetor for a smooth startup. Over-priming can flood the engine and cause excessive fuel consumption, leading to potential starting issues and increased emissions. Follow the manufacturer’s instructions and recommendations for the appropriate number of primer bulb presses.

Under-Priming the Snowblower

On the other hand, under-priming can result in insufficient fuel supply to the carburetor, leading to difficulty in starting the snowblower. It is crucial to perform the recommended number of primer bulb presses, as specified by the manufacturer, to ensure optimal fuel delivery.

Priming the Snowblower with a Full Tank of Fuel

Priming the snowblower with a full tank of fuel is not recommended. When the fuel tank is completely filled, there is already sufficient fuel in the carburetor, and additional priming may flood the engine. It is best to check the fuel level and fill it as needed before priming to avoid any potential issues.

Checking the Primer Bulb for Issues

Cracked or Damaged Bulb

Inspect the primer bulb for any signs of cracking or damage before each use. A cracked or damaged bulb can lead to air leaks, preventing proper fuel delivery. If you notice any issues with the primer bulb, it is important to replace it immediately to ensure smooth operation.

Air Leaks in the Primer Bulb

Air leaks in the primer bulb can occur due to a loose connection or damage to the bulb itself. If you suspect an air leak, you can perform a simple test. Apply some soapy water to the bulb and observe for any bubbles forming. If bubbles appear, it indicates an air leak. If you detect an air leak, it is advisable to have the primer bulb replaced to maintain the snowblower’s optimal performance.

Conclusion

Priming your snowblower is an essential step in ensuring a smooth and efficient startup. By following the steps outlined in this article and avoiding common mistakes, you can ensure that your snowblower is primed correctly for optimal performance. Regularly check the primer bulb for any cracks or damage, and replace it if necessary. Remember to consult your snowblower’s user manual for specific instructions and recommendations. With proper priming, you can confidently tackle the winter snowfall and keep your property clean and safe.

Frequently Asked Questions

How Long Should I Prime the Snowblower?

The duration of priming can vary depending on factors such as the snowblower’s make and model and the outdoor temperature. Generally, priming for 2-4 seconds should be sufficient. However, it is advisable to consult the manufacturer’s instructions for the recommended priming duration.

Do Electric Snowblowers Require Priming?

No, electric snowblowers do not require priming. Electric snowblowers operate differently than gas-powered ones, as they run purely on electricity. Instead of priming, electric snowblowers usually have a simple push-button or switch mechanism for starting.

What Happens If I Don’t Prime My Snowblower?

Not priming your snowblower can result in difficulty starting the engine or even failure to start. Without proper priming, the carburetor may not receive enough fuel to sustain combustion, leading to sputtering or stalling. It is crucial to prime your snowblower before every use to ensure a smooth startup.

Is Priming Necessary Every Time I Start the Snowblower?

In most cases, yes, priming is necessary every time you start the snowblower. It ensures that the carburetor receives a fresh fuel supply and helps prevent starting issues. However, consult your snowblower’s user manual to determine if there are any specific exceptions or recommendations for your particular model.

Can A Snowblower Also Spread Salt Or Sand?

So you’ve just invested in a snowblower to tackle the piles of snow that accumulate on your driveway during those brutal winter months. But the question now arises: can a snowblower also do the double duty of spreading salt or sand? After all, battling icy surfaces is just as important as clearing away the snow itself. In this article, we will explore whether your trusty snowblower can tackle both snow removal and ice management, giving you a comprehensive solution to combat winter’s wrath.

Overview

Snowblowers are essential tools for clearing snow from driveways, sidewalks, and other outdoor areas during winter. However, did you know that some snowblowers have the added capability of spreading salt or sand? This article will provide you with a comprehensive understanding of snowblowers, including how they work, the types available, and their purpose. Additionally, we will explore the benefits, considerations, safety precautions, and maintenance of using a snowblower for spreading salt or sand. We will also discuss alternative options and cost considerations. So let’s dive in and discover everything you need to know about snowblowers with salt or sand spreading capability.

Understanding Snowblowers

Types of Snowblowers

Snowblowers come in various types, each suited for specific snow removal needs. The primary types include single-stage snowblowers, two-stage snowblowers, and three-stage snowblowers.

Single-stage snowblowers are ideal for light snowfall, with an auger that breaks up the snow and throws it out through a discharge chute. These models are typically smaller, more affordable, and easier to maneuver.

Two-stage snowblowers feature an auger and an impeller. The auger gathers the snow, and the impeller propels it through a discharge chute. Two-stage snowblowers are suitable for heavier snowfall and can handle larger areas more efficiently.

Three-stage snowblowers are heavy-duty machines with an accelerator in addition to the auger and impeller. The accelerator breaks up compacted snow and ice, making it more effective for tackling wet and heavy snow.

How Snowblowers Work

Snowblowers work by utilizing a combination of impellers or augers to break up and propel snow away from the area being cleared. The auger, a rotating helical blade, collects the snow and moves it towards the center of the machine. The impeller, usually located behind the auger, then throws the snow out through a chute, which can be controlled and adjusted by the operator. This process allows for efficient and quick snow removal.

Purpose of Snowblowers

The primary purpose of snowblowers is to remove snow from outdoor areas such as driveways, sidewalks, and parking lots. By blowing or throwing the snow aside, snowblowers provide a convenient alternative to shoveling, saving time and effort. However, some snowblowers have additional capabilities, such as the ability to spread salt or sand. This feature enhances the snowblower’s functionality, allowing it to tackle not only the removal of snow but also the prevention of ice buildup by spreading salt or sand onto the cleared surface.

Adding Salt or Sand to a Snowblower

Why Add Salt or Sand

Adding salt or sand to a snowblower improves its effectiveness in combating ice buildup on cleared surfaces. Salt helps lower the freezing point of snow and ice, causing them to melt more quickly. Sand, on the other hand, increases traction and provides a non-slip surface, reducing the likelihood of accidents caused by slippery conditions. By incorporating salt or sand spreading capability, snowblowers become versatile winter maintenance tools, ensuring safer and more convenient snow removal.

Compatibility of Snowblowers with Salt or Sand

Not all snowblowers have the capability to spread salt or sand. It’s essential to check the specifications and features of a snowblower before purchasing to ensure it has this functionality. Some snowblowers come equipped with a separate attachment or add-on specifically designed for salt or sand spreading. These attachments can be easily connected to the snowblower, allowing for seamless operation. Others may have built-in salt or sand spreaders, eliminating the need for additional attachments. Be sure to choose a snowblower that aligns with your specific needs and offers the salt or sand spreading capability you require.

Benefits of Using a Snowblower for Spreading Salt or Sand

Using a snowblower for spreading salt or sand offers several benefits. Firstly, it saves time and effort by combining snow removal and ice prevention into a single task. Instead of manually spreading salt or sand after clearing snow with a shovel, you can accomplish both tasks simultaneously with a snowblower. Additionally, snowblowers provide a more even and consistent distribution of salt or sand, ensuring optimal coverage and effectiveness. This ensures that the cleared area remains safe and accessible, reducing the risk of slips and falls. Furthermore, the flexibility of adjusting the spread width and volume allows you to customize the application according to the specific conditions and needs of your property.

Considerations for Spreading Salt or Sand

Type of Salt or Sand

When spreading salt or sand with a snowblower, it’s essential to consider the type of material being used. For salt, calcium chloride and magnesium chloride are commonly recommended due to their effectiveness in melting ice at lower temperatures. It’s important to purchase ice melt products specifically labeled for outdoor use and compatible with the surfaces you plan to clear. As for sand, using coarse sand or grit specifically intended for winter conditions is advisable, as it provides better traction and is less likely to scatter or blow away in windy conditions. Always follow the manufacturer’s recommendations for the type and quantity of salt or sand to be used with your snowblower.

Adjusting the Snowblower

Proper adjustment of the snowblower is crucial when using it for spreading salt or sand. Most snowblowers allow you to control the spread width and throw distance of the material. Adjusting the spread width ensures that the salt or sand is evenly distributed across the cleared area, avoiding unnecessary waste or concentration. The throw distance adjustment allows you to control the range at which the salt or sand is projected. This feature is particularly useful when dealing with different surface sizes or when there are specific areas that require more attention. Experimenting with different settings and observing the results will help you find the optimal adjustment for your specific conditions.

Environmental Impact

It’s important to be mindful of the potential environmental impact when spreading salt or sand with a snowblower. Excessive use of salt can lead to runoff into nearby water bodies, which can be harmful to aquatic life and vegetation. To minimize environmental impact, consider using environmental-friendly alternatives such as potassium-based deicers or opting for sand instead. Additionally, when applying salt or sand, avoid spreading it too close to sensitive areas such as plants or water sources. Being conscious of the environmental implications and using the appropriate amount of salt or sand will help maintain a balance between safety and sustainability.

Safety Precautions

Protective Gear

When operating a snowblower with salt or sand spreading capability, it’s vital to prioritize safety by wearing appropriate protective gear. This includes safety goggles or glasses to protect your eyes from flying debris and particles, as well as a face mask to prevent inhalation of dust or fine particles. Additionally, wearing gloves and sturdy footwear with good traction is essential for maintaining a firm grip and reducing the risk of slips or falls. It is also recommended to dress in warm and waterproof clothing to protect yourself from the cold and moisture. Prioritizing safety gear ensures that you can operate the snowblower comfortably and with minimized risks.

Use on Different Surfaces

Another safety consideration when using a snowblower for spreading salt or sand is the type of surface it will be used on. Different surfaces may require various adjustments and precautions. For example, concrete surfaces can withstand salt but may be damaged by excessive sand. In contrast, sand may be more suitable for asphalt or gravel surfaces without causing damage. It’s important to understand the compatibility of your surfaces with the materials being spread, as well as any specific recommendations from the snowblower manufacturer. By using the appropriate materials and taking necessary precautions, you can ensure that no harm is done to the surfaces being cleared.

Storage and Disposal of Salt or Sand

Proper storage and disposal of salt or sand are essential for both convenience and environmental protection. Ensure that the salt or sand is stored in a dry, sealed container away from moisture to prevent clumping. This will ensure that the material remains free-flowing and ready for use when needed. When disposing of salt or sand, be mindful of environmental regulations and guidelines. Avoid dumping the material in areas where it can easily be carried into water bodies or cause harm to plant life. Where possible, consider recycling or repurposing the material or consult with local waste management facilities for proper disposal methods.

Maintenance and Cleaning

Maintenance Routine

Performing regular maintenance on your snowblower with salt or sand spreading capability is essential for optimal performance and durability. Follow the manufacturer’s maintenance guidelines regarding oil changes, spark plug inspection, and belt adjustments. It’s also crucial to keep the salt or sand spreading components clean and free from debris, as any obstructions can affect the distribution and performance of the material. Regularly inspect the spreader attachment or mechanisms and make any necessary repairs or replacements. By incorporating a consistent maintenance routine, you can extend the lifespan of your snowblower and ensure it operates efficiently.

Cleaning the Snowblower

After each use, it’s important to clean your snowblower to remove any salt or sand residue. Begin by disconnecting the spark plug to ensure safety. Use a brush or scraper to dislodge any caked or stuck material from the auger, impeller, chute, and any other components. You can also use a hose or pressure washer to rinse off any remaining debris. After cleaning, allow the snowblower to dry thoroughly before storing it to prevent moisture-related issues such as rust or corrosion. Regular cleaning not only maintains the functionality of your snowblower but also prevents the buildup of salt or sand, which could potentially affect its performance.

Avoiding Corrosion

When using salt or sand with your snowblower, there is a potential risk of corrosion, especially if the materials come into contact with certain metal parts. To minimize the risk, look for snowblowers that feature corrosion-resistant components or apply a protective coating to vulnerable areas. Additionally, thorough cleaning and drying of the snowblower after each use will help remove any corrosive residue. Applying a rust inhibitor or lubricant to susceptible areas can also provide an extra layer of protection. By taking preventive measures, you can prolong the lifespan of your snowblower and minimize the impact of corrosion.

Alternatives to Snowblowers for Spreading Salt or Sand

Hand-Push Spreaders

Hand-push spreaders, also known as broadcast spreaders, are handheld devices that allow you to manually distribute salt or sand over a specific area. These spreaders are designed to be pushed and operated by hand, making them suitable for smaller areas or spaces where a snowblower may not be practical. Hand-push spreaders are relatively affordable, lightweight, and easy to use. However, they require physical effort and may not be as efficient for larger areas or heavy snowfall. If you have a smaller property or need for occasional ice prevention, a hand-push spreader could be a viable alternative to a snowblower.

Walk-Behind Spreaders

Walk-behind spreaders are larger versions of hand-push spreaders that are designed to be wheeled and operated by walking behind them. These self-propelled spreaders can cover more ground than hand-push spreaders, making them suitable for medium-sized areas. Walk-behind spreaders often have adjustable spread widths and volumes, allowing for customization based on the conditions and requirements of the surface being treated. While they may require more physical effort than a snowblower, walk-behind spreaders are an efficient and cost-effective alternative for those who need to spread salt or sand over a larger area.

Truck-Mounted Spreaders

For larger properties or commercial use, truck-mounted spreaders offer a highly efficient and time-saving solution. These spreaders are mounted onto trucks or utility vehicles, allowing for large quantities of salt or sand to be distributed over wide areas quickly. Truck-mounted spreaders are often used by municipalities, landscaping companies, and snow removal services. While they may not be practical for individual homeowners or smaller properties, they provide a comprehensive and high-volume solution for those who require extensive snow and ice management.

Cost Considerations

Cost of Snowblower with Salt or Sand Spreading Capability

Snowblowers with salt or sand spreading capability are available at various price points, depending on the brand, features, and size. Entry-level models typically range from $400 to $800, while more advanced and commercial-grade snowblowers can exceed $2,000. The inclusion of the salt or sand spreading feature may also impact the price, with separate attachments or built-in spreaders often adding to the cost. It’s important to consider your specific needs, budget, and the quality of the snowblower when making a purchasing decision. Investing in a reliable and durable snowblower with salt or sand spreading capability can provide long-term convenience and savings.

Cost Comparison with Other Options

When comparing the cost of a snowblower with salt or sand spreading capability to alternative options, it’s essential to consider both upfront and ongoing expenses. Hand-push spreaders, being the most affordable option, generally range from $30 to $100. Walk-behind spreaders can cost anywhere from $100 to $400, depending on the size and features. Truck-mounted spreaders, being more specialized and heavy-duty, can range from $1,000 to $5,000 or more. While these alternatives may have lower initial costs, they may require more time and effort for operation, as well as ongoing maintenance and replacement of consumables. Assessing the long-term costs and benefits of each option will help you make an informed decision based on your unique requirements.

Popular Snowblowers with Salt or Sand Spreading Capability

Brand 1

Brand 1 offers a range of snowblowers with salt or sand spreading capability, providing customers with exceptional performance and convenience. These snowblowers are engineered with durable materials and powerful engines, ensuring reliable operation even in challenging conditions. With adjustable spread widths and throw distances, Brand 1 snowblowers allow for precise and efficient salt or sand distribution. The built-in spreading mechanism is designed for seamless integration with the snowblower, minimizing the need for additional attachments. Brand 1’s commitment to quality and customer satisfaction makes their snowblowers a popular choice for those seeking both snow removal and ice prevention capabilities.

Brand 2

Brand 2 excels in producing snowblowers that combine efficient snow removal with effective salt or sand spreading. Their snowblowers are equipped with innovative features such as variable speed control and adjustable throwing heights, allowing for customized and precise operation. Brand 2 prioritizes user-friendly designs with intuitive controls and ergonomic handles, making their snowblowers easy to operate and maneuver. The salt or sand spreading mechanism seamlessly integrates with the snowblower, ensuring optimal distribution and coverage. Brand 2’s reputation for durability, reliability, and customer satisfaction positions them as a notable contender in the market for snowblowers with salt or sand spreading capability.

Brand 3

Brand 3 stands out in the realm of snowblowers with salt or sand spreading capability, offering top-tier performance and functionality. Their snowblowers are engineered with state-of-the-art technology, featuring powerful engines and precision controls. Brand 3 prioritizes durability by utilizing high-quality materials and components, ensuring long-lasting operation in harsh winter conditions. The salt or sand spreading feature on Brand 3 snowblowers is designed to provide even and controlled distribution, allowing for efficient and effective ice prevention. With a reputation for excellence and innovation, Brand 3 snowblowers are favored by professional landscapers and homeowners alike.

Conclusion

Snowblowers with salt or sand spreading capability offer a convenient and efficient solution for winter snow removal and ice prevention. By understanding the types of snowblowers available, how they work, and their purpose, you can make an informed decision on which model best suits your needs. Adding salt or sand to a snowblower enhances its effectiveness in combating ice buildup, offering not only a safer environment but also time and cost savings. However, it is important to consider the type of salt or sand, adjust the snowblower appropriately, and be mindful of the environmental impact. Prioritizing safety precautions, proper maintenance, and cleaning will ensure the longevity and optimal performance of your snowblower. Additionally, exploring alternative options and comparing costs can help you determine the most suitable solution for your budget and specific requirements. With popular brands offering snowblowers with salt or sand spreading capability, you have a variety of options to choose from, each delivering outstanding performance and reliability. So, equip yourself with the knowledge in this article, and embrace winter with confidence and ease, knowing that your snowblower is ready to tackle all your snow removal and ice prevention needs.

How Do I Choose The Right Tire Chains For My Snowblower?

So you’ve got yourself a trusty snowblower, ready to tackle the winter storms that will inevitably come knocking at your door. But before you hit the icy terrain, there’s one essential accessory you need to consider – tire chains. These seemingly simple chains play a vital role in ensuring your snowblower maintains traction on slippery surfaces, preventing it from skidding or getting stuck in the snow. But with so many options available, how do you know which tire chains are right for your snowblower? In this article, we’ll break it down for you, providing you with all the information you need to make an informed decision and keep your snowblower running smoothly throughout the winter season.

How Do I Choose The Right Tire Chains For My Snowblower?

This image is property of www.troybilt.com.

Understanding Tire Chains

What are tire chains?

Tire chains are devices made of metal or synthetic materials that are designed to provide added traction to your snowblower’s tires when operating in snowy or icy conditions. These chains consist of interconnected links that wrap around the tires and help improve grip, allowing the snowblower to maneuver more easily and effectively through snow-covered surfaces.

Why are tire chains important for a snowblower?

Snowblowers are powerful machines that help clear snow effectively. However, they can face challenges when operating on slippery surfaces. This is where tire chains come into play. By installing tire chains, you enhance the traction and grip of your snowblower, making it easier to navigate through snow and ice. Tire chains improve the overall performance and efficiency of your snowblower, allowing it to effectively clear snow and keep your pathways safe and accessible.

Types of tire chains

There are various types of tire chains available in the market, each offering its own unique characteristics and benefits. Here are some common types:

  1. Steel chains: Steel chains are the most durable option and work well in extreme winter conditions. They provide excellent traction but can be noisy and may cause damage to delicate surfaces like asphalt.

  2. Zinc-plated chains: These chains are coated with zinc, which helps prevent rust and corrosion. They offer good traction and are less likely to damage surfaces, making them suitable for both residential and commercial use.

  3. Composite chains: Composite chains are made of a blend of materials, such as rubber and metal, to provide a balance between durability and surface protection. They are relatively quiet, lightweight, and offer moderate traction.

Choosing the right type of tire chains depends on your specific needs, budget, and the terrain you’ll be operating in. Considering factors like durability, traction, and surface protection will help you make an informed decision.

Consider Your Snowblower Size and Model

Determining the size and model of your snowblower

To select the appropriate tire chains for your snowblower, you need to determine its size and model. Snowblower sizes vary, ranging from compact models to larger commercial-grade ones. Start by checking your snowblower’s user manual or measuring the width and diameter of the tires to accurately determine the size.

Additionally, note down the model number and brand of your snowblower. This information will help you find compatible tire chains, as manufacturers often provide guidelines and recommendations regarding compatible tire chains for their specific models.

Finding compatible tire chains

Once you have the size and model information, you can look for tire chains that are compatible with your snowblower. Many tire chain manufacturers provide compatibility charts or online tools that match tire chain options to different snowblower models. Consult these resources or reach out to the manufacturer’s customer support for assistance in finding the right tire chains for your specific snowblower.

Remember, using tire chains that are specifically made for your snowblower’s size and model ensures proper fit and optimal performance.

How Do I Choose The Right Tire Chains For My Snowblower?

This image is property of www.cubcadet.com.

Assess Your Snowblowing Needs

Identifying your typical snowblowing conditions

Every snowblower user faces unique snowblowing conditions. Consider the average snowfall in your area, the frequency of use, and the type of terrain you’ll be operating on. If you live in an area with heavy snowfall or encounter deep snow regularly, you’ll require tire chains with superior traction and durability.

On the other hand, if you typically deal with lighter snowfall or have mostly flat terrain, you might not need heavy-duty chains. Understanding your typical snowblowing conditions helps narrow down the type of tire chains that will best suit your needs.

Considering the terrain and incline

The terrain on which you’ll be using your snowblower plays a significant role in determining the type of tire chains you should choose. If you have a flat driveway or pathway, standard chains with moderate traction may be sufficient. However, if you have a sloped driveway or frequently encounter steep inclines, you’ll need tire chains with excellent grip to ensure safe and efficient snowblowing.

Consider the inclination and roughness of the terrain you’ll be operating on to make an informed decision regarding the level of traction required for your tire chains.

Choosing the Right Chain Material

Steel chains

Steel chains are the most common and popular choice due to their durability and reliability. They can withstand harsh winter conditions, including ice and packed snow. Steel chains provide excellent traction, ideal for heavy-duty snowblowing tasks. However, keep in mind that steel chains can be noisy and may cause damage to delicate surfaces like asphalt. They are best suited for rough terrains and commercial use.

Zinc-plated chains

Zinc-plated chains are steel chains coated with zinc to prevent rust and corrosion. These chains offer good traction and perform well in moderate winter conditions. They are less likely to damage surfaces, making them suitable for residential use. Zinc-plated chains strike a balance between durability, surface protection, and affordability.

Composite chains

Composite chains are a newer type of tire chain, combining materials such as rubber and metal. These chains offer moderate traction, making them suitable for lighter snowblowing tasks and less rugged terrains. They are lightweight, relatively quiet, and provide better surface protection compared to steel chains. Composite chains are a good option for residential use, where noise and surface damage are concerns.

Consider your specific snowblowing needs, the terrain you’ll be operating on, and the level of traction required when choosing the right chain material for your snowblower.

How Do I Choose The Right Tire Chains For My Snowblower?

This image is property of kenjones.com.

Understanding Chain Traction

The importance of traction

Traction is crucial when operating a snowblower, especially in challenging winter conditions. Tire chains enhance traction by providing additional grip on slippery surfaces. With improved traction, your snowblower can effectively propel forward, maneuver easily, and clear snow more efficiently.

When choosing tire chains, consider the type of chain tread pattern on the link surface. The design of the chains affects the level of traction they provide. Different chain tread patterns are suitable for different snowblowing conditions, terrains, and inclines.

Exploring different chain tread patterns

There are several common chain tread patterns available, each designed to optimize traction in specific conditions:

  1. V-Bar chains: These chains have metal bars shaped like a “V” that bite into ice and hard-packed snow. V-Bar chains provide exceptional traction, making them ideal for icy surfaces or areas with severe winter conditions.

  2. Ladder chains: Ladder chains have horizontal bars that run across the tire. They offer good traction on snowy and icy surfaces, making them a versatile option for various snowblowing conditions.

  3. Diamond chains: Diamond chains have diamond-shaped metal studs placed diagonally across the chain surface. They provide stable traction and are suitable for both packed snow and icy surfaces.

Consider the typical snow conditions you encounter and the level of traction required when selecting the chain tread pattern that best suits your snowblower’s needs.

Evaluating Chain Durability

Durability considerations

Durability is an essential factor to consider when choosing tire chains. You want chains that can withstand tough winter conditions and remain effective for multiple seasons. The durability of tire chains depends on various factors, including the materials used and the manufacturing quality.

Steel chains are known for their exceptional durability, making them a reliable option for heavy-duty snowblowing tasks. Zinc-plated chains offer corrosion resistance and a decent lifespan. Composite chains provide durability with added flexibility and surface protection.

Evaluate your snowblowing needs, expected frequency of use, and the harshness of your winter conditions to determine the level of durability required for your tire chains.

Understanding the lifespan of different tire chains

The lifespan of tire chains can vary depending on factors such as usage, terrain, and maintenance. Steel chains generally have a longer lifespan compared to zinc-plated and composite chains. Proper care, such as regular cleaning and lubrication, can help extend the lifespan of tire chains.

Consider the estimated lifespan of different tire chains when making your selection. Investing in durable and long-lasting chains ensures reliable performance and value for your snowblowing needs.

How Do I Choose The Right Tire Chains For My Snowblower?

This image is property of www.tirechainsrus.com.

Examining Ease of Installation

How easy is it to install the tire chains?

When shopping for tire chains, consider how easy they are to install on your snowblower’s tires. Some chains require specific tools or complicated installation steps, while others have user-friendly designs that simplify the installation process.

Look for tire chains that come with clear instructions and require minimal effort to install. Quick and hassle-free installation saves you time and frustration when preparing your snowblower for winter use.

Considering self-tensioning options

Self-tensioning tire chains are designed to automatically adjust and maintain proper tension throughout use. These chains utilize tensioning devices or springs, reducing the need for manual readjustment and ensuring optimal performance.

Consider opting for self-tensioning tire chains if ease of use and convenience are important to you. They eliminate the hassle of constant tension adjustments and ensure a secure fit on your snowblower’s tires.

Considering Budget and Value

Determining your budget

Budget is an important consideration when choosing tire chains for your snowblower. Tire chain prices vary depending on factors such as the chain material, durability, and brand reputation. Determine how much you are willing to spend on tire chains and look for options that fall within your budget.

While it may be tempting to opt for the cheapest tire chains available, keep in mind that quality and performance can vary significantly. Striking a balance between affordability and quality is crucial to ensure long-term value for your investment.

Balancing quality and price

When evaluating tire chain options, consider the overall quality and value they offer. Look for reputable brands and read customer reviews to gain insights into the performance and durability of different tire chains. Remember that higher-quality chains may come with a higher price tag, but they often offer better traction, durability, and longevity.

Choose tire chains that provide the best value for your budget, considering factors such as durability, traction, ease of installation, and overall customer satisfaction.

How Do I Choose The Right Tire Chains For My Snowblower?

This image is property of www.etrailer.com.

Reading Customer Reviews and Recommendations

Importance of customer reviews

Customer reviews are an excellent resource when choosing the right tire chains for your snowblower. Reading reviews from other snowblower owners who have used the chains provides valuable insights into their performance, durability, and overall satisfaction. Look for reviews that specifically mention snowblower use to ensure relevance to your needs.

Pay attention to common themes in the reviews, such as the reliability of the chains, ease of installation, and performance in various snow conditions. Real-life experiences from other customers can help you make an informed decision and avoid potential pitfalls.

Getting recommendations

In addition to reading customer reviews, consider seeking recommendations from friends, family, or neighbors who own snowblowers. Personal recommendations can provide firsthand information on the performance, durability, and suitability of specific tire chains.

Snowblower owners who have experience using tire chains may offer valuable tips and insights, helping you choose the right chains for your snowblower with greater confidence.

Consulting With Experts and Retailers

Seeking advice from experts

If you are still unsure about which tire chains to choose for your snowblower, consider seeking advice from experts in the field. Snowblower manufacturers, mechanics, and professionals at local hardware stores or equipment rental centers can provide valuable guidance based on their expertise and experience.

These experts can recommend tire chain options based on your snowblower model, typical snowblowing conditions, and specific requirements. They can answer your questions and provide additional insights to ensure you make an informed decision.

Talking to snowblower retailers

When purchasing tire chains, consider visiting snowblower retailers or contacting them online. The staff at these retailers have knowledge about different tire chain options and can help you identify the best fit for your snowblower. They often have access to compatibility charts, manufacturer guidelines, and firsthand experience with various tire chains.

Discuss your snowblowing needs and concerns with the retailer’s staff to receive personalized recommendations and ensure you choose the right tire chains for your specific snowblower model and conditions.

Choosing the right tire chains for your snowblower involves considering factors such as size, model, terrain, traction, durability, ease of installation, budget, and customer reviews. By carefully evaluating these aspects and consulting with experts and retailers, you can select tire chains that enhance the performance of your snowblower, improve safety, and make snowblowing a more efficient and enjoyable task.

Are There Snowblowers That Can Also Function As Lawn Mowers?

So you wake up one winter morning, ready to tackle the snowy driveway, only to realize that your lawn mower is broken. But wait, wouldn’t it be convenient if you could use your snowblower as a lawn mower too? Well, you’re not alone in wondering this. Many homeowners have pondered the possibility of combining these two handy machines into one. In this article, we’ll explore whether snowblowers that can also function as lawn mowers exist, and if so, how they work.

Are There Snowblowers That Can Also Function As Lawn Mowers?

Pros and Cons of Dual Function Snowblowers and Lawn Mowers

Advantages of Having a Dual Function Machine

Having a dual function snowblower and lawn mower can be incredibly convenient, as it allows you to tackle both snow removal and lawn maintenance tasks with a single machine. Here are some advantages of owning such a versatile piece of equipment:

  1. Space-saving: With a dual function machine, you don’t need to find separate storage space for a snowblower and a lawn mower. This is especially beneficial for those with limited storage space, such as small garages or sheds.

  2. Cost-efficient: Purchasing a dual function machine can be more cost-effective compared to buying separate snowblowers and lawn mowers. Combining the functionalities eliminates the need for buying two separate machines, saving you money in the long run.

  3. Time-saving: Instead of spending time and effort switching between different machines, a dual function snowblower and lawn mower allows you to seamlessly transition between snow removal and lawn maintenance tasks. This can significantly reduce your overall workload and save you valuable time.

  4. Versatility: Dual function machines usually come with a range of features and attachments that make them suitable for various terrains and conditions. Whether you need to clear heavy snow or mow your lawn, these machines offer versatility for year-round use.

Disadvantages of Dual Function Machines

While there are numerous advantages to owning a dual function snowblower and lawn mower, it’s essential to consider some potential drawbacks as well:

  1. Performance limitations: A dual function machine may not perform as efficiently as a standalone snowblower or lawn mower. While it can handle both tasks, you may sacrifice some performance qualities specific to each function in favor of versatility.

  2. Weight and maneuverability: Combining the functions of a snowblower and a lawn mower may result in a heavier machine. This added weight can make maneuvering the equipment more challenging, especially in tight areas or on uneven terrain.

  3. Maintenance complexity: With dual function machines, there may be more components to maintain and service. This can increase the complexity of maintenance and repairs, requiring more attention and potentially higher costs over time.

  4. Specialized features: Standalone snowblowers and lawn mowers often come with specialized features tailored to their specific functions. While dual function machines may offer overall functionality, they may lack some advanced features that dedicated snowblowers or lawn mowers have.

Features to Consider in a Dual Function Snowblower and Lawn Mower

When choosing a dual function snowblower and lawn mower, several key features should be considered to ensure you get the most suitable machine for your needs. Let’s take a look at these features:

Power Source

Dual function machines can be powered by electricity, gasoline, or rechargeable batteries. Each power source has its advantages and limitations. Electric models are often quieter and require less maintenance, but they may have a limited range due to the length of the power cord. Gasoline-powered machines offer more mobility but require regular refueling and maintenance. Rechargeable battery-powered options provide good maneuverability but may have limited battery life.

Clearing Width

The clearing width refers to the width of the snowblower’s auger or the lawn mower’s cutting deck. A wider clearing width allows you to cover a larger area in less time. However, if you have narrow pathways or restricted spaces, a narrower clearing width may be more suitable. Consider the size of your property and the amount of snow or grass you typically need to clear to determine the appropriate clearing width for your needs.

Wheels and Traction

Good traction is crucial for both snow removal and lawn mowing. Look for dual function machines with sturdy wheels and reliable traction systems that can handle various terrains. Some models come with specialized tires or adjustable traction control settings to optimize performance in different conditions.

Cutting Height Adjustment

For lawn mowing, cutting height adjustment is an important feature to consider. Look for a dual function machine that allows you to easily adjust the cutting height to accommodate different grass lengths and preferences. Ideally, the machine should offer multiple cutting height options to suit various types of grass and seasonal changes.

Blade and Auger Design

The design of the blades or augers is crucial for the machine’s performance. For snow removal, look for snowblower blades that are sturdy, sharp, and able to handle various snow types. For lawn mowing, consider a machine with durable and efficient cutting blades that provide clean and precise cuts.

Collection and Discharge Methods

Consider how the machine collects and disposes of snow or grass clippings. Some models feature a collection bag or bin for easy disposal, while others may discharge the snow or clippings to the side. Choose a dual function machine with a collection or discharge method that best suits your preference and the layout of your property.

Accessories and Attachments

Check if the dual function machine offers any additional accessories or attachments that can enhance its performance. Certain models may come with attachments such as a snow plow or a mulching kit for more specialized tasks. These accessories can expand the versatility of the machine and make it more suitable for your specific needs.

Ease of Use

Consider the overall ease of use of the dual function machine. Look for features such as ergonomic handles, intuitive controls, and easy-to-access maintenance points. A user-friendly machine will make your snow removal and lawn mowing tasks more efficient and enjoyable.

Maintenance and Durability

Consider the maintenance requirements and durability of the dual function machine. Look for models with easy maintenance features, such as accessible oil and filter changes. Additionally, check the build quality and construction materials to ensure the machine can withstand regular use and different weather conditions.

Price and Value for Money

Lastly, consider the price range of the dual function snowblower and lawn mower options available. Compare the features, specifications, and overall value for money that each machine offers. It’s important to find a balance between your budget and the machine’s performance and durability.

Are There Snowblowers That Can Also Function As Lawn Mowers?

Best Dual Function Snowblower and Lawn Mower Brands

When looking for a dual function snowblower and lawn mower, it’s important to consider reputable brands that offer quality products. Here are three top brands known for their dual function machines:

Brand A

Brand A is renowned for its innovative and reliable dual function snowblowers and lawn mowers. They have a wide range of models designed to meet different needs and budgets. Their machines are known for their durability, performance, and user-friendly features.

Brand B

Brand B has established itself as a leader in the dual function machine market. Their machines are known for their powerful engines, excellent traction, and versatility. With a strong reputation for quality and performance, Brand B offers a range of options to suit various property sizes and terrains.

Brand C

Brand C is known for its cutting-edge technology and advanced features in their dual function snowblowers and lawn mowers. They prioritize customer satisfaction and produce machines that are both efficient and environmentally friendly. Brand C offers a range of models suitable for residential and commercial use.

Top Dual Function Snowblower and Lawn Mower Models

Choosing the right dual function snowblower and lawn mower model can be overwhelming with the multitude of options available. Here are three top models worth considering:

Model X

Model X from Brand A is a powerful and versatile dual function machine designed for efficient snow removal and lawn mowing. It features a wide clearing width, easy cutting height adjustment, and excellent maneuverability. With its durable construction and user-friendly design, Model X is a popular choice among homeowners.

Model Y

Model Y from Brand B is a reliable and robust dual function snowblower and lawn mower. It boasts a powerful engine, exceptional traction, and a range of convenient features. Model Y is known for its high performance in various weather conditions and terrains, making it a favored option for those with larger properties.

Model Z

Model Z from Brand C stands out with its advanced technology and eco-friendly design. It offers efficient snow removal and lawn mowing capabilities, along with features such as automatic blade adjustment and smart navigation. Model Z’s durability, versatility, and modern features make it a top choice among tech-savvy users.

How to Choose the Right Dual Function Snowblower and Lawn Mower

Choosing the right dual function snowblower and lawn mower requires careful consideration of your specific needs and property characteristics. Here are some factors to help you make an informed decision:

Evaluate Your Needs

Assess the specific snow removal and lawn mowing requirements for your property. Consider factors such as the average snowfall, lawn size, terrain, and any unique challenges your property may present. Understanding your needs will guide you towards the most suitable dual function machine.

Consider Your Property Size and Terrain

If you have a small property with flat terrain, a compact and lightweight dual function machine may suffice. However, larger properties or properties with uneven terrain may require a more powerful and robust machine. Consider the size and specific characteristics of your property to ensure the machine can handle the workload.

Read Reviews and Compare Features

Take the time to read reviews and compare the features and performance of different dual function machines. Look for reviews from other homeowners with similar needs and property characteristics. Consider feedback on durability, ease of use, performance, and any potential issues users may have encountered.

Test the Machine before Purchase

Whenever possible, try to test the dual function machine before making a final purchase decision. Visit local dealerships or attend trade shows where you can see the machines in action. This hands-on experience will give you a better sense of the machine’s performance, maneuverability, and overall suitability for your needs.

Tips for Using a Dual Function Snowblower and Lawn Mower

Using a dual function snowblower and lawn mower efficiently and safely is crucial for optimal results. Here are some tips to help you make the most out of your machine:

Prepare Your Lawn and Snow for the Machine

Before using the machine, make sure your lawn is free of obstacles, debris, and large rocks that can damage the blades. Similarly, clear the snow from your driveway and pathways to avoid excess strain on the snowblower. Proper preparation ensures smoother operation and reduces the risk of damage.

Follow Safety Precautions

Always follow the manufacturer’s safety guidelines when using a dual function snowblower and lawn mower. Wear appropriate protective gear, such as gloves, safety goggles, and sturdy footwear. Keep bystanders at a safe distance and be aware of any potential hazards or obstacles in your surroundings. Safety should always be a top priority.

Maintain the Machine Regularly

Regular maintenance is essential for keeping your dual function machine in top condition. Follow the manufacturer’s maintenance schedule, which typically includes oil changes, filter replacements, and blade sharpening. Inspect the machine for any loose or damaged parts before each use. Proper maintenance will prolong the machine’s lifespan and ensure consistent performance.

Store the Machine Properly

When not in use, store your dual function snowblower and lawn mower in a clean and dry location. Protect it from extreme temperatures and moisture that can cause damage. Take the necessary precautions to prevent unauthorized access and ensure the machine is securely stored. This will help extend its life and maintain its overall performance.

Conclusion

Dual function snowblowers and lawn mowers provide a convenient and cost-effective solution for homeowners who want to tackle snow removal and lawn maintenance tasks with a single machine. While these machines offer numerous advantages, it’s important to consider the limitations and potential drawbacks as well.

When choosing a dual function machine, carefully evaluate important features such as power source, clearing width, traction, cutting height adjustment, blade and auger design, collection and discharge methods, accessories, ease of use, maintenance needs, and overall value for money. Consider reputable brands like Brand A, Brand B, and Brand C, and explore top models such as Model X, Model Y, and Model Z.

To make the right choice, evaluate your specific needs, property size, and terrain. Read reviews and test the machine before making a final decision. Once you have your dual function snowblower and lawn mower, follow safety precautions, maintain it regularly, and store it properly to ensure optimal performance and longevity.

By carefully considering these factors and following the tips provided, you can confidently choose and effectively use a dual function snowblower and lawn mower that meets your requirements, making winter snow removal and summer lawn maintenance a breeze.

How Do I Replace The Belts On My Snowblower?

So, you’ve found yourself facing the task of replacing the belts on your snowblower, huh? Well, fear not, because we’ve got you covered! In this article, we’ll walk you through the step-by-step process of replacing those worn-out belts and getting your snowblower up and running smoothly again in no time. Whether you’re a seasoned DIY enthusiast or a novice in the world of machine maintenance, we’ve got the tips and tricks you need to tackle this task with confidence. So, let’s get started and make sure you’re well-equipped to handle any snowy surprises that come your way!

How Do I Replace The Belts On My Snowblower?

Preparing for Belt Replacement

Before you embark on replacing the belts on your snowblower, it is important to gather the necessary tools. You will need a socket set or wrench, a belt tension gauge, and possibly a screwdriver or pliers, depending on the model of your snowblower. It’s also a good idea to have a clean cloth or rag on hand to wipe away any dirt or debris you may encounter during the process.

Safety should always be a top priority when working on any machinery, and replacing the belts on your snowblower is no exception. Ensure that the snowblower is turned off and disconnected from the power source before beginning any work. This will prevent any accidental starts or injuries while handling the belts.

Another crucial step in preparing for belt replacement is to identify the belt type and model number. Different snowblowers may require different types of belts, so it is important to know the specific belt size and model number for your particular machine. This information can usually be found in the snowblower’s manual or on the manufacturer’s website. Having this information handy will ensure that you purchase the correct replacement belts for your snowblower.

Removing the Old Belts

Now that you have gathered the necessary tools and taken the appropriate safety precautions, it is time to remove the old belts from your snowblower. Start by turning off the snowblower and disconnecting it from the power source. This will prevent any accidents while working in the belt area.

To access the belt area, you may need to remove any protective covers or panels that are in place. Use a socket set or wrench to carefully remove the screws or bolts that are holding the covers in place. Once the covers are removed, you should have a clear view of the old belts.

To remove the old belts, you will need to loosen and release the tension that is holding them in place. This can usually be done by either adjusting the tensioner pulley or loosening the mounting bolts. Consult your snowblower’s manual or manufacturer’s instructions for specific guidance on how to release the tension and remove the old belts.

Installing the New Belts

With the old belts removed, it is now time to install the new belts onto your snowblower. First and foremost, ensure that you have obtained the correct replacement belts for your particular snowblower model. Using incorrect belts can damage your snowblower and may not provide the proper functioning.

To begin installing the new belts, thread them onto the pulleys in the designated path. Take care to follow the specific routing diagram provided in your snowblower’s manual or manufacturer’s instructions. This will ensure that the belts are correctly aligned and properly engaged with the pulleys.

Once the new belts are threaded onto the pulleys, it is important to tighten them to the appropriate tension. Using a belt tension gauge, check the tension of the new belts and adjust as necessary. Proper belt tension is crucial for optimal performance and longevity of the belts. Additionally, ensure that the belts are properly aligned and centered on the pulleys for smooth operation.

How Do I Replace The Belts On My Snowblower?

Performing Belt Tension Adjustment

After installing the new belts and ensuring proper alignment, it is time to check the tension and make any necessary adjustments. Using a belt tension gauge, measure the tension of the new belts. It is important to refer to your snowblower’s manual for the specific tension requirements, as these can vary depending on the make and model.

If the tension of the belts is not within the specified range, adjustments will need to be made. This can typically be done by adjusting the position of the tensioner pulley or tightening the mounting bolts. Take caution while making adjustments and ensure that the belts are kept aligned and centered on the pulleys.

Proper belt tension is essential for the snowblower’s performance and longevity. It allows for smooth operation and prevents excessive wear and tear on the belts. It is important to regularly check and adjust the belt tension to ensure optimal functioning of your snowblower.

Testing the Snowblower

After replacing the belts and adjusting their tension, it is time to test the snowblower. Reconnect the snowblower to the power source and turn it on. Engage the belts and closely observe their performance. The belts should run smoothly and without any slipping or unnecessary noise.

If you notice any issues during the test, such as slipping or excessive noise, you may need to make final adjustments to the belt tension or alignment. Refer to your snowblower’s manual or manufacturer’s instructions for guidance on how to make these adjustments.

It is important to note that proper belt tension and alignment are crucial for the snowblower’s performance. A misaligned or poorly tensioned belt can lead to decreased snowblowing efficiency and may cause further damage to the snowblower. Take the time to thoroughly test and make any necessary adjustments to ensure optimal functioning.

Troubleshooting Belt Issues

In some cases, even after replacing the belts and making necessary adjustments, issues may arise. It is important to be familiar with common belt problems and how to troubleshoot them.

Some common belt problems include slipping, excessive wear, or breakage. If you encounter any of these issues, it is important to inspect the belt-related components for damage. Check the pulleys for any signs of wear or damage and ensure that they are clean and free from debris.

If you are unsure about the cause of the belt issue or if the problem persists after troubleshooting, it may be necessary to seek professional assistance. A trained technician will have the expertise to diagnose and resolve the problem effectively.

Maintaining Belt Longevity

To ensure the longevity of the belts on your snowblower, it is important to regularly inspect them for wear. Check for any signs of fraying, cracking, or excessive wear. If you notice any damage, it is recommended to replace the belts as soon as possible.

Additionally, it is important to regularly clean the pulleys and remove any debris or buildup that may accumulate over time. Debris can cause the belts to slip or wear unevenly, leading to decreased performance and potential damage.

Proper storage and handling of the snowblower are also crucial for maintaining belt longevity. Store the snowblower in a clean and dry area, away from extreme temperatures or moisture. Avoid placing heavy objects on top of the snowblower or storing it in a way that may cause strain on the belts.

Safety Considerations

When working on your snowblower, always prioritize safety. Use personal protective equipment, such as safety goggles and gloves, to protect yourself from any potential hazards. Additionally, avoid working on a running snowblower to prevent any accidents or injuries. Always follow the manufacturer’s instructions and warnings to ensure safe and proper use of your snowblower.

Common Belt Replacement Mistakes

While replacing the belts on your snowblower, it is important to avoid common mistakes that may negatively impact the performance or longevity of the belts. Some common mistakes include using incorrect belt types or sizes, not applying sufficient tension to the belts, and improper belt alignment.

Using incorrect belt types or sizes can lead to decreased performance and potential damage to the snowblower. Always ensure that you purchase the correct replacement belts for your specific snowblower model.

Insufficient belt tension can cause slipping or improper operation of the snowblower. Be sure to measure and adjust the tension of the belts according to the manufacturer’s specifications to ensure proper functioning.

Improper belt alignment can also negatively affect the snowblower’s performance. Make sure that the belts are properly aligned and centered on the pulleys to prevent any unnecessary wear or damage.

Conclusion

Replacing the belts on your snowblower is a task that can be accomplished with the right tools, knowledge, and safety precautions. By following the steps outlined in this article, you can successfully remove the old belts, install the new ones, adjust the tension, and ensure proper alignment. Regular maintenance and inspection of the belts will help prolong their longevity and keep your snowblower running smoothly. Remember to always prioritize safety and seek professional assistance if needed. With proper care and attention, your snowblower belts will continue to perform effectively, allowing you to conquer the winter weather with ease.

Can I Use A Snowblower On Artificial Turf?

Imagine waking up to a winter wonderland, ready to face the day and conquer the snow-covered landscape. But as you look out the window, you realize that your beautiful artificial turf is hidden beneath a thick blanket of snow. Panic sets in as you wonder, “Can I use a snowblower on artificial turf?” Before you break out the trusty snow-clearing machine, it’s crucial to understand the potential impact it may have on your pristine lawn. While the convenience of a snowblower may be tempting, it’s essential to tread carefully to ensure the longevity and aesthetics of your artificial turf.

Can I Use A Snowblower On Artificial Turf?

This image is property of returf.com.

Understanding Artificial Turf

Artificial turf, also known as synthetic grass, is a man-made alternative to natural grass. It is made using synthetic materials such as polyethylene, polypropylene, or nylon, and is designed to resemble the look and feel of real grass. Artificial turf has become increasingly popular in residential and commercial settings due to its low maintenance requirements and ability to withstand heavy foot traffic. However, it is important to understand the characteristics of artificial turf before deciding whether or not to use a snowblower on it.

Types of Artificial Turf

There are different types of artificial turf available, each with its own specific characteristics and suitability for various purposes. Some types are designed for sports fields, while others are more suitable for landscaping applications. When considering the use of a snowblower on artificial turf, it is important to know the specifics of the type of turf you have installed. This information can typically be obtained from the manufacturer or the installer of the turf.

The Function of a Snowblower

A snowblower is a machine that is used to remove snow from driveways, sidewalks, and other surfaces. It works by using an auger to scoop up the snow and a chute to blow it to the side. Snowblowers are commonly used during the winter months to clear away heavy snowfall, making it easier to navigate and access different areas. While snowblowers are highly effective at removing snow, they may not be suitable for use on all surfaces.

Pros and Cons of Using a Snowblower on Artificial Turf

Using a snowblower on artificial turf has both advantages and disadvantages. One of the main advantages is that it can quickly and effectively remove large amounts of snow from the turf, allowing you to clear the area and use it as desired. Snowblowers also offer convenience and require minimal physical effort compared to manually shoveling snow. However, there are also potential drawbacks to using a snowblower on artificial turf.

One important consideration is that snowblowers generate a significant amount of heat, which can potentially melt the artificial turf. This is especially true if the turf is made from materials that are sensitive to heat or have a low melting point. Additionally, the auger and chute of the snowblower can cause friction and physical damage to the turf fibers, leading to potential wear and tear over time. It is crucial to weigh these pros and cons before deciding to use a snowblower on artificial turf.

Can I Use A Snowblower On Artificial Turf?

This image is property of returf.com.

Considerations Before Using a Snowblower on Artificial Turf

Before using a snowblower on artificial turf, there are several important considerations to keep in mind. Firstly, it is essential to check the manufacturer’s guidelines and recommendations regarding the use of snowblowers on their specific turf products. Some manufacturers may explicitly advise against using a snowblower, while others may provide guidelines on how to minimize potential damage.

Another consideration is the depth of the snow. Snowblowers are typically designed to handle certain snow depths, and using them on excessive or compacted snow can put unnecessary strain on the machine and increase the risk of damaging the turf. It is advisable to clear any excessively deep or compacted snow using alternative methods, such as a snow shovel, before resorting to a snowblower.

The Impact of a Snowblower on Artificial Turf

Using a snowblower on artificial turf can have both immediate and long-term impacts on the integrity of the turf. The immediate impact may include the physical damage caused by the auger and chute coming into contact with the turf fibers. This can result in tearing, fraying, or loosening of the fibers, leading to a compromised appearance and functionality of the turf.

In the long term, the heat generated by the snowblower can cause the turf to melt or deform, especially if it is made from materials that are sensitive to heat. This can lead to the formation of uneven surfaces and potential tripping hazards. Additionally, repeated use of a snowblower on the same areas of the turf can cause accelerated wear and tear, reducing the lifespan of the turf.

Can I Use A Snowblower On Artificial Turf?

This image is property of returf.com.

Potential Damages Caused by Snowblower Usage

Using a snowblower on artificial turf can potentially cause various damages to the turf, depending on factors such as the type of turf, the condition of the turf, and the method of snowblower operation. Some common damages associated with snowblower usage include:

  1. Fiber damage: The auger and chute of the snowblower can cause the turf fibers to become torn, frayed, or detached, leading to a less aesthetically pleasing appearance.

  2. Matting and compacting: The weight and pressure exerted by the snowblower can cause the turf fibers to become matted and compacted, resulting in an uneven and flattened appearance.

  3. Melting or deformations: The heat generated by the snowblower can melt or deform the artificial turf, especially if the materials used in the turf have a low melting point. This can result in permanent damage and deformation of the turf.

  4. Wear and tear: Repeated and frequent use of a snowblower on the same areas of the turf can accelerate wear and tear, causing the turf to deteriorate more quickly and potentially requiring costly repairs or replacements.

It is crucial to assess the potential damages and risks before deciding to use a snowblower on artificial turf.

Alternatives to Using a Snowblower on Artificial Turf

If you have artificial turf and are concerned about the potential damages caused by using a snowblower, there are alternative methods for snow removal that can be considered. One option is to use a plastic snow shovel or a push broom to manually remove the snow from the turf. This method requires more physical effort but eliminates the risks associated with using a snowblower.

Another alternative is to use a snowmelt system, which involves installing heating elements beneath the turf to melt the snow. This method can be more expensive and requires professional installation but eliminates the need for manual snow removal and the potential damages caused by snowblower usage.

Can I Use A Snowblower On Artificial Turf?

This image is property of themotzgroup.com.

Maintenance and Care for Artificial Turf during Winter

Regardless of the method chosen for snow removal, it is important to properly maintain and care for artificial turf during the winter months. Here are some tips:

  1. Regular brushing: Use a soft-bristle brush or leaf blower to remove debris and prevent compaction of the turf fibers. This will help maintain the appearance and functionality of the turf.

  2. Prompt snow removal: Remove snow from the turf as soon as possible to prevent accumulation and potential damage. Avoid using metal or sharp-edged tools that can scratch or tear the turf.

  3. Avoid salt and de-icers: While it may be tempting to use salt or de-icing chemicals on artificial turf, they can cause damage to the turf fibers and the infill material. Opt for alternative ice melt products that are specifically designed for use on synthetic surfaces.

  4. Regular inspections: Periodically inspect the turf for signs of damage or wear, such as frayed fibers or uneven patches. Address any issues promptly to prevent further damage.

Conclusion

In conclusion, the use of a snowblower on artificial turf can potentially cause damages and compromise the integrity of the turf. The heat generated by the snowblower, along with the physical impact of the auger and chute, can lead to melting, tearing, and accelerated wear and tear. It is important to carefully consider the type of artificial turf, manufacturer’s guidelines, and the depth of the snow before deciding whether to use a snowblower.

If you are concerned about potential damages, alternative methods such as manual snow removal with a shovel or the installation of a snowmelt system can be considered. Regardless of the chosen method, proper maintenance and care are essential to preserve the lifespan and appearance of the artificial turf during the winter months. Regular brushing, prompt snow removal, and avoiding the use of salt or de-icers can help protect and maintain the longevity of the turf.

Can I Use A Snowblower On Artificial Turf?

This image is property of snopusher.com.

How Do I Determine The Horsepower Of My Snowblower?

So, you’re standing in front of your snowblower, ready to tackle the winter white that’s gathered on your driveway. But you can’t help but wonder, just how powerful is this machine? How do I determine the horsepower of my snowblower? Well, fear not, because we’ve got all the answers you need. In this article, we’ll guide you through the simple steps to determine the horsepower of your snowblower, allowing you to confidently face any winter storm that comes your way. No more wondering if your machine is up to the task – with our help, you’ll know exactly what you’re working with.

What is horsepower?

Horsepower is a unit of measurement used to indicate the power or strength of an engine, specifically in this case, the power of a snowblower. It is a term that originates from the days when steam engines were commonly used, and it refers to the amount of work that an engine can do in a given amount of time. In simple terms, horsepower represents how quickly and efficiently an engine can perform tasks such as clearing snow.

Definition of horsepower

Horsepower is defined as the amount of power required to lift 550 pounds one foot in one second, or the equivalent of 746 watts. This standardized measurement allows consumers to compare the power outputs of different machines, including snowblowers. It serves as a reliable indicator of the performance capabilities and efficiency of the machine.

How Do I Determine The Horsepower Of My Snowblower?

This image is property of img.hobbyfarms.com.

Horsepower in relation to snowblowers

In the context of snowblowers, horsepower measures the machine’s ability to perform tasks such as clearing snow and throwing it away. The higher the horsepower rating of a snowblower, the more power it will have to tackle heavy or deep snow, and the smoother and faster the snow-clearing process will be. A snowblower with higher horsepower can handle larger amounts of snow, making it suitable for larger driveways or areas that experience heavy snowfall.

Why is horsepower important for a snowblower?

Power to clear snow

Snowblowers with higher horsepower ratings have more power to effectively break up and clear heavy or compacted snow. This is especially important when dealing with wet, heavy snow that can be more challenging to remove. Higher horsepower ensures that the snowblower can effectively handle these demanding conditions without straining the engine.

Ability to throw snow

Another crucial aspect of horsepower is its impact on the snowblower’s ability to throw snow. Higher horsepower allows the snowblower to propel snow a greater distance with more force. This is particularly beneficial when you need to throw snow to a specific location, such as away from walkways or driveways, instead of just pushing it to the side.

Type and depth of snow

The amount of horsepower you need for a snowblower also depends on the type and depth of snow you typically encounter. For light, fluffy snow, a snowblower with lower horsepower may suffice. However, if you often deal with heavy, wet snow or regularly experience deep snowfalls, a higher horsepower snowblower will be more effective and efficient in removing the snow.

How Do I Determine The Horsepower Of My Snowblower?

This image is property of img.hunkercdn.com.

Where to find the horsepower rating?

Determining the horsepower rating of a snowblower is relatively straightforward. The information can typically be found in three main places:

1. Manufacturer’s label

The manufacturer’s label, usually located on the body or engine of the snowblower, provides important specifications and details about the machine. Look for the specific horsepower rating mentioned on this label.

2. Product manual

The product manual, which is often provided by the manufacturer, contains valuable information about the snowblower, including its horsepower rating. Check the manual for the exact horsepower measurement of your snowblower.

3. Website or online resources

If you don’t have access to the manufacturer’s label or product manual, you can usually find the information you need on the manufacturer’s website or other online resources. Many manufacturers publish specifications and details on their websites, allowing you to easily find the horsepower rating of their snowblower models.

Calculating snowblower horsepower

Determining the horsepower of a snowblower can also be done through calculation, although this method requires some additional information and understanding of the machine’s specifications. Two common approaches to calculate snowblower horsepower are:

1. Using engine displacement

Engine displacement refers to the total volume of all the cylinders in the snowblower’s engine. To calculate horsepower based on engine displacement, you would need to know the specific formula or conversion factor provided by the manufacturer.

2. Using RPM and torque

Another method involves using measurements of the snowblower’s engine’s rotational speed (RPM) and torque. Torque, a measure of an engine’s rotational force, can be used in combination with RPM to calculate horsepower. However, this method often requires more technical knowledge and expertise.

It is important to note that calculating horsepower manually may not provide the exact horsepower rating specified by the manufacturer. It is always best to rely on the manufacturer’s provided horsepower rating or consult their customer service for accurate information.

How Do I Determine The Horsepower Of My Snowblower?

This image is property of s7.sears.com.

Other factors to consider

While horsepower is an essential factor to consider when selecting a snowblower, there are other crucial aspects that can impact its overall performance and suitability for your needs:

1. Brand reputation and reliability

Choosing a snowblower from a reputable brand known for producing quality machines can provide you with peace of mind and confidence in the product’s performance and durability. Research different brands, read customer reviews, and take into account their reputations when making a purchasing decision.

2. Build quality and construction

The build quality and construction of a snowblower can greatly affect its performance and longevity. Look for durable materials, solid construction, and robust components. Pay attention to features such as reinforced augers, sturdy housing, and a strong frame, as these contribute to the snowblower’s ability to handle various conditions.

3. Additional features and attachments

Consider the additional features and attachments that come with the snowblower. Features such as electric start, heated handles, headlights, and adjustable chutes can enhance convenience and ease of use. Additionally, some snowblowers offer attachments like snow cabs or drift cutters, which can be beneficial in specific situations.

Determining the appropriate horsepower for your needs

When selecting a snowblower, it is important to determine the appropriate horsepower for your specific needs and circumstances. Consider the following factors:

1. Size of your driveway or area to clear

The size of the area you need to clear plays a significant role in determining the horsepower you require. Larger areas will generally require higher horsepower to efficiently and effectively clear the snow without straining the machine.

2. Average annual snowfall

The average amount of snowfall in your area also affects the horsepower needed. Areas with heavier snowfall will require higher horsepower snowblowers to handle the increased volume of snow.

3. Type of snow and terrain

Consider the type of snow you typically encounter. Wet, heavy snow, or snow with compacted ice will require more power to clear effectively. Similarly, if your terrain is hilly or uneven, you may need more horsepower to tackle the additional challenges.

4. Personal preferences and physical abilities

It is important to consider your own preferences and physical abilities when choosing a snowblower. If you prefer a quicker snow-clearing process and want a machine that can handle any snowfall, opting for a higher horsepower snowblower may be ideal. Additionally, individuals with physical limitations or those who prefer lighter machinery may opt for lower horsepower models.

How Do I Determine The Horsepower Of My Snowblower?

This image is property of i.ytimg.com.

The relationship between horsepower and clearing width

Understanding clearing width

The clearing width of a snowblower refers to the width of snow that the machine can clear in a single pass. It determines how much area you can clear in one sweep. The wider the clearing width, the faster you can remove snow from your driveway or other areas.

Relation to horsepower

While horsepower is not directly linked to the clearing width, it indirectly influences the snowblower’s capacity to handle wider clearing widths. Higher horsepower snowblowers often have wider clearing widths, allowing for more efficient snow removal. However, it is still essential to consider other factors, such as the snowblower’s design and efficiency, to ensure optimal performance.

Common snowblower horsepower ranges

Snowblowers come in various horsepower ranges, each suited to different needs and conditions. The three main horsepower ranges are:

1. Low horsepower range

Snowblowers in the low horsepower range typically have ratings between 4 to 8 horsepower. These are suitable for smaller areas with lighter snowfall or for users who prefer a compact and maneuverable machine. They can effectively clear light to moderate snow conditions.

2. Medium horsepower range

The medium horsepower range typically falls between 9 to 13 horsepower. Machines in this range offer greater power and efficiency than their low horsepower counterparts, making them suitable for areas with moderate snowfall and larger driveways. Medium horsepower snowblowers can handle wetter and deeper snow more effectively.

3. High horsepower range

High horsepower snowblowers, often with ratings above 14 horsepower, are designed to handle heavy snowfall and challenging conditions. These machines offer exceptional performance and are suitable for larger areas or properties that experience frequent heavy snowfall. They have the power to handle significant snow depths and throw the snow long distances.

How Do I Determine The Horsepower Of My Snowblower?

This image is property of assets.northerntool.com.

Final thoughts

Understanding the importance of horsepower in a snowblower is crucial for ensuring that you select the right machine for your needs. Consider factors such as the power to clear snow, ability to throw snow, and the type and depth of snow you typically encounter. Additionally, take into account the horsepower rating provided by the manufacturer, as well as other factors like brand reputation, build quality, and any additional features or attachments. By considering these elements, you can confidently choose a snowblower that is not only powerful but also suited to your specific requirements and preferences.