Tag Archives: Storage

How Do I Store My Snowblower During The Off-season?

If you’re a proud owner of a snowblower, you know how invaluable it is in clearing your driveway and walkways during the winter months. But as the snow melts away and spring arrives, you might find yourself wondering, “How do I store my snowblower during the off-season?” After all, proper storage is essential to ensure your snowblower remains in optimal condition and is ready to tackle the next winter season without any hiccups. In this article, we’ll provide you with some practical tips on how to store your snowblower effectively, so that it’s protected and ready to go when the snow starts falling again.

How Do I Store My Snowblower During The Off-season?

Prepare the Snowblower

Before you store your snowblower for the off-season, it’s important to properly prepare it to ensure its longevity and effectiveness when you need it again. Here are some steps you can follow to prepare your snowblower for storage:

Clean the Snowblower

Start by thoroughly cleaning your snowblower. Remove any dirt, debris, or ice that may have accumulated during the winter season. Use a brush or a scraper to clean the chute, auger, and impeller. You can also use a mild detergent and water to remove any stubborn stains or grime. Cleaning your snowblower not only helps prevent rust and corrosion but also ensures smooth operation when you use it again.

Drain the Fuel

To prevent the fuel from deteriorating and damaging your snowblower’s engine during storage, it’s important to drain the fuel tank. First, make sure the engine is cool and turn off the fuel valve. Then, start the snowblower and let it run until it runs out of fuel. This step is crucial because leftover fuel can gum up the carburetor and clog the fuel lines. Once the fuel is drained, you can safely proceed with the other preparation steps.

Inspect and Replace Parts

Before storing your snowblower, it’s essential to inspect all the parts and replace any that are worn or damaged. Check the auger blades, scraper bar, belts, and cables for any signs of wear and tear. If you notice any cracks, fraying, or significant deterioration, it’s best to replace these parts before storing the snowblower. This way, you’ll be ready to tackle the next winter season without any unexpected breakdowns or malfunctions.

Check the Belts and Cables

While inspecting the parts, pay close attention to the belts and cables of your snowblower. These components are crucial for the proper functioning of the machine. Ensure that the belts are properly tensioned and not loose or worn out. Check the cables for any signs of damage or fraying. If you notice any issues, make the necessary adjustments or replacements. This will help prevent any mechanical issues and ensure your snowblower is in optimal condition when you need to use it again.

Prepare the Engine

In addition to preparing the snowblower itself, it’s equally important to prepare the engine properly. Taking care of the engine during the off-season will help extend its lifespan and ensure reliable performance in the future. Here are some steps you can take to prepare the engine:

Run the Engine

Before storing your snowblower, it’s recommended to run the engine for a short period. This helps circulate any remaining fuel in the system and ensures that there are no clogs or blockages. It also helps keep the engine components well-lubricated during storage. Simply start the engine and let it run for a few minutes. This quick step can make a significant difference in the overall performance of your snowblower when you take it out of storage.

Change the Oil

Changing the oil in your snowblower’s engine is an important step in its maintenance routine, especially before storage. Over time, oil can become contaminated with debris and lose its effectiveness. Before storing the snowblower, check the oil level and quality. If it appears dirty or low, it’s best to change it. Follow the manufacturer’s instructions on how to change the oil properly. Fresh oil will protect the engine during storage and ensure it’s ready for use in the next winter season.

Remove the Spark Plug

Another crucial step in preparing the engine for storage is removing the spark plug. This prevents accidental starting and keeps the engine from firing up when you don’t intend to use it. Start by disconnecting the spark plug wire and removing the spark plug using a spark plug wrench. Inspect the spark plug for any signs of damage or excessive wear. Consider replacing it with a new one if needed. Once the spark plug is removed, you can safely proceed with the other steps in preparing your snowblower for storage.

Fogging the Engine

Fogging the engine is an optional but highly recommended step to protect its internal components during storage. Fogging involves treating the engine with a fogging oil or a rust preventive spray. This coating helps prevent corrosion by creating a protective barrier. Follow the manufacturer’s instructions on how to properly fog the engine. This step will give you added peace of mind and help maintain the engine’s performance and longevity.

Protect the Snowblower

Now that your snowblower and engine are ready for storage, it’s important to take precautions to protect them from potential damage. Here are some steps you can take to ensure the safety and longevity of your equipment during the off-season:

Cover the Snowblower

Investing in a high-quality cover for your snowblower is a wise decision. A cover will protect your equipment from dust, moisture, and other elements that could potentially lead to damage or rust. Look for a cover specifically designed for snowblowers, ensuring it fits snugly and provides full protection. Covering your snowblower will also help keep it clean and ready for use when winter arrives again.

Store in a Dry Location

Choosing the right storage location is crucial to ensure the longevity of your snowblower. Opt for a dry area with adequate ventilation. Moisture can lead to rust and corrosion, so avoid storing your snowblower in damp basements or sheds prone to leaks. A well-ventilated, dry area, such as a garage or a shed with proper insulation, will help keep your equipment in excellent condition during the off-season.

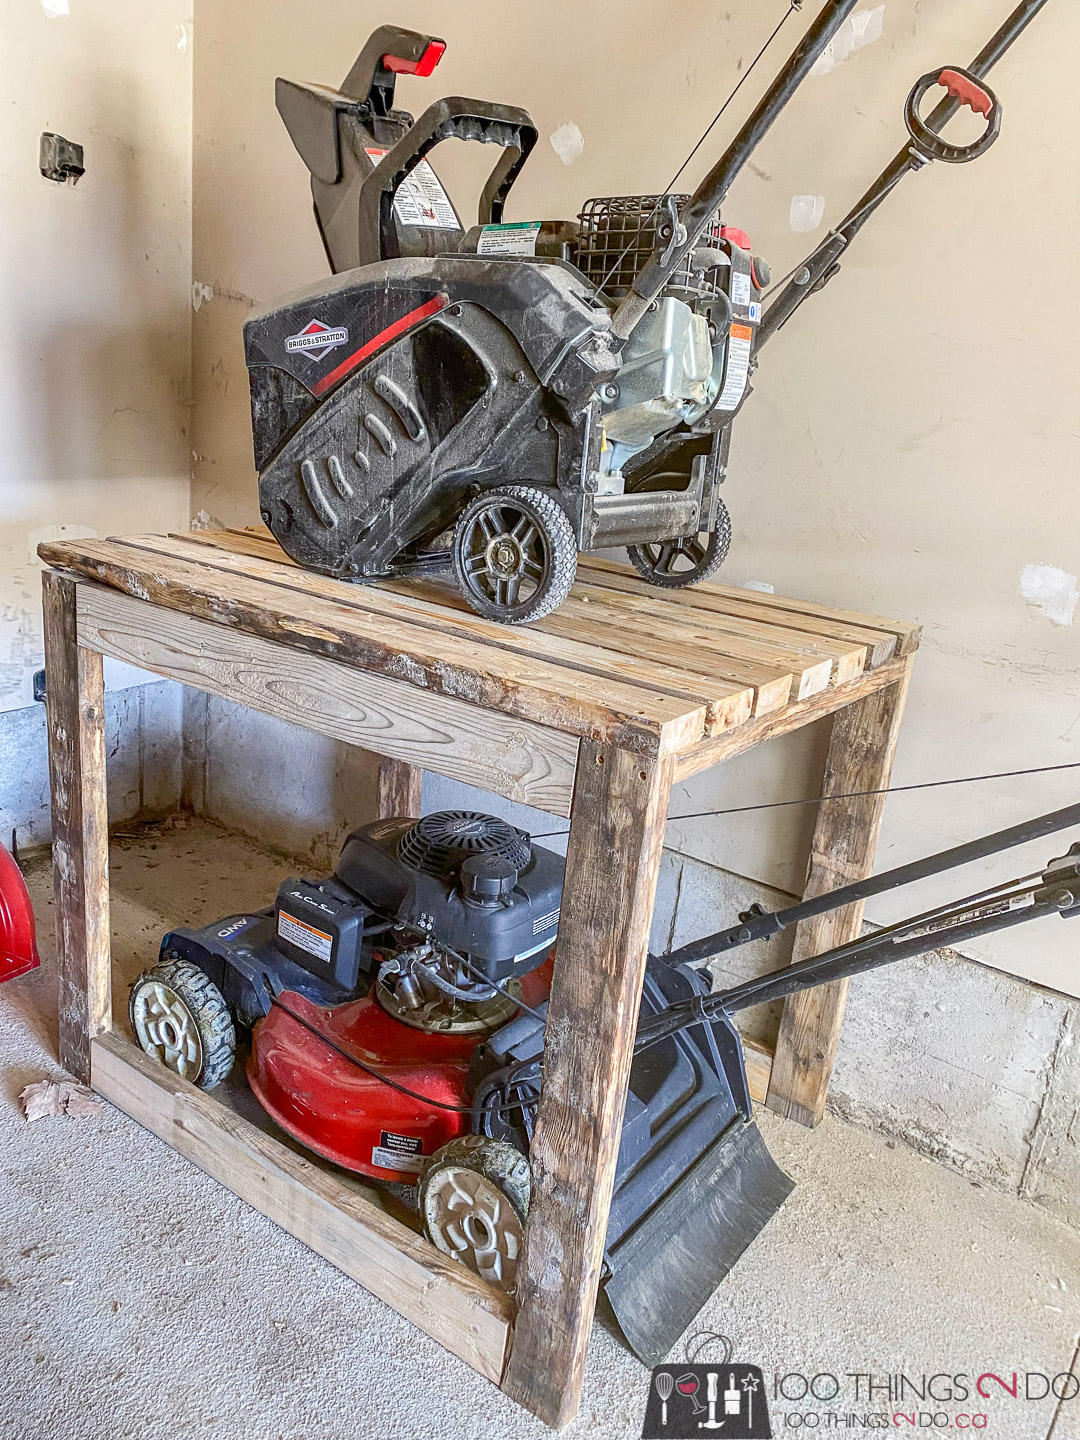
Elevate the Snowblower

To further protect your snowblower, consider elevating it off the ground. Placing a wooden or plastic pallet underneath the machine helps prevent moisture buildup and potential damage from contact with the ground. Elevating the snowblower also makes it easier to access and keeps it in a secure position during storage.

Use Stabilizers

Using fuel stabilizers is highly recommended to prevent fuel deterioration and engine damage during storage. Stabilizers help keep the fuel stable, preventing it from turning into varnish or gum that can clog the carburetor or fuel system. Look for a fuel stabilizer specifically designed for small engines and follow the instructions on the packaging. Adding a stabilizer to your fuel tank before storing the snowblower will ensure its smooth operation when the next winter season rolls around.

Maintain the Battery

If your snowblower is equipped with a battery, proper maintenance during the off-season is essential to ensure its longevity and performance. Here’s how you can take care of your snowblower’s battery:

Remove the Battery

Before storing your snowblower, it’s important to remove the battery. Disconnect the battery cables, starting with the negative (-) cable, followed by the positive (+) cable. Be sure to wear gloves and eye protection when handling the battery. Removing the battery prevents it from discharging or freezing during the off-season, which can damage the battery’s cells and reduce its lifespan.

Clean the Battery

While the battery is removed, take the opportunity to clean it. Use a battery cleaning solution or a mixture of baking soda and water to clean the battery terminals and cables. This will remove any accumulated dirt or corrosion that could interfere with the battery’s performance. Gently scrub the terminals with a wire brush or a battery terminal cleaner. Rinse with clean water and let the battery air dry completely before storage.

Store in a Cool Place

Proper storage of the battery is crucial to maintain its capacity. Aim to store the battery in a cool, dry place, away from direct sunlight. Extreme temperatures can negatively affect the battery’s performance and lifespan. Find a location where the battery won’t be exposed to freezing temperatures or excessive heat, such as a basement or a utility room.

Charge the Battery

Before storing the battery, it’s essential to fully charge it. Use a battery charger or a maintainer specifically designed for small engine batteries. Follow the manufacturer’s instructions for charging, ensuring you choose the correct voltage and amperage settings. Charging the battery to its full capacity before storage will help maintain its charge and prevent it from discharging completely during the off-season.

How Do I Store My Snowblower During The Off-season?

Store the Accessories

In addition to prepping the snowblower itself, don’t forget to properly store the accessories to keep them in top condition. Here are some steps you can take to store the snowblower accessories:

Clean and Lubricate the Chute

Take some time to clean and lubricate the snow blower chute before storage. Remove any snow, ice, or debris that may have accumulated. Use a brush or compressed air to ensure it’s completely clean. Apply a light coating of lubrication spray to prevent rust and ensure smooth operation when you use it in the next winter season.

Detach and Store Snowblower Skids

Snowblower skids are critical for maintaining proper clearance and preventing damage to your snowblower. Before storing your snowblower, detach the skids and clean them thoroughly. Check for any signs of wear or damage and replace if necessary. Store the skids in a safe and dry location to prevent them from getting lost or damaged during the off-season.

Stow Auger and Drive Belts

Properly storing the auger and drive belts helps maintain their integrity and prevent deterioration during storage. Inspect these belts for any signs of wear, cracking, or fraying. If you notice any issues, it’s best to replace them before storage. Once you’ve inspected, clean the belts by removing any debris or residue. Coil them neatly and store them in a dry location, away from direct sunlight.

Secure the Stabilizer Bar

The stabilizer bar keeps the snowblower stable and aligned during operation. It’s important to store it securely to prevent any damage or misalignment. Detach the stabilizer bar, inspect it for any signs of wear or damage, and clean it thoroughly. Store the bar in a safe place, away from any potential harm or misplacement. Ensuring the stabilizer bar is properly stored will maintain its effectiveness and reliability when you need it again.

Ensure Proper Ventilation

To ensure your snowblower continues to function optimally, proper ventilation is essential. Here are some steps you can take to ensure proper ventilation:

Keep the Air Filter Clean

A clean air filter is crucial for the smooth operation of your snowblower. Make it a habit to regularly inspect and clean the air filter. If the air filter appears dirty or clogged, gently remove it and clean it using compressed air or by tapping it against a surface. A clean air filter allows for proper airflow and prevents debris from entering the engine, ensuring optimal performance.

Check the Ventilation Vents

Inspect the ventilation vents of your snowblower for any obstructions or blockages. These vents are responsible for allowing air to flow through the machine, preventing overheating. Use a brush or compressed air to remove any debris or built-up dirt. Ensuring the ventilation vents are clean and clear will help maintain proper airflow and prevent any potential issues during usage.

Clean the Cooling Fins

The cooling fins on your snowblower’s engine are designed to dissipate heat and keep the engine running at an optimal temperature. Over time, these fins can become clogged with debris, affecting their efficiency. Regularly inspect the cooling fins and gently clean them using a soft brush or compressed air to remove any dirt or buildup. This will help ensure that the engine stays cool and runs smoothly during operation.

Inspect and Clear the Exhaust

A clear and unobstructed exhaust system is essential for the proper functioning of your snowblower. Check the exhaust outlet and muffler for any debris, dirt, or blockages. Use a brush or compressed air to remove any obstructions and ensure the exhaust can flow freely. A clear exhaust system prevents the accumulation of harmful gases and guarantees the efficient operation of your snowblower.

Prevent Pest and Rodent Damage

During the off-season, pests and rodents can find their way into your storage area and cause damage to your snowblower. Taking preventive measures can help protect your equipment. Here are some steps you can take:

Remove Organic Debris

Before storing your snowblower, make sure the surrounding area is free from any organic debris that could attract pests or rodents. Clear away any leaves, grass, or other organic matter that may be nearby. Removing these potential food sources will discourage pests from seeking shelter near your snowblower.

Seal Possible Entry Points

Inspect your storage area for potential entry points that pests and rodents can use to access your snowblower. Check for cracks, gaps, or holes in walls, doors, or windows. Seal any openings using caulk or weatherstripping to prevent pests from entering. This will minimize the chances of pests damaging your snowblower or building nests in or around it.

Use Pest Deterrents

To further deter pests and rodents, you can use repellents or deterrents designed specifically for this purpose. There are natural and commercially available options such as peppermint oil, mothballs, or ultrasonic devices that emit high-frequency sounds. Place these deterrents strategically around the storage area to discourage pests from approaching your snowblower.

Check for Signs of Infestation

Regularly inspect your storage area for any signs of pest or rodent activity. Look for droppings, chewed items, or nests. If you notice any indications of infestation, take immediate action to remove the pests and prevent further damage. Consider seeking professional assistance if the infestation is severe or unmanageable.

Perform Periodic Maintenance

Snowblowers require periodic maintenance to ensure their longevity and reliable performance. Here are some key maintenance tasks you should perform:

Inspect for Rust and Corrosion

Regularly inspect your snowblower for any signs of rust or corrosion. Check all the surfaces, especially metal components that may be prone to rusting. If you notice any rust, use a wire brush or sandpaper to remove it. Once the rust is removed, apply a rust inhibitor or touch-up paint to protect the surface and prevent further corrosion.

Test and Replace Spark Plugs

Spark plugs play a vital role in starting and running your snowblower smoothly. Over time, spark plugs can become fouled or worn out. Regularly test your spark plugs to ensure they’re in good condition. If you notice any signs of wear, corrosion, or poor performance, it’s best to replace them. Always use the correct type and specification of spark plugs recommended by the manufacturer.

Check and Adjust Tire Pressure

Proper tire pressure is crucial for optimal performance and maneuverability of your snowblower. Regularly check the tire pressure and adjust it as needed. Underinflated tires can affect the snowblower’s handling, while overinflated tires can make the ride uncomfortable and increase the risk of damage. Refer to your snowblower’s manual for the recommended tire pressure and use a tire gauge to ensure accuracy.

Clean and Sharpen Blades

The blades of your snowblower are subjected to a lot of wear and tear during the winter season. It’s important to clean and sharpen the blades before storage. Remove any debris or residue that may have accumulated on the blades. Inspect them for any signs of damage or excessive wear. Sharpen the blades using a file or a bench grinder, following the manufacturer’s recommendations. Sharp blades ensure efficient snow clearing and prevent unnecessary strain on the snowblower’s engine.

Prepare for Storage

As the off-season approaches, it’s time to prepare your snowblower for storage. Here are some steps you should follow:

Review the Owner’s Manual

Before storing your snowblower, take the time to review the owner’s manual. The manual contains specific instructions and recommendations for storing your specific model. It provides valuable information on maintenance tasks, storage requirements, and potential issues to look out for. Familiarize yourself with the manual to ensure you’re following the manufacturer’s guidelines properly.

Empty the Fuel Tank

To prevent fuel from deteriorating and causing damage to your snowblower, it’s essential to empty the fuel tank completely before storage. Turn off the fuel valve to stop the flow of fuel and let the engine run until it runs out of fuel. This step ensures that no fuel remains in the carburetor or fuel system. It’s also important to remove any fuel from the storage container, as old fuel can degrade and cause issues when used later.

Store with Fresh Fuel

While it’s crucial to empty the fuel tank, it’s equally important to store your snowblower with fresh fuel when the next winter season approaches. Adding fuel stabilizer to a full tank of fresh fuel just before you start using the snowblower again will help prevent any fuel-related issues. Follow the recommended ratio of fuel stabilizer to fuel as specified by the manufacturer.

Properly Lubricate Moving Parts

Before storing your snowblower, properly lubricate all the moving parts to prevent rust and corrosion. Apply lubricating oil or spray to the auger, impeller, and other rotating components. Lubricating these parts ensures they remain in good condition and are ready for use when the winter season arrives.

Spring Readiness

As winter comes to an end, it’s time to prepare your snowblower for the warm months ahead. Here are some steps you can take to ensure your snowblower is ready for storage and that it will be in great shape for the next winter season:

Perform Seasonal Maintenance

Before storing your snowblower, perform any necessary seasonal maintenance tasks. This includes inspecting and replacing worn parts, checking and tightening any loose bolts or screws, and ensuring all components are in good working condition. Performing seasonal maintenance will save you time and effort when you take out your snowblower next winter.

Reattach and Adjust Worn Parts

During the winter season, certain parts of your snowblower may require readjustment or replacement due to wear and tear. Before storing your snowblower, take the time to reattach or adjust any worn parts, such as loose belts or cables, to ensure they are in optimal working condition for the next winter. This will prevent any unexpected malfunctions or breakdowns when the snow starts falling again.

Reinstall the Battery

If you removed the battery for storage, now’s the time to reinstall it. Clean the battery terminals and cables again, removing any accumulated dirt or corrosion. Attach the positive (+) cable first, followed by the negative (-) cable, ensuring they are securely connected. Securing the battery properly will help ensure it’s ready for the next winter season and will provide reliable starting power.

Check for Fuel Leaks

Before firing up your snowblower for the next winter season, do a quick check for any fuel leaks. Inspect the fuel lines, fuel tank, and connections for any signs of leakage. If you notice any leaks, address them immediately before using the snowblower. Remember to always use caution and follow proper safety procedures when dealing with fuel and potential leaks.

By following these comprehensive steps and taking the time to properly store and maintain your snowblower during the off-season, you can ensure its longevity, reliability, and optimal performance when the next winter season arrives. Taking care of your snowblower will save you time, money, and potential frustration, allowing you to clear snow effectively and efficiently to keep your property safe and accessible.

How To Clean Your Snow Blowers Before Storage?

Are you ready to bid farewell to the snowy season and safely store away your trusty snow blower until next winter? Before you do, it’s important to give your snow blower a thorough cleaning to ensure it stays in top-notch condition. Cleaning your snow blower before storage not only helps prevent rust and corrosion, but it also extends the lifespan of this invaluable winter tool. In this article, you’ll discover a step-by-step guide on how to properly clean your snow blower, so it’s ready for action when the snowflakes start falling once again.

How To Clean Your Snow Blowers Before Storage?

This image is property of terre-products.com.

Preparing Your Snow Blower for Storage

As the winter season comes to an end, it’s time to start thinking about storing your snow blower until next year. But before you tuck it away, it’s important to properly clean and prepare your snow blower for storage. By following a few simple steps, you can ensure that your snow blower remains in good condition and is ready for use when the snow starts falling again. In this article, we’ll guide you through the process of preparing your snow blower for storage, covering everything from disconnecting the spark plug to storing it in a dry and secure location.

Disconnecting the Spark Plug

One of the first Steps in preparing your snow blower for storage is to disconnect the spark plug. This is an important safety precaution that will prevent the engine from accidentally starting during the storage period. To disconnect the spark plug, follow these simple steps:

Step 1: Locate the spark plug

The spark plug is typically located on the side or top of the engine. It is a small, cylindrical object with a wire attached to it.

Step 2: Disconnect the spark plug wire

Once you have located the spark plug, simply pull off the wire connected to it. This will break the electrical connection and prevent the engine from starting. It’s important to note that you should never disconnect the spark plug while the engine is running or when the snow blower is still hot.

Emptying the Fuel Tank

Before storing your snow blower, it’s crucial to empty the fuel tank. Stale fuel can cause damage to the engine and make it difficult to start the snow blower when you need it next. Here’s how you can empty the fuel tank:

Step 1: Run the snow blower until it runs out of fuel

Start the snow blower and let it run until it runs out of fuel. This ensures that there is no fuel remaining in the tank or the fuel lines.

Step 2: Invert the snow blower to drain any remaining fuel

Once the snow blower has run out of fuel, tilt it on its side or invert it to drain any remaining fuel from the tank. You can use a fuel siphon or simply wait for the fuel to drain out naturally.

Step 3: Dispose of the old fuel properly

It’s important to dispose of the old fuel properly and not simply pour it down the drain or into the soil. Check with your local waste management facility for the proper disposal methods for fuel in your area. In some cases, they may have specific guidelines or collection points for disposing of hazardous materials.

Checking and Changing the Oil

To keep your snow blower running smoothly, it’s essential to check and change the oil regularly. Before storing your snow blower, it’s a good idea to change the oil to ensure that it is fresh and clean. Here’s how you can do it:

Step 1: Locate the oil drain plug or dipstick

The oil drain plug or dipstick is usually located on the bottom or side of the engine. Refer to your snow blower’s manual to locate it.

Step 2: Drain the old oil

Place a pan or container under the oil drain plug and remove the plug to drain the old oil. Make sure to dispose of the old oil properly.

Step 3: Refill with fresh oil

Replace the oil drain plug and refill the engine with fresh oil. Consult your snow blower’s manual for the recommended type and amount of oil.

Step 4: Dispose of the old oil properly

Just like with the fuel, it’s important to dispose of the old oil properly. Many auto parts stores or service stations have oil recycling programs, so you can drop off the used oil there for proper disposal.

How To Clean Your Snow Blowers Before Storage?

This image is property of www.guardianstorage.com.

Cleaning the Exterior

Cleaning the exterior of your snow blower is important to remove any dirt, debris, or salt residue that may have accumulated during use. Here’s how you can do it:

Step 1: Remove any debris from the snow blower

Start by removing any loose debris, such as leaves or twigs, from the surface and components of the snow blower. You can use a brush or your hands to do this.

Step 2: Use a mild detergent and water to clean the surfaces

Mix a small amount of mild detergent with water and use a sponge or soft cloth to gently clean the surfaces of the snow blower. Pay special attention to areas that are more prone to dirt buildup, such as the handlebars and control panel.

Step 3: Dry thoroughly before storage

After cleaning, make sure to dry the snow blower thoroughly before storing it. Use a clean cloth or allow it to air dry for some time. Moisture can lead to rust or damage to certain components, so it’s crucial to store the snow blower when it’s completely dry.

Cleaning the Chute and Auger Housing

The chute and auger housing are key components of your snow blower that require regular cleaning to ensure proper functioning. Here’s how you can clean them:

Step 1: Disconnect the spark plug for safety

As a safety precaution, always disconnect the spark plug before performing any maintenance or cleaning tasks on your snow blower.

Step 2: Use a brush to remove any caked-on snow or debris

Using a stiff brush, carefully scrape away any caked-on snow or debris from the chute and auger housing. Pay attention to hard-to-reach areas and corners.

Step 3: Wipe down with a clean cloth

After brushing off the snow and debris, use a clean cloth to wipe down the chute and auger housing. This will help remove any remaining dirt or residue.

Step 4: Lubricate the chute and auger for smooth operation

To ensure smooth operation, apply a light coat of lubricant to the chute and auger. This will help prevent rust and allow for easy snow discharge during use.

How To Clean Your Snow Blowers Before Storage?

This image is property of www.absolutemgmt.com.

Inspecting and Replacing the Belts

Belts are an important part of your Snow blower’s functionality and should be inspected regularly for wear and tear. Here’s how you can check and replace the belts, if necessary:

Step 1: Locate the belts on the snow blower

Refer to your snow blower’s manual to locate the belts. They are usually found near the engine or transmission.

Step 2: Check for any signs of wear or damage

Inspect the belts for signs of wear, cracks, or fraying. If you notice any damage, it’s important to replace the belts before storing the snow blower.

Step 3: Replace any worn or damaged belts

If you find that one or more belts are worn or damaged, it’s best to replace them before storing the snow blower. Refer to your snow blower’s manual or consult a professional if you are unsure how to replace the belts yourself.

Cleaning the Carburetor

The carburetor is responsible for mixing air and fuel to create the necessary combustion in your snow blower’s engine. Cleaning the carburetor is vital to ensure proper functioning. Here’s how you can clean the carburetor:

Step 1: Remove the air filter cover

Start by removing the air filter cover to access the carburetor. This cover is usually located near the top or side of the engine.

Step 2: Remove the air filter and clean it

Take out the air filter and clean it according to the manufacturer’s instructions. If the air filter is damaged or excessively dirty, it’s best to replace it with a new one.

Step 3: Remove the carburetor bowl and clean it

Next, remove the carburetor bowl by unscrewing the bolts or screws that hold it in place. Carefully clean the bowl using a carburetor cleaner or a brush to remove any dirt or debris.

Step 4: Reassemble the carburetor

After cleaning the carburetor bowl, carefully reassemble the carburetor by following the reverse order of the disassembly process. Make sure all the components are securely attached and in the correct positions.

How To Clean Your Snow Blowers Before Storage?

This image is property of www.snowblowersdirect.com.

Removing and Cleaning the Spark Arrestor

The spark arrestor is an important safety component in your snow blower that helps prevent sparks from igniting surrounding flammable materials. Cleaning it regularly will ensure its proper functioning. Here’s how you can remove and clean the spark arrestor:

Step 1: Locate the spark arrestor

The spark arrestor is typically located near the exhaust outlet of the snow blower’s engine. Refer to your snow blower’s manual to locate it.

Step 2: Remove the spark arrestor

Detach the spark arrestor by unscrewing or unclamping it from the engine. Make sure to handle it carefully as it can be hot.

Step 3: Clean the spark arrestor with a wire brush

Using a wire brush, gently scrub the spark arrestor to remove any carbon buildup or debris. Take care not to damage the screen or any other components.

Checking the Skid Shoes and Scraper Blade

The skid shoes and scraper blade are crucial for maintaining the proper clearance between the snow blower and the ground, as well as protecting surfaces from damage. Here’s how you can check them:

Step 1: Inspect the skid shoes

Check the condition of the skid shoes, which are located on the sides of the auger housing. If they are worn or damaged, replace them before storing the snow blower.

Step 2: Examine the scraper blade

Inspect the scraper blade, located at the bottom of the auger housing. Look for signs of wear or damage. If the scraper blade is worn down, it’s best to replace it to ensure efficient snow removal.

How To Clean Your Snow Blowers Before Storage?

This image is property of www.snowblowersdirect.com.

Storing the Snow Blower in a Dry and Secure Location

Now that you have completed all the necessary maintenance and cleaning tasks, it’s time to store your snow blower in a dry and secure location. Follow these steps for proper storage:

Step 1: Choose a dry and secure storage location

Find a place to store the snow blower where it will be protected from moisture, extreme temperatures, and potential damage. Ideally, this would be a garage, shed, or any covered area.

Step 2: Cover the snow blower with a protective tarp or cover

To keep your snow blower clean and dust-free during storage, cover it with a protective tarp or cover. This will also help prevent any accidental damage from falling objects.

Step 3: Store the snow blower in an upright position

Finally, store the snow blower in an upright position. This helps prevent any fuel or oil from leaking onto other parts of the snow blower and reduces the risk of damage to the machine.

By following these steps and properly preparing your snow blower for storage, you can ensure that it remains in good condition and is ready for use when the next snowstorm hits. Taking the time to disconnect the spark plug, empty the fuel tank, clean the exterior, inspect and replace any worn parts, and store it in a dry and secure location will extend the life of your snow blower and save you from headaches when winter returns. Stay prepared, stay safe, and enjoy a hassle-free snow season!

How Do You Store Your Honda Snowblower?

When winter comes to an end and the snow starts to melt away, it’s time to think about storing your Honda snowblower until the next season. But how exactly do you go about storing this powerful machine to ensure its longevity and optimal performance? Whether you’re a seasoned snowblower owner or new to the world of winter maintenance, this article will provide you with practical tips and guidance on how to store your Honda snowblower properly. From cleaning and lubricating to fuel maintenance and storage location, we’ve got you covered, so you can bid farewell to winter knowing your snowblower is tucked away safely and ready for action when the snowflakes start to fall again.

How Do You Store Your Honda Snowblower?

This image is property of blog.hondalawnparts.com.

Preparing for Storage

Drain the Fuel

Before storing your Honda snowblower for an extended period, it’s important to drain the fuel from the tank and carburetor. You can do this by running the engine until it runs out of gas or by using a siphon pump to remove any remaining fuel. Leaving fuel in the tank can lead to fuel deterioration and clog the carburetor, resulting in starting issues when you need to use the snowblower again.

Change the Oil

Another crucial step in preparing your snowblower for storage is changing the oil. Over time, oil can become contaminated with debris, reducing its effectiveness in lubricating the engine. By changing the oil before storing the snowblower, you ensure that the engine will be properly lubricated and protected during the off-season. Consult your owner’s manual for instructions on how to drain the old oil and refill with fresh oil.

Clean the Snowblower

Before storing your snowblower, make sure to give it a thorough cleaning. Use a brush or scraper to remove any snow or ice buildup on the auger, housing, and chute. Pay attention to the areas around the engine, as debris and dirt can affect its performance. A clean snowblower not only looks better but also helps prevent corrosion and damage while in storage.

Inspect for Damage

Take some time to inspect your Honda snowblower for any signs of damage or wear that may need to be addressed before storing it. Check the belts, cables, and auger for any signs of fraying or breakage. Look for loose bolts or missing parts that may need to be replaced. It’s better to address these issues now rather than discovering them when you’re ready to use the snowblower again.

Remove the Spark Plug

To prevent any accidental starting of the engine while in storage and to protect against potential damage, it’s important to remove the spark plug. This step ensures that the engine won’t start inadvertently and allows you to inspect the spark plug for any signs of wear or damage. If necessary, you can replace the spark plug before storing the snowblower.

Proper Storage Location

Choose a Sheltered Area

When considering where to store your Honda snowblower, it’s essential to choose a sheltered area that offers protection from the elements. A garage, shed, or storage unit with a roof is ideal for keeping your snowblower safe from rain, snow, and excessive moisture. By storing it in a sheltered area, you reduce the risk of rust, corrosion, or damage caused by exposure to harsh weather conditions.

Protect from Elements

Even when stored in a sheltered location, it’s a good idea to take additional steps to protect your snowblower from the elements. Cover your snowblower with a waterproof tarp or a fitted cover specifically designed for snowblower storage. This extra layer of protection will further safeguard your equipment from dust, moisture, and potential damage.

Consider Temperature and Humidity

While choosing a sheltered area is important, it’s also crucial to consider the temperature and humidity levels of the storage location. Extreme temperatures can affect the performance and condition of your snowblower. Avoid storing it in areas that are prone to temperature fluctuations or excessive humidity, as these can lead to damage or deterioration of critical components.

Storing the Snowblower

Positioning the Snowblower

When storing your Honda snowblower, it’s essential to position it in a way that maximizes space and reduces the risk of accidental damage. Place the snowblower in an upright position, ensuring that it rests securely on its wheels. This not only saves space but also prevents unnecessary strain on the handlebars, controls, and auger.

Securing the Snowblower

To further protect your snowblower from potential damage while in storage, secure it to prevent movement. Use straps or bungee cords to fasten the snowblower to a wall or support structure. This prevents it from tipping over or being jostled, minimizing the risk of damage to delicate parts.

Covering the Snowblower

To shield your snowblower from dust, debris, and potential damage, it’s advisable to cover it with a fitted cover or a waterproof tarp. Choose a cover specifically designed for snowblower storage to ensure a proper fit and maximum protection. This cover will also act as an additional layer to safeguard your snowblower from moisture and any potential scratches or dings.

Storing the Accessories

Don’t forget about the accessories that come with your Honda snowblower. Keep them organized and safely stored alongside the snowblower to ensure that they are readily available when you need them next season. Consider using storage bins or hooks to keep all the accessories in one place, reducing the risk of misplacing or damaging them during storage.

Battery Storage

Removing the Battery

If your Honda snowblower is equipped with a battery, it’s crucial to remove it before storing the equipment. Disconnect the battery cables, starting with the negative terminal, to ensure that there is no electrical power flowing to the snowblower. Removing the battery prevents any potential drain or damage during storage.

Cleaning the Battery

Before storing the battery, it’s a good idea to clean it to remove any dirt or corrosion that may have accumulated. Use a battery cleaning solution or a mixture of baking soda and water to gently clean the battery terminals and cables. Avoid using excessive force or abrasive materials that could damage the battery.

Charge and Store the Battery

To maintain the battery’s longevity and performance, it’s recommended to charge it fully before storing it. Use a battery charger with a maintenance mode or choose a smart charger that automatically adjusts the charging process. Once fully charged, store the battery in a cool, dry place away from any flammable materials.

How Do You Store Your Honda Snowblower?

This image is property of i.ytimg.com.

Maintenance Tips

Lubricate Moving Parts

Proper lubrication is essential for maintaining the performance and longevity of your snowblower. Before storing it, apply lubricating oil to all moving parts, such as the auger shaft, impeller, chute control, and any other mechanisms that require lubrication. This helps prevent rust and ensures smooth operation when you use the snowblower again.

Inspect Belts and Cables

Take a close look at the belts and cables of your Honda snowblower before storing it. Look for signs of wear, fraying, or cracking, as these can affect the snowblower’s performance. Replace any worn or damaged belts or cables to avoid potential breakdowns or malfunctions next season.

Check Tire Pressure

Maintaining proper tire pressure is crucial for optimal snowblower performance. Before storing the snowblower, check the tire pressure and adjust if necessary. Inflating the tires to the manufacturer’s recommended pressure helps ensure easy maneuverability and a smooth ride when you tackle snow removal next winter.

Maintain the Auger and Chute

The auger and chute are critical components of your snowblower, responsible for throwing and directing the snow. Inspect the auger for any debris or obstructions that may have accumulated during use. Clear out any clogs and ensure that the auger is clean and in good condition. Lubricate the chute control and make sure it moves freely to avoid any restrictions or malfunctions.

Protect the Engine

To protect the engine of your Honda snowblower during storage, spray a light coat of engine fogging oil into the spark plug hole. This oil coating helps prevent corrosion and lubricates the internal components, keeping them in good condition while the snowblower is not in use.

Preparation for Next Season

Perform Routine Maintenance

When the snow season is over, it’s important to perform routine maintenance before storing your Honda snowblower for an extended period. Follow the manufacturer’s guidelines in your owner’s manual to perform any necessary maintenance tasks, such as changing the oil, replacing filters, or inspecting and lubricating components. By taking these steps, you ensure that your snowblower will be ready to tackle the next winter season.

Inspect for Wear and Tear

Before storing the snowblower, thoroughly inspect it for any signs of wear and tear. Look for loose or worn parts, damaged cables, or belts that may need to be replaced. Addressing these issues now will save you time and effort when you’re ready to use the snowblower again.

Reassemble and Test

After performing any necessary maintenance or repairs, reassemble your Honda snowblower and give it a test run. This ensures that everything is in proper working order and allows you to address any last-minute adjustments or issues. Testing the snowblower before storage gives you peace of mind that it will be ready for use when the next snow season arrives.

Organize and Store Accessories

To ensure that you can easily find and access your snowblower accessories next season, take the time to organize and store them properly. Keep them in a designated storage container, such as a toolbox or storage bin, and place them alongside the snowblower. This way, you’ll have everything you need close at hand when it’s time to tackle the snow again.

How Do You Store Your Honda Snowblower?

This image is property of i.ytimg.com.

Summary

Properly preparing, storing, and maintaining your Honda snowblower is essential for its longevity and performance. By following the steps outlined in this article, you can ensure that your snowblower remains in top condition during the off-season and is ready for use when the next snowfall arrives. Remember to drain the fuel, change the oil, clean the snowblower, inspect for damage, and remove the spark plug. Choose a sheltered area, protect from elements, and consider temperature and humidity when selecting a storage location. Position and secure the snowblower, cover it properly, and store the accessories together. Remove, clean, charge, and store the battery correctly. Perform maintenance tasks such as lubricating moving parts, inspecting belts and cables, checking tire pressure, maintaining the auger and chute, and protecting the engine. Finally, perform routine maintenance, inspect for wear and tear, reassemble and test the snowblower, and organize and store accessories for easy access next season. By following these guidelines, you can ensure that your Honda snowblower remains in excellent condition for years to come.

What To Do With Snow Blower After Use?

In this article, we will discuss some practical steps that you can take with your snow blower after using it. We will explore how to properly clean and maintain the machine, as well as storage tips for the off-season. By following these guidelines, you can ensure the longevity and efficiency of your snow blower, so let’s get started!

What To Do With Snow Blower After Use?

This image is property of i.ytimg.com.

Cleaning the Snow Blower

Removing Excess Snow

After using a snow blower to clear out snow from your driveway or walkways, it’s essential to clean it properly to ensure its longevity and optimal performance in the future. The first step in this process is to remove any excess snow that may have accumulated on the machine during usage. Use a snow shovel or brush to gently remove the snow from the exterior surfaces of the blower, making sure to clear out any snow that may be clogging the chute or auger.

Disconnecting the Power Source

Once you have cleared away the excess snow, it’s important to disconnect the power source of the snow blower. This will help prevent any accidental start-ups or injuries during the cleaning process. If your snow blower is electric, unplug it from the power outlet. For gas-powered models, switch off the ignition and remove the spark plug wire to ensure complete disconnection from any power source.

Cleaning the Chute and Auger

Next, focus on cleaning the chute and auger of the snow blower. The chute is the part of the blower that directs the snow away from the machine, while the auger is responsible for scooping up the snow and propelling it through the chute. Start by using a brush or gloved hand to remove any remaining snow or debris from these areas. Be cautious when working around the blades of the auger, as they can be sharp. Once the snow and debris have been cleared, use a hose or pressure washer to thoroughly rinse the chute and auger and remove any remaining dirt or grime. Allow the snow blower to dry completely before moving on to the next step.

Inspecting the Snow Blower

Checking for Damage

After cleaning the snow blower, it’s crucial to inspect it for any signs of damage. Look for cracks, dents, or other visible damage on the exterior of the machine. Pay close attention to the chute, auger, and handlebars, as these are the parts that are most susceptible to wear and tear. Additionally, inspect the wheels and axles for any damage that may affect the blower’s maneuverability. If you notice any significant damage, it’s recommended to consult a professional or the manufacturer for repairs or replacement parts.

Inspecting the Belts and Cables

In addition to checking for external damage, it’s important to inspect the belts and cables of the snow blower. These parts play a crucial role in the blower’s operation and should be in good condition for optimal performance. Check the belts for any signs of fraying, cracking, or excessive wear. If any issues are detected, replace the belts as soon as possible to avoid further damage. Similarly, inspect the cables for any damage or signs of wear and tear. Replace any damaged cables to ensure proper functionality of the snow blower.

What To Do With Snow Blower After Use?

This image is property of www.bhg.com.

Maintenance and Storage

Changing the Oil

Regular maintenance of your snow blower is essential to keep it running smoothly. One critical aspect is changing the oil. Over time, the oil in the engine can become dirty or contaminated, affecting the blower’s performance. Refer to the snow blower’s user manual for specific instructions on how to change the oil. Generally, this involves draining the old oil and replacing it with fresh, clean oil. Dispose of the old oil properly, following local regulations. Regular oil changes will help extend the life of your snow blower and keep it functioning efficiently.

Replacing the Spark Plug

Another crucial maintenance task is replacing the spark plug. Over time, spark plugs can become fouled or worn, leading to issues with starting the snow blower. Check the condition of the spark plug and replace it if it appears damaged or excessively dirty. Refer to the user manual for the correct spark plug model for your snow blower. It’s recommended to replace the spark plug at least once per season to ensure reliable starting and optimal performance.

Emptying the Fuel Tank

Before storing the snow blower, it’s important to empty the fuel tank completely. Leaving fuel in the tank for an extended period can lead to clogs and damage to the engine. To empty the tank, run the snow blower until it runs out of fuel. This ensures that no fuel is left inside the tank or fuel lines. Additionally, consider adding a fuel stabilizer to the remaining fuel before running the machine dry. Fuel stabilizers help prevent the fuel from degrading and causing issues when you start the snow blower again in the future.

Storing the Snow Blower

Proper storage is essential to protect your snow blower during the off-season. Store the snow blower in a clean and dry area, away from any potential moisture or extreme temperatures. If possible, cover the snow blower with a waterproof cover or tarp to prevent dust and debris from accumulating on the machine. Additionally, store the blower in an upright position to prevent any leaks or damage to the engine. Taking these steps will help maintain the condition of your snow blower and ensure it’s in optimal working order for the next winter season.

What To Do With Snow Blower After Use?

This image is property of cdn.fivestarstorage.biz.

Additional Tips

Sharpening the Auger Blades

To ensure the snow blower’s optimal performance and efficiency, regular maintenance of the auger blades is crucial. Over time, the blades can become dull, making it harder for the blower to effectively clear snow. Sharpen the blades using a grinder or file to ensure they are cutting through the snow cleanly. Follow the manufacturer’s recommendations for blade sharpening intervals, typically once per season or as needed, based on usage.

Checking Tire Pressure

The tire pressure of your snow blower plays a significant role in its maneuverability and stability. Before each use, check the tire pressure and adjust it accordingly. Refer to the user manual for the recommended tire pressure for your specific model. Proper tire pressure ensures better traction on slippery surfaces and improves the overall performance of the snow blower.

Greasing Moving Parts

Greasing the moving parts of your snow blower is another crucial maintenance task. Over time, the moving parts can become dry and lose their lubrication, leading to increased friction and wear. Regular greasing will help prevent this and ensure smooth operation. Consult the user manual for the recommended lubrication points and use a high-quality grease or lubricant suitable for the snow blower’s components.

What To Do With Snow Blower After Use?

This image is property of cdn.mos.cms.futurecdn.net.

Conclusion

Proper maintenance of your snow blower after use is essential for its longevity and optimal performance. By following these steps, you can ensure that your snow blower is clean, inspected for damage, and well-maintained for the next winter season. Remember to always refer to the user manual for specific instructions and recommendations for your particular snow blower model. Taking the time to care for your snow blower properly will help keep your driveways and walkways clear of snow for many winters to come.

What To Do With Snow Blower After Use?

This image is property of www.bhg.com.

How Do You Store A Snowblower In Your Garage?

In this article, we will discuss some tips on how to properly store a snowblower in your garage. We will share step-by-step instructions on how to prepare your snowblower for storage, including draining the fuel and oil, cleaning the machine, and inspecting for any damage. Additionally, we will provide guidance on the best storage practices, such as using a cover and finding the right location in your garage. By the end of this article, you will have all the information you need to safely and effectively store your snowblower during the off-season. Shoveling snow can be a strenuous task, and that’s why many people invest in a snowblower to make their lives easier during the winter months. However, when the snow season comes to an end, it’s important to properly store your snowblower to ensure its longevity and performance for the following winter. In this article, we will guide you through the process of storing your snowblower in your garage.

How Do You Store A Snowblower In Your Garage?

This image is property of c.dam-img.rfdcontent.com.

Choosing the right spot in your garage

Before you begin the storage process, it’s important to choose the right spot in your garage to place your snowblower. Here are a few factors to consider:

Clearing the space

Before you can even think about storing your snowblower, you’ll need to clear out enough space in your garage. Snowblowers can take up quite a bit of room, especially if you have a large model, so it’s essential to make sure there is enough space for it to be stored safely and without obstruction.

Considering climate control

Snowblowers are sensitive to extreme temperatures, so it’s important to consider the climate control in your garage. If your garage is not heated or insulated, extreme temperature fluctuations could damage your snowblower. It’s best to store it in a garage that is temperature-regulated or at least insulated to protect it from freezing temperatures or excessive heat.

Avoiding moisture and water damage

Moisture and water can easily damage a snowblower, so it’s crucial to avoid storing it in a damp or wet environment. Look for a spot in your garage that is away from any potential moisture sources, such as leaky pipes or areas prone to flooding. Keeping your snowblower dry will help prevent rust and other potential damage.

Preparing the snowblower for storage

Once you have chosen the right spot in your garage, it’s time to prepare your snowblower for storage. Follow these steps to ensure it stays in good condition:

Cleaning the snowblower

Before storing your snowblower, it’s important to give it a thorough cleaning. Remove any dirt, debris, or snow buildup from the machine. Pay special attention to the blades, chute, and auger, as these areas are prone to clogging and buildup. Use a brush or compressed air to remove any remaining debris.

Inspecting for damage

While cleaning your snowblower, it’s a good idea to inspect it for any damage. Look for any signs of wear and tear, loose parts, or damage that may have occurred during use. If you notice any issues, address them before storing the snowblower to avoid further damage.

Draining fuel and oil

To prevent fuel from deteriorating and causing damage to your snowblower’s engine, it’s important to drain both the fuel and oil before storage. Consult your owner’s manual for specific instructions on how to safely drain the fuel and oil from your snowblower. Dispose of the fuel and oil properly, following local regulations.

Removing the spark plug

One last step in preparing your snowblower for storage is to remove the spark plug. This will prevent the engine from accidentally starting during storage. It’s a simple process that involves disconnecting the spark plug wire and using a spark plug wrench to remove the spark plug. Store the spark plug in a safe place until you’re ready to use your snowblower again.

Protective measures for long-term storage

Once your snowblower is prepared for storage, it’s time to take additional protective measures to ensure its condition throughout the storage period. Here are some steps you can take:

Covering the snowblower

To protect your snowblower from dust, debris, and potential damage, consider covering it with a breathable cover. A cover will prevent dust from settling on your machine and keep it protected from any accidental bumps or scratches.

Using rust prevention methods

Snowblowers are susceptible to rust, especially if they are stored in damp environments. To prevent rust from forming, consider using a rust prevention product on any bare metal surfaces of your snowblower. This will provide an added layer of protection against moisture and rust damage.

Applying lubricant to moving parts

Lubricating your snowblower’s moving parts is crucial to keep them functioning properly. Before storage, apply a small amount of lubricant to the auger, chute, wheels, and any other moving parts. This will help prevent rust and ensure that the machine operates smoothly when you’re ready to use it again.

Protecting the blades

The blades of your snowblower are essential for its proper functioning, so it’s important to protect them during storage. Consider covering the blades with protective guards or cardboard to prevent them from accidentally getting damaged or causing injuries.

Storing accessories and attachments

In addition to the snowblower itself, you may also have accessories and attachments that need to be stored properly. Here are some tips:

Removing standalone attachments

If your snowblower has standalone attachments, such as a snowblower cab or drift cutters, remove them before storing the machine. Store these attachments separately in a safe and organized manner to prevent them from getting lost or damaged.

Storing accessories in an organized manner

If you have accessories, such as extra blades or belts, it’s important to store them in an organized manner. Consider using labeled containers or a designated storage area to keep everything easily accessible when you need them again.

How Do You Store A Snowblower In Your Garage?

This image is property of www.mvsottawa.com.

Choosing the proper storage container

To further protect your snowblower from potential damage, it’s important to choose the proper storage container. Here are a few factors to consider:

Selecting the right size

Make sure the storage container you choose is the right size to accommodate your snowblower and any accompanying accessories. You don’t want a container that is too small and crams everything together, as this could cause unnecessary damage. On the other hand, a container that is too large may take up excessive space in your garage.

Considering material and durability

When choosing a storage container, opt for materials that are durable and can withstand the elements. Plastic storage containers are a popular choice, as they are lightweight, resistant to moisture, and provide adequate protection for your snowblower.

Storing in a dedicated container

Consider storing your snowblower in a dedicated container that is specifically designed for snowblower storage. These containers often come with padded interiors and additional features to protect your machine from damage during transportation and storage.

Positioning and arranging the snowblower

Now that you have prepared your snowblower for storage and chosen the right container, it’s time to position and arrange your snowblower properly. Follow these tips:

Placing the snowblower correctly

When placing your snowblower in the storage container, ensure that it is in a stable position. Avoid leaning it against any walls or other items that could potentially fall onto it. Placing it in an upright position will help maintain its shape and prevent any unnecessary strain on the machine.

Ensuring stability

To prevent any accidental falls or damage, ensure that your snowblower is stable within the storage container. Use foam padding or packing materials to secure the snowblower in place and prevent it from moving during transportation or if the container is accidentally bumped.

Arranging for easy access

Consider how you will access your snowblower when you need it again. Arrange your storage container in a way that allows easy access to the snowblower without having to move other items or reposition the container itself. This will save you time and effort when you’re ready to use your snowblower again.

How Do You Store A Snowblower In Your Garage?

This image is property of birchtreeorganizing.ca.

Maintaining battery health

If your snowblower is equipped with a battery, it’s important to take proper care of it during storage. Here are a few steps you can take:

Removing and storing the battery

If possible, remove the battery from your snowblower before storage. Store it in a cool, dry place away from any potential sources of heat, such as radiators or direct sunlight. Keeping the battery in a stable and controlled environment will help maintain its health.

Properly charging and maintaining the battery

Before storing your snowblower’s battery, ensure that it is fully charged. This will help prolong its lifespan during the storage period. Additionally, consider using a battery maintainer or trickle charger to keep the battery in good condition. Regularly check the battery’s charge and voltage levels to ensure it remains healthy.

Regularly checking battery health

During the storage period, it’s a good idea to periodically check the health of your snowblower’s battery. Use a battery tester or take it to a professional to have it tested. This will help identify any potential issues before they become major problems.

Labeling and documenting

To keep your storage area organized and easily identifiable, it’s important to label storage containers and create an inventory checklist. Here’s why it’s important:

Labeling storage containers

Labeling your storage containers will save you time and effort when you’re looking for specific items. Clearly label each container with its contents, such as “Snowblower Accessories” or “Belts and Blades.” This will prevent you from having to open every container to find what you need.

Creating an inventory checklist

Creating an inventory checklist will help you keep track of what you have stored and where it is located. List all the items you have stored, along with their corresponding storage container. This will help you quickly locate and access the items you need without having to search through multiple containers.

How Do You Store A Snowblower In Your Garage?

This image is property of anestwithayard.com.

Regular maintenance during storage period

Even though your snowblower is in storage, it still requires some regular maintenance to ensure it remains in good condition. Here are a few tasks to include in your maintenance routine during the storage period:

Scheduled and periodic maintenance

Follow the manufacturer’s instructions for scheduled maintenance, even during storage. This may include tasks such as checking the belts, lubricating the moving parts, or inspecting for any signs of wear or damage. Regular maintenance will ensure that your snowblower is ready to go when the winter season comes around again.

Checking for pest infestation

Pests, such as rodents, can make nests in your snowblower or chew on the wires, causing damage. Regularly check for any signs of pest infestation, such as droppings or chewed wires. If you find any evidence of pests, take the necessary steps to eliminate them and prevent further damage.

Cleaning and removing dust

Dust can accumulate on your snowblower during the storage period, so it’s important to clean it periodically. Use a brush or compressed air to remove any dust or debris that has settled on the machine. This will help prevent any potential clogs or damage when you use the snowblower again.

Conclusion

Properly storing a snowblower in your garage is essential for its longevity and performance. By following the steps outlined in this article, you can ensure that your snowblower stays in good condition during the off-season. Remember, maintenance and organization play key roles in the storage process, so take the time to properly clean, prepare, and store your snowblower. When the next snowfall arrives, you’ll be glad you did!

How Do You Store A Snowblower In Your Garage?

This image is property of i0.wp.com.

Should You Drain Oil From Snowblower For Storage?

In this article, we will discuss whether or not it is necessary to drain the oil from your snowblower before storing it. We will explore the reasons why some people choose to do so and the potential benefits it may offer. Additionally, we will provide guidance on how to properly drain the oil if you decide it is the best course of action. By the end of this article, you will have a better understanding of whether or not draining the oil from your snowblower is necessary for proper storage.

Should You Drain Oil From Snowblower For Storage?

This image is property of terre-products.com.

Why is it important to drain oil from a snowblower before storage?

When it comes to preparing your snowblower for storage, one crucial step that often gets overlooked is draining the oil. Many snowblower owners wonder if it is really necessary to go through the hassle of draining the oil before storing their equipment. The short answer is yes, it is indeed important to drain the oil from a snowblower before storage. In this article, we will discuss the reasons why this step is crucial and provide you with a detailed guide on how to drain the oil from your snowblower properly.

Prevent engine damage

One of the main reasons why it is important to drain the oil from your snowblower before storing it is to prevent potential engine damage. Over time, the oil in your snowblower can become contaminated with dirt, debris, and other impurities. If left in the engine during storage, these contaminants can cause corrosion, leading to engine damage and decreased performance. By draining the oil, you ensure that fresh oil is used when the snowblower is ready for use again, thus reducing the risk of engine damage.

Avoid oil degradation

Oil degradation is another reason why you should drain the oil from your snowblower before storage. Despite its high-quality composition, oil can break down over time, especially when exposed to extreme temperatures. This breakdown of oil can lead to the formation of sludge, which can clog the engine and affect its performance. By draining the oil, you remove the degraded oil from the system, allowing for clean oil to be added when necessary.

Prevent fuel system clogs

In addition to engine damage and oil degradation, failing to drain the oil from your snowblower can also result in fuel system clogs. The oil and fuel in your snowblower can mix and create a residue that can congest the carburetor, fuel lines, and other fuel system components. This clogging can prevent the engine from starting or cause it to run inefficiently. By draining the oil, you help prevent these fuel system clogs from occurring, thus ensuring smooth and reliable performance when you need to use your snowblower again.

Steps to drain oil from a snowblower for storage

Now that you understand the importance of draining the oil from your snowblower before storage, let’s go through the step-by-step process of how to drain the oil properly.

Gather necessary tools and equipment

Before you begin, make sure you have all the necessary tools and equipment on hand. You will need an oil drain pan or container to collect the oil, a socket wrench or pliers to remove the drain plug, and fresh oil for when you’re ready to refill the engine.

Run the engine to warm up the oil

Start by running the snowblower’s engine for a few minutes to warm up the oil. This will help the oil flow more easily when you drain it.

Turn off the engine and disconnect spark plug wire

Once the engine has warmed up, turn it off completely. To ensure safety and prevent accidental starting, disconnect the spark plug wire.

Place a container to collect the oil

Position the oil drain pan or container underneath the snowblower’s oil drain plug. This will catch the oil as it drains out.

Remove the drain plug

Using a socket wrench or pliers, carefully remove the drain plug located underneath the snowblower engine. Slowly and steadily, loosen the plug until the oil starts to drain out.

Allow the oil to fully drain

Let the oil drain completely from the snowblower, ensuring that all the old oil has been drained out. This may take a few minutes, depending on the size of your snowblower and the amount of oil it holds.

Replace the drain plug and tighten it securely

Once all the oil has been drained, carefully replace the drain plug and tighten it securely. Make sure it is snug to prevent any oil leaks during storage.

Should you change the oil filter when draining oil from a snowblower?

While you have the oil drained from your snowblower, it is a good idea to check the condition of the oil filter. The oil filter helps remove contaminants from the oil, ensuring a clean and well-lubricated engine. If the oil filter is old or clogged, it may not function properly and can potentially lead to engine damage. Therefore, it is advisable to consider replacing the oil filter when draining oil from your snowblower. Check the manufacturer’s guidelines or consult with a professional to determine the appropriate time to replace the oil filter.

Where should you dispose of the drained oil?

Proper disposal of the drained oil is essential to protect the environment and comply with local regulations. It is important to check your local regulations and guidelines regarding the proper disposal of used oil. In many areas, there are authorized recycling centers or service stations that accept used oil for recycling. Dispose of the drained oil responsibly by taking it to one of these authorized locations.

Should You Drain Oil From Snowblower For Storage?

This image is property of cdn2.tmbi.com.

When is the best time to drain oil from a snowblower?

To ensure the best performance and longevity of your snowblower, it is recommended to drain the oil before long-term storage, at the end of the winter season, or when the snowblower will not be in use for an extended period. By draining the oil before storage, you prevent the accumulation of contaminants and degradation of the oil, ensuring that your snowblower is ready for use when you need it again.

Are there any alternatives to draining the oil?

If draining the oil from your snowblower seems like a hassle or you’re unable to do so for any reason, there are a few alternatives you can consider.

Using a fuel stabilizer

Adding a fuel stabilizer to the gasoline can help prevent fuel deterioration and the formation of deposits in the fuel system. This can be an effective alternative to draining the oil, especially if you plan to use the snowblower intermittently during the storage period. However, it is important to note that a fuel stabilizer does not address the benefits of fresh oil change and oil filter replacement.

Running the snowblower regularly

Another alternative is to run the snowblower regularly throughout the storage period. By doing so, you can help keep the oil circulating and prevent the formation of sludge. However, this method is not as effective as draining the oil, as the oil will still deteriorate and become contaminated over time, even with regular use.

Consulting the manufacturer’s guidelines

Lastly, it is always a good idea to consult the manufacturer’s guidelines for your specific snowblower model. The manufacturer may provide additional instructions or alternative methods for storing your snowblower, taking into consideration the type of engine and other factors.

Should You Drain Oil From Snowblower For Storage?

This image is property of tech.akom.net.

Benefits of draining oil from a snowblower for storage

Draining the oil from your snowblower before storage offers several important benefits that contribute to the overall longevity and performance of your equipment. Here are some of the key benefits:

Extended engine life

By draining the oil, you remove contaminants and prevent the formation of sludge, which can cause engine damage. This helps extend the life of your snowblower’s engine, ensuring it runs smoothly and efficiently.

Prevention of engine corrosion

Old oil left in the engine during storage can contribute to corrosion, particularly when moisture is present. By replacing the old oil with fresh oil, you reduce the risk of corrosion and preserve the integrity of your snowblower’s engine.

Easier maintenance in the future

When it comes time for maintenance or repairs in the future, having clean oil in the engine makes the process easier and more effective. Fresh oil allows for proper lubrication and facilitates smoother operation of the engine components.

Potential risks of not draining oil from a snowblower for storage

Failing to drain the oil from your snowblower before storage can lead to several potential risks that can compromise its overall performance. Here are a few risks you should be aware of:

Oil degradation and sludge buildup

Over time, oil can break down and deteriorate, developing sludge that can clog the engine and affect its performance. Neglecting to drain the old oil increases the risk of oil degradation and sludge buildup, leading to decreased engine efficiency and potential damage.

Increased likelihood of engine failure

Old, contaminated oil can introduce foreign particles and debris into the engine, increasing the likelihood of engine failure. Failure to drain the oil before storage can result in costly repairs, or worse, irreversible damage to the engine.

Compromised overall performance

If the oil in your snowblower’s engine is not changed regularly and drained before storage, it can result in compromised overall performance. The engine may run less efficiently, consume more fuel, produce excessive smoke, or experience frequent stalling. By draining the oil, you help maintain optimal performance and avoid these potential issues.

Should You Drain Oil From Snowblower For Storage?

This image is property of www.snowblowersdirect.com.

Tips for proper snowblower maintenance

To ensure your snowblower remains in top condition, it is important to follow proper maintenance practices. Here are some tips to keep your snowblower in optimal shape:

Regularly check oil levels

Monitor the oil levels in your snowblower regularly and top up if necessary. Maintaining the correct oil level ensures proper lubrication of the engine and prevents excessive wear.

Clean and lubricate moving parts

Periodically clean and lubricate the moving parts of your snowblower to prevent rust and ensure smooth operation. This includes lubricating the auger, chute, and control levers.

Inspect spark plugs and replace if necessary

Check the condition of the spark plugs in your snowblower and replace them if they are worn or dirty. Clean spark plugs ensure effective ignition and optimal engine performance.

Conclusion

In conclusion, it is crucial to drain the oil from your snowblower before storage to maintain its performance and prolong its lifespan. The process of draining the oil is relatively straightforward and can help prevent engine damage, oil degradation, and fuel system clogs. By following the outlined steps and considering factors such as the oil filter and disposal methods, you can ensure that your snowblower remains in optimal condition for future use. Regular maintenance, including checking oil levels, cleaning and lubricating moving parts, and inspecting spark plugs, further contributes to the smooth and efficient operation of your snowblower. So don’t overlook the importance of draining the oil from your snowblower before storage, and enjoy reliable performance season after season.

Should You Drain Oil From Snowblower For Storage?

This image is property of i.ytimg.com.

How Do You Store A Honda Snowblower For The Summer?

In this article, we will provide you with some tips on how to properly store your Honda snowblower during the summer months. We will discuss the importance of preparing your machine for storage, including cleaning and lubricating certain parts. You will also learn about the proper storage location and techniques to prevent any damage to your snowblower. Lastly, we will touch on the importance of regular maintenance and proper storage practices to ensure your Honda snowblower is ready for use when the winter season arrives.

How Do You Store A Honda Snowblower For The Summer?

This image is property of i.ytimg.com.

Preparing for Storage

Cleaning the Snowblower

Before storing your Honda snowblower for the summer, it is essential to clean it thoroughly. Start by removing any remaining snow or ice from the exterior of the machine. Use a brush or broom to sweep away any debris, dirt, or grass that may have accumulated on the snowblower during use.

Next, take a damp cloth or sponge and clean the surfaces of the snowblower to remove any dirt or grime. Pay close attention to the chute, auger, and impeller, as these areas tend to collect the most debris. Ensure that there are no clogs or obstructions that could interfere with the snowblower’s performance when it is used again.

Inspecting for Damage

Once the snowblower is clean, carefully inspect it for any signs of damage or wear. Check the auger blades, impeller, and chute for any cracks, dents, or bending. Ensure that the belts and cables are in good condition and not frayed or worn. Look for any loose or missing bolts and tighten or replace them as necessary.

Inspect the tires to ensure they have adequate tread and are not flat or damaged. Check the control panel and handles for any loose or broken parts. Addressing any damage or issues now will prevent further damage and ensure that your snowblower is ready to go when winter arrives again.

Removing Fuel and Oil

Before storing your Honda snowblower, it is crucial to remove any remaining fuel and oil. This is a necessary step in order to prevent clogs, build-up, and potential damage to the engine during the off-season.

Disconnecting the Spark Plug

To begin the fuel and oil draining process, first, disconnect the spark plug to ensure the engine does not accidentally start while you are working. This is an important safety precaution that should never be overlooked.

Locating Fuel and Oil Drains

Next, locate the fuel and oil drains on your Honda snowblower. These drains are typically located on the bottom or side of the engine. Refer to your owner’s manual for specific instructions on the location of these drains for your specific model.

Draining the Fuel Tank

Using a fuel container or a suitable container, carefully position it under the fuel drain. Open the fuel drain and allow the remaining fuel to drain completely into the container. Be sure to support the container securely to prevent any spillage or accidents.

Once the fuel tank is empty, close the fuel drain and dispose of the fuel properly, following local regulations and guidelines. It is essential to dispose of fuel safely to protect the environment and prevent any potential hazards.

Draining the Oil

After draining the fuel, it is time to drain the oil from the engine. Position a suitable container under the oil drain, usually located on the bottom of the engine. Open the oil drain and allow the oil to drain completely.

Once the oil has drained, close the oil drain and dispose of the used oil responsibly. Many auto parts stores and service centers accept used oil for recycling. Do not dispose of the oil in the trash or pour it down the drain, as it can be harmful to the environment.

Changing the Oil Filter

Locating the Oil Filter

Some Honda snowblower models may be equipped with an oil filter. Locate the oil filter on your snowblower. Refer to your owner’s manual for specific instructions on how to locate and change the oil filter for your particular model.

Removing the Oil Filter

To remove the oil filter, use an oil filter wrench or your hands if the filter is easily accessible. Turn the filter counterclockwise to loosen and remove it. Be prepared for some oil to spill out as the oil filter is removed. Make sure to have a container ready to catch this oil.

Replacing with a New Oil Filter

Once the old oil filter is removed, replace it with a new one. Apply a small amount of oil to the seal of the new filter to ensure a proper seal. Hand tighten the new oil filter by turning it clockwise until it is snug. Do not overtighten the filter, as this can cause damage.

Lubricating Moving Parts

Applying Lubricant to Moving Parts

To keep the moving parts of your Honda snowblower in good condition during storage, it is recommended to apply a lubricant. Use a silicone or lithium-based lubricant to grease the chute, auger, impeller, and any other moving parts that require lubrication.

Apply the lubricant generously to ensure that all parts are adequately coated. This will help prevent rust and corrosion during the off-season and ensure that the snowblower is ready for optimal performance when winter returns.

Protecting the Auger and Impeller

While lubricating the moving parts, pay extra attention to the auger and impeller. These components are crucial to the snowblower’s functionality. Ensure that they are well-lubricated and free of any debris or buildup.

To further protect these parts, it is recommended to apply a thin coat of oil or rust inhibitor to them. This will serve as an extra layer of protection against rust and corrosion during storage.

Removing the Battery

Disconnecting the Battery Cables

If your Honda snowblower is equipped with a battery, it is essential to remove it before storing the machine for the summer. Start by disconnecting the battery cables. Remove the negative cable first, followed by the positive cable.

Removing the Battery from the Snowblower

Once the cables are disconnected, carefully remove the battery from the snowblower. Store the battery in a cool, dry place away from direct sunlight. It is recommended to place the battery on a wooden or plastic surface to prevent any electrical discharge.

Before storing the battery, ensure that it is fully charged. This will help maintain its overall health and longevity. Periodically check the battery’s charge during the storage period and recharge it if necessary.

How Do You Store A Honda Snowblower For The Summer?

This image is property of blog.hondalawnparts.com.

Storing in a Dry Location

Choosing a Suitable Storage Space

When storing your Honda snowblower for the summer, it is crucial to choose a suitable storage space. Ideally, the storage area should be dry, well-ventilated, and away from any potential hazards. Avoid storing the snowblower outdoors or in a location prone to high humidity.

If possible, store the snowblower in a garage or shed. Ensure that the area is free from excessive moisture or temperature fluctuations, as these can cause damage to the snowblower.

Protecting the Snowblower from Moisture

To further protect your Honda snowblower from moisture during storage, it is recommended to cover it with a tarp or snowblower cover. This will help prevent any condensation from accumulating on the machine and causing rust or corrosion.

Before covering the snowblower, ensure that it is completely dry to avoid trapping any moisture inside. This step is crucial to maintaining the snowblower’s longevity and ensuring that it is ready for use when winter returns.

Covering for Protection

Using a Snowblower Cover

Using a snowblower cover is an excellent way to protect your Honda snowblower from dust, debris, and potential damage during storage. Choose a cover that is made specifically for snowblowers and provides a snug fit.

A cover will help keep your snowblower clean and protected from the elements. It will also prevent any pests or rodents from making a home in your machine during the off-season.

Securing the Cover

Once you have placed the cover over your Honda snowblower, make sure to secure it properly. Most covers come with straps or cords that can be tightened to ensure a snug fit. This will prevent the cover from blowing off or shifting during storage.

How Do You Store A Honda Snowblower For The Summer?

This image is property of www.snowblowersdirect.com.

Regular Maintenance Check

Inspecting Belts and Cables

Performing a regular maintenance check before storing your Honda snowblower will help identify any potential issues and prevent unexpected problems when you need to use the machine again. Inspect the belts and cables for any signs of wear, fraying, or damage.

If any belts or cables appear to be in poor condition, it is recommended to replace them before storing the snowblower. This will ensure that they are ready for use when winter arrives.

Cleaning and Greasing Controls

Clean and grease the controls of your Honda snowblower to ensure they are in good working order. Use a mild detergent and water to clean any residue or debris from the controls and then dry them thoroughly.

After cleaning, apply a light coat of grease to the controls to prevent rust and ensure smooth operation. This will help maintain the snowblower’s overall performance and extend its lifespan.

Checking Tires

Inspect the tires of your Honda snowblower for any signs of wear or damage. Ensure that the tires are properly inflated to the recommended pressure. If the tires are worn or damaged, it is advisable to replace them before storing the snowblower.

Maintaining properly inflated tires will not only ensure the snowblower’s optimal performance but also prevent any unnecessary strain on the engine during use.

Inspecting the Shear Bolts

Shear bolts are essential safety devices on a snowblower that protect the machine’s transmission from damage in case of a blockage. Inspect the shear bolts for any signs of wear or damage.

If any shear bolts appear to be weak or broken, replace them with new ones before storing the snowblower. This will help ensure that the machine is in proper working order and ready for use when winter returns.

Safety Measures

Keeping Children and Pets Away

When storing your Honda snowblower, it is crucial to keep children and pets away from the machine. The snowblower contains moving parts and potentially hazardous components that could cause injury.

Store the snowblower in a secure location, such as a locked shed or garage, to prevent any unauthorized access. Keep the keys or ignition switch separate from the snowblower to prevent any accidental operation.

Wearing Protective Gear

When operating a snowblower, it is essential to wear proper protective gear, such as goggles, gloves, and sturdy footwear. This will help protect you from potential hazards, such as flying debris or slipping on icy surfaces.

Similarly, it is advisable to wear the appropriate protective gear when performing maintenance or storing the snowblower. This will help prevent any injuries and ensure your safety.

How Do You Store A Honda Snowblower For The Summer?

This image is property of lh6.googleusercontent.com.

Conclusion

Storing your Honda snowblower for the summer is a crucial step in maintaining its performance and longevity. Following the proper steps outlined in this article will ensure that your snowblower is ready for use when the next winter season arrives.

From cleaning and inspecting the snowblower for damage to draining the fuel and oil, changing the oil filter, and lubricating moving parts, each step plays a vital role in preparing your snowblower for storage.

Furthermore, removing the battery, storing the snowblower in a dry location, covering it for protection, and conducting regular maintenance checks will help keep your Honda snowblower in top condition and ready to tackle winter snowstorms year after year.

Remember to follow safety measures and wear appropriate protective gear when operating or performing maintenance on your snowblower. By taking these precautions, you can ensure your own safety and the longevity of your Honda snowblower. Happy storing!