So, you’ve found yourself in a snowy wonderland at a high altitude, but your trusty snowblower just can’t seem to keep up. Don’t worry, you’re not alone in this predicament. Many people face the challenge of adapting their snowblowers to work efficiently in high-altitude conditions. The good news is, with a few simple modifications, you can have your snowblower up and running smoothly, making your winter wonderland experience a breeze. In this article, we’ll explore some practical tips and tricks to help you modify your snowblower for optimal performance at high altitudes.

This image is property of blog.hondalawnparts.com.
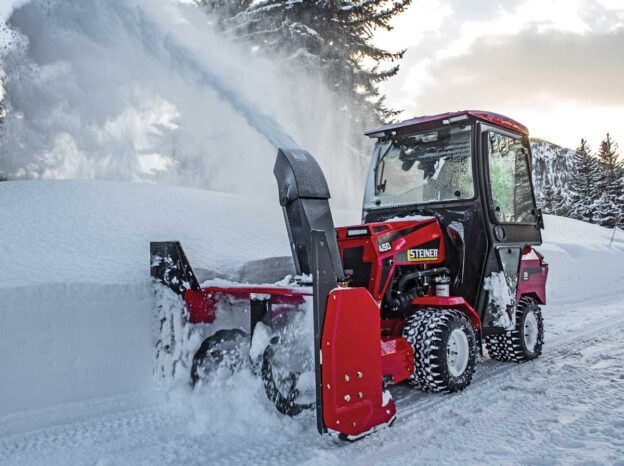
Choosing the Right Snowblower for High Altitude
When it comes to choosing the right snowblower for high altitude areas, there are a few important factors to consider. High altitude locations pose unique challenges for snow removal, and not all snowblowers are designed to handle these conditions effectively. Here are some key points to keep in mind when selecting a snowblower for high altitude use.
Understanding High Altitude Challenges
High altitude areas come with their own set of challenges for snowblowing. The thin air at higher elevations affects the performance and efficiency of snowblowers. The lack of oxygen can cause engines to run lean, leading to decreased power and potential damage to the machine. Additionally, the lower atmospheric pressure affects the fuel-air mixture, which can result in poor combustion and reduced performance. It is crucial to choose a snowblower that can handle these challenges and operate optimally in high altitude conditions.
Considerations for High Altitude Performance
When choosing a snowblower for high altitude, there are a few essential considerations to keep in mind. First and foremost, look for models specifically designed for high altitude use. These snowblowers are equipped with features and adjustments that cater to the unique challenges posed by higher elevations. It is also important to consider the power and size of the snowblower. High altitude areas often experience heavier snowfall, so opting for a more powerful machine with a wider clearing path can ensure efficient snow removal. Additionally, look for snowblowers with adjustable skid shoes that allow you to adapt to the varying terrain common in mountainous regions.
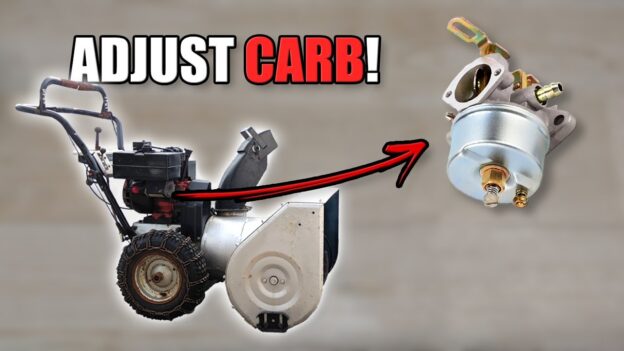
Adjusting the Carburetor for High Altitudes
The carburetor plays a crucial role in the functioning of a snowblower’s engine, and adjusting it for high altitude use is essential for optimal performance. Understanding the role of the carburetor and determining the ideal settings for high altitude conditions is crucial in ensuring your snowblower runs smoothly.
Understanding the Role of the Carburetor
The carburetor is responsible for mixing the fuel and air in the correct proportion to create combustible vapor for the engine. In high altitude areas, the thinner air affects the fuel-air mixture, leading to a lean condition. This means that there is a higher proportion of air to fuel, resulting in decreased engine power and efficiency. By adjusting the carburetor, you can optimize the fuel-air mixture for high altitude conditions and ensure the engine runs properly.
Determining the Ideal Settings for High Altitude
To adjust the carburetor for high altitude, refer to the manufacturer’s instructions or consult a professional. The process typically involves adjusting the fuel and air mixture screws on the carburetor. By turning these screws, you can control the amount of fuel and air entering the engine. The goal is to achieve a slightly richer mixture than at lower altitudes to compensate for the thinner air. Keep in mind that every snowblower model may have different carburetor adjustment procedures, so always consult the owner’s manual or seek expert guidance.

This image is property of bloximages.chicago2.vip.townnews.com.
Modifying the Air-Fuel Mixture
In addition to adjusting the carburetor, modifying the air-fuel mixture is another way to enhance the performance of your snowblower at high altitudes. Checking and adjusting the air-fuel mixture can further optimize the combustion process and ensure efficient snow removal.
Checking the Air-Fuel Mixture
To check the air-fuel mixture, you will need a spark plug wrench and a screwdriver. Start by removing the spark plug from the engine. Examine the color and condition of the electrode. A light tan or gray color indicates a proper air-fuel mixture, while a white or very light-colored electrode may indicate a lean condition. Conversely, a dark, sooty electrode may signify a rich mixture. It’s important to find the right balance to achieve optimal performance at high altitudes.
Adjusting the Air-Fuel Mixture for High Altitudes
To adjust the air-fuel mixture, refer to the snowblower’s manual or consult a professional. The process usually involves turning the mixture screw on the carburetor in small increments to achieve the desired mixture. It’s important to make slight adjustments and test the snowblower’s performance after each modification. By fine-tuning the air-fuel mixture, you can ensure efficient combustion and peak performance in high altitude conditions.
Replacing or Modifying the Jetting
Jetting refers to the system of jets in the carburetor that control the fuel flow. In some cases, replacing or modifying the jetting can significantly improve the performance of your snowblower at high altitudes.
Understanding the Importance of Jetting
The jets in the carburetor control the flow of fuel from the fuel bowl into the engine’s combustion chamber. In high altitude areas, the thinner air requires a different fuel flow to maintain the proper air-fuel ratio. If the jetting is not adjusted accordingly, the snowblower may experience decreased power and sluggish performance. Modifying or replacing the jets can enable the engine to receive the appropriate amount of fuel and optimize its operation at higher altitudes.
Determining If Jetting Replacement is Necessary
Determining if jetting replacement is necessary involves careful observation of the snowblower’s performance. If you notice a persistent lean or rich condition, even after adjusting the carburetor and air-fuel mixture, it may be a sign that the jets need modification or replacement. Consult the snowblower’s manual or seek professional assistance to determine the appropriate jetting for high altitude conditions. Jetting replacement or modification can greatly enhance the performance of your snowblower and ensure efficient snow removal.

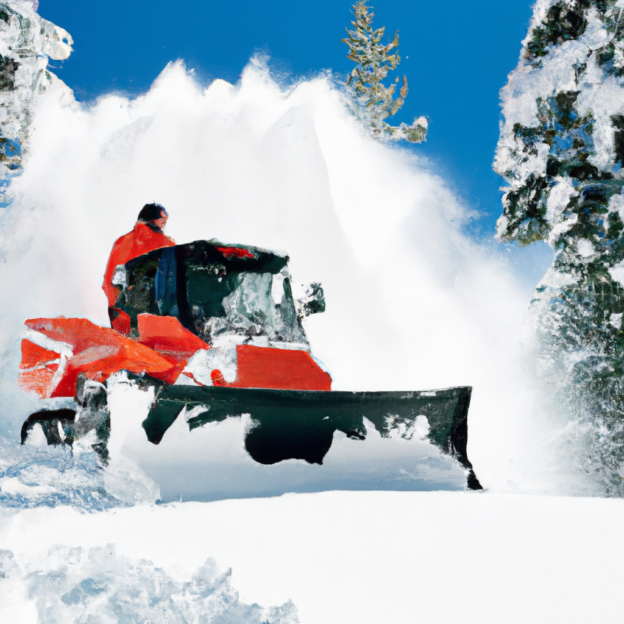
This image is property of compactequip.com.
Installing a High Altitude Kit
If your snowblower does not come equipped with high altitude capabilities, installing a high altitude kit can provide the necessary adjustments and modifications to help it perform optimally in high altitude areas.
Understanding High Altitude Kits
High altitude kits are specifically designed to address the challenges posed by higher elevation. These kits typically include various components such as carburetor jets, air intake restrictors, and other parts necessary for adjusting the fuel-air mixture and optimizing the engine’s performance in thinner air. Installing a high altitude kit can ensure that your snowblower operates efficiently and delivers the power needed for effective snow removal in high altitude conditions.
Steps to Install a High Altitude Kit
The installation process for a high altitude kit may vary depending on the snowblower model. It is essential to consult the manufacturer’s instructions or seek professional assistance for proper installation. Generally, the process involves replacing or modifying specific components of the snowblower, such as the carburetor jets or air intake restrictor. Follow the provided instructions carefully, ensuring all components are properly installed and adjusted to match the high altitude specifications. By installing a high altitude kit, you can optimize your snowblower’s performance for the unique challenges of high altitude snow removal.
Modifying the Ignition Timing
Ignition timing refers to the precise moment when the spark plug ignites the air-fuel mixture in the combustion chamber. Modifying the ignition timing can help your snowblower adapt to high altitude conditions and maximize its performance.
Understanding the Ignition Timing
The ignition timing plays a crucial role in the overall operation of the snowblower’s engine. By adjusting the timing, you can optimize the combustion process to achieve maximum power and efficiency. In high altitude areas, the thinner air affects the combustion characteristics, necessitating adjustments to the ignition timing. Modifying the ignition timing can help ensure proper ignition and efficient power delivery, even in high altitude conditions.
Modifying Ignition Timing for High Altitudes
Modifying the ignition timing is a complex process that requires expertise and precision. It is recommended to consult a professional or refer to the snowblower’s manual for detailed instructions. The process generally involves locating the ignition timing adjustment on the engine and making slight adjustments to advance or retard the timing. Care must be taken not to overadvance the timing, as this can lead to engine damage. With the proper adjustments, the engine can fire at the optimum moment and deliver the power needed to tackle snow removal at high altitudes.

This image is property of volvoceblog.com.
Adjusting the Throttle Cable
Proper adjustment of the throttle cable is essential for ensuring smooth and responsive engine performance. Adapting the throttle cable for high altitude use allows you to have greater control over the engine’s power output and response.
Importance of Throttle Cable Adjustment
The throttle cable is responsible for controlling the engine’s speed and power output. In high altitude areas, where the air is thinner, precise control of the throttle becomes crucial for optimal performance. Adjusting the throttle cable allows you to fine-tune the engine’s power delivery to match the changing snow conditions and the challenging terrain commonly found at higher altitudes. With proper throttle cable adjustment, you can ensure smooth operation and efficient snow removal.
Steps to Adjust the Throttle Cable
To adjust the throttle cable, start by locating the throttle control on your snowblower. Depending on the model, it may be a lever or a knob. Check the snowblower’s manual or consult a professional for specific instructions on adjusting the throttle cable. Generally, the process involves loosening the cable adjustment nut, adjusting the cable tension to match the desired engine speed, and then tightening the adjustment nut securely. It is important to ensure that the throttle moves freely and returns to the idle position smoothly. By making the necessary adjustments, you can have precise control over your snowblower’s engine power and response, even in high altitude conditions.
Inspecting and Cleaning the Spark Plug
The spark plug is a critical component of the snowblower’s ignition system. Regular inspection and cleaning of the spark plug are essential for maintaining optimal engine performance, especially in high altitude areas.
Importance of a Clean Spark Plug
A clean spark plug is crucial for efficient combustion and reliable ignition. Over time, the spark plug can become fouled or covered in carbon deposits, leading to decreased performance and potential starting issues. In high altitude areas, where the air is thinner, it becomes even more essential to ensure that the spark plug is clean and functioning properly. By regularly inspecting and cleaning the spark plug, you can prevent performance issues and ensure reliable operation of your snowblower.
Steps to Inspect and Clean the Spark Plug
Inspecting and cleaning the spark plug is a relatively simple task that can be done with basic tools. Start by locating the spark plug on the engine. Use a spark plug wrench to remove it carefully. Examine the electrode for any signs of fouling, carbon deposits, or wear. If necessary, use a wire brush or spark plug cleaner to remove any debris or deposits. Ensure that the electrode gap is within the manufacturer’s specified range and adjust if needed. Before reinstalling the spark plug, apply a small amount of anti-seize compound to the threads to prevent seizing. Finally, carefully reconnect the spark plug wire. Regular inspection and cleaning of the spark plug will help maintain optimal ignition and engine performance in high altitude conditions.

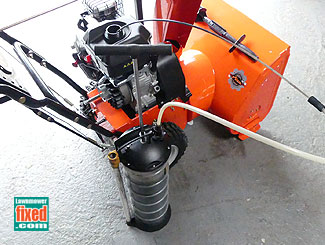
This image is property of i.ytimg.com.
Ensuring Proper Lubrication
Proper lubrication is crucial for the smooth operation and longevity of your snowblower. In high altitude areas, where the air is thinner and the temperatures often colder, choosing the right lubricant and applying it correctly becomes even more important.
Choosing the Right Lubricant
In high altitude areas, where temperatures can drop significantly, it is essential to choose a lubricant that is specifically designed for cold weather use. Look for lubricants with appropriate viscosity ratings for cold temperatures to ensure smooth operation of the snowblower’s engine and other moving parts. Consult the snowblower’s manual or consult a professional to determine the recommended lubricants for high altitude use. Using the right lubricant will help protect the engine from excessive wear, prevent freezing, and ensure optimal performance in frigid conditions.
Lubrication Tips for High Altitude Performance
Proper lubrication goes beyond just selecting the right lubricant. Applying the lubricant correctly is also crucial for optimal high altitude performance. Start by referring to the snowblower’s manual for specific lubrication points and recommended intervals. Pay special attention to areas exposed to extreme temperatures, such as the engine’s moving parts and the auger gearbox. Apply the lubricant according to the manufacturer’s instructions, ensuring that the components are adequately coated. Regularly inspect the lubricated parts and reapply the lubricant as needed. By following these lubrication tips, you can ensure smooth operation and prolong the lifespan of your snowblower in high altitude conditions.
Storing and Maintaining the Snowblower
Proper storage and regular maintenance are essential for ensuring optimal performance of your snowblower, regardless of the altitude. By following a few key practices, you can keep your snowblower in excellent shape and ready for high altitude snow removal when needed.
Proper Storage Practices
When the snow season is over or when your snowblower is not in use for an extended period, proper storage is crucial to maintain its performance. Start by thoroughly cleaning your snowblower, removing any dirt, debris, or snow. Drain the fuel from the tank and run the engine until it runs out of fuel to prevent fuel system issues. Remove the spark plug and apply a small amount of oil to the cylinder to prevent rusting. Store the snowblower in a clean, dry location, preferably indoors, to protect it from the elements. Regularly inspect the stored snowblower for any signs of damage or wear, and address them promptly. Proper storage practices will help prolong the lifespan of your snowblower and ensure it is ready for optimal performance when high altitude snow removal season arrives.
Regular Maintenance for Optimal Altitude Performance
Regular maintenance is crucial for keeping your snowblower in excellent condition and ensuring optimal performance at high altitudes. Follow the manufacturer’s recommended maintenance schedule outlined in the snowblower’s manual. This includes tasks such as changing the oil, inspecting and replacing worn belts, lubricating moving parts, and checking the fuel and air filters. Regularly inspect the snowblower for any signs of damage or wear, and address them promptly. Pay attention to the specific maintenance requirements for high altitude use, such as carburetor adjustments and jetting modifications. By performing regular maintenance, you can keep your snowblower running smoothly and efficiently in high altitude conditions.
In conclusion, choosing the right snowblower for high altitude areas and making the necessary modifications and adjustments are crucial for optimal performance in these challenging conditions. By understanding the unique challenges posed by high altitudes and following the recommended steps for carburetor adjustment, air-fuel mixture modification, jetting replacement, and ignition timing modification, you can enhance your snowblower’s performance. Additionally, installing a high altitude kit, adjusting the throttle cable, inspecting and cleaning the spark plug, ensuring proper lubrication, and following proper storage and maintenance practices are essential for maintaining your snowblower’s optimal altitude performance. With the right snowblower and the necessary modifications, your high altitude snow removal tasks can be handled efficiently and effectively.