So you’ve got a snowblower and you’re ready to tackle the winter weather head-on, but suddenly you’re faced with a problem: the carburetor needs adjusting. Don’t worry, you’re not alone. Adjusting the carburetor on your snowblower may seem like a daunting task, but with a few simple steps, you’ll have it running smoothly in no time. In this article, we’ll walk you through the process of adjusting the carburetor on your snowblower, helping you navigate through the snow-covered roads with ease.

This image is property of i.ytimg.com.
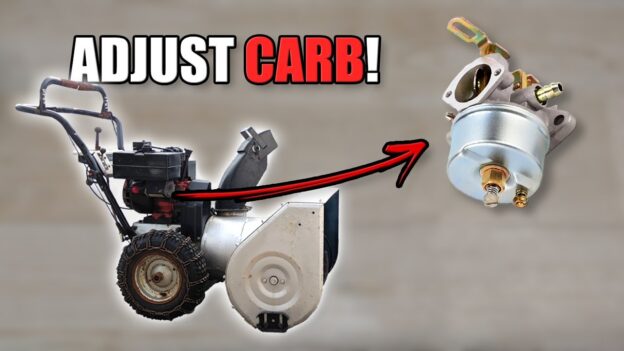
Checking the Carburetor
When it comes to keeping your snowblower in top shape, one of the most important maintenance tasks is checking and adjusting the carburetor. The carburetor is responsible for mixing fuel and air in the proper ratio to ensure efficient engine performance. If your snowblower is not running smoothly or is experiencing starting issues, it may be time to check the carburetor. Follow these steps to effectively check and adjust the carburetor on your snowblower.
Step 1: Safety Precautions
Before you begin working on your snowblower’s carburetor, it’s crucial to prioritize safety. Make sure the snowblower is turned off and the engine is cool. Always wear protective gear, including gloves and safety glasses, to prevent any accidents or injuries. Additionally, ensure that you are working in a well-ventilated area to avoid inhaling any harmful fumes.
Step 2: Remove the Air Filter Cover
To access the carburetor, you’ll need to remove the air filter cover. This cover is usually located on the side or top of the engine. Use a screwdriver or a wrench, depending on the type of fasteners used, to loosen and remove the screws or bolts securing the cover. Once the cover is removed, set it aside in a safe place.
Step 3: Inspect the Carburetor
With the air filter cover removed, you will now have a clear view of the carburetor. Take a close look at the carburetor, examining for any signs of damage or debris. Look for loose connections, worn-out gaskets, or clogged passages. If you notice any issues, such as a damaged gasket or a buildup of dirt and debris, it may be necessary to clean or replace the affected parts.
Step 4: Check Fuel Filter and Lines
Next, it’s essential to inspect the fuel filter and lines connected to the carburetor. Over time, fuel filters can become clogged or lines can develop leaks, causing fuel flow issues. Check the fuel filter for any signs of blockage or particles. Also, examine the fuel lines for any cracks, leaks, or looseness. If you find any problems with the fuel filter or lines, it’s recommended to replace them to ensure proper fuel delivery to the carburetor.
Step 5: Clean the Carburetor
To optimize the performance of your snowblower’s carburetor, it’s important to keep it clean. Use a carburetor cleaning solution specifically designed for small engine carburetors. Apply the solution to the carburetor, ensuring all the components and passages are thoroughly cleaned. You can use a small brush or a clean cloth to remove any dirt or grime. Pay close attention to the tiny openings and jets, as these can easily get clogged and affect the carburetor’s functionality. Once the carburetor is clean, reassemble the parts, ensuring they are properly secured.
Adjusting Fuel Mixture
After checking and cleaning the carburetor, it may be necessary to make adjustments to the fuel mixture to achieve optimal performance. The fuel mixture determines the ratio of fuel to air that enters the combustion chamber. Adjusting the fuel mixture can help improve the snowblower’s idle and high-speed performance. Here’s how you can adjust the fuel mixture on your snowblower’s carburetor.
Step 1: Locate the Adjustment Screws
To adjust the fuel mixture, you will need to locate the adjustment screws on the carburetor. These screws are typically labeled as “idle” and “high-speed.” Refer to your snowblower’s owner manual to find the exact location of these screws, as it may vary based on the make and model of your snowblower.
Step 2: Understanding the Idle Screw
The idle screw controls the amount of fuel entering the engine during idle speed. By turning the idle screw clockwise, you will increase the fuel flow, and by turning it counterclockwise, you will decrease the fuel flow. It’s important to note that small adjustments should be made to avoid making drastic changes that may affect the engine’s performance.
Step 3: Adjusting the Idle Screw
To adjust the idle screw, start by warming up the engine for a few minutes. Then, locate the idle screw and begin turning it in small increments, either clockwise or counterclockwise, depending on the desired adjustment. Observe the engine’s idle speed and listen for any noticeable changes in its performance. Continue making slight adjustments until you achieve a smooth and steady idle.
Step 4: Understanding the High-Speed Screw
The high-speed screw, as the name suggests, controls the fuel flow during high-speed operation. By turning the high-speed screw clockwise, you will increase the fuel flow, and by turning it counterclockwise, you will decrease the fuel flow. Similar to the idle screw, gradual adjustments should be made to achieve the desired performance.
Step 5: Adjusting the High-Speed Screw
To adjust the high-speed screw, it’s important to have the snowblower running at full throttle. Start by locating the high-speed screw on the carburetor and begin turning it in small increments, just like the idle screw. Pay attention to the engine’s response, specifically its acceleration and overall performance at high speeds. Make minor adjustments until you achieve optimal performance.
Step 6: Checking for Optimal Performance
Once you’ve completed adjusting the fuel mixture, it’s important to test the engine’s performance. Take your snowblower for a test run, paying attention to how it starts, idles, accelerates, and runs at full speed. If you notice any issues, such as poor acceleration, rough idling, or loss of power, further adjustments may be necessary. Remember that fine-tuning may be required to achieve the best results.

This image is property of i.ytimg.com.
Fine-Tuning the Carburetor
Even after adjusting the fuel mixture, there may be additional fine-tuning needed to ensure optimal performance. Fine-tuning involves making small tweaks to various carburetor settings to maximize efficiency and power output. Here’s how you can fine-tune the carburetor on your snowblower.
Step 1: Testing the Engine’s Performance
Before proceeding with any fine-tuning adjustments, it’s important to thoroughly test the engine’s performance. Take your snowblower for a test run, paying close attention to any issues or areas that need improvement. Note any symptoms such as poor acceleration, rough idling, or decreased power.
Step 2: Adjusting the Idle Speed
If you notice that the snowblower’s idle speed is not optimal, you can make adjustments to the idle speed screw. Turn the idle speed screw clockwise to increase the idle speed and counterclockwise to decrease it. Make small adjustments and test the engine’s performance after each adjustment until you achieve a smooth and consistent idle speed.
Step 3: Fine-Tuning the Idle Mixture
To fine-tune the carburetor’s idle mixture, you will need to make slight adjustments to the idle mixture screw. Turning the idle mixture screw clockwise will enrich the fuel mixture, while turning it counterclockwise will lean it out. Make tiny adjustments, one-eighth of a turn at a time, and carefully observe the engine’s performance.
Step 4: Fine-Tuning the High-Speed Mixture
Similar to the idle mixture, the high-speed mixture can also be fine-tuned to optimize the snowblower’s performance at higher speeds. Locate the high-speed mixture screw and make small adjustments, one-eighth of a turn at a time, until you achieve the desired performance. Test the snowblower’s acceleration and overall power to ensure the adjustments have been effective.
Step 5: Rechecking the Engine’s Performance
After making the fine-tuning adjustments, it’s crucial to retest the engine’s performance to ensure the changes have had a positive impact. Take your snowblower for another test run, paying close attention to any improvements or changes. If you are still experiencing issues, further adjustments may be necessary.
Troubleshooting Carburetor Issues
Despite proper maintenance and adjustments, carburetor issues can still arise. Understanding and addressing these symptoms can help you identify and resolve any problems with your snowblower’s carburetor. Here are some common symptoms and troubleshooting tips.
Symptom 1: Engine Won’t Start
If your snowblower’s engine won’t start, there may be a problem with the carburetor. Check for clogged fuel lines, a dirty carburetor, or a faulty fuel filter. Clean or replace any components that are causing the fuel flow issue.
Symptom 2: Engine Runs Rough
If your snowblower’s engine runs rough or sputters, it’s a sign of an improper fuel mixture. Check the carburetor for any debris or dirt that may be affecting the fuel flow. Clean the carburetor and make necessary adjustments to the fuel mixture screws.
Symptom 3: Engine Stalls Under Load
If the engine stalls or loses power when under load, it may be due to a lean fuel mixture. Check the high-speed mixture screw and adjust it to increase fuel flow. Be cautious not to over-enrich the mixture, as it can cause other issues.
Symptom 4: Engine Overheating
An overheating engine can be a result of a rich fuel mixture. Check the high-speed mixture screw and adjust it to lean out the fuel mixture. If the issue persists, there may be other underlying problems that require professional assistance.
Symptom 5: Fuel Leakage
If you notice fuel leaking from the carburetor, it’s important to address the issue promptly. Check for loose connections, damaged gaskets, or faulty fuel lines. Replace or tighten any components as needed.

This image is property of www.ereplacementparts.com.
Tips and Precautions
To ensure your snowblower’s carburetor remains in good working condition, here are some tips and precautions to follow:
Tip 1: Use Fresh Fuel
Always use fresh fuel in your snowblower. Fuel that has been sitting for a long time can degrade and cause issues with the carburetor. Consider using a fuel stabilizer to keep the fuel fresh during the off-season.
Tip 2: Regular Maintenance
Perform regular maintenance on your snowblower, including cleaning and inspecting the carburetor. Regularly check for any signs of damage, blockages, or leaks. Keeping up with maintenance will prolong the life of your snowblower and ensure its optimal performance.
Tip 3: Use Fuel Stabilizer in Off-Season
During the off-season when your snowblower is not in use, add a fuel stabilizer to the fuel tank. This will prevent the fuel from deteriorating and causing carburetor issues when you start the snowblower again.
Precaution 1: Wear Protective Gear
When working on the carburetor or performing any maintenance tasks, always wear protective gear, including gloves and safety glasses. This will protect you from any potential accidents, such as fuel leakage or debris flying off.
Precaution 2: Work in a Well-Ventilated Area
When working on your snowblower’s carburetor, ensure that you are in a well-ventilated area. Carburetor cleaning solutions and fumes can be hazardous if inhaled in a confined space. Open the garage door or work outside to avoid any health risks.
Conclusion
Checking and adjusting the carburetor on your snowblower is an essential maintenance task that ensures optimal engine performance. By following the steps outlined in this article, you can effectively maintain and troubleshoot any issues related to the carburetor. Remember to prioritize safety, take your time during adjustments, and regularly perform maintenance tasks to keep your snowblower running smoothly all winter long.
In conclusion, by properly checking, adjusting, and fine-tuning your snowblower’s carburetor, you can maximize its performance and prolong its lifespan. With regular maintenance and attention to any symptoms or issues, you’ll be able to conquer the winter season without any hitch. So, roll up your sleeves, grab your tools, and get ready to optimize your snowblower’s carburetor for a winter full of efficient snow-clearing power.

This image is property of i.ytimg.com.