Tag Archives: Snowblower

Are There Any Snowblowers That Can Be Operated Remotely Or Autonomously?

Imagine never having to go out into the freezing cold to clear your driveway of snow again. Sounds like a dream, right? Well, what if I told you that there may be a solution? In this article, we will explore the possibility of snowblowers that can be operated remotely or even autonomously. Say goodbye to hours of back-breaking snow removal and hello to a more efficient and convenient way of tackling winter’s worst. Keep reading to find out if this technological innovation is just around the corner. Yes, there are snowblowers that can be operated remotely or autonomously. In this article, we will explore the different types of snowblowers that offer these features, their definition, advantages, and disadvantages. We will also delve into the technology behind remote and autonomous snowblowers, the challenges and limitations they face, and the safety considerations that need to be taken into account. Additionally, we will discuss the various applications of remote and autonomous snowblowers, the future developments and trends in this field, and the environmental considerations associated with their use. Finally, we will explore the costs and availability of these snowblowers.

Are There Any Snowblowers That Can Be Operated Remotely Or Autonomously?

This image is property of library.homeserve.com.

Types of Snowblowers

Snowblowers come in different types to suit various snow-clearing needs. The three main types are single-stage, two-stage, and three-stage snowblowers.

Single-stage Snowblowers

Single-stage snowblowers are typically the smallest and most lightweight option. They rely on a single rotating auger to both gather the snow and propel it through the discharge chute. While these snowblowers are usually best suited for light snowfalls and smaller areas, they can still be effective in clearing driveways and sidewalks. Their simplicity and compact size make them easy to maneuver and store.

Two-stage Snowblowers

Two-stage snowblowers are larger and more powerful than single-stage models. They have an additional impeller that throws the collected snow out through the discharge chute, allowing for greater velocity and distance. These snowblowers are suitable for clearing larger areas and handling heavier snowfalls. The auger gathers the snow and feeds it to the impeller, which forcefully blows it out of the machine. Two-stage snowblowers are generally self-propelled, which makes them easier to handle in challenging icy or uneven terrain.

Three-stage Snowblowers

Three-stage snowblowers are the most powerful and heavy-duty option. They feature an accelerator in addition to the auger and impeller, which provides an extra stage of snow processing. The accelerator helps break down the snow before it reaches the impeller, resulting in faster and more efficient snow clearing. These snowblowers are typically used for heavy wet snow or ice, making them suitable for clearing large areas like parking lots or commercial spaces. However, they are usually larger and heavier, requiring more storage space and effort to operate.

Remote-Controlled Snowblowers

Remote-controlled snowblowers offer the convenience of operating the machine from a distance using a wireless remote control. Let’s explore their definition, features, and the advantages and disadvantages they offer.

Definition and Features

Remote-controlled snowblowers are equipped with communication technology that allows the user to control the snowblower’s movement, speed, and other functions remotely. The wireless remote control provides the operator with the flexibility to maneuver the snowblower without having to be physically close to it. These snowblowers often come with features like variable speed control, chute rotation control, and even heated handgrips for added comfort during operation.

Advantages and Disadvantages

The primary advantage of remote-controlled snowblowers is the convenience they offer. You can control the snowblower from a safe distance, ensuring your comfort and reducing the risk of exposure to cold temperatures. They also allow for precise maneuvering, especially in tight or hard-to-reach areas, as the operator can adjust the movement of the snowblower more easily. Additionally, remote-controlled snowblowers can be operated by individuals with limited physical capabilities, enabling them to clear snow without exerting excessive effort.

However, there are also some disadvantages to consider. Remote-controlled snowblowers tend to be more expensive than their manually operated counterparts. They also require batteries for both the snowblower and the remote control, which means you need to ensure they are adequately charged or have backup batteries available. Furthermore, operating the snowblower remotely may not provide the same level of visibility as operating it up close, which could potentially lead to issues with accuracy or obstacle detection.

Popular Remote-Controlled Snowblowers

Some popular remote-controlled snowblower models include the Troy-Bilt Storm Tracker 2890, the Husqvarna ST 224P, and the Cub Cadet 3X 26″. These models offer various features such as easy-to-use remote controls, powerful engines, and adjustable snow discharge chutes. It’s always recommended to read reviews and compare different brands and models to find the one that best suits your needs and preferences.

Are There Any Snowblowers That Can Be Operated Remotely Or Autonomously?

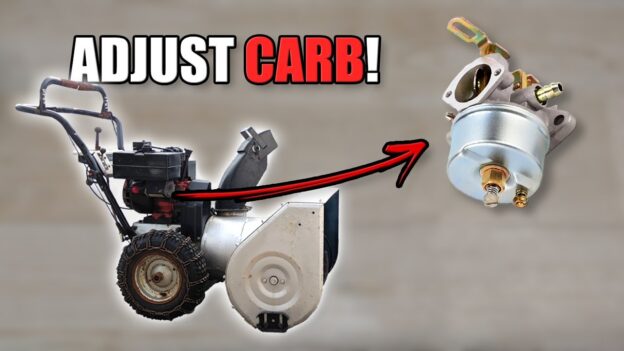
This image is property of s.yimg.com.

Autonomous Snowblowers

Autonomous snowblowers take convenience to the next level by offering automated snow clearing without any direct operator control. Let’s delve into their definition, working principle, and the advantages and disadvantages they bring.

Definition and Working Principle

Autonomous snowblowers are equipped with advanced technologies, including sensors, navigation systems, and software algorithms, that enable them to operate independently. These snowblowers use various sensors to detect obstacles and map the surrounding environment. They then use their navigation systems and control algorithms to determine the most efficient path for snow clearing. The snowblower can navigate and clear the snow without any direct input from the user, making the process fully automated.

Advantages and Disadvantages

The main advantage of autonomous snowblowers is the complete hands-free operation they offer. You can simply set the snowblower’s parameters, such as the area to be cleared and the desired time, and let it do the job on its own. This frees up your time and energy for other tasks, especially during heavy snowfalls or harsh weather conditions. Autonomous snowblowers can also provide consistent and reliable snow clearing, as they follow pre-programmed routes and algorithms that optimize efficiency.

However, there are some limitations and challenges to consider. First, autonomous snowblowers tend to be more expensive than manually operated or remote-controlled models. The advanced technology and systems required for autonomous operation contribute to the higher cost. Second, these snowblowers rely heavily on accurate sensor data and sophisticated algorithms for obstacle detection and avoidance. While technology has improved greatly, there may still be instances where obstacles are not detected, leading to potential damage or accidents. Lastly, autonomous snowblowers may have limitations when facing certain snow conditions or terrain, as their algorithms and systems may not be optimized for every scenario.

Current State of Autonomous Snowblowers

Currently, autonomous snowblowers are still in the early stages of development and adoption. They have primarily been used in research and experimental settings or limited commercial applications. However, with advancements in technology and the increasing demand for automated solutions, the development and production of autonomous snowblowers are expected to continue to evolve. As the challenges and limitations are addressed and refined, we can anticipate wider availability and more robust performance from autonomous snowblowers in the future.

Technology behind Remote and Autonomous Snowblowers

Both remote-controlled and autonomous snowblowers rely on advanced technology to offer their unique features. Let’s take a closer look at the key technologies involved in their operation.

Wireless Communication

Remote-controlled snowblowers use wireless communication technology to connect the remote control to the snowblower. This allows for seamless transmission of commands and instructions between the operator and the machine. Bluetooth and radio frequency (RF) technologies are commonly used for this purpose.

Autonomous snowblowers, on the other hand, often utilize more advanced wireless technologies to communicate with other devices and systems. They may employ Wi-Fi, cellular, or even satellite connectivity to enable data exchange, remote monitoring, and control.

Sensors and Navigation Systems

Both remote-controlled and autonomous snowblowers rely on sensors and navigation systems to gather information about the environment and facilitate their operation.

Sensors, such as cameras, LiDAR (Light Detection and Ranging), ultrasonic sensors, and radar, are used to detect obstacles, measure distances, and capture environmental data. These sensors provide valuable information that allows the snowblower to navigate and avoid obstacles or hazards in its path.

Navigation systems, including GPS (Global Positioning System), gyroscopes, and accelerometers, help the snowblower determine its position, orientation, and movement. These systems enable the snowblower to follow predetermined routes, maintain proper alignment, and optimize its snow-clearing efficiency.

Both remote-controlled and autonomous snowblowers rely on a combination of sensors and navigation systems to ensure safe and efficient operation.

Software and Control Algorithms

Remote-controlled and autonomous snowblowers employ software and control algorithms to process data from sensors, interpret user commands, and make decisions regarding movement, speed, and other operations.

For remote-controlled snowblowers, the software and control algorithms primarily focus on translating the operator’s commands received from the remote control into the appropriate actions. These algorithms ensure that the snowblower responds accurately and promptly to the user’s input.

Autonomous snowblowers, on the other hand, utilize advanced algorithms that leverage sensor data and navigation system inputs to make complex decisions autonomously. These algorithms determine the optimal path, adjust speed based on snow conditions, and enable obstacle detection and avoidance.

Software and control algorithms play a vital role in ensuring the smooth and precise operation of both remote-controlled and autonomous snowblowers.

Are There Any Snowblowers That Can Be Operated Remotely Or Autonomously?

This image is property of arc-anglerfish-arc2-prod-bostonglobe.s3.amazonaws.com.

Challenges and Limitations

Like any technology, remote and autonomous snowblowers face certain challenges and limitations. These factors should be taken into account when considering their use.

Snow Conditions

One of the primary challenges for snowblowers of all types is dealing with varying snow conditions. Light, fluffy snow is easier to clear than heavy, wet snow or ice. Remote-controlled and autonomous snowblowers may struggle with certain types of snow due to differences in their snow-processing capabilities. For example, single-stage snowblowers may struggle with heavy snow, while two-stage or three-stage models may handle it more effectively.

Obstacle Detection and Avoidance

Accurate obstacle detection and avoidance are critical for both remote-controlled and autonomous snowblowers. While advancements in sensor technology have greatly improved obstacle detection capabilities, there are still limitations. Small or low-lying objects, such as rocks or branches buried in the snow, may go undetected and pose a risk to the snowblower. Additionally, sudden changes in the environment, such as animals or children entering the path of the snowblower, can present challenges for both detection and avoidance.

Power and Battery Life

Remote-controlled and autonomous snowblowers rely on power sources, typically gasoline engines or batteries, for their operation. The power and battery life of these machines can impact their performance and run time. Gasoline-powered snowblowers generally provide greater power and longer run times compared to battery-powered ones. However, battery technology is continuously improving, and newer models offer longer battery life and faster charging capabilities.

Cost and Affordability

Remote-controlled and autonomous snowblowers tend to be more expensive than their manually operated counterparts. The advanced technology, sensors, navigation systems, and software algorithms required for remote or autonomous operation contribute to the higher cost. While the prices of these machines may vary depending on the brand and model, their affordability might still be a limiting factor for some users.

Safety Considerations

Safety is of utmost importance when operating any type of snowblower, including remote-controlled and autonomous models. Let’s explore the safety considerations that need to be taken into account.

User Safety

When operating a remote-controlled or autonomous snowblower, the safety of the user should always be the top priority. Users should follow the manufacturer’s instructions and guidelines for safe operation. This includes wearing appropriate protective gear, such as goggles and gloves, to protect against flying debris and cold temperatures. Additionally, it’s essential to ensure that the remote control or autonomous operation is conducted in a safe manner, avoiding any risky or hazardous situations.

Public Safety

Snow clearing in public areas, such as sidewalks or roadways, requires careful attention to public safety. Remote-controlled or autonomous snowblowers should be operated in accordance with local regulations and guidelines. Clear and visible signage or barriers should be used to indicate the presence of the snowblower and help ensure public awareness and safety. It’s important to consider the presence of pedestrians, vehicles, and other potentially vulnerable individuals when operating these machines in public spaces.

Emergency Shutdown Systems

Both remote-controlled and autonomous snowblowers should be equipped with emergency shutdown systems to ensure immediate and safe stopping of the machine in case of emergencies or unforeseen circumstances. These systems can include easily accessible emergency stop buttons or switches that instantly halt the operation of the snowblower. It’s crucial for users to be familiar with the location and functioning of these shutdown systems to enable quick response and prevent accidents.

Are There Any Snowblowers That Can Be Operated Remotely Or Autonomously?

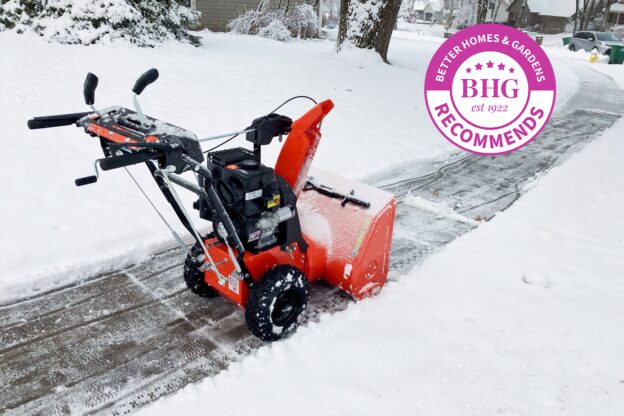
This image is property of static.urbandaddy.com.

Applications of Remote and Autonomous Snowblowers

Remote and autonomous snowblowers offer a range of applications in different settings. Let’s explore some of these applications.

Residential Use

Remote-controlled snowblowers are well-suited for residential use, allowing homeowners to clear snow from their driveways, walkways, and other areas without direct physical exertion. The convenience and ease of operation make these snowblowers a practical choice for individuals who prefer not to shovel manually or have limited physical capabilities. Autonomous snowblowers are also being developed for residential use, providing an automated solution for snow clearing in local neighborhoods.

Commercial Use

In commercial settings, such as retail establishments, offices, or industrial complexes, remote-controlled and autonomous snowblowers offer efficient snow clearing solutions. These snowblowers can quickly clear parking lots, sidewalks, and other large areas in a timely and consistent manner. The ability to remotely control or automate the snow clearing process reduces labor costs and ensures the area remains safe and accessible for customers, employees, and visitors.

Public Facilities and Road Clearing

Remote-controlled and autonomous snowblowers have the potential to revolutionize snow clearing in public facilities and on roads. These machines can be programmed to follow predefined routes and schedules, ensuring timely and efficient snow removal. By minimizing the reliance on human labor and providing consistent snow clearing, remote and autonomous snowblowers can help maintain essential services and keep public areas safe and accessible during winter weather events.

Future Developments and Trends

The field of remote and autonomous snowblowers is continuously evolving, with ongoing developments and emerging trends. Here are some key areas of future focus.

Improved Snow Sensing Technology

Advancements in snow sensing technology, including more accurate snow depth sensors and snow condition detectors, will contribute to improved performance and efficiency of remote and autonomous snowblowers. These technologies can help snowblowers adapt to different snow conditions, adjust their operation accordingly, and provide more accurate data for decision-making algorithms.

Integration with Smart Homes

The integration of remote-controlled and autonomous snowblowers with smart home systems is an emerging trend. This allows users to control the snowblower through voice commands or smartphone applications, enabling seamless integration into their overall smart home ecosystem. For example, homeowners can schedule snow clearing while they are away or monitor the progress of autonomous snowblowers remotely.

Collaborative Autonomous Snowblowers

Collaborative autonomous snowblowers are an exciting area of development. These machines can work together in a coordinated manner to clear larger areas quickly and efficiently. By sharing data and coordinating their movements, collaborative autonomous snowblowers can overcome limitations faced by individual machines and offer enhanced snow clearing performance.

Are There Any Snowblowers That Can Be Operated Remotely Or Autonomously?

This image is property of assets2.cbsnewsstatic.com.

Environmental Considerations

When considering snowblowers, it’s important to take into account their environmental impact and sustainability. Remote-controlled and autonomous snowblowers can contribute to reducing energy consumption and emissions compared to manual snow clearing methods.

Energy Efficiency

Many remote and autonomous snowblowers are designed with energy efficiency in mind. These machines often utilize advanced engine technology or battery-powered systems that offer better fuel efficiency or longer battery life. By optimizing the energy consumption of snowblowers, we can reduce both cost and environmental impact.

Emission Reduction

Gasoline-powered snowblowers can contribute to air pollution through the emission of pollutants such as carbon monoxide and nitrogen oxides. However, advancements in engine technology have led to reduced emissions in newer snowblower models. Battery-powered snowblowers produce zero emissions during operation, making them an environmentally friendly choice for those concerned about air quality and pollution.

Sustainable Snow Management

Snow management practices, such as where and how the cleared snow is deposited, are also important considerations. Remote and autonomous snowblowers should be used in conjunction with responsible snow management practices to minimize the environmental impact. This includes avoiding the deposit of snow in sensitive areas or bodies of water and utilizing snow storage or melting systems that prioritize environmental sustainability.

Costs and Availability

The cost and availability of remote-controlled and autonomous snowblowers can vary depending on factors such as brand, model, and geographic location.

Price Range

Remote-controlled snowblowers generally fall within the range of $600 to $2,500, depending on the features, size, and brand. Autonomous snowblowers tend to be more expensive due to the advanced technology involved, and prices can range from $2,000 to $10,000 or higher.

Brands and Models

There are several reputable brands that offer remote-controlled and autonomous snowblowers. Some popular brands in this space include Troy-Bilt, Husqvarna, Cub Cadet, and Honda. Each brand offers a range of models with varying features and capabilities, allowing users to choose the one that best suits their needs.

Availability in Different Regions

The availability of remote-controlled and autonomous snowblowers can vary depending on the region and market demand. These machines are more commonly found in areas that experience heavy snowfall or have a greater emphasis on technological advancements. However, as the technology continues to evolve and gain popularity, we can expect wider availability of these snowblowers in different regions.

In conclusion, remote-controlled and autonomous snowblowers offer convenience, efficiency, and automation in snow clearing processes. While remote-controlled models provide the flexibility of operation from a distance, autonomous snowblowers take it a step further by offering hands-free snow clearing. The technology behind these snowblowers, including wireless communication, sensors, navigation systems, and software algorithms, enables their advanced functionality. However, there are challenges and limitations to consider, such as snow conditions, obstacle detection, power and battery life, and cost. Safety considerations, such as user safety, public safety, and emergency shutdown systems, are essential when operating these machines. Remote and autonomous snowblowers find applications in residential, commercial, and public facility snow clearing. The future developments and trends in this field include improved snow sensing technology, integration with smart homes, and the emergence of collaborative autonomous snowblowers. Environmental considerations, including energy efficiency, emission reduction, and sustainable snow management, are important for minimizing the environmental impact of these machines. Finally, the costs and availability of remote-controlled and autonomous snowblowers vary depending on factors such as price range, brands and models, and regional availability.

How Do I Deal With A Leaking Snowblower?

So you wake up one morning to find that your trusty snowblower is leaving a trail of oil stains on your garage floor. Frustrating, isn’t it? No need to panic, though! In this article, we’ll walk you through some simple steps to help you deal with a leaking snowblower and get it back to its reliable self in no time. Whether it’s a small drip or a major leakage, we’ve got you covered with practical tips and solutions to keep your snowblower running smoothly and your garage oil-free.

How Do I Deal With A Leaking Snowblower?

Inspecting the Leaking Snowblower

If you find yourself dealing with a leaking snowblower, the first step is to identify the source of the leak. This will help you determine the best course of action to fix the issue. Leaks can come from various components, such as the fuel system, oil system, coolant system, or even damaged gaskets or seals. By inspecting each of these areas, you can narrow down the cause of the leak and proceed with the necessary repairs.

Identify the source of the leak

To identify the source of the leak, start by examining the snowblower closely. Look for any visible signs of fluid pooling or dripping. Take note of the color and consistency of the leaking fluid, as this can provide clues about which system it may be coming from. Common fluids you might find leaking from a snowblower include fuel, oil, or coolant.

Check for gasket or seal damage

Gaskets and seals are essential components of a snowblower’s engine and various systems. Over time, they can become damaged or worn-out, leading to leaks. Inspect these gaskets and seals carefully for any signs of damage or deterioration. If you notice any cracks, tears, or breaks, it’s important to address these issues promptly to prevent further leakage.

Inspect the fuel system

The fuel system of a snowblower consists of components such as fuel lines, fittings, and the carburetor. Start by checking all the fuel fittings to ensure they are tight and properly sealed. If you find any loose fittings, tighten them securely. Next, inspect the fuel lines for any signs of damage or leaks. If you notice any cracks or leaks, it is recommended to replace the damaged fuel lines. Additionally, the fuel tank cap should be cleaned regularly or replaced if it is damaged or not sealing properly. Lastly, consider checking and, if needed, repairing or replacing the carburetor, as this can also be a potential source of fuel leaks.

Examine the oil system

The oil system of a snowblower is responsible for lubricating the engine and its various moving parts. Oil leaks can occur due to damaged or loose components. Begin by checking the oil drain plug to ensure it is tightened securely. If it is loose, tighten it carefully. Additionally, inspect the oil filter for any signs of damage or leaks. If you notice any issues, it is advisable to replace the damaged or worn-out oil filter promptly. Furthermore, gaskets or seals within the oil system may become worn-out over time, leading to leaks. It is important to inspect these gaskets and seals and replace them if needed. If you come across any loose fittings, using thread seal tape or thread locking compound can help prevent leaks.

Look for coolant leaks

Coolant leaks are another common issue with snowblowers, especially in colder climates. Coolant is responsible for regulating the engine’s temperature and preventing it from overheating. Inspect the coolant system by first checking the coolant level. If it is lower than the recommended level, consider topping it up. Next, examine the radiator and hoses for any visible signs of leaks or damage. If you notice any cracks, leaks, or worn-out components, it is crucial to replace them promptly to prevent coolant leaks.

Fixing Fuel System Leaks

If you have determined that the leak is originating from the fuel system, there are several steps you can take to fix the issue and ensure the snowblower operates smoothly.

Tighten loose fuel fittings

Start by carefully inspecting all the fuel fittings in the snowblower. If you notice any loose fittings, use a suitable wrench or tool to tighten them securely. It is important not to overtighten them, as this can cause damage. Finding the appropriate balance between snug and secure is key.

Replace damaged fuel lines

If you find any fuel lines that are cracked, leaking, or damaged in any way, it is crucial to replace them. Fuel lines are essential for transporting gasoline from the tank to the engine. Before replacing the damaged fuel lines, ensure you have the correct replacement parts and follow the manufacturer’s instructions to ensure a proper fit.

Clean or replace the fuel tank cap

The fuel tank cap plays a critical role in keeping the fuel system sealed and preventing leaks. If the fuel tank cap is not sealing properly or is damaged, it should be cleaned thoroughly or replaced. This can help prevent any fuel from spilling or leaking during operation.

Repair or replace the carburetor

The carburetor is a vital component of the fuel system that mixes air and fuel to ensure proper combustion in the engine. If you suspect that the carburetor is the source of the leak, it is advisable to have it inspected by a professional or authorized service center. They can diagnose any issues and either repair or replace the carburetor as needed.

Stopping Oil Leaks

Oil leaks can be messy and harmful to the snowblower’s engine if not addressed promptly. Here are some steps to help you stop oil leaks and maintain the oil system:

Check the oil drain plug

Begin by inspecting the oil drain plug located on the bottom of the engine. Ensure it is tightened securely. Over time, vibrations and engine operation can cause the plug to become loose, leading to oil leaks. If you find the oil drain plug loose, tighten it carefully to prevent any further leakage.

Inspect the oil filter

The oil filter is responsible for removing impurities and contaminants from the engine oil. Inspect the oil filter regularly for any signs of damage or leaks. If you notice any leaks, it is crucial to replace the oil filter promptly to prevent oil from seeping out.

Replace damaged or worn-out gaskets or seals

Gaskets and seals play a crucial role in preventing oil leaks. Over time, these components can become worn-out or damaged, leading to leakage. Inspect the gaskets and seals within the oil system carefully. If you notice any signs of deterioration or damage, it is important to replace them promptly. This will help ensure a proper seal and prevent oil leaks.

Use thread seal tape or thread locking compound on loose fittings

If you come across any loose fittings within the oil system, consider using thread seal tape or thread locking compound to prevent leaks. These products are designed to provide an additional layer of sealing and help secure fittings, preventing oil leaks due to loose connections.

How Do I Deal With A Leaking Snowblower?

Addressing Coolant Leaks

Coolant leaks are a concern, especially during cold weather when the snowblower’s engine needs proper cooling. To address coolant leaks, follow these steps:

Check the coolant level

Start by checking the coolant level in the snowblower’s coolant reservoir. If the level is lower than the recommended amount, consider topping it up. It is essential to use the correct coolant mixture as specified by the manufacturer to ensure optimal performance.

Inspect the radiator and hoses

Inspect the radiator carefully for any signs of leaks, cracks, or damage. Additionally, check the hoses connected to the radiator for any visible damage or leaks. If you notice any issues, including worn-out components or leaks, it is crucial to replace them promptly to prevent coolant leaks.

Replace damaged or worn-out coolant system components

If you encounter any damaged or worn-out components within the coolant system, such as the radiator or hoses, it is important to replace them promptly. These components play a vital role in maintaining the engine’s temperature and preventing overheating. Proper functioning of the coolant system is crucial to prevent coolant leaks and ensure the snowblower operates effectively.

Repairing Gasket or Seal Damage

Gaskets and seals are critical components that prevent leaks in various systems of the snowblower. If you identify any damaged gaskets or seals during your inspection, follow these steps to repair them:

Identify the damaged gasket or seal

Carefully locate the damaged gasket or seal. It may be necessary to disassemble certain components or systems in order to access the damaged gasket or seal.

Clean the area surrounding the damaged gasket or seal

Before applying any adhesive or sealant, it is crucial to clean the surrounding area thoroughly. Use an appropriate cleaning solution and ensure the area is free from any debris, dirt, or oil. This will help create a clean and smooth surface for the adhesive to bond effectively.

Apply a gasket or sealant adhesive

Once the area is clean, apply a suitable gasket or sealant adhesive to the damaged gasket or seal. Follow the manufacturer’s instructions for the specific adhesive you are using. Apply the adhesive evenly and ensure complete coverage. This will help create a strong and reliable seal.

Allow the adhesive to cure

After applying the adhesive, allow it sufficient time to cure. Follow the manufacturer’s instructions regarding curing time. It is important to avoid any stress or pressure on the repaired gasket or seal during the curing process. Once the adhesive has cured, reassemble the components and systems, and perform a thorough check to ensure the leak is resolved.

Preventing Common Leaks

Taking preventive measures can significantly reduce the chances of encountering leaks in your snowblower. Here are some tips to help you prevent common leaks and maintain a reliable machine:

Follow proper maintenance practices

Regularly follow the manufacturer’s recommended maintenance schedule for your snowblower. This includes routine inspections, oil changes, filter replacements, and other necessary maintenance tasks. Proper maintenance can help identify potential issues before they turn into major leaks or failures.

Store the snowblower properly during the offseason

When not in use, it is essential to store your snowblower properly. Choose a dry and secure location to prevent exposure to moisture and ensure the machine is protected from the elements. Proper storage can help prevent rust, corrosion, and other issues that may lead to leaks.

Use the correct fuel mixture

Using the right fuel mixture is crucial for the snowblower’s engine performance and longevity. Follow the manufacturer’s recommendations regarding the appropriate fuel type and fuel-to-oil ratio. Using the wrong fuel mixture can lead to engine issues, including leaks.

Avoid overfilling the oil or coolant

When adding oil or coolant to your snowblower, it is important to avoid overfilling. Overfilling can cause excess pressure within the systems, leading to leaks. Follow the recommended fill levels specified by the manufacturer to prevent this issue.

Seeking Professional Help

If you are unsure about how to address the leak or if you encounter a complex issue, it may be best to seek professional help. Here are a couple of options to consider:

Consult the snowblower’s manual

The snowblower’s manual is an invaluable resource when it comes to understanding its components, systems, and maintenance procedures. Consult the manual for guidance on addressing specific leaks or for troubleshooting steps. It will provide you with accurate information tailored to your snowblower’s make and model.

Contact the manufacturer or authorized service center

If you find yourself unable to resolve the leak or if it requires specialized tools or expertise, it is recommended to contact the manufacturer or an authorized service center for assistance. They have the knowledge and experience to diagnose and repair complex issues properly. Getting professional help can save you time, effort, and potential mistakes.

Maintaining the Snowblower

Regular maintenance is crucial for the longevity and performance of your snowblower. Here are some key maintenance practices to keep in mind:

Regularly inspect and clean the snowblower

Inspect your snowblower regularly, looking for any signs of wear, damage, or leaks. Clean the machine thoroughly, removing any debris or buildup from the various components. This will ensure that the snowblower operates smoothly and minimize the chances of leaks occurring.

Keep the fuel and oil systems well-maintained

Maintaining the fuel and oil systems is essential for avoiding leaks. Regularly check the fuel and oil levels, ensuring they are at the correct levels. Perform routine oil changes and filter replacements as recommended. Properly maintain and store fuel to prevent contamination. These practices will help keep these systems in optimal condition, reducing the risk of leaks.

Check for worn-out parts and replace them

Over time, certain parts of your snowblower may become worn-out or damaged, leading to leaks. Regularly inspect all components, including belts, hoses, filters, and seals, for signs of wear. If you notice any parts that are past their prime, it is important to replace them promptly. This proactive approach will help prevent leaks and ensure the snowblower operates efficiently.

Safety Precautions

When dealing with a leaking snowblower or performing any maintenance or repairs, it is essential to prioritize safety. Keep the following precautions in mind:

Always disconnect the spark plug wire

Before working on the snowblower, always disconnect the spark plug wire to prevent accidental starting. This will ensure your safety while inspecting, diagnosing, or fixing any leaks.

Wear protective gloves and safety glasses

Protective gloves and safety glasses are crucial when working on a snowblower. Gloves will protect your hands from sharp edges and potential chemical exposure, while safety glasses will shield your eyes from debris or splashing fluids.

Work in a well-ventilated area

Whether you are working indoors or outdoors, ensure there is proper ventilation. Exhaust fumes, fuel vapors, or other chemicals can pose health risks if inhaled in closed or poorly ventilated areas. Open windows, use fans or ventilation systems, and prioritize your safety.

Avoid smoking or working near open flames

Working with flammable materials, such as fuel or oil, poses a fire hazard. It is crucial to avoid smoking or working near open flames when inspecting, repairing, or handling the snowblower. Remove any potential ignition sources from the work area to reduce the risk of accidents.

Conclusion

Dealing with a leaking snowblower can be a frustrating experience, but by following the steps outlined in this article, you can identify the source of the leak and address it effectively. Regular inspection, proper maintenance practices, and taking necessary safety precautions are key to preventing and resolving leaks. However, in case of complex issues or if you are unsure about the repair process, do not hesitate to seek professional help. Remember, by properly maintaining your snowblower, you can ensure its optimal performance, longevity, and a leak-free operation season after season.

Can I Add A Larger Fuel Tank To My Snowblower?

So, you’ve got a trusty snowblower that helps you plow through those snowy days, but there’s one small hiccup: its fuel tank just doesn’t hold enough gas to get the job done. You find yourself constantly running out of fuel and having to refill, interrupting your snow-clearing rhythm. Frustrating, isn’t it? Well, you might be wondering if there’s a way to add a larger fuel tank to your snowblower to avoid those frequent trips to the gas station. In this article, we’ll explore whether it’s possible to upgrade your snowblower’s fuel tank and the potential benefits and considerations to keep in mind. Yes, you can! Adding a larger fuel tank to your snowblower can bring several benefits and improve your overall snowblowing experience. In this article, we will explore the reasons why adding a larger fuel tank is advantageous, the considerations you should keep in mind before modifying the fuel tank, the step-by-step guide to adding a larger fuel tank, the tools and materials required for the task, safety precautions to follow, the benefits of adding a larger fuel tank, potential challenges and risks, as well as alternative solutions. So, let’s dive in and learn more about adding a larger fuel tank to your snowblower.

Can I Add A Larger Fuel Tank To My Snowblower?

This image is property of pixabay.com.

Reasons for Adding a Larger Fuel Tank

Increased Runtime

One of the primary reasons to consider adding a larger fuel tank to your snowblower is to increase its runtime. Snowblowing can be a time-consuming task, especially if you have a large area to clear. By having a larger fuel tank, you can ensure that your snowblower will run for a longer period without requiring frequent refueling.

Reduced Refueling

Adding a larger fuel tank also means you won’t have to make as many trips to refill the tank. This reduces the hassle of constantly stopping your snowblower and interrupting your work to refuel. With a larger fuel tank, you can complete your snow-clearing task more efficiently.

Less Downtime

A larger fuel tank can significantly reduce downtime. When you don’t have to stop frequently to refuel, you can keep up momentum and complete your snow-clearing tasks more quickly. This means less time spent waiting for the tank to be refilled and more time spent clearing the snow.

Efficiency Improvement

Adding a larger fuel tank can lead to efficiency improvements in your snowblower’s performance. With a larger fuel capacity, your snowblower can run at a consistent pace without experiencing any interruptions due to low fuel levels. This can result in smoother operation and better overall efficiency.

Considerations Before Modifying the Fuel Tank

Before you make any modifications to your snowblower’s fuel tank, there are some important considerations that you should keep in mind.

Manufacturer’s Warranty

Modifying the fuel tank of your snowblower may void the manufacturer’s warranty. It’s crucial to understand the terms and conditions of your warranty and assess whether adding a larger fuel tank is worth the potential loss of warranty coverage.

Compatibility with Snowblower

Not all snowblowers are designed to accommodate larger fuel tanks. Before proceeding with the modification, ensure that your snowblower has the necessary space and mounting compatibility to accommodate a larger fuel tank.

Space and Mounting Constraints

Consider the available space on your snowblower for mounting a larger fuel tank. Measure the dimensions of your snowblower and compare them with the size of the fuel tank you intend to install. Ensure that there is enough space for proper installation and that the mounting straps fit securely.

Fuel Gauge and Venting

Check if your snowblower’s fuel gauge and venting system are compatible with a larger fuel tank. Some snowblowers rely on the factory-mounted fuel gauge, which may not accurately measure the fuel level in a larger tank. Additionally, ensure that the venting system can handle the increased capacity of a larger fuel tank.

Can I Add A Larger Fuel Tank To My Snowblower?

This image is property of pixabay.com.

Steps to Add a Larger Fuel Tank to Your Snowblower

Now that you have considered the important factors let’s outline the steps involved in adding a larger fuel tank to your snowblower.

Research and Choose a Suitable Tank

Begin by researching and selecting a suitable fuel tank for your snowblower. Consider factors such as compatibility, size, material, and fuel capacity when choosing the tank. Ensure that the tank you choose is designed for use in a snowblower and meets your specific requirements.

Check for Fuel Tank Access

Before you commit to adding a larger fuel tank, check if your snowblower has easy access to the fuel tank. Some models may have a fuel tank that is difficult to access or requires partial disassembly of the snowblower. If the access is limited, it may complicate the installation process.

Measure Available Space

Once you have chosen a suitable fuel tank and verified access, measure the available space on your snowblower for the installation. Take accurate measurements to ensure the tank fits properly without interfering with other components or functions of the snowblower.

Modify Fittings and Connections

To install the larger fuel tank, you may need to modify the fittings and connections on your snowblower. This may involve removing the existing fuel tank, disconnecting fuel lines, and making any necessary adjustments to accommodate the larger tank.

Mount the Fuel Tank Properly

Properly mounting the fuel tank is crucial for safe and secure operation. Use mounting straps to attach the tank securely to your snowblower. Ensure that the tank is positioned in a way that does not interfere with any moving parts or the overall balance of the snowblower.

Tools and Materials Required

To successfully add a larger fuel tank to your snowblower, you will need the following tools and materials:

  • Screwdrivers
  • Wrenches
  • Drill and Bits
  • Hose Clamps
  • Fuel Line
  • Fuel Tank
  • Mounting Straps

Can I Add A Larger Fuel Tank To My Snowblower?

This image is property of pixabay.com.

Step-by-Step Guide to Adding a Larger Fuel Tank

Let’s now explore the step-by-step guide to adding a larger fuel tank to your snowblower:

Step 1: Prepare the Snowblower

Begin by disconnecting the spark plug from the snowblower to ensure safety during the installation process. This will prevent any accidental starting of the snowblower while you are working on it.

Step 2: Research and Choose a Suitable Tank

Research and choose a suitable fuel tank for your snowblower, considering factors such as compatibility, size, material, and fuel capacity. Ensure that the tank meets your specific requirements and is designed for use in a snowblower.

Step 3: Check for Fuel Tank Access

Check if your snowblower has easy access to the fuel tank. If the access is limited or requires significant disassembly, the installation process may become more complex. Evaluate whether the selected tank can be installed without major modifications to your snowblower.

Step 4: Measure Available Space

Measure the available space on your snowblower to ensure that the larger fuel tank will fit properly. Take accurate measurements to determine the tank’s placement and ensure it does not interfere with other components or the overall balance of the snowblower.

Step 5: Modify Fittings and Connections

Remove the existing fuel tank, disconnect fuel lines, and modify fittings and connections as necessary to accommodate the larger tank. Ensure that the connections are secure, leak-free, and properly fitted to both the tank and the snowblower.

Step 6: Mount the Fuel Tank Properly

Attach the larger fuel tank securely to your snowblower using mounting straps. Position the tank in a way that does not interfere with any moving parts or the balance of the snowblower. Double-check the security of all connections and ensure that the tank is stable.

Step 7: Secure all Connections

After mounting the fuel tank, secure all connections to ensure proper functioning. Ensure that there are no leaks, and all fittings are tight and secure. It’s crucial to perform this step meticulously to avoid any fuel-related issues or potential hazards during operation.

Step 8: Test for Proper Functioning

Once all connections are secure, test the snowblower for proper functioning. Start the snowblower and observe the fuel flow and performance. Monitor for any leaks, unusual noises, or issues that may arise during operation. If everything functions as expected, you have successfully added a larger fuel tank to your snowblower.

Safety Precautions

When working with your snowblower’s fuel system, it’s important to prioritize safety. Here are some safety precautions to keep in mind:

Disconnect Spark Plug

Before starting any work on your snowblower, always disconnect the spark plug to prevent accidental starting. This ensures your safety during the installation process.

Wear Protective Gear

When working on your snowblower, wear protective gear such as gloves, safety glasses, and work boots. This will protect you from potential injuries and ensure a safe working environment.

Work in a Well-Ventilated Area

Ensure that you are working in a well-ventilated area when handling fuel and making modifications to your snowblower. Proper ventilation helps prevent the accumulation of fuel vapors, reducing the risk of fire or explosion.

Handle Fuel with Care

When working with fuel, handle it with care. Avoid spillage, and ensure that all fuel is properly contained within the fuel tank or appropriate containers. Follow proper fuel storage and disposal guidelines to minimize the risk of accidents or environmental harm.

Avoid Open Flames or Sparks

Keep all open flames and sparks sources away from the fueling area. This includes cigarettes, lighters, and power tools that may produce sparks. Avoid any potential ignition sources that can cause a fire or explosion.

Follow Snowblower’s Manual

Always consult the snowblower’s manual and follow the manufacturer’s instructions. The manual provides specific guidance on maintenance, modifications, and safety guidelines that are crucial for the safe operation of your snowblower.

Can I Add A Larger Fuel Tank To My Snowblower?

Benefits of Adding a Larger Fuel Tank

Adding a larger fuel tank to your snowblower offers several benefits:

Extended Operating Time

With a larger fuel tank, your snowblower can operate for a longer period without requiring frequent refueling. This allows you to complete your snow-clearing tasks more efficiently, without constant interruptions to refuel.

Reduced Frequency of Refueling

A larger fuel tank means you won’t have to make as many trips for refueling. This saves time and effort, making the snow-clearing process more convenient and less disruptive.

Enhanced Efficiency

A properly installed larger fuel tank can improve your snowblower’s efficiency. With a consistent fuel supply, your snowblower can maintain a steady operation without experiencing interruptions due to low fuel levels.

Convenience in Large Clearing Areas

If you have a large area to clear, a larger fuel tank provides added convenience. With extended operating time and reduced refueling requirements, you can efficiently clear snow without having to worry about running out of fuel midway through the task.

Potential Challenges and Risks

While adding a larger fuel tank to your snowblower has its benefits, it’s important to consider potential challenges and risks associated with the modification:

Voiding Manufacturer’s Warranty

Modifying the fuel tank may void the manufacturer’s warranty. Before proceeding, carefully review the terms and conditions of your warranty and assess whether the benefits of a larger fuel tank outweigh the potential loss of warranty coverage.

Compatibility Issues

Not all snowblowers are designed to accommodate larger fuel tanks. Ensure that your snowblower has the necessary space and mounting compatibility before proceeding with the modification. Failure to do so may result in an ineffective or unsafe installation.

Limited Space for New Tank

Space constraints on your snowblower may limit the size of the larger fuel tank you can install. It’s important to accurately measure the available space and choose a tank that fits properly without interfering with other components or functions of the snowblower.

Vented Fuel System

For proper operation, a larger fuel tank may require modifications to the venting system. This ensures that the fuel flow is regulated and the tank does not pressurize. Incorrect venting can result in fuel leaks, reduced performance, or safety hazards.

Fuel Gauge Accuracy

The existing fuel gauge may not accurately measure the fuel level in a larger tank. Depending on your snowblower’s design, you may need to explore alternative options for monitoring fuel levels, such as manually checking or installing a separate fuel gauge.

Alternative Solutions

If adding a larger fuel tank is not a feasible option for you, consider these alternative solutions:

Carrying Spare Fuel

Instead of modifying the fuel tank, you can carry spare fuel with you while snowblowing. This allows you to refill the fuel tank as needed without interrupting your work. Ensure that the spare fuel is stored safely and in accordance with local regulations.

Using Fuel Additives

Fuel additives can improve the fuel efficiency of your snowblower. These additives are designed to maximize fuel performance, resulting in longer runtimes and reduced fuel consumption. However, consult your snowblower’s manual and manufacturer recommendations before using any additives.

Optimizing Snowblower’s Performance

Regular maintenance and optimization of your snowblower’s performance can help improve fuel efficiency and runtime. Keep the snowblower in good condition by following the recommended maintenance schedule, including cleaning the air filter, changing the spark plug, and lubricating moving parts.

Fuel Tank Extensions

If increasing the fuel tank capacity is not possible, consider installing a fuel tank extension. These extensions attach to the existing fuel tank and provide some additional fuel capacity. While not as significant as adding a larger fuel tank, extensions can still offer some benefits, especially for smaller snowblowers.

Conclusion

Adding a larger fuel tank to your snowblower can offer several advantages, including increased runtime, reduced refueling, less downtime, and improved efficiency. However, before modifying the fuel tank, it’s important to consider factors such as warranty implications, compatibility issues, space constraints, and fuel gauge accuracy. Following the step-by-step guide, using the appropriate tools and materials, and adhering to safety precautions can help you successfully add a larger fuel tank to your snowblower. If adding a larger tank is not feasible, alternative solutions such as carrying spare fuel, using additives, optimizing performance, or using fuel tank extensions can still enhance the efficiency and convenience of your snowblowing experience. Stay safe, follow the manufacturer’s guidelines, and enjoy the benefits of a longer-lasting fuel supply while tackling the winter snowfall.

What Type Of Spark Plug Does My Snowblower Need?

So, you’ve just purchased a brand new snowblower, and now you’re faced with the daunting task of figuring out what type of spark plug it needs. With so many options available on the market, it can be overwhelming to determine the correct one for your specific machine. Don’t worry, though, because in this article, we’ll break down the factors you need to consider when choosing a spark plug for your snowblower. From the size and heat range to the electrode material, we’ve got you covered. So, let’s cut through the confusion and ensure your snowblower keeps running smoothly all winter long.

Why is the spark plug important in a snowblower?

Ignition system overview

The ignition system is a crucial component of a snowblower, as it is responsible for starting the engine and generating the spark needed to ignite the fuel-air mixture. The spark plug plays a vital role in this process by creating the electrical discharge required for combustion to occur. Without a functioning spark plug, the engine would fail to start or run poorly, resulting in inefficient performance, decreased power, and potential damage to other engine components.

The role of the spark plug

The spark plug is a small but critical part of the ignition system in a snowblower. Its primary role is to deliver an electric current from the ignition coil to the combustion chamber, where it ignites the fuel-air mixture. When the spark plug receives the electrical charge, it creates a spark across the gap between its electrodes. This spark ignites the compressed mixture, initiating the combustion process and producing the power needed to operate the snowblower.

Signs of a faulty spark plug

A faulty spark plug can lead to several noticeable symptoms in a snowblower. If you experience difficulty starting the engine, such as multiple attempts or a slow cranking speed, it may indicate a problem with the spark plug. Misfiring or irregular engine operation, including rough idling or poor acceleration, can also be attributed to a faulty spark plug. Additionally, decreased fuel efficiency, increased exhaust emissions, and engine stalling are commonly associated with a spark plug that needs to be replaced. It is important to address these signs promptly to ensure optimal snowblower performance.

Understanding spark plug basics

Composition of a spark plug

Spark plugs consist of several key components, including the center electrode, ground electrode, insulator, shell, and metal housing. The center electrode, made of a durable conductive material such as copper or platinum, extends into the combustion chamber to create the spark. The ground electrode, typically positioned at an angle to expose it to the fuel-air mixture, helps guide the spark and facilitate combustion. The insulator surrounds the center electrode and provides electrical insulation. The shell, often made of steel, connects the spark plug to the engine. Finally, the metal housing protects the internal components and ensures proper heat dissipation.

Heat range

The heat range of a spark plug refers to its ability to dissipate heat generated during combustion. It is a crucial factor in determining the spark plug’s performance and longevity. The heat range is determined by the length and thickness of the insulator, as well as the materials used. A hot spark plug has a longer insulator and transfers less heat from the combustion chamber to the spark plug body. In contrast, a cold spark plug has a shorter insulator and dissipates more heat. It is essential to select the appropriate heat range for your snowblower to prevent overheating or fouling of the spark plug.

Gap size

The gap size of a spark plug refers to the distance between the center electrode and the ground electrode. It plays a critical role in determining the spark plug’s performance and the efficiency of combustion. The ideal gap size for a snowblower spark plug is typically specified by the manufacturer and can vary depending on the engine’s design and specifications. A gap that is too wide can cause misfires and poor combustion, while a gap that is too narrow can lead to difficulty in ignition or increased wear on the spark plug. It is important to check and adjust the gap size when replacing a spark plug.

Thread size

The thread size of a spark plug refers to the diameter and pitch of the threads on the spark plug’s shell. It is essential to ensure that the new spark plug has the correct thread size and is compatible with your snowblower’s engine. Using the wrong thread size can result in improper installation, which may lead to damage to the spark plug or the engine itself. It is crucial to consult the snowblower’s manual or seek professional advice to determine the appropriate thread size for your specific snowblower model.

Types of spark plugs for snowblowers

Standard spark plugs

Standard spark plugs, also known as non-resistor spark plugs, are the most basic and commonly used type. They provide a reliable and cost-effective option for most snowblowers. Standard spark plugs typically have a solid copper core, which offers excellent heat dissipation and reliable ignition. However, they may be more prone to fouling and may not provide long-term durability compared to other spark plug types.

Resistor spark plugs

Resistor spark plugs, as the name suggests, contain a built-in resistor that reduces electrical noise and interference. This makes them suitable for use in snowblowers with electronic ignition systems. The resistor helps prevent radio frequency interference that can interfere with modern electronic components. Resistor spark plugs are generally designed to be more durable and resistant to fouling than standard spark plugs, making them a suitable choice for snowblowers that require reliable performance in various conditions.

Platinum spark plugs

Platinum spark plugs feature a platinum center electrode, which provides several advantages over traditional copper or nickel alloy electrodes. Platinum is more resistant to wear and corrosion, offering improved longevity and consistent performance. These spark plugs tend to have a longer lifespan and provide more efficient combustion, resulting in better fuel economy and reduced emissions. While platinum spark plugs may be more expensive than standard or resistor spark plugs, they can be a worthwhile investment for individuals seeking enhanced snowblower performance.

Iridium spark plugs

Iridium spark plugs are renowned for their exceptional durability, longevity, and high performance. They feature a center electrode made of iridium, which has a higher melting point and is extremely resistant to erosion. Iridium spark plugs offer superior ignitability and reduce the likelihood of misfires, resulting in smoother engine operation and improved overall efficiency. While they are typically the most expensive of the spark plug types, iridium spark plugs are favored by those who prioritize longevity and optimal performance in their snowblower.

Choosing the right spark plug for your snowblower

Manufacturer’s recommendations

To ensure optimal performance and longevity of your snowblower, it is advisable to consult the manufacturer’s recommendations for spark plug selection. The manufacturer’s specifications will typically indicate the specific spark plug type, heat range, gap size, and thread size suitable for your snowblower model. Following these recommendations will help ensure compatibility and enable the spark plug to perform optimally under the intended operating conditions.

Consulting the snowblower’s manual

The snowblower’s manual is a valuable resource when it comes to selecting the right spark plug. It often contains detailed information about the spark plug requirements, including the specific type and specifications recommended by the manufacturer. The manual may also provide step-by-step instructions on spark plug replacement and maintenance, allowing you to properly care for and extend the lifespan of your snowblower’s spark plug.

Considering engine specifications

In certain cases, the engine specifications may influence the choice of spark plug for your snowblower. Engines with modified components, such as high-performance upgrades or alternative fuel systems, may require specific spark plug characteristics to optimize combustion and ensure reliable performance. If you have made modifications to your snowblower’s engine, it is essential to consult with a knowledgeable professional or refer to specialized resources to determine the most suitable spark plug for your specific setup.

Step-by-step guide to replacing snowblower spark plug

Gathering necessary tools

Before replacing the spark plug, gather the necessary tools. These typically include a socket wrench or spark plug socket, a spark plug gap gauge, and a wire brush or spark plug cleaner. It is essential to use the correct socket size to avoid damaging the spark plug or the engine.

Preparing the snowblower

Ensure that the snowblower is turned off and remove the ignition key to prevent accidental starting. Allow the engine to cool down if it has been recently in use to avoid the risk of burns. Locate the spark plug, which is typically positioned on the top or side of the engine cylinder.

Removing the old spark plug

Using a socket wrench or spark plug socket, loosen and remove the old spark plug by turning it counterclockwise. Take care not to damage the spark plug or drop any debris into the spark plug well. Inspect the old spark plug for signs of fouling, such as carbon deposits or worn electrodes, which may indicate performance issues.

Inspecting and cleaning

Examine the new spark plug to ensure it matches the manufacturer’s specifications and is free of any visible defects. With the spark plug gap gauge, check the gap size between the center electrode and the ground electrode. Adjust the gap if necessary using the appropriate tool. Cleaning the spark plug threads with a wire brush or spark plug cleaner can help remove any dirt or debris that may affect the installation.

Installing the new spark plug

Carefully thread the new spark plug into the spark plug well by hand, ensuring it is aligned correctly. Use the socket wrench or spark plug socket to tighten the spark plug snugly, but avoid over-tightening, which can cause damage. Reinstall any protective covers or components that were removed during the process. Finally, reconnect the spark plug wire to the spark plug, ensuring a secure connection.

Maintenance tips for snowblower spark plugs

Regular inspection and cleaning

To maintain optimal performance, it is important to regularly inspect and clean the spark plug. Periodically remove the spark plug and visually inspect it for any signs of fouling or damage. Use a wire brush or spark plug cleaner to gently remove any deposits or debris that may have accumulated on the electrodes. Proper cleaning helps ensure reliable ignition and extends the life of the spark plug.

Replacing spark plugs

While spark plugs are designed to be durable, they will eventually wear out and require replacement. The frequency of spark plug replacement will vary depending on factors such as the snowblower’s usage, operating conditions, and the type of spark plug used. As a general guideline, it is recommended to replace the spark plug every one to two years or as specified by the manufacturer. Regularly inspecting the spark plug can help determine if replacement is necessary.

Using an anti-seize compound

When installing a new spark plug, applying a small amount of anti-seize compound to the spark plug’s threads can help prevent seizing or sticking. The anti-seize compound acts as a lubricant and prevents the spark plug from becoming stuck in the engine. This can be particularly beneficial when replacing spark plugs in older snowblowers or in areas with harsh environmental conditions.

Avoiding over-tightening

When installing a spark plug, it is important to avoid over-tightening. Over-tightening can cause damage to the spark plug or the engine’s threads, potentially leading to costly repairs. Follow the manufacturer’s recommended torque specifications or tighten the spark plug snugly by hand, ensuring it is securely in place without excessive force.

Frequently asked questions about snowblower spark plugs

How often should I replace the spark plug?

The frequency of spark plug replacement depends on various factors such as the snowblower’s usage, operating conditions, and the type of spark plug used. As a general guideline, it is recommended to replace the spark plug every one to two years or as specified by the manufacturer. However, it is important to regularly inspect the spark plug and replace it if signs of fouling, wear, or damage are apparent.

What happens if I use the wrong spark plug?

Using the wrong spark plug can result in poor engine performance, difficulty starting, misfires, increased fuel consumption, or even engine damage. Each snowblower is designed to work optimally with specific spark plug characteristics, including heat range, gap size, and thread size. It is crucial to consult the manufacturer’s recommendations or the snowblower manual to ensure the correct spark plug is selected and installed for your specific snowblower model.

Can I clean and reuse a spark plug?

It is possible to clean a spark plug and reuse it under certain conditions. If the spark plug is only lightly fouled or has minimal wear, cleaning the electrodes with a wire brush or spark plug cleaner can restore its performance. However, heavily fouled or damaged spark plugs may not be salvaged through cleaning alone and should be replaced. Regular inspection and cleaning can help determine if a spark plug is suitable for reuse.

Can colder spark plugs improve performance?

In certain cases, using colder spark plugs may improve engine performance, especially in high-performance or modified snowblowers. Colder spark plugs have a shorter insulator, allowing them to dissipate heat more effectively. This can help prevent pre-ignition and detonation in engines operating under extreme conditions, such as high RPM or increased compression. However, it is important to consult with a knowledgeable professional or refer to specialized resources when considering the use of colder spark plugs, as their suitability depends on the specific snowblower setup and intended use.

Conclusion

The spark plug plays a vital role in the ignition system of a snowblower, ensuring that the engine starts and operates efficiently. Understanding the basics of spark plug composition, heat range, gap size, and thread size is important in selecting the right spark plug for your snowblower. Following manufacturer recommendations, consulting the snowblower manual, and considering engine specifications are essential steps in choosing the most suitable spark plug. By maintaining and replacing spark plugs when necessary, you can ensure optimal snowblower performance and prolong the lifespan of your machine.

What’s The Role Of A Scraper Blade In A Snowblower?

So you may be wondering, what exactly is the role of a scraper blade in a snowblower? Well, let me break it down for you. Picture this: you wake up to a thick blanket of snow smothering your driveway. As you drag yourself out of bed, you know you’re in for a long morning of snow removal. But fear not, because the trusty scraper blade in your snowblower is here to save the day. Its main job is to scrape the snow off your pavement or sidewalk, leaving it clear and free of any icy residue. Without this crucial component, your snowblower would be ineffective at its primary task – clearing the path for you and ensuring safe passage in snowy conditions.

Importance of a scraper blade in a snowblower

Preventing damage to the surface

When it comes to using a snowblower, a scraper blade plays a crucial role in preventing damage to the surface being cleared. The scraper blade acts as a protective barrier between the machine and the ground, ensuring that only the layer of snow is removed while the underlying surface remains unharmed. Without a scraper blade, the rotating auger could potentially scrape the ground, causing damage to concrete, asphalt, or other delicate surfaces such as wooden decks or stone paths.

Efficient snow removal

Another important function of a scraper blade is to facilitate efficient snow removal. The design of the scraper blade allows it to glide along the surface, effectively removing snow without leaving behind any significant residue. This ensures a cleaner and more thorough clearing of the snow, making the task of snow removal much quicker and easier. With a properly functioning scraper blade, you can save time and effort while achieving desirable results.

Improving machine stability

The presence of a scraper blade also helps to improve the overall stability of the snowblower during operation. By maintaining a consistent distance between the machine’s auger and the ground, the scraper blade acts as a stabilizing element, preventing unnecessary vibrations or jerking movements that could affect the machine’s maneuverability. This stability not only enhances the user’s control over the snowblower but also contributes to a smoother and more even distribution of power, resulting in a more efficient snow removal process.

Functionality of a scraper blade

Removing snow from the surface

At its core, the main functionality of a scraper blade is to effectively and efficiently remove snow from the surface. The scraper blade is positioned at the bottom of the snowblower, directly in contact with the ground. As the machine moves forward, the rotating auger collects the snow and transports it to the blower chute for discharge. Simultaneously, the scraper blade ensures that the layer of snow adhering to the ground is cleanly and effortlessly scraped away, allowing the auger to access a new layer of snow.

Preventing damage to the machine

In addition to its role in protecting the surface, the scraper blade also prevents damage to the snowblower itself. During operation, the scraper blade absorbs any impact or contact with obstructions that may be hidden beneath the snow. This helps to safeguard the more intricate and delicate components of the snowblower, such as the auger and impeller. By absorbing the brunt of these encounters, the scraper blade acts as a sacrificial element, reducing the likelihood of costly repairs or replacements.

Clearing obstacles

One often overlooked functionality of a scraper blade is its ability to clear obstacles from the snowblower’s path. As the machine glides along the ground, the scraper blade has the capacity to push aside loose debris, small rocks, or other objects that may impede the snowblower’s progress. By effectively clearing these obstacles, the scraper blade ensures that the snowblower can continue operating smoothly without any interruptions or potential damage to the internal components.

Scraper blade materials

Rubber scraper blades

Rubber scraper blades are a common choice for many snowblower owners due to their excellent flexibility and durability. These blades are adept at conforming to various surfaces, allowing for efficient snow removal without causing damage. Rubber scraper blades are particularly effective in situations where the snowblower is being used on sensitive surfaces such as wooden decks or gravel driveways. However, it is important to note that rubber scraper blades may wear down more quickly compared to other materials and may not be suitable for heavy-duty use.

Polyurethane scraper blades

Polyurethane scraper blades offer a balance between flexibility and longevity. These blades are known for their ability to withstand extreme temperatures and harsh conditions, making them an ideal choice for individuals who frequently encounter heavy snowfall. Polyurethane scraper blades are also resistant to chemicals and abrasion, ensuring a prolonged lifespan and reduced need for frequent replacements. However, it’s worth noting that these blades may be slightly more expensive upfront compared to rubber blades.

Steel scraper blades

Steel scraper blades are the most durable option available for snowblowers. These blades are capable of withstanding heavy use and can efficiently clear snow even on icy or compacted surfaces. Steel scraper blades provide excellent scraping power and are less prone to wear and tear. However, due to their rigid nature, steel blades may not be suitable for delicate surfaces as they have the potential to cause damage if not used with caution. It’s important to assess the specific operating conditions and surface type before opting for steel scraper blades.

Choosing the right scraper blade

Consider the operating conditions

When selecting a scraper blade for your snowblower, it is crucial to consider the specific operating conditions you will encounter. Factors such as the average snowfall in your region, the surface type you’ll be clearing, and the potential presence of hidden obstacles should all be taken into account. For areas with heavy snowfall or rough terrain, a more durable scraper blade material such as steel or polyurethane may be necessary. On the other hand, for lighter snowfall and delicate surfaces, a rubber blade may suffice.

Match blade material to the surface

The type of surface you’ll be clearing plays a significant role in determining the ideal scraper blade material. For surfaces that are more susceptible to damage, such as wooden decks or interlocking stone pathways, a softer and more flexible blade material like rubber should be used. However, for sturdy surfaces like concrete or asphalt driveways, a steel or polyurethane blade may be more appropriate as it offers increased scraping power and longevity.

Consider the desired outcome

To make an informed decision, it’s essential to consider your desired outcome when choosing a scraper blade. If your main objective is to prioritize the protection of delicate surfaces, then a rubber blade would be the most suitable option. Conversely, if your focus is on durability and long-term use, a steel blade may be the better choice. Assess your needs and priorities to ensure you select the scraper blade that aligns with your specific requirements.

Maintenance and replacement

Regular inspection and cleaning

To ensure the optimal performance of your scraper blade and extend its lifespan, regular maintenance is crucial. After each use, it is advisable to inspect the blade for any signs of damage, such as cracks or excessive wear. Additionally, remove any accumulated snow, ice, or debris from the blade to prevent unnecessary strain on the snowblower. Simple cleaning and inspection routines can help identify potential issues early on and allow for timely repairs or replacements.

Replacing worn-out scraper blades

Over time, scraper blades naturally wear down and lose their effectiveness. To maintain the highest level of performance, it is essential to replace worn-out scraper blades as soon as they show signs of significant deterioration. Signs of wear may include reduced scraping efficiency, visible damage, or the inability to adequately clear snow from the ground. Following the manufacturer’s guidelines, replace the scraper blade with the appropriate material and ensure correct installation for optimal snowblower performance.

Proper storage during offseason

When the snowblower is not in use, it is crucial to store the equipment properly to prevent damage to the scraper blade and other components. Thoroughly clean the blade, removing any dirt, debris, or residual snow. Store the snowblower in a dry and protected area to prevent rust or corrosion. Additionally, ensure that the scraper blade is stored in a safe position to maintain its shape and integrity. Taking these steps will help preserve the longevity of the scraper blade and prevent any potential issues when the snowblower is needed again.

Tips for effective use of a snowblower scraper blade

Maintain the correct scraping height

To maximize the efficiency of the scraper blade, it is important to maintain the correct scraping height. Adjust the snowblower’s skid shoes or shoes to ensure that the scraper blade is consistently touching the ground without excessive pressure. This allows for optimal snow removal while minimizing the risk of surface damage. Adjust the scraping height according to the surface conditions and the type of snow being cleared for the best results.

Avoid scraping uneven surfaces

When using a snowblower with a scraper blade, it is important to avoid scraping over uneven surfaces or obstacles. Uneven surfaces can lead to strain on the blade and potentially cause damage. Avoiding direct contact with rocks, curbs, or other obstructions will help maintain the integrity of the scraper blade and prevent unnecessary wear or breakage. If encountering uneven surfaces is unavoidable, proceed with caution and adjust the scraping height accordingly.

Use the correct angle of attack

To achieve the most efficient snow removal, it is recommended to use the correct angle of attack when operating the snowblower. Position the machine at an angle that allows the scraper blade to make constant contact with the ground, effectively removing snow without leaving behind significant residue. Adjusting the angle of attack according to the speed and depth of the snow will allow the snowblower to work optimally and result in a clean, well-cleared surface.

Frequently asked questions

Why is my scraper blade not touching the ground?

If your scraper blade is not touching the ground, it could be due to incorrect adjustment of the snowblower’s skid shoes or shoes. Ensure that these are properly adjusted to maintain the desired scraping height. Additionally, check for any obstructions or debris that may be preventing the scraper blade from making contact with the ground. Regular inspection and maintenance routines will help identify and resolve any issues that may arise.

How often should I replace the scraper blade?

The frequency of scraper blade replacement depends on various factors, including the intensity of snowfall, the type of scraper blade material used, and the overall wear and tear it undergoes during operation. As a general guideline, it is advisable to inspect the scraper blade after each season and replace it if there are visible signs of significant deterioration or when snow removal efficiency is noticeably compromised.

Can I use aftermarket scraper blades?

While aftermarket scraper blades may be available for your snowblower, it is recommended to use the manufacturer-recommended scraper blades for optimal performance and compatibility. Aftermarket blades may not match the specific design and functionality of your snowblower, potentially leading to inferior snow removal or damage to the machine. To maintain the reliability and longevity of your snowblower, it is best to stick with the scraper blades recommended by the manufacturer.

Conclusion

In conclusion, a scraper blade plays a vital role in the overall functionality and performance of a snowblower. From preventing damage to the surface being cleared to facilitating efficient snow removal and improving machine stability, the importance of a scraper blade cannot be understated. By carefully considering the operating conditions, matching the blade material to the surface, and properly maintaining and replacing the scraper blade, you can ensure optimal snowblowing results and prolong the lifespan of your snowblower. Remember to follow the tips provided for effective use of a scraper blade and refer to the manufacturer’s guidelines for specific maintenance and replacement recommendations. With the right scraper blade and proper care, your snowblower will be better equipped to handle any snow removal task efficiently and effectively.

How Can I Protect My Snowblower From Theft?

Imagine waking up on a crisp winter morning, excited to clear your driveway with your trusty snowblower, only to find it missing from your yard. The heart-sinking feeling of realizing that your valuable equipment has been stolen is something no one wants to experience. In this article, we will explore some practical tips and strategies to keep your snowblower safe from would-be thieves. Whether you live in a tightly-knit community or a bustling city, these simple steps will help ensure that your snowblower stays right where it belongs – in your hands.

How Can I Protect My Snowblower From Theft?

Securing Your Snowblower at Home

Use a Strong Lock

When it comes to securing your snowblower at home, using a strong lock is essential. Look for a heavy-duty lock that is resistant to bolt cutters or other tools that thieves may use to break it. A quality lock will give you peace of mind knowing that your snowblower is secure.

Secure the Snowblower to an Immovable Object

In addition to using a strong lock, it’s important to secure your snowblower to an immovable object. This could be a post, a wall, or even the floor of your garage. By attaching your snowblower to something that can’t be easily moved, you’ll make it much more difficult for thieves to steal.

Install a Security Camera

Another effective way to protect your snowblower at home is by installing a security camera. Not only will this serve as a deterrent for potential thieves, but it will also provide you with valuable evidence in the unfortunate event that your snowblower is stolen. Choose a camera with high-resolution capabilities and ensure that it covers the area where your snowblower is stored.

Consider a Snowblower Enclosure

If you want to take your snowblower security to the next level, consider investing in a snowblower enclosure. These enclosures are made from durable materials and provide an additional layer of protection against theft. They often come with built-in locks and can be securely anchored to the ground, making it virtually impossible for thieves to access your snowblower.

Install Motion Sensor Lights

One simple yet effective way to deter thieves from targeting your snowblower is by installing motion sensor lights. These lights will automatically turn on when someone approaches your snowblower, alerting you and potentially scaring away any potential thieves. It’s a cost-effective and easy-to-install solution that can greatly enhance the security of your snowblower.

Protecting Your Snowblower on the Go

Choose a Durable Lock

When you need to protect your snowblower on the go, selecting a durable lock is crucial. Look for a lock that is resistant to tampering and made from strong materials such as hardened steel. Portable locks with thick cables or chains can be wrapped around your snowblower and a secure anchor point, providing you with peace of mind while you’re away.

Utilize a GPS Tracker

One of the most advanced ways to protect your snowblower while you’re away is by utilizing a GPS tracker. These devices can be discreetly installed on your snowblower and allow you to track its location in real-time. In the unfortunate event that your snowblower is stolen, you can provide the authorities with the precise location data, increasing the chances of a successful recovery.

Remove and Store the Key

When leaving your snowblower unattended, it’s important to remove and store the key in a secure location. This simple step can prevent opportunistic thieves from easily starting and driving off with your snowblower. Consider using a lockbox or another secure storage solution that is separate from your vehicle to ensure that the key is safe.

Use a Hitch Lock

If you own a trailer and transport your snowblower on it, using a hitch lock is essential. These locks prevent unauthorized access to the hitch, making it difficult for would-be thieves to disconnect your snowblower from your vehicle. Look for a sturdy, weather-resistant hitch lock that fits securely and provides a visual deterrent to potential thieves.

Consider a Snowblower Cover

While a snowblower cover may not directly prevent theft, it can provide an additional layer of protection by keeping your snowblower out of sight. Thieves are less likely to target something they can’t immediately see, so investing in a cover can make your snowblower less attractive to potential thieves. Additionally, a cover can shield your snowblower from the elements, extending its lifespan.

General Theft Prevention Tips

Mark Your Snowblower

Marking your snowblower with a unique identifier, such as your driver’s license number or a personalized engraving, can assist in its recovery if it is ever stolen. Thieves are less likely to steal an item that can be easily traced back to its owner. Additionally, take note of the serial number and store it in a safe place, as this information can be crucial when filing a police report.

Keep Records and Take Photos

To aid in the recovery process, it’s important to keep detailed records of your snowblower’s make, model, and any distinguishing features. Take clear photos from multiple angles and include any serial numbers or identification marks. These records will not only help the police identify your snowblower if it’s stolen but can also be used when contacting insurance companies.

Keep Your Snowblower Out of Sight

When it comes to theft prevention, one of the simplest steps is to keep your snowblower out of sight when it’s not in use. If you have a garage, make sure to close and lock the doors whenever your snowblower is stored inside. If you don’t have a garage, consider using a tarp or a cover to conceal your snowblower from prying eyes.

Be Mindful of Garage Security

If you store your snowblower in a garage, it’s important to ensure that your garage is secure. Consider reinforcing the doors and windows, installing a security system, or adding extra locks to the garage doors. If your garage has windows, consider using curtains or blinds to prevent potential thieves from peering in and seeing your snowblower.

Inform Neighbors and Local Authorities

Lastly, it’s crucial to inform your neighbors and local authorities about your efforts to protect your snowblower from theft. By doing so, they can keep an eye out for any suspicious activity in your neighborhood and report it to the authorities if necessary. Building a strong community network and working together can greatly enhance the security of your snowblower and your overall peace of mind.

In conclusion, protecting your snowblower from theft requires a combination of preventive measures both at home and on the go. By using strong locks, securing the snowblower to immovable objects, installing security cameras, and considering enclosures, you can significantly reduce the risk of theft when your snowblower is stored at home. When you’re on the go, utilizing durable locks, GPS trackers, hitch locks, and covers can help safeguard your snowblower from opportunistic thieves. Additionally, marking your snowblower, keeping records, and taking photos, keeping it out of sight, being mindful of garage security, and informing neighbors and local authorities can further bolster your theft prevention efforts. By following these comprehensive tips, you can minimize the chances of your snowblower being stolen and enjoy a worry-free winter season.

How Do I Adjust The Carburetor On My Snowblower?

So you’ve got a snowblower and you’re ready to tackle the winter weather head-on, but suddenly you’re faced with a problem: the carburetor needs adjusting. Don’t worry, you’re not alone. Adjusting the carburetor on your snowblower may seem like a daunting task, but with a few simple steps, you’ll have it running smoothly in no time. In this article, we’ll walk you through the process of adjusting the carburetor on your snowblower, helping you navigate through the snow-covered roads with ease.

How Do I Adjust The Carburetor On My Snowblower?

This image is property of i.ytimg.com.

Checking the Carburetor

When it comes to keeping your snowblower in top shape, one of the most important maintenance tasks is checking and adjusting the carburetor. The carburetor is responsible for mixing fuel and air in the proper ratio to ensure efficient engine performance. If your snowblower is not running smoothly or is experiencing starting issues, it may be time to check the carburetor. Follow these steps to effectively check and adjust the carburetor on your snowblower.

Step 1: Safety Precautions

Before you begin working on your snowblower’s carburetor, it’s crucial to prioritize safety. Make sure the snowblower is turned off and the engine is cool. Always wear protective gear, including gloves and safety glasses, to prevent any accidents or injuries. Additionally, ensure that you are working in a well-ventilated area to avoid inhaling any harmful fumes.

Step 2: Remove the Air Filter Cover

To access the carburetor, you’ll need to remove the air filter cover. This cover is usually located on the side or top of the engine. Use a screwdriver or a wrench, depending on the type of fasteners used, to loosen and remove the screws or bolts securing the cover. Once the cover is removed, set it aside in a safe place.

Step 3: Inspect the Carburetor

With the air filter cover removed, you will now have a clear view of the carburetor. Take a close look at the carburetor, examining for any signs of damage or debris. Look for loose connections, worn-out gaskets, or clogged passages. If you notice any issues, such as a damaged gasket or a buildup of dirt and debris, it may be necessary to clean or replace the affected parts.

Step 4: Check Fuel Filter and Lines

Next, it’s essential to inspect the fuel filter and lines connected to the carburetor. Over time, fuel filters can become clogged or lines can develop leaks, causing fuel flow issues. Check the fuel filter for any signs of blockage or particles. Also, examine the fuel lines for any cracks, leaks, or looseness. If you find any problems with the fuel filter or lines, it’s recommended to replace them to ensure proper fuel delivery to the carburetor.

Step 5: Clean the Carburetor

To optimize the performance of your snowblower’s carburetor, it’s important to keep it clean. Use a carburetor cleaning solution specifically designed for small engine carburetors. Apply the solution to the carburetor, ensuring all the components and passages are thoroughly cleaned. You can use a small brush or a clean cloth to remove any dirt or grime. Pay close attention to the tiny openings and jets, as these can easily get clogged and affect the carburetor’s functionality. Once the carburetor is clean, reassemble the parts, ensuring they are properly secured.

Adjusting Fuel Mixture

After checking and cleaning the carburetor, it may be necessary to make adjustments to the fuel mixture to achieve optimal performance. The fuel mixture determines the ratio of fuel to air that enters the combustion chamber. Adjusting the fuel mixture can help improve the snowblower’s idle and high-speed performance. Here’s how you can adjust the fuel mixture on your snowblower’s carburetor.

Step 1: Locate the Adjustment Screws

To adjust the fuel mixture, you will need to locate the adjustment screws on the carburetor. These screws are typically labeled as “idle” and “high-speed.” Refer to your snowblower’s owner manual to find the exact location of these screws, as it may vary based on the make and model of your snowblower.

Step 2: Understanding the Idle Screw

The idle screw controls the amount of fuel entering the engine during idle speed. By turning the idle screw clockwise, you will increase the fuel flow, and by turning it counterclockwise, you will decrease the fuel flow. It’s important to note that small adjustments should be made to avoid making drastic changes that may affect the engine’s performance.

Step 3: Adjusting the Idle Screw

To adjust the idle screw, start by warming up the engine for a few minutes. Then, locate the idle screw and begin turning it in small increments, either clockwise or counterclockwise, depending on the desired adjustment. Observe the engine’s idle speed and listen for any noticeable changes in its performance. Continue making slight adjustments until you achieve a smooth and steady idle.

Step 4: Understanding the High-Speed Screw

The high-speed screw, as the name suggests, controls the fuel flow during high-speed operation. By turning the high-speed screw clockwise, you will increase the fuel flow, and by turning it counterclockwise, you will decrease the fuel flow. Similar to the idle screw, gradual adjustments should be made to achieve the desired performance.

Step 5: Adjusting the High-Speed Screw

To adjust the high-speed screw, it’s important to have the snowblower running at full throttle. Start by locating the high-speed screw on the carburetor and begin turning it in small increments, just like the idle screw. Pay attention to the engine’s response, specifically its acceleration and overall performance at high speeds. Make minor adjustments until you achieve optimal performance.

Step 6: Checking for Optimal Performance

Once you’ve completed adjusting the fuel mixture, it’s important to test the engine’s performance. Take your snowblower for a test run, paying attention to how it starts, idles, accelerates, and runs at full speed. If you notice any issues, such as poor acceleration, rough idling, or loss of power, further adjustments may be necessary. Remember that fine-tuning may be required to achieve the best results.

How Do I Adjust The Carburetor On My Snowblower?

This image is property of i.ytimg.com.

Fine-Tuning the Carburetor

Even after adjusting the fuel mixture, there may be additional fine-tuning needed to ensure optimal performance. Fine-tuning involves making small tweaks to various carburetor settings to maximize efficiency and power output. Here’s how you can fine-tune the carburetor on your snowblower.

Step 1: Testing the Engine’s Performance

Before proceeding with any fine-tuning adjustments, it’s important to thoroughly test the engine’s performance. Take your snowblower for a test run, paying close attention to any issues or areas that need improvement. Note any symptoms such as poor acceleration, rough idling, or decreased power.

Step 2: Adjusting the Idle Speed

If you notice that the snowblower’s idle speed is not optimal, you can make adjustments to the idle speed screw. Turn the idle speed screw clockwise to increase the idle speed and counterclockwise to decrease it. Make small adjustments and test the engine’s performance after each adjustment until you achieve a smooth and consistent idle speed.

Step 3: Fine-Tuning the Idle Mixture

To fine-tune the carburetor’s idle mixture, you will need to make slight adjustments to the idle mixture screw. Turning the idle mixture screw clockwise will enrich the fuel mixture, while turning it counterclockwise will lean it out. Make tiny adjustments, one-eighth of a turn at a time, and carefully observe the engine’s performance.

Step 4: Fine-Tuning the High-Speed Mixture

Similar to the idle mixture, the high-speed mixture can also be fine-tuned to optimize the snowblower’s performance at higher speeds. Locate the high-speed mixture screw and make small adjustments, one-eighth of a turn at a time, until you achieve the desired performance. Test the snowblower’s acceleration and overall power to ensure the adjustments have been effective.

Step 5: Rechecking the Engine’s Performance

After making the fine-tuning adjustments, it’s crucial to retest the engine’s performance to ensure the changes have had a positive impact. Take your snowblower for another test run, paying close attention to any improvements or changes. If you are still experiencing issues, further adjustments may be necessary.

Troubleshooting Carburetor Issues

Despite proper maintenance and adjustments, carburetor issues can still arise. Understanding and addressing these symptoms can help you identify and resolve any problems with your snowblower’s carburetor. Here are some common symptoms and troubleshooting tips.

Symptom 1: Engine Won’t Start

If your snowblower’s engine won’t start, there may be a problem with the carburetor. Check for clogged fuel lines, a dirty carburetor, or a faulty fuel filter. Clean or replace any components that are causing the fuel flow issue.

Symptom 2: Engine Runs Rough

If your snowblower’s engine runs rough or sputters, it’s a sign of an improper fuel mixture. Check the carburetor for any debris or dirt that may be affecting the fuel flow. Clean the carburetor and make necessary adjustments to the fuel mixture screws.

Symptom 3: Engine Stalls Under Load

If the engine stalls or loses power when under load, it may be due to a lean fuel mixture. Check the high-speed mixture screw and adjust it to increase fuel flow. Be cautious not to over-enrich the mixture, as it can cause other issues.

Symptom 4: Engine Overheating

An overheating engine can be a result of a rich fuel mixture. Check the high-speed mixture screw and adjust it to lean out the fuel mixture. If the issue persists, there may be other underlying problems that require professional assistance.

Symptom 5: Fuel Leakage

If you notice fuel leaking from the carburetor, it’s important to address the issue promptly. Check for loose connections, damaged gaskets, or faulty fuel lines. Replace or tighten any components as needed.

How Do I Adjust The Carburetor On My Snowblower?

This image is property of www.ereplacementparts.com.

Tips and Precautions

To ensure your snowblower’s carburetor remains in good working condition, here are some tips and precautions to follow:

Tip 1: Use Fresh Fuel

Always use fresh fuel in your snowblower. Fuel that has been sitting for a long time can degrade and cause issues with the carburetor. Consider using a fuel stabilizer to keep the fuel fresh during the off-season.

Tip 2: Regular Maintenance

Perform regular maintenance on your snowblower, including cleaning and inspecting the carburetor. Regularly check for any signs of damage, blockages, or leaks. Keeping up with maintenance will prolong the life of your snowblower and ensure its optimal performance.

Tip 3: Use Fuel Stabilizer in Off-Season

During the off-season when your snowblower is not in use, add a fuel stabilizer to the fuel tank. This will prevent the fuel from deteriorating and causing carburetor issues when you start the snowblower again.

Precaution 1: Wear Protective Gear

When working on the carburetor or performing any maintenance tasks, always wear protective gear, including gloves and safety glasses. This will protect you from any potential accidents, such as fuel leakage or debris flying off.

Precaution 2: Work in a Well-Ventilated Area

When working on your snowblower’s carburetor, ensure that you are in a well-ventilated area. Carburetor cleaning solutions and fumes can be hazardous if inhaled in a confined space. Open the garage door or work outside to avoid any health risks.

Conclusion

Checking and adjusting the carburetor on your snowblower is an essential maintenance task that ensures optimal engine performance. By following the steps outlined in this article, you can effectively maintain and troubleshoot any issues related to the carburetor. Remember to prioritize safety, take your time during adjustments, and regularly perform maintenance tasks to keep your snowblower running smoothly all winter long.

In conclusion, by properly checking, adjusting, and fine-tuning your snowblower’s carburetor, you can maximize its performance and prolong its lifespan. With regular maintenance and attention to any symptoms or issues, you’ll be able to conquer the winter season without any hitch. So, roll up your sleeves, grab your tools, and get ready to optimize your snowblower’s carburetor for a winter full of efficient snow-clearing power.

How Do I Adjust The Carburetor On My Snowblower?

This image is property of i.ytimg.com.

Can I Convert My Snowblower To Use An Alternative Fuel Source?

So you’re tired of relying on gasoline to power your snowblower every winter, and you’re wondering if there’s a way to switch things up and use a more eco-friendly fuel source. Well, the answer is yes, it is possible to convert your snowblower to use an alternative fuel source. By making a few modifications and investing in the right equipment, you can enjoy the benefits of using alternative fuels such as propane or electric power. In this article, we’ll explore the different options available and the steps you need to take to convert your snowblower successfully. So put on your winter gear and let’s dive into the world of alternative fuel-powered snowblowers!

Can I Convert My Snowblower To Use An Alternative Fuel Source?

This image is property of qph.cf2.quoracdn.net.

Overview

Snowblowers are essential tools for clearing snow during the winter months. However, traditional snowblowers typically run on gasoline, which contributes to air pollution and greenhouse gas emissions. To combat this, many people are considering converting their snowblowers to use alternative fuel sources. This article will explore the different types of alternative fuel sources available, the benefits of using them in snowblowers, and provide a comprehensive guide on how to convert your snowblower to use alternative fuel.

Understanding Alternative Fuel Sources

Alternative fuel sources are those that can be used as a substitute for traditional gasoline or diesel. These fuels are typically more environmentally friendly and sustainable. By using alternative fuel sources in snowblowers, you can reduce carbon emissions and contribute to a cleaner and greener environment.

Can I Convert My Snowblower To Use An Alternative Fuel Source?

This image is property of az417944.vo.msecnd.net.

Benefits of Using Alternative Fuel Sources in Snowblowers

There are several advantages to using alternative fuel sources in snowblowers. Firstly, alternative fuels produce fewer harmful emissions, resulting in improved air quality. Secondly, they often have lower operational costs, making them more cost-effective in the long run. Additionally, using alternative fuels can reduce our dependence on fossil fuels and promote a more sustainable future.

Types of Alternative Fuel Sources

There are several different types of alternative fuel sources that can be used in snowblowers. Let’s explore each of them:

Electric Power

Electric power is a popular choice for converting snowblowers. By replacing the gasoline engine with an electric motor, you eliminate harmful emissions and reduce noise pollution. Electric-powered snowblowers also require less maintenance since they have fewer moving parts.

Propane

Propane is another viable alternative fuel source for snowblowers. It burns cleaner than gasoline and emits fewer greenhouse gas emissions. Propane-powered snowblowers are also quieter and require less maintenance.

Natural Gas

Natural gas is a clean-burning fuel that produces fewer emissions than gasoline. Converting your snowblower to run on natural gas can significantly reduce your carbon footprint. However, it’s important to ensure that you have access to a natural gas supply before considering this conversion.

Biofuels

Biofuels are renewable fuels made from organic matter such as plants or algae. They can be used as an alternative to gasoline in snowblowers, offering a greener and more sustainable option. However, it’s crucial to identify compatible biofuel options and modify the fuel system accordingly.

Hydrogen Fuel Cells

Hydrogen fuel cells use hydrogen gas to create electricity, powering the snowblower. This technology is still relatively new and not widely available. However, hydrogen fuel cells are incredibly efficient and produce only water vapor as a byproduct. Safety precautions should be taken when handling hydrogen due to its highly flammable nature.

Can I Convert My Snowblower To Use An Alternative Fuel Source?

This image is property of hackaday.com.

Considerations Before Conversion

Before converting your snowblower to use alternative fuel, there are a few crucial considerations to keep in mind:

Manufacturer’s Warranty

Converting your snowblower to use alternative fuel may void the manufacturer’s warranty. It’s essential to review the warranty terms and consult with the manufacturer or a professional before proceeding with the conversion.

Compatibility of the Snowblower

Not all snowblowers are compatible with alternative fuel conversions. It’s crucial to assess whether your snowblower is suitable for conversion before investing time and money into the process.

Availability of Alternative Fuel Sources

You need to ensure that the alternative fuel source you plan to use is readily available in your area. It’s important to have easy access to the fuel to avoid any inconveniences during snow removal.

Cost of Conversion

Converting your snowblower to use alternative fuel may require some upfront investment. Consider the cost of conversion, including any professional fees, parts, and modifications, before proceeding.

Converting Your Snowblower to Use Alternative Fuel

If you’ve decided to convert your snowblower to use alternative fuel, it’s crucial to follow the proper conversion process. Here are the key steps involved:

Consulting a Professional

Before attempting the conversion yourself, it is highly recommended to consult a professional with experience in alternative fuel conversions. They can assess the compatibility of your snowblower, provide guidance on the necessary modifications, and ensure that the conversion is done safely and effectively.

Modifying the Engine

Depending on the type of alternative fuel you choose, modifying the engine may be necessary. This can involve replacing the existing engine with an electric motor, installing a conversion kit, or making adjustments to accommodate the new fuel source.

Modifying the Fuel System

The fuel system of your snowblower will also need modification to accommodate the alternative fuel source. This may involve changing fuel lines, adding fuel injectors or regulators, or modifying the carburetor or fuel pump.

Installing Necessary Components

During the conversion process, you may need to install additional components specific to your chosen alternative fuel source. These can include batteries and charging infrastructure for an electric conversion, propane tanks and fittings for propane conversion, or hydrogen storage tanks for hydrogen fuel cell conversion.

Can I Convert My Snowblower To Use An Alternative Fuel Source?

This image is property of az417944.vo.msecnd.net.

Electric Power Conversion

If you’ve chosen to convert your snowblower to electric power, here are some considerations specific to this type of conversion:

Benefits of Electric Power Conversion

Electric-powered snowblowers offer numerous benefits, such as zero emissions, reduced noise levels, and lower maintenance requirements. They also provide instant torque, making them efficient in clearing heavy and wet snow.

Installing an Electric Motor

To convert your snowblower to electric power, you’ll need to remove the existing gasoline engine and replace it with an electric motor. This requires careful installation to ensure compatibility and proper functioning.

Battery Size and Capacity

The size and capacity of the battery used in your electric-powered snowblower will determine its runtime. Consider factors such as the size of the area you need to clear, the type of snow you typically encounter, and the battery’s capacity to ensure optimal performance.

Charging Infrastructure

An essential aspect of electric-powered snowblower conversion is ensuring you have access to a reliable charging infrastructure. Consider convenient charging options, such as a dedicated charging station or portable charging units.

Propane Conversion

If you’ve opted for a propane conversion, here are the key factors to consider:

Benefits of Propane Conversion

Propane offers a cleaner burning alternative to gasoline, reducing both emissions and pollution. Propane-powered snowblowers also tend to be quieter and require less maintenance.

Installing a Propane Kit

To convert your snowblower to propane, you’ll need to install a propane conversion kit. This typically includes components such as a fuel regulator, fittings, and a carburetor spacer.

Propane Tank Considerations

When converting to propane, you’ll need to consider the size and type of propane tank that best suits your snowblower. Portable tanks are an option, but larger, stationary tanks may provide longer runtimes and less frequent refueling.

Maintenance and Safety Precautions

Regular maintenance is important when using propane as a fuel source. This includes checking for leaks, inspecting connections, and ensuring proper storage and handling of propane tanks. Safety precautions should always be observed when working with propane due to its flammable nature.

Can I Convert My Snowblower To Use An Alternative Fuel Source?

This image is property of www.orangetractortalks.com.

Natural Gas Conversion

For those considering a natural gas conversion, here are the key points to keep in mind:

Benefits of Natural Gas Conversion

Converting your snowblower to run on natural gas offers similar benefits to propane, with cleaner emissions and reduced pollution. However, it’s crucial to ensure you have access to a natural gas supply in your area before considering this conversion.

Installing a Natural Gas Conversion Kit

A natural gas conversion kit contains components necessary to modify your snowblower’s fuel system for natural gas use. This can include a natural gas regulator, carburetor modification, and a new fuel delivery system.

Gas Line Requirements

Converting to natural gas requires a connection to a natural gas line. Ensure that your property has the necessary infrastructure and contact a professional if you require assistance with the installation.

Safety Precautions

Natural gas is a flammable fuel, and proper safety precautions should always be followed. This includes regular inspections for leaks, ensuring proper ventilation, and using approved natural gas supply lines and fittings.

Biofuel Conversion

For those interested in biofuel conversion, here are the essential considerations:

Benefits of Biofuel Conversion

Biofuels are renewable and produce fewer emissions than gasoline. Converting your snowblower to use biofuels promotes sustainability and reduces environmental impact.

Identifying Compatible Biofuel Options

Not all biofuels are suitable for use in snowblowers. It’s essential to identify compatible biofuel options and ensure they are available in your area before proceeding with the conversion.

Modifying the Fuel System for Biofuel Use

Converting your snowblower to use biofuels may require modifications to the fuel system. This can include changing fuel lines, modifying the carburetor, or adding additional filtration systems.

Environmental Considerations

When using biofuels, it’s important to be mindful of the environmental impact. Ensure that the biofuel you choose is sustainably sourced and does not contribute to deforestation or other negative environmental practices.

Hydrogen Fuel Cell Conversion

For those interested in hydrogen fuel cell conversion, here’s what you need to know:

Benefits of Hydrogen Fuel Cell Conversion

Hydrogen fuel cells offer a highly efficient and environmentally friendly alternative to traditional fuel sources. They produce zero emissions, with the only byproduct being water vapor.

Installing a Hydrogen Fuel Cell

To convert your snowblower to a hydrogen fuel cell, you’ll need to install the fuel cell system, including hydrogen storage tanks and a fuel cell stack. This requires careful installation and adherence to safety guidelines.

Hydrogen Storage Considerations

Storing hydrogen safely is essential due to its highly flammable nature. Specialized hydrogen storage tanks and safety measures must be in place to ensure the overall safety of the conversion.

Safety Precautions

When working with hydrogen, proper safety precautions must be followed. This includes handling and storing hydrogen in well-ventilated areas, using approved storage tanks and fittings, and following guidelines for leak detection and prevention.

Maintenance and Safety

Regardless of the type of alternative fuel conversion, regular maintenance and safety precautions are vital. Here are some key points to consider:

Regular Maintenance and Inspections

Perform regular maintenance and inspections on your snowblower to ensure optimal performance and safety. This includes checking fuel lines, filters, and electrical connections, as well as lubricating moving parts as needed.

Safety Precautions for Using Alternative Fuel Sources

Whether using electric power, propane, natural gas, biofuels, or hydrogen, always follow the manufacturer’s guidelines and safety precautions. This includes proper storage and handling of fuel, using approved equipment and components, and avoiding potential fire hazards.

Proper Storage and Handling of Fuel

Improper storage and handling of alternative fuels can lead to safety hazards and damage to your snowblower. Always store fuel in designated containers, follow proper fuel transfer procedures, and keep fuels away from open flames and heat sources.

Troubleshooting Common Issues

In the event of any issues or malfunctions with your alternative fuel-powered snowblower, familiarize yourself with troubleshooting procedures outlined in the user manual. If necessary, consult a professional for assistance in resolving the problem.

How Can I Protect My Plants And Garden When Using A Snowblower?

Imagine waking up after a heavy snowfall, eager to clear your driveway and walkways. But as you consider using your trusty snowblower, the thought of potential damage to your beloved plants and garden starts nagging at the back of your mind. How can you enjoy the convenience of a snow-free property without sacrificing the beauty of your outdoor space? In this article, we will explore some practical tips and strategies to ensure that your plants and garden remain unharmed while using a snowblower. So put your worries to rest and let’s dive into the world of snowblowing with peace of mind.

Choosing the Right Snowblower

When it comes to choosing the right snowblower for your garden, there are a few key factors to consider. The first thing to take into account is the size of your garden. If you have a small to medium-sized garden, a compact and lightweight snowblower would be more suitable. On the other hand, if you have a large garden with plenty of space to cover, a more powerful and heavy-duty snowblower would be a better choice.

In addition to the size of your garden, it is also important to opt for a snowblower with adjustable settings. This allows you to customize the speed and height of the snowblower, ensuring that it is suitable for your specific garden needs. Being able to adjust the settings will provide you with greater control and flexibility when clearing snow.

Another important feature to look for in a snowblower is chute control. This allows you to direct the snow in a specific direction, away from your plants and delicate areas. Being able to control where the snow is thrown will help minimize any potential damage to your garden.

Lastly, it is worth investing in a snowblower with an anti-clog feature. This feature helps prevent the snowblower from clogging up with snow and debris, ensuring that it continues to function properly even in heavy snowfall. An anti-clog feature will save you time and effort by reducing the need for constant maintenance and cleaning.

Preparing Your Garden Before Snow Removal

Before using a snowblower to remove snow from your garden, it is important to take some preparatory steps to protect your plants. One of the first things you should do is stake your plants. This will help support them and prevent them from being damaged or bent under the weight of the snow. Staking your plants beforehand will give them the necessary support they need to withstand the snowfall.

Another step to take is to trim and prune your plants. By removing any dead or damaged branches, you are not only tidying up your garden but also reducing the risk of these branches breaking under the weight of the snow. Trimming and pruning your plants before the snowfall will promote healthy growth and prevent any unnecessary damage.

If you have any fragile or delicate plants in your garden, it may be best to remove them altogether before the snowfall. These plants are more susceptible to damage and may not survive the harsh winter conditions. By temporarily removing them and storing them in a protected area, you are ensuring their survival and allowing them to thrive once the snow has melted.

For sensitive plants that you are unable to remove, covering them with a protective layer is essential. Using materials such as burlap or horticultural fleece, carefully cover your plants to shield them from the harsh winter elements. This layer of protection will help retain heat and prevent cold winds from damaging your plants.

Using the Snowblower Properly

When using a snowblower to remove snow from your garden, there are a few guidelines to follow to ensure that you are using it properly without causing any harm to your plants.

Firstly, before starting the snowblower, it is important to clear the area of any debris or obstacles. This includes branches, rocks, and any other objects that may be hidden under the snow. Clearing the area will prevent the snowblower from getting clogged and reduce the risk of any damage to your machine or plants.

While the snowblower can efficiently remove snow, it is advisable to clear the snow manually around plants and delicate areas. Using a shovel or snowbrush, carefully remove the snow in these areas to avoid accidentally damaging your plants. Manual snow removal allows for more precision and control, ensuring that your plants remain unharmed during the process.

Adjusting the height and speed settings of the snowblower is crucial in protecting your plants. Make sure to set the height of the snowblower blade according to the depth of the snow. Setting it too low can damage your plants, while setting it too high may leave behind a layer of snow. Additionally, adjusting the speed of the snowblower to a slower setting will give you greater control and reduce the risk of snow being blown directly onto your plants.

Directing the snow away from your plants is another important step in ensuring their protection. Use the chute control feature of the snowblower to point the direction of the snow away from your plants and delicate areas. This will prevent any snow from accumulating on your plants and potentially causing damage.

Lastly, avoid using excessive force or pressure when operating the snowblower. Overly aggressive use can damage plants, especially if they are covered by a layer of snow. Take your time and be gentle when maneuvering the snowblower around your garden to minimize any potential harm to your plants.

Protecting Plants from Snow and Ice

Apart from using a snowblower to remove snow from your garden, incorporating additional protective measures can help safeguard your plants from the harsh winter conditions.

Creating physical barriers around your plants can help shield them from snow and ice. This can be done by constructing temporary fences or installing windbreaks. These barriers will help reduce the impact of strong winds and prevent snow from accumulating on your plants, reducing the risk of damage.

Applying anti-desiccant sprays to your plants before the onset of winter can provide them with an extra layer of protection. These sprays help to reduce moisture loss from the leaves and prevent them from drying out in the winter cold. Anti-desiccant sprays are particularly beneficial for evergreen plants and shrubs.

Using burlap or similar materials to cover your plants can offer them a protective layer against snow and ice. Wrapping the plants loosely with burlap allows for air circulation while still shielding them from the elements. This method is especially effective for delicate plants that cannot withstand the weight of snow.

For particularly sensitive plants, providing extra insulation is key to their survival. This can be achieved by mulching around the base of the plants with organic matter such as straw or leaves. Mulching helps to regulate soil temperature and retain moisture, providing a cozy environment for your plants during the winter months.

Post-Snowblowing Garden Care

Once you have successfully used a snowblower to remove snow from your garden, it is important to take some post-snowblowing care to ensure the well-being of your plants.

Shoveling any remaining snow by hand is necessary, especially around plants and delicate areas where the snowblower may not have reached. Using a shovel or snowbrush, gently remove the remaining snow to prevent any potential damage to your plants.

Inspecting your plants for any damage or breakage is crucial after snow removal. Snow can be heavy and may have weighed down branches or caused them to snap. Carefully examine your plants and prune any damaged or broken branches to encourage new growth and maintain their health.

If there is any excess snow buildup on your plant branches, carefully remove it to prevent the branches from bending or breaking under the weight. Use a soft broom or your hands to brush off the snow, being careful not to apply too much pressure or force that could harm the plants.

Watering dry or frozen plants after snow removal requires special care. It is important to wait until the soil has thawed before attempting to water your plants. Watering frozen plants can cause more harm than good, as the water will not be able to penetrate the frozen soil. Once the ground has thawed, water your plants gently and evenly to rehydrate them.

Common Mistakes to Avoid

There are several common mistakes that gardeners often make when using a snowblower or dealing with snow removal around their plants. By being aware of these mistakes, you can avoid them and better protect your plants.

One common mistake is not considering the sensitivity of your plants before using a snowblower. Some plants are more delicate and susceptible to damage than others. Take the time to identify these plants and take extra precautions to protect them, such as manual snow removal or using barriers to shield them from snow and ice.

Neglecting to clear debris from your garden before using a snowblower is another mistake to avoid. Branches, rocks, or any other objects can get caught in the snowblower and potentially cause damage to your plants or the machine itself. Clearing the area beforehand will ensure a smoother and safer snow-removal process.

Blowing snow directly onto your plants is a mistake that can easily be avoided with proper chute control. Directing the snow away from your plants will prevent it from piling up and potentially causing harm. Use the chute control feature of your snowblower to redirect the snow in a safe direction.

Using incorrect snowblower settings is another common mistake that can lead to damage. Make sure to adjust the height and speed settings of your snowblower according to the depth of the snow and the sensitivity of your plants. Using too high a speed or setting the blade too low can harm your plants, so take the time to adjust the settings properly before starting.

Alternative Methods of Snow Removal

While using a snowblower is a popular and efficient method of removing snow from your garden, there are alternative methods that you can consider.

Shoveling by hand is a traditional method that allows for more precision and control. While it may require more physical effort, shoveling by hand ensures that you have direct control over the snow removal process and can carefully navigate around your plants.

Using a snow pusher or brush is another alternative to consider. These tools are designed specifically for snow removal and can be effective in clearing snow from paths, driveways, and other areas without causing damage to your plants.

If you prefer to leave the snow removal to the professionals, hiring a snow removal service is a convenient option. These services have the equipment and expertise to quickly clear snow from your garden without causing harm to your plants. It may be a more costly option, but it saves you time and effort in the long run.

Winterizing Your Garden

Winterizing your garden is an important step in preparing it for the cold winter months. By taking a few simple steps, you can protect your plants and ensure their survival until spring.

Applying mulch and compost to your garden beds is a great way to insulate the soil and protect your plants’ roots from freezing temperatures. Mulch acts as a blanket, retaining heat and moisture in the soil, while compost adds essential nutrients to nourish your plants during the dormant season.

Covering garden beds with straw or leaves is another effective method of winterizing. This additional layer of protection helps regulate soil temperature, prevents frost from penetrating the soil, and keeps your plants safe from freezing temperatures. Mulch or compost can be used as well in this method.

Draining and storing garden hoses is crucial to prevent them from freezing and potentially bursting. Disconnect the hoses from the faucets, drain any remaining water, and store them in a dry and protected area until spring. This will extend the lifespan of your hoses and prevent any damage caused by freezing temperatures.

Protecting garden structures from snow and ice is also important for their longevity. Remove any snow buildup from arbors, trellises, or other structures to prevent them from collapsing under the weight. Applying a protective coating or sealant to wooden structures will help prevent moisture damage and prolong their lifespan.

Selecting Snow-Tolerant Plants

Choosing the right plants for your garden that can tolerate snow and cold temperatures is essential for a thriving winter garden. Here are some considerations when selecting snow-tolerant plants:

Researching plants that are suitable for your region’s climate is the first step. Different plants have different tolerances to cold and snow, so it is important to choose plants that are well-suited to your specific climate conditions. Consult with local garden centers or nurseries for expert advice on the best plants for your area.

Selecting plants with strong branches and sturdy structures is important to withstand the weight of snow or ice. These plants are less likely to bend or break under the pressure of heavy snowfall. Look for plants with sturdy stems and branches that can withstand winter conditions.

Considering evergreen plants for winter interest is a great way to add color and texture to your garden during the colder months. Evergreen plants retain their foliage year-round and provide a vibrant backdrop against the white snow. They also act as a natural shield, protecting other plants from harsh winter winds and reducing the impact of snowfall.

Exploring winter-blooming plants is another option to add beauty and interest to your winter garden. These plants have adapted to bloom during the colder months, bringing bursts of color and fragrance to your garden when everything else seems dormant. Winter-blooming plants can provide a delightful contrast against the snowy backdrop.

Seeking Expert Advice

If you have any questions or uncertainties about protecting your plants and garden during snow removal, it is always a good idea to seek expert advice. There are several resources available to help guide you in the right direction.

Consulting with a local garden center or plant nursery is a great place to start. They have knowledgeable staff who can offer guidance on protecting your plants during winter and using a snowblower effectively. They can recommend specific products or techniques that are best suited to your garden’s needs.

Contacting a professional landscaper is another option if you want more specialized advice or assistance with your garden. They have the expertise and experience to provide customized recommendations for snow removal and winter garden care. Hiring a professional may be especially beneficial if you have a larger garden or complex landscaping features.

Joining gardening communities or forums online can also be a valuable resource for gathering advice and insights from fellow gardeners. These platforms provide a space for discussion, sharing tips, and asking questions. You can learn from the experiences of others and gain valuable knowledge on how to protect your plants and garden during winter.

By following the tips and guidelines outlined in this article, you can effectively protect your plants and garden when using a snowblower. Remember to choose the right snowblower, prepare your garden beforehand, use the snowblower properly, employ additional protective measures, and take care of your garden post-snow removal. Avoid common mistakes, explore alternative methods of snow removal, winterize your garden, select snow-tolerant plants, and seek expert advice when needed. With proper care and attention, you can ensure that your plants and garden thrive even in the harshest winter conditions.

What’s The Purpose Of The Drift Cutters On A Snowblower?

If you’ve ever wondered why snowblowers come equipped with those curious-looking blades on the sides, known as drift cutters, you’re not alone. These small, yet mighty tools serve a crucial purpose when it comes to efficiently removing snow. Acting as guides, drift cutters effectively slice through the compacted snow and ice, allowing the snowblower to clear wider paths with greater ease. In this article, we’ll explore how drift cutters work and why they are an indispensable feature for tackling heavy snowdrifts.

Whats The Purpose Of The Drift Cutters On A Snowblower?

1. Function of Drift Cutters

1.1 Clearing Snow Drifts

Snow drifts are a common phenomenon during winter, especially in areas with high snowfall. Drift cutters play a crucial role in tackling these snow drifts by helping to break them apart and clear them efficiently. When snow accumulates and is pushed by the wind, it tends to accumulate in certain areas, creating large drifts that can be challenging to remove. Drift cutters act as specialized tools that cut through these drifts, allowing the snowblower to effectively clear them.

1.2 Preventing Clogging

One of the main challenges when using a snowblower is the clogging of the chute due to the heavy and wet snow. Drift cutters help prevent this issue by breaking up the snow drifts and ensuring a smoother flow of snow into the intake chute. By cutting through the compacted snow, drift cutters allow for improved snow removal and reduce the chances of clogging, which can be time-consuming and frustrating to deal with.

1.3 Enhancing Efficiency

Efficiency is key when it comes to snow removal, and drift cutters play a vital role in enhancing the overall efficiency of a snowblower. By efficiently breaking through snow drifts, drift cutters save both time and effort. They enable the snowblower to evenly distribute the snow throughout the chute, allowing for a consistent and faster clearing process. Additionally, they help prevent the snowblower from getting stuck in deep snow, making the overall snow removal process more efficient and effective.

2. How Do Drift Cutters Work?

2.1 Fixed Position

Drift cutters are usually installed on the sides of the snowblower’s auger housing. They have a fixed position, slightly above the ground, and are designed to catch the edge of the snow drifts. As the snowblower moves forward, the drift cutters cut through the compacted snow, loosening it and making it easier for the auger to break it apart and direct it into the chute. The fixed position of the drift cutters ensures a consistent height and angle, allowing for a precise and controlled cutting action.

2.2 Adjustable Height

Some drift cutters come with adjustable height features, allowing you to customize the cutting depth according to the height of the snow drifts. This flexibility is particularly useful when dealing with varying snow conditions or when you encounter particularly stubborn or deep snow drifts. By adjusting the height, you can ensure that the drift cutters effectively cut through the entire depth of the drifts, providing optimal snow removal capabilities.

2.3 Material and Design

Drift cutters are commonly made of durable materials such as steel or hardened plastic, ensuring their strength and longevity in harsh winter conditions. The design of drift cutters typically consists of a curved or angled blade that efficiently cuts through the snow drifts. The shape and sharpness of the blade are tailored to penetrate and break up the compacted snow, facilitating the snowblower’s clearing process. Some drift cutters may also feature serrated edges for enhanced cutting performance.

3. Benefits of Using Drift Cutters

3.1 Increased Snow Removal Capacity

One of the significant benefits of using drift cutters is the increased snow removal capacity they provide. By effectively breaking up snow drifts, drift cutters allow the snowblower to handle larger volumes of snow. This is especially beneficial in areas with heavy snowfall or when clearing large spaces such as driveways, parking lots, or commercial areas. The enhanced snow removal capacity enables you to clear larger areas more quickly and efficiently.

3.2 Reduced Time and Effort

Drift cutters can significantly reduce the time and effort required for snow removal. By efficiently cutting through snow drifts, they make it easier for the auger and impeller of the snowblower to handle the snow. This reduces the strain on the machine and minimizes the effort required to clear the snow. Moreover, by preventing clogging and ensuring a smoother flow of snow, drift cutters save you from the hassle of frequently stopping to unclog the chute or manually clear the snow. Overall, using drift cutters can make the snow removal process significantly quicker and less physically demanding.

3.3 Safety and Convenience

Safety is always a top priority when operating any equipment, including snowblowers. Drift cutters contribute to safety by breaking down snow drifts and preventing the snowblower from getting stuck or becoming unstable while clearing deep snow. This reduces the risk of accidents and increases overall stability when operating the machine. Furthermore, using drift cutters adds convenience to the snow removal process. By enhancing the snowblower’s efficiency, you spend less time battling with stubborn snow drifts and more time enjoying a clean and snow-free environment.

Whats The Purpose Of The Drift Cutters On A Snowblower?

4. Proper Usage and Maintenance

4.1 Correct Installation

To ensure optimal performance, it is essential to correctly install drift cutters on your snowblower. Follow the manufacturer’s instructions carefully, as the installation process may vary depending on the make and model of your snowblower. Generally, the drift cutters should be securely mounted to the sides of the auger housing, with the cutting edge positioned slightly above the ground. Proper installation ensures that the drift cutters effectively engage with the snow drifts and perform their intended function.

4.2 Regular Inspection and Cleaning

Like any other equipment, drift cutters require regular inspection and cleaning to maintain their efficiency. After each snow removal session, inspect the drift cutters for any signs of damage or wear. Check the mounting hardware to ensure that it is secure and tighten if necessary. Remove any accumulated snow or ice from the blades to prevent them from becoming dull or ineffective. Regular cleaning and maintenance increase the longevity of the drift cutters and ensure their continued performance.

4.3 Replacements and Repairs

Over time, drift cutters may experience wear and tear, especially if used frequently or in particularly challenging snow conditions. If you notice significant damage or if the drift cutters no longer function effectively, it may be time for replacements or repairs. Consult the manufacturer’s guidelines or a professional for guidance on replacing worn-out drift cutters or repairing any damaged components. Keeping your drift cutters in good condition is key to their performance and your overall snow removal experience.

5. Choosing the Right Drift Cutters

5.1 Compatibility with Snowblower

When selecting drift cutters, it is crucial to ensure their compatibility with your snowblower. Consider the make and model of your snowblower and check the specifications provided by the manufacturer. This ensures that the drift cutters will fit and function properly with your specific snowblower. Choosing compatible drift cutters guarantees optimal performance and prevents any compatibility issues.

5.2 Quality and Durability

Investing in high-quality drift cutters is essential to their longevity and performance. Look for drift cutters made from durable materials such as steel or hardened plastic. These materials are designed to withstand the harsh winter conditions and prolonged use. Additionally, consider the overall construction and design of the drift cutters to ensure their durability. Reading customer reviews and seeking recommendations from experienced snow removal professionals can help you choose reliable and long-lasting drift cutters.

5.3 User-Friendly Features

Consider the user-friendly features offered by different drift cutter models. Adjustable height settings, easy installation mechanisms, and simple maintenance requirements are factors to keep in mind. Having the ability to adjust the cutting depth or easily remove and clean the drift cutters can significantly enhance your snow removal experience. Choose drift cutters that offer convenience and user-friendly features that align with your specific needs and preferences.

6. Alternatives to Drift Cutters

6.1 Snow Fences

Snow fences are another option to prevent snow drifts and improve snowblowing efficiency. These fences act as barriers and redirect the flow of wind, consequently reducing the formation of snow drifts. Snow fences are typically installed strategically around properties to protect desired areas from accumulating excessive snow. While not a direct substitute for drift cutters, they complement the snowblowing process by minimizing the formation of large snow drifts.

6.2 Snow Barriers and Windbreaks

Similar to snow fences, snow barriers and windbreaks serve as physical barriers to prevent snow accumulation and drifting. These barriers can be constructed using various materials, such as wooden planks or metal sheets, depending on the desired level of protection. Snow barriers and windbreaks are particularly useful in areas with high wind speeds, as they help create a sheltered space that reduces the likelihood of snow drifts forming.

6.3 Adjusting Blower Technique

While not a physical alternative, adjusting your snowblower technique can also help minimize the formation of snow drifts. By changing the angle and direction of the snowblower chute, you can better distribute the snow during the clearing process. Aim to disperse the snow evenly, rather than concentrating it in a single area, to prevent the build-up of large drifts. Experimenting with different techniques and modifying your blowing patterns can help improve the effectiveness of snow removal, especially in areas prone to drifting.

7. Safety Precautions When Using Drift Cutters

7.1 Awareness of Surroundings

When operating a snowblower with drift cutters, it is crucial to be aware of your surroundings. Watch out for obstacles, such as rocks, curbs, or uneven surfaces, as they can damage the drift cutters or the snowblower itself. Additionally, be mindful of people or animals nearby and ensure they are at a safe distance to prevent any accidents. Being aware of your surroundings helps ensure safe and efficient operation of the snowblower with drift cutters.

7.2 Proper Clothing and Protection

Snow removal can be physically demanding, so it is essential to wear appropriate clothing and protective gear. Dress in layers to stay warm and wear insulated, waterproof boots to keep your feet dry and comfortable. Use gloves to protect your hands and consider wearing safety goggles or a face shield to shield your eyes from flying debris. Additionally, always be cautious of the moving parts of the snowblower and avoid wearing loose clothing or jewelry that could get caught.

7.3 Clearing Obstructions

If you encounter any obstructions or tough-to-clear areas while using drift cutters, exercise caution. Avoid forcing the snowblower or drift cutters through dense or icy snow, as this can strain the machine or potentially cause damage. Instead, clear any blockages manually using a shovel or other appropriate tools. Taking the time to remove obstructions safely and effectively ensures the longevity of both the drift cutters and the snowblower.

8. Frequently Asked Questions (FAQs)

8.1 How often should drift cutters be replaced?

The lifespan of drift cutters can vary depending on factors such as frequency of use, snow conditions, and maintenance. However, on average, drift cutters should be replaced every few seasons or when noticeable wear or damage occurs. Regularly inspect the drift cutters after each snow removal session and consult the manufacturer’s guidelines for specific recommendations on replacement intervals.

8.2 Can drift cutters be installed on any snowblower?

Drift cutters are designed to be compatible with most snowblowers, but it is essential to ensure their compatibility with your specific make and model. Check the manufacturer’s specifications and guidelines to verify that the drift cutters you choose are suitable for your snowblower. Installing incompatible drift cutters may affect the performance of the snowblower or result in suboptimal snow removal.

8.3 Can drift cutters damage the snowblower?

When used correctly and installed properly, drift cutters should not cause damage to the snowblower. However, it is crucial to operate the snowblower with drift cutters with caution and observe proper usage techniques. Avoid pushing the snowblower into dense or icy snow that may strain the machine or cause the drift cutters to become damaged. Following the manufacturer’s guidelines and practicing safe snowblowing techniques will minimize the risk of damage to the snowblower.

9. Conclusion

Drift cutters serve as invaluable tools when it comes to efficient snow removal. By clearing snow drifts, preventing clogging, and enhancing overall efficiency, drift cutters offer numerous benefits for snowblower users. Understanding their function, proper usage, and maintenance will ensure optimal performance and longevity. When choosing drift cutters, consider compatibility with your snowblower, quality, and user-friendly features. While drift cutters are effective, alternatives such as snow fences and adjusting blower techniques can also enhance snow removal efficiency. Remember to always prioritize safety by being aware of your surroundings and wearing appropriate clothing and protection. By utilizing drift cutters effectively, you can conquer those stubborn snow drifts and enjoy a clean and snow-free environment with reduced time and effort.