Tag Archives: Maintenance

How Do I Maintain My Snowblower?

So you finally got yourself a shiny new snowblower to tackle those heavy snowfalls, but now you’re wondering how to keep it in top shape. Maintaining your snowblower is essential for its longevity and efficiency. From conducting regular inspections and cleaning to changing the oil and storing it properly, this article will guide you through the simple steps to ensure your snowblower continues to work like a charm, no matter how much snow is piling up outside. Don’t worry, it’s easier than it sounds!

Inspecting and Cleaning the Snowblower

Inspecting the Spark Plug

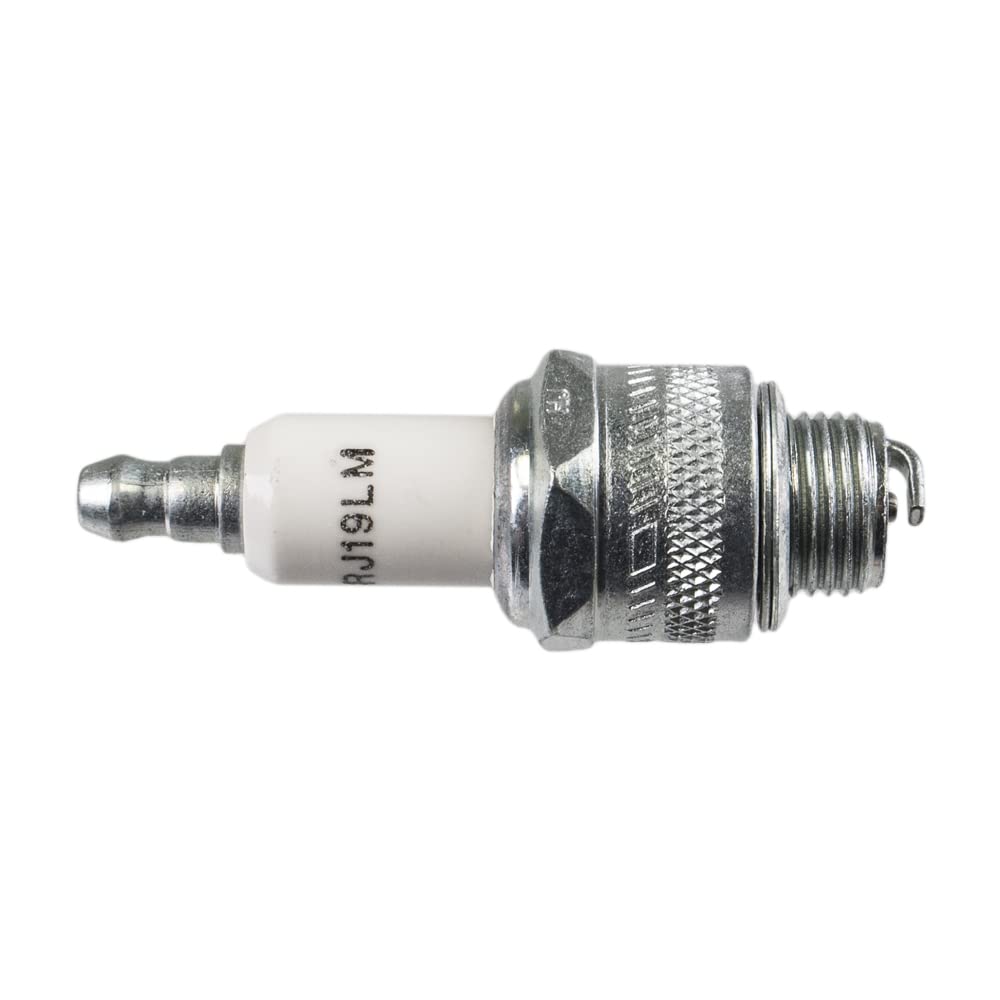
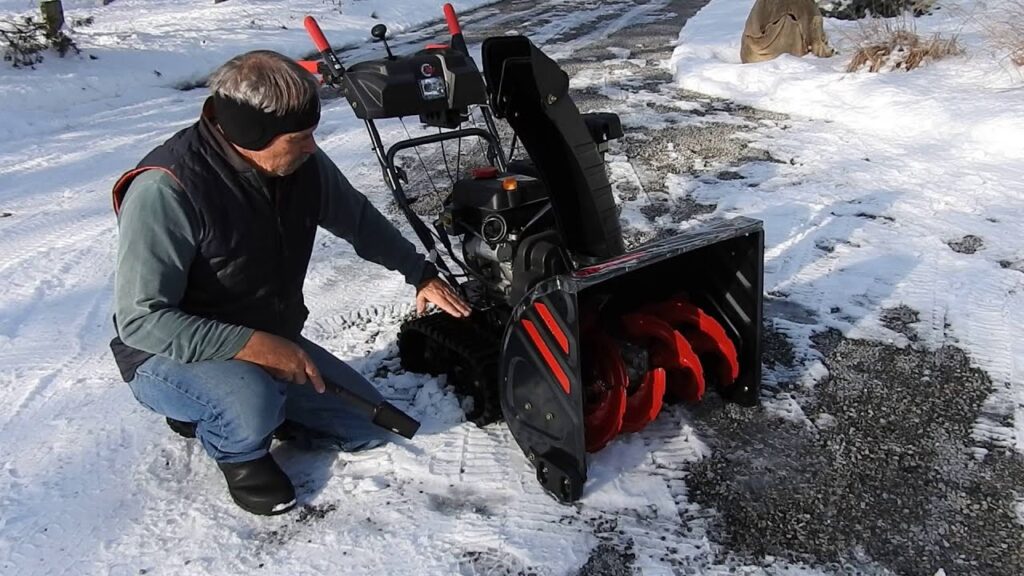
The first step in maintaining your snowblower is to inspect the spark plug. The spark plug is a crucial component that ignites the fuel and air mixture in the engine, so it’s important to make sure it’s in good condition. Start by removing the spark plug wire and using a spark plug socket to remove the plug. Check for any signs of wear or damage, such as corrosion or a worn electrode. If necessary, clean the spark plug with a wire brush or replace it with a new one.

Cleaning or Replacing the Air Filter

The air filter is responsible for trapping dirt and debris before it enters the engine. Over time, the filter can become clogged and restrict airflow, leading to poor engine performance. To clean the air filter, remove it from the snowblower and gently tap it to remove any loose debris. If the filter is heavily soiled, it may need to be replaced. Refer to your snowblower’s manual for instructions on how to properly clean or replace the air filter.

Checking and Replacing the Fuel Filter

The fuel filter is another important component to inspect. Its purpose is to remove any impurities from the fuel before it reaches the engine. Start by locating the fuel filter, typically found in the fuel line or inside the fuel tank. Check for any signs of clogging or damage. If the filter is dirty or damaged, it should be replaced with a new one. Remember to follow the manufacturer’s recommendations on how often to replace the fuel filter.

Examining the Belts and Pulleys

The belts and pulleys in your snowblower are responsible for transferring power from the engine to the auger and impeller. Over time, these components can become worn or loose, which can affect the performance of your snowblower. Inspect the belts for any signs of cracking, fraying, or stretching. Check the pulleys for any wobbling or damage. If any issues are found, it’s important to replace the belts or pulleys to ensure proper operation.

Inspecting the Scraper Bar and Skid Shoes

The scraper bar and skid shoes are located at the bottom of the snowblower and come into contact with the ground. These components help to clear the snow and protect the housing of the snowblower. Inspect the scraper bar for any signs of wear or damage. If it is worn down, it should be replaced. Similarly, check the skid shoes for any signs of wear. If they are worn unevenly or broken, they should be replaced to prevent damage to the snowblower and ensure proper clearance.

Cleaning the Chute and Auger

The chute and auger are integral parts of your snowblower, responsible for directing and throwing the snow. It’s important to regularly clean these components to prevent clogging and ensure optimal performance. Start by removing any loose snow or debris from the chute and auger. Use a brush or scraper to remove any compacted snow or ice. Avoid using metal tools that can damage the auger or chute. Regular cleaning will help prevent clogs and keep your snowblower running smoothly.

Removing Debris from the Impeller

The impeller is located behind the auger and is responsible for blowing the snow out of the chute. Over time, debris such as sticks, rocks, or ice can get lodged in the impeller, which can affect its performance. To remove debris from the impeller, disconnect the spark plug wire and use a sturdy stick or broom handle to carefully dislodge any obstructions. Make sure to wear gloves and exercise caution to avoid injury. Regularly checking and clearing any debris from the impeller will help maintain optimal snowblower performance.

Inspecting and Cleaning the Controls

The controls of your snowblower, including the throttle, choke, and starter, should be regularly inspected and cleaned to ensure they are in proper working order. Check for any signs of wear or damage, such as loose or sticky controls. Clean any dirt or debris that may have accumulated on the controls using a soft cloth or brush. If any controls are not functioning correctly, they should be repaired or replaced to ensure safe and efficient operation.

Cleaning the Exterior

Lastly, don’t forget to clean the exterior of your snowblower. Snow, ice, and dirt can accumulate on the housing and other exterior components, which can lead to rust or corrosion over time. Use a damp cloth or sponge to wipe down the exterior and remove any dirt or debris. Avoid using harsh chemicals or abrasive materials that can damage the paint or plastic parts. Regularly cleaning the exterior of your snowblower will help extend its lifespan and maintain its appearance.

Preparing for Storage

Draining the Fuel System

Before storing your snowblower for an extended period, it’s important to properly drain the fuel system. Gasoline can deteriorate over time and lead to clogs or damage to the engine if left sitting in the snowblower’s fuel system. Start by running the snowblower until it runs out of fuel. This will help ensure that there is minimal gasoline left in the system. If your snowblower has a fuel valve, turn it off. Then, start the engine and allow it to run until it stalls. This will help remove any remaining fuel from the carburetor.

Changing the Engine Oil

Changing the engine oil is another important step in preparing your snowblower for storage. Over time, oil can become contaminated with dirt and debris, which can lead to engine damage if not properly maintained. Refer to your snowblower’s manual for instructions on how to change the oil. Typically, this involves removing a drain plug and allowing the old oil to drain into a container. Once the oil has drained completely, replace the drain plug and fill the engine with fresh oil according to the manufacturer’s specifications.

Greasing the Bearings and Moving Parts

To ensure smooth and efficient operation, it’s important to grease the bearings and moving parts of your snowblower before storing it. Refer to your snowblower’s manual for the specific locations where grease should be applied. Typically, this includes greasing the auger shaft, impeller shaft, and any other rotating or moving parts. Use a high-quality grease recommended by the manufacturer and apply it in the designated areas. Greasing the bearings and moving parts will help prevent rust and corrosion during storage and maintain their performance.

Cleaning the Snowblower Thoroughly

Before storing your snowblower, it’s crucial to clean it thoroughly to remove any dirt, debris, or moisture that may be present. Use a damp cloth or sponge to wipe down the exterior and remove any dirt or debris. Pay special attention to the auger, chute, and impeller areas, as they tend to accumulate the most snow and ice. Use a brush or scraper to remove any compacted snow or ice. Allow the snowblower to dry completely before storing it to prevent rust or corrosion.

Storing the Snowblower in a Dry Place

Finally, when it comes to storing your snowblower, it’s important to choose a dry and secure location. Moisture and humidity can cause rust and corrosion, so avoid storing the snowblower in a damp basement or garage. Instead, find a cool and dry spot, such as a shed or a dedicated storage area. Make sure the snowblower is covered to protect it from dust and other debris. Additionally, store the snowblower in an upright position to prevent any fuel or oil leaks.
How Do I Maintain My Snowblower?

Regular Maintenance Tasks

Checking the Tire Pressure

Regularly checking the tire pressure is an important maintenance task for your snowblower. Proper tire pressure ensures optimal traction and maneuverability, allowing the snowblower to perform at its best. Refer to your snowblower’s manual for the recommended tire pressure. Use a tire pressure gauge to check the pressure and add or release air as necessary. It’s a good idea to check the tire pressure before each use to ensure safe and efficient operation.

Inspecting and Tightening the Bolts and Nuts

Inspecting and tightening the bolts and nuts on your snowblower is essential for maintaining its structural integrity and preventing any loose parts during operation. Regularly inspect all bolts and nuts, including those on the handles, housing, and chute assembly. If any are loose, use the appropriate tools to tighten them securely. Be careful not to overtighten, as this can cause damage to the components. Taking the time to inspect and tighten the bolts and nuts will help prevent accidents and ensure the snowblower operates safely.

Greasing the Axle Shaft

The axle shaft is a critical component that connects the wheels and allows for smooth movement of the snowblower. Regularly greasing the axle shaft is important to reduce friction and ensure proper operation. Refer to your snowblower’s manual for instructions on how to grease the axle shaft. Typically, this involves applying grease to the fittings or joints using a grease gun. Greasing the axle shaft will help extend its lifespan and maintain optimal performance.

Inspecting and Adjusting the Drive Belt

The drive belt is responsible for transferring power from the engine to the wheels, allowing the snowblower to move forward or backward. Over time, the belt can become worn or loose, affecting the snowblower’s performance. Regularly inspect the drive belt for any signs of damage, such as cracking or fraying. If any issues are found, it’s important to replace the drive belt or make the necessary adjustments. Refer to your snowblower’s manual for instructions on how to properly inspect and adjust the drive belt.

Inspecting and Adjusting the Auger Belt

The auger belt is another important component of your snowblower that should be regularly inspected and adjusted. The auger is responsible for collecting and moving the snow into the chute. Inspect the auger belt for any signs of wear or damage, such as cracking or stretching. If any issues are found, it’s important to replace the auger belt or adjust it to the proper tension. Refer to your snowblower’s manual for instructions on how to properly inspect and adjust the auger belt.

Lubricating the Auger and Impeller

Proper lubrication of the auger and impeller is essential for maintaining their performance and preventing excessive wear. Refer to your snowblower’s manual for the recommended lubricant and locations where lubrication is required. Typically, this involves applying a light grease or oil to the auger and impeller, ensuring that all moving parts are properly lubricated. Regularly lubricating the auger and impeller will help reduce friction and extend their lifespan.

Inspecting and Adjusting the Skid Height

The skid shoes, located at the bottom of the snowblower, determine the height at which the snowblower clears the ground. Regularly inspecting and adjusting the skid height is important to ensure proper clearance and prevent damage to the snowblower or the surface being cleared. Adjust the skid height according to the type of surface you’ll be clearing. For example, set the skid height higher for gravel surfaces to prevent rocks from being picked up, and lower for paved surfaces. Refer to your snowblower’s manual for instructions on how to properly adjust the skid height.

Inspecting and Adjusting the Scraper Bar

The scraper bar is located at the bottom of the snowblower and helps to remove snow down to the pavement. Regularly inspecting and adjusting the scraper bar is important to maintain optimal clearing performance. Check the scraper bar for any signs of wear or damage, such as excessive wear or bending. If necessary, adjust the scraper bar to the proper height to ensure it makes proper contact with the ground. Refer to your snowblower’s manual for instructions on how to properly inspect and adjust the scraper bar.

Checking the Engine Oil Level

Regularly checking the engine oil level is important to ensure proper lubrication of the engine and prevent damage. Refer to your snowblower’s manual for instructions on how to check the engine oil level. Typically, this involves removing the dipstick, wiping it clean, reinserting it, and then removing it again to check the oil level. Add oil if necessary, ensuring that it is the correct type and viscosity recommended by the manufacturer. Regular oil checks and maintenance will help extend the life of your snowblower’s engine.

Inspecting the Spark Plug Gap

Regularly inspecting the spark plug gap is important to maintain proper ignition and prevent engine misfires. Refer to your snowblower’s manual for instructions on how to check and adjust the spark plug gap. Typically, this involves using a gap tool to measure the distance between the center and ground electrode of the spark plug. If the gap is too wide or too narrow, adjust it accordingly using the gap tool. Regularly checking and adjusting the spark plug gap will help ensure optimal engine performance and fuel efficiency.

When to Service Your Snowblower

Following the Manufacturer’s Guidelines

It’s important to follow the manufacturer’s guidelines when it comes to servicing your snowblower. Different models and brands may have specific maintenance intervals or recommendations. Refer to your snowblower’s manual for a comprehensive guide on when and how to perform maintenance tasks. By following the manufacturer’s guidelines, you can ensure that your snowblower operates safely and efficiently.

After Extended Periods of Inactivity

If your snowblower has been sitting unused for an extended period, such as over the summer months, it’s a good idea to perform a thorough maintenance routine before using it again. Even if the snowblower was properly stored, it’s still important to inspect and clean the various components to ensure they are in proper working condition. This includes inspecting and cleaning the spark plug, air filter, fuel filter, belts, pulleys, scraper bar, skid shoes, chute, and auger.

When the Snowblower is Difficult to Start

If your snowblower is difficult to start or requires multiple attempts before it turns on, it may be a sign that it requires servicing. Difficulty starting can be caused by a variety of issues, such as a dirty spark plug, clogged air filter, or faulty ignition system. Inspect and clean the spark plug and air filter, and if the issue persists, consult a professional for further diagnosis and repairs.

If It Is Not Throwing Snow Properly

If your snowblower is not throwing snow properly, such as snow not being discharged from the chute or the throwing distance being reduced, it’s important to address the issue. This can be caused by a variety of factors, such as a clogged chute, worn auger or impeller, or a loose belt. Inspect and clean the chute and auger, and check the belts for proper tension. If the issue persists, consult a professional for further inspection and repairs.

When You Notice Unusual Noises or Vibrations

Unusual noises or vibrations coming from your snowblower can indicate underlying issues that require servicing. Strange grinding or rattling noises can be a sign of worn or damaged components, while excessive vibrations can indicate a loose or imbalanced part. If you notice any unusual noises or vibrations, it’s important to inspect the snowblower and address the issue promptly. Consult a professional if necessary for further diagnosis and repairs.

How Do I Maintain My Snowblower?

Safety Precautions

Reading the Operator’s Manual

Before operating your snowblower, it’s crucial to read and familiarize yourself with the operator’s manual. The manual provides important safety information, as well as instructions on how to properly operate and maintain your snowblower. Understanding the manual will help ensure that you use the snowblower safely and effectively, reducing the risk of accidents or damage.

Wearing Appropriate Safety Gear

When operating a snowblower, wearing appropriate safety gear is essential to protect yourself from potential hazards. This includes goggles or safety glasses to protect your eyes from flying debris, ear protection to reduce noise levels, and sturdy footwear with good traction to prevent slips and falls. Additionally, wearing gloves and warm clothing will provide insulation and protect your hands and body from the cold.

Working in a Well-Ventilated Area

When performing maintenance tasks on your snowblower, it’s important to work in a well-ventilated area to avoid the buildup of harmful fumes. If you’re working indoors, such as in a garage, make sure the space is properly ventilated to allow for fresh air circulation. If working outdoors, ensure there is a steady flow of fresh air. Good ventilation will help prevent the inhalation of exhaust fumes and promote a safe and healthy working environment.

Disconnecting the Spark Plug Wire

Before performing any maintenance or repair tasks on your snowblower, it’s important to disconnect the spark plug wire to prevent accidental starts. This will ensure that the engine cannot be accidentally started while you’re working on it, reducing the risk of injury. Simply locate the spark plug wire and disconnect it by pulling the rubber boot away from the spark plug.

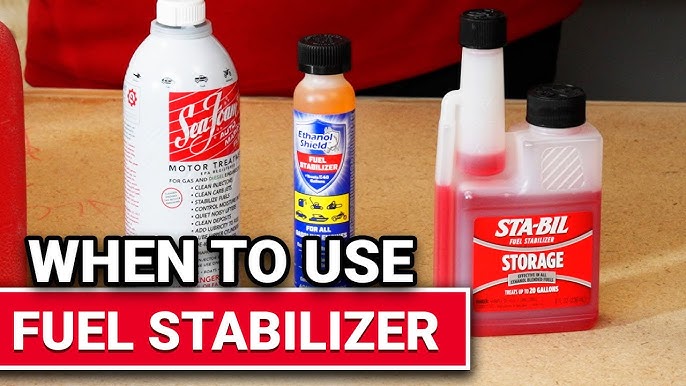
Using a Fuel Stabilizer

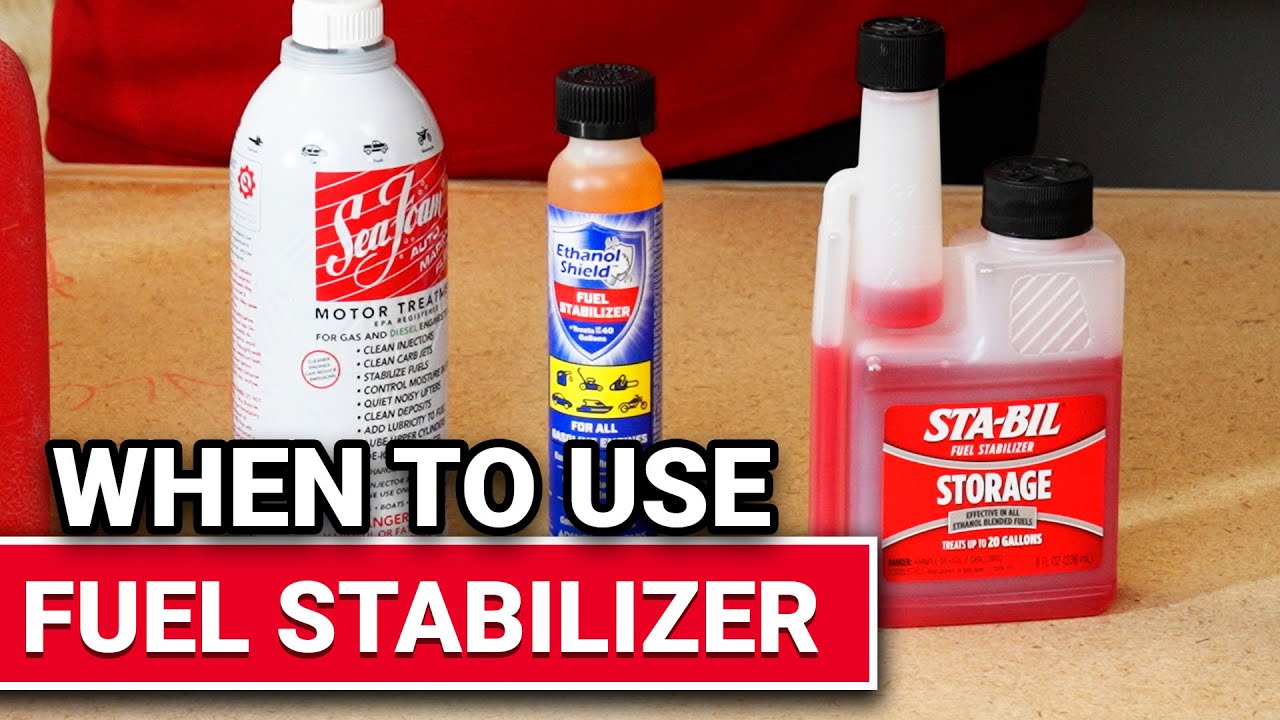
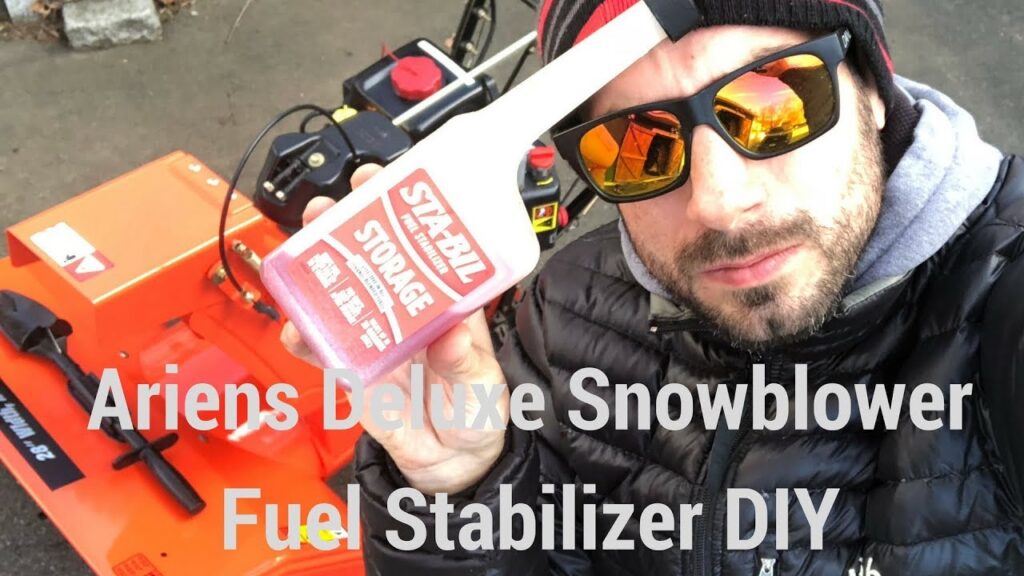
When storing your snowblower for an extended period, it’s advisable to use a fuel stabilizer in the gasoline to prevent it from deteriorating. Fuel stabilizers help to prevent the formation of varnish and gum in the fuel system, which can clog the carburetor and lead to engine problems. Follow the manufacturer’s instructions on the appropriate amount of stabilizer to use, and make sure to run the engine for a few minutes to circulate the treated fuel throughout the system.

Avoiding Loose Clothing or Jewelry

When operating a snowblower, it’s important to avoid wearing loose clothing or jewelry that can get caught in moving parts. Loose clothing or dangling jewelry can present a safety hazard if they come into contact with belts, augers, or other rotating components. Make sure to wear proper fitting clothing and remove any jewelry or accessories that can pose a risk.

Using a Sturdy Ice Scraper

When clearing packed or hardened snow, it’s important to use a sturdy ice scraper to loosen it before using the snowblower. Using a metal or plastic ice scraper with a long handle allows you to safely break up stubborn snow and ice without risking damage to the snowblower. This will make the snowblower’s job easier and prevent unnecessary strain on the machine.

Keeping Hands and Feet Away from Moving Parts

When operating or working on the snowblower, it’s crucial to keep your hands and feet away from any moving parts. Never attempt to clear obstructions or unclog the chute while the engine is running. Before performing any maintenance tasks, make sure the snowblower is turned off and the engine is completely cool. Always use tools or implements provided with the snowblower to safely clear debris or perform necessary maintenance.

Clearing Jammed Snow Safely

If your snowblower becomes jammed with snow or ice, it’s important to clear it safely to avoid injury or damage to the machine. Start by turning off the engine and waiting for all moving parts to come to a complete stop. Use a solid object, such as a sturdy stick or broom handle, to carefully dislodge the jammed snow or ice from the auger or chute. Avoid using your hands or feet, as they can be injured by the rotating auger. Take your time and exercise caution to clear the jam safely.

Being Cautious of Hidden Obstacles

When operating a snowblower, it’s important to be cautious of any hidden obstacles that may be hidden beneath the snow. Rocks, branches, or other debris can cause damage to the auger or other components if they are not cleared properly. Take your time and be mindful of your surroundings, using the snowblower’s adjustable skid height to avoid any potential obstacles. Clearing the area of any potential hazards before operating the snowblower will help prevent damage and ensure safe operation.

Troubleshooting Tips

If the Engine Won’t Start

If you’re having trouble starting the snowblower’s engine, there could be a few potential issues to address. First, check to ensure that there is fuel in the tank and that the fuel valve is open if applicable. Inspect the spark plug to make sure it is clean and properly gapped. If the spark plug is dirty or damaged, clean or replace it as necessary. Check the ignition switch and wiring for any loose connections or damage. If the engine still won’t start, consult a professional for further diagnosis and repairs.

If the Engine Runs Roughly or Stalls

If your snowblower’s engine runs roughly or stalls during operation, there may be an underlying issue that needs to be addressed. Start by inspecting the spark plug and air filter to ensure they are clean and in good condition. Check the fuel filter and fuel lines for any clogs or restrictions. If these components are clean and functioning properly, it may be necessary to consult a professional for further diagnosis and repairs.

If the Snowblower Doesn’t Throw Snow Far Enough

If your snowblower is not throwing snow far enough or the discharge chute is clogging frequently, there may be a few potential causes to investigate. Start by checking the auger and impeller for any signs of wear or damage. Worn or damaged components can affect the snowblower’s throwing distance and performance. Inspect the belts for proper tension and any signs of wear or stretching. If necessary, replace the belts or adjust the tension. Lastly, make sure the chute and auger are clear of any debris or obstructions that may be hindering the snowblower’s performance.

If the Snowblower Vibrates Excessively

Excessive vibrations coming from your snowblower can be a sign of an underlying issue that needs to be addressed. First, ensure that all bolts and nuts are properly tightened and secure. Loose parts can cause vibrations during operation. Inspect the auger and impeller for any signs of damage or balance issues. If necessary, replace any worn or damaged components. Excessive vibrations can also sometimes be caused by an engine imbalance or a bent driveshaft. If the issue persists, consult a professional for further diagnosis and repairs.

If the Snowblower Leaves a Layer of Snow on the Ground

If your snowblower is leaving a layer of snow on the ground after clearing, there may be a few potential causes to consider. First, check the skid shoes and scraper bar to ensure they are properly adjusted and making good contact with the ground. Adjust the skid height as necessary to achieve the desired clearance. Inspect the auger and impeller for any signs of wear or damage that may be preventing proper snow discharge. Lastly, make sure the chute is clear of any obstructions or debris. Addressing these potential issues should help improve the snowblower’s clearing performance.

Using the Snowblower on Different Types of Snow

Handling Light, Powdery Snow

When clearing light, powdery snow, it’s important to adjust the snowblower’s speed and settings accordingly. Light snow can be easily blown away, so you may need to decrease the snowblower’s speed to prevent it from throwing the snow too far. Adjust the chute deflector to direct the snow where you want it to go. Additionally, it’s important to be mindful of the wind direction, as light snow can be easily blown back towards you.

Dealing with Wet, Heavy Snow

Clearing wet, heavy snow requires a different approach than light, powdery snow. Wet snow tends to be heavier and more difficult to move. To effectively clear wet snow, it’s important to set the snowblower to a higher speed to ensure that it has enough power to throw the snow. Adjust the chute deflector to direct the snow away from the cleared area. Take smaller passes and avoid overloading the machine to prevent clogs or damage.

Clearing Packed or Hardened Snow

Clearing packed or hardened snow can be challenging, but with the right approach, it can be done effectively. Start by using a sturdy ice scraper to break up the packed or hardened snow before using the snowblower. Take your time and make multiple passes to gradually clear the area. Setting the snowblower to a lower speed can help provide more power to break up the packed snow. Adjust the chute deflector to direct the snow where you want it to go.

Removing Snow with Ice or Icy Conditions

When dealing with ice or icy conditions, it’s important to exercise caution and use the appropriate tools and techniques. Use a sturdy ice scraper or de-icing solution to break up and melt the ice before attempting to use the snowblower. Take your time and make sure the area is clear and safe before operating the machine. Adjust the speed and chute deflector as necessary to effectively clear the ice while ensuring your safety.

Winter Storage Tips

Storing the Snowblower in a Safe Location

When storing your snowblower for the winter season, it’s important to choose a safe location that is protected from the elements and secure from potential theft. A dry and well-ventilated garage, shed, or storage area is ideal for storing your snowblower. Make sure the area is free from any flammable materials and is locked to prevent unauthorized access. Additionally, keep the area free from clutter to ensure easy access to the snowblower when needed.

Using Fuel Stabilizer for Long-Term Storage

Using a fuel stabilizer is an important step in preparing your snowblower for long-term storage. Fuel stabilizers help prevent the deterioration of gasoline, which can lead to clogs or damage to the engine. Before adding a fuel stabilizer, run the snowblower until the fuel tank is nearly empty to minimize the amount of treated fuel in the system. Refer to the fuel stabilizer’s instructions for the appropriate amount to use. Run the engine for a few minutes to ensure that the treated fuel circulates throughout the system.

Disconnecting the Spark Plug Wire

Before storing your snowblower for an extended period, it’s important to disconnect the spark plug wire to prevent accidental starts. This will ensure that the engine cannot be accidentally started while in storage, reducing the risk of injury or damage. Locate the spark plug wire and pull the rubber boot away from the spark plug to disconnect it. Store the spark plug wire in a safe location to prevent it from becoming damaged or lost.

Removing the Battery (if applicable)

If your snowblower is equipped with a battery, it’s a good idea to remove it before storing the snowblower for an extended period. This will help prevent the battery from deteriorating and ensure it remains in good condition for the next winter season. Consult your snowblower’s manual for instructions on how to safely remove the battery. Store the battery in a cool, dry place and consider using a battery maintainer to keep it charged during storage.

Covering the Snowblower

When storing your snowblower, it’s important to cover it to protect it from dust, debris, and moisture. Use a fitted cover or tarp specifically designed for snowblowers to ensure a proper fit and protection. This will help prevent rust or corrosion on exposed metal parts, as well as keep the snowblower clean and ready for use in the next winter season. Make sure the snowblower is completely dry before covering it to avoid trapping moisture.

Taking Care of the Battery (Electric Models)

Checking the Battery Connections

If you have an electric snowblower that is powered by a battery, it’s important to regularly check the battery connections to ensure they are secure and free from corrosion. Inspect the battery terminals for any signs of corrosion, such as a white, powdery substance. If corrosion is present, carefully clean the terminals using a wire brush and a mixture of baking soda and water. Rinse the terminals with clean water and dry them thoroughly before reconnecting.

Charging the Battery

To ensure optimal performance, it’s important to keep the battery of your electric snowblower charged. Regularly check the battery’s charge level using a battery charger or the snowblower’s built-in indicator. If the charge is low, connect the battery to a charger and follow the manufacturer’s instructions for charging. Avoid overcharging the battery, as this can shorten its lifespan. Once fully charged, disconnect the battery from the charger and reconnect it to the snowblower.

Storing the Battery

If you plan to store your electric snowblower for an extended period, it’s important to take proper care of the battery to ensure it remains in good condition. Before storing, make sure the battery is fully charged. Store the battery in a cool, dry place away from direct sunlight or extreme temperatures. Consider using a battery maintainer or trickle charger to keep the battery charged during storage. Refer to your snowblower’s manual for further instructions on storing the battery.

Replacing the Battery

If your electric snowblower’s battery is no longer holding a charge or is not providing sufficient power, it may be necessary to replace it. Batteries have a limited lifespan and will eventually need to be replaced. Consult your snowblower’s manual for the correct battery size and specifications. Make sure to dispose of the old battery properly, following the relevant regulations in your area. Installing a new battery will help ensure optimal performance of your electric snowblower.

Importance of Professional Servicing

Benefits of Professional Snowblower Servicing

While there are many maintenance tasks you can perform on your snowblower yourself, there are certain benefits to having it professionally serviced. Professional servicing ensures that your snowblower is thoroughly inspected, maintained, and repaired by trained technicians who have the knowledge and tools to identify and address any issues. By having your snowblower professionally serviced, you can have peace of mind knowing that it has been properly cared for and is in optimal condition for the winter season.

When to Consider Professional Servicing

While regular maintenance tasks can be performed by the owner, there are certain situations where professional servicing may be necessary. If you’re unsure of how to properly perform maintenance tasks or if you’re experiencing persistent issues with your snowblower, it’s advisable to consult a professional. Additionally, if your snowblower is still covered by a warranty, professional servicing may be required to maintain the warranty coverage. Consulting a professional for servicing will ensure that any necessary repairs or adjustments are done correctly.

Finding a Trusted Service Provider

When seeking professional snowblower servicing, it’s important to find a trusted service provider who can accurately diagnose and address any issues. Start by asking for recommendations from friends, family, or neighbors who own snowblowers. Read online reviews and check the provider’s credentials and certifications. Look for a service provider that specializes in snowblowers and has experience with your specific make and model. Contact the provider and ask questions about their services, pricing, and turnaround time. Choosing a trusted service provider will give you confidence in the quality of their work and ensure that your snowblower receives the attention it needs.

In conclusion, maintaining your snowblower is essential for ensuring its optimal performance and longevity. Regularly inspecting and cleaning key components, preparing for storage properly, performing regular maintenance tasks, and following safety precautions will help keep your snowblower in good working condition. By understanding how to troubleshoot common issues and use the snowblower on different types of snow, you can make the most out of your snowblowing experience. Whether you choose to perform maintenance tasks yourself or seek professional servicing, proper care will help you tackle snow removal efficiently and safely.

What’s It Actually Like Owning A Snow Blower?

So, you’re considering getting a snow blower, huh? Well, you’ve come to the right place! In this article, we’re going to give you an inside look at what it’s really like to own a snow blower. Forget about tedious hours spent shoveling snow in freezing temperatures – with a snow blower, you can say goodbye to sore muscles and hello to a more convenient and efficient snow-clearing experience. From the benefits and drawbacks to tips on maintenance and usage, we’ve got you covered. Get ready to embrace winter with open arms and a trusty snow blower by your side!

Whats It Actually Like Owning A Snow Blower?

This image is property of owenhouse.com.

Cost of Owning a Snow Blower

Initial Purchase Price

Purchasing a snow blower involves an initial investment that varies depending on the type and features of the machine. Single-stage electric snow blowers are typically the most budget-friendly option, with prices ranging from $100 to $300. Single-stage gas snow blowers can cost anywhere between $300 and $800, while two-stage gas models range from $800 to $2,000. The top-of-the-line Three-stage snow blowers can cost over $2,000. Considering your budget and the specific needs of your property is important when deciding which snow blower to buy.

Maintaining and Repair Costs

In addition to the initial purchase price, it’s essential to consider the ongoing maintenance and repair costs associated with owning a snow blower. Regular maintenance tasks, such as changing the oil, lubricating moving parts, and replacing spark plugs, will ensure the machine operates smoothly and efficiently. Depending on the type and brand of snow blower, maintenance costs may vary. It’s advisable to consult the user manual or seek professional assistance for any maintenance or repair needs to ensure the longevity of your snow blower.

Fuel and Energy Expenses

Another aspect to consider when assessing the cost of owning a snow blower is the fuel or energy expenses associated with its operation. Gas-powered snow blowers require gasoline, and their fuel consumption will depend on factors such as the size of the machine and the frequency and intensity of snowfall. On the other hand, electric snow blowers rely on electricity to power their motors, which can increase your energy bill. Although operating costs will differ depending on the snow blower type, it’s important to factor in these ongoing expenses when budgeting for your snow removal needs.

Advantages of Owning a Snow Blower

Quick and Efficient Snow Removal

One of the primary benefits of owning a snow blower is the ability to quickly and efficiently remove snow from your property. Compared to shoveling, which can be time-consuming and physically demanding, snow blowers can clear large amounts of snow in a shorter period. With their powerful motors and rotating augers, snow blowers can effectively propel snow away from driveways, walkways, and other areas, providing a clear path for you and your family.

Reduced Physical Strain

Snow removal can take a toll on your body, especially if you have a large property or experience heavy snowfall. Shoveling can lead to muscle strains, back injuries, and other physical discomforts. Owning a snow blower significantly reduces the physical strain associated with manually shoveling snow. With the machine doing most of the work, you can avoid the potential risks associated with strenuous physical activity and enjoy a smoother snow removal process.

Versatility in Snow Conditions

A major advantage of owning a snow blower is its versatility in tackling various snow conditions. Whether the snow is light and fluffy or wet and heavy, snow blowers are designed to handle both types. The augers and impellers of a snow blower can effectively break up and propel different snow textures, ensuring efficient snow removal regardless of the conditions. This versatility allows you to maintain your property even during heavy snowstorms, ensuring accessibility and safety for you and your loved ones.

Clearing Large Areas

If you have a large property or need to clear extensive parking areas, sidewalks, or driveways regularly, a snow blower is an invaluable tool. Unlike shoveling, which is a labor-intensive task, snow blowers are equipped with wide clearing widths and powerful engines capable of handling large areas efficiently. With their ability to clear snow up to several feet wide, snow blowers save you time and effort, enabling you to swiftly clear substantial spaces with ease.

Considerations before Buying a Snow Blower

Amount and Type of Snowfall

Before investing in a snow blower, it’s crucial to consider the amount and type of snowfall you typically experience. If you live in an area with minimal snow accumulation, a smaller and less powerful snow blower may suffice. However, if you frequently encounter heavy snowfall or icy conditions, a larger and more robust machine may be necessary to handle the task effectively.

Size and Layout of Property

The size and layout of your property should also be taken into account when selecting a snow blower. If you have a small driveway or walkway, a compact and maneuverable snow blower might be more suitable. Conversely, if you own a large property with long driveways and extensive walkways, a larger model with a wider clearing width and increased power will help you efficiently clear the snow.

Storage Space

Storage space is another crucial consideration before purchasing a snow blower. These machines can be bulky, and finding a suitable space to store them when not in use is essential. Some snow blowers can be folded or disassembled for easier storage, whereas others may require a shed or garage with ample room. Assess the available storage space on your property to ensure that your snow blower can be properly protected and conveniently accessed when needed.

Budget

Last but not least, your budget is a significant factor when buying a snow blower. As mentioned earlier, snow blowers come in varying price ranges depending on their type, features, and capabilities. It’s important to strike a balance between your budget and the specific requirements of your property. While it may be tempting to opt for a more economical option, remember to consider the long-term benefits and durability of the machine to make an informed decision.

Different Types of Snow Blowers

Single-Stage Electric Snow Blowers

Single-stage electric snow blowers are an excellent option for small to medium-sized properties with moderate snowfall. These lightweight machines are typically corded and require an electrical outlet for operation. With a single auger that both propels and discharges snow, they are best suited for clearing flat and paved surfaces. They are also relatively quiet and environmentally friendly due to their electric motors. However, their clearing width and throwing distance may be limited compared to other types of snow blowers.

Single-Stage Gas Snow Blowers

Single-stage gas snow blowers are ideal for medium-sized properties with heavier snowfall. Equipped with a powerful engine, these machines use a single-stage auger to break up and discharge snow. They are typically self-propelled, enabling easy maneuverability even on inclined surfaces. While they offer greater clearing capabilities than electric models, they do require gasoline for operation and emit some noise and exhaust fumes.

Two-Stage Gas Snow Blowers

Two-stage gas snow blowers are suitable for larger properties or areas with heavy snowfall. These machines feature an auger that breaks up the snow and a separate impeller that propels it through a chute. Two-stage blowers can handle deeper snow and clear wider paths compared to single-stage models. They are typically self-propelled and offer more power, making them suitable for tackling challenging terrains. However, they are bulkier, louder, and require more storage space than single-stage snow blowers.

Three-Stage Snow Blowers

Three-stage snow blowers are the most advanced and powerful option available. These machines are designed for heavy-duty snow removal in commercial or large residential settings. Three-stage blowers feature an accelerator, in addition to an auger and impeller, which helps break up and propel the snow more efficiently. With their impressive clearing widths and throwing distances, they can handle large amounts of snow and clear substantial areas in no time. However, their size, cost, and complexity make them more suitable for professional use or areas with extreme snowfall.

Whats It Actually Like Owning A Snow Blower?

This image is property of www.snowblowersdirect.com.

Operating a Snow Blower

Safety Precautions

When operating a snow blower, it is crucial to prioritize safety. Always read the user manual thoroughly before using the machine to familiarize yourself with its specific safety features and guidelines. Wear appropriate clothing, including waterproof boots and warm layers, to protect yourself from the cold and wet conditions. Keep bystanders, especially children and pets, at a safe distance while operating the snow blower. Avoid loose clothing or jewelry that could get caught in the machine’s moving parts.

Starting the Snow Blower

Before starting the snow blower, ensure that the area you intend to clear is free from any debris or obstacles that may damage the machine or pose a safety risk. Follow the manufacturer’s instructions for starting the snow blower, such as priming the engine, adjusting the choke, or using an electric starter. Take a moment to familiarize yourself with the controls, including the throttle, auger engagement, and chute direction controls. Once the machine is running, allow it a few moments to warm up before engaging in snow removal.

Navigating Different Snow Conditions

Different types of snow require different techniques when operating a snow blower. Light and powdery snow can be easily discharged by directing the machine’s chute away from the cleared path. However, wet and heavy snow may require multiple passes to fully clear the area. Ensure that the machine’s engine is running at optimal speed and adjust the speed and direction controls according to the snow conditions. Take care not to overload the machine’s intake, as this could result in clogging.

Clearing Snow from Driveways and Walkways

When clearing snow from driveways and walkways, it is recommended to begin by clearing a path down the middle, following the length of the area to be cleared. Once the initial path is established, make additional passes on each side, throwing snow away from the cleared area. Take care not to blow snow onto neighboring properties or onto roads, as this may cause hazards or violate local ordinances. Be mindful of potential obstacles, such as curbs or steps, and adjust the chute direction accordingly to avoid throwing snow in the wrong direction.

Maintenance Tips

Proper maintenance of your snow blower is essential to ensure its longevity and optimal performance. Regularly check the machine for any loose or damaged parts and promptly address any issues. Change the oil and spark plug according to the manufacturer’s recommendations to keep the engine running smoothly. Lubricate any moving parts and store the snow blower properly when not in use. Snow blowers should be winterized before the season ends, which involves draining fuel and performing other maintenance tasks to prevent damage from moisture or freezing temperatures.

Noise and Environmental Considerations

Noise Levels of Snow Blowers

Noise levels can vary depending on the type and model of snow blower. Gas-powered snow blowers generally produce more noise due to the combustion engines. Electric snow blowers, on the other hand, tend to be quieter since they operate on electric motors. If noise is a concern, electric snow blowers are a more suitable option, particularly in residential areas where minimizing noise disturbances is important.

Gas vs Electric Snow Blowers

Gas-powered snow blowers and electric snow blowers each have their advantages and considerations when it comes to noise and environmental impact. Gas-powered snow blowers emit exhaust fumes and contribute to air pollution. Additionally, these machines typically require gasoline, which further adds to their environmental impact. Electric snow blowers are cleaner and produce zero emissions, making them more environmentally friendly. They are also quieter, reducing noise pollution. However, electric snow blowers rely on electricity, which may come from non-renewable sources, so it’s important to consider the overall carbon footprint of your energy source.

Environmental Impact

With growing concerns about environmental sustainability, it’s crucial to consider the environmental impact of owning a snow blower. Gas-powered snow blowers emit greenhouse gases and contribute to air pollution. Electric snow blowers, while more environmentally friendly in terms of emissions, still rely on electricity produced through various means. Choosing a snow blower with lower emissions or opting for an electric model can help minimize your carbon footprint and contribute to a cleaner environment. Additionally, proper maintenance, including fuel and oil management, and responsible snow disposal are important practices to reduce the environmental impact of snow removal.

Whats It Actually Like Owning A Snow Blower?

This image is property of cdn.thewirecutter.com.

Storage and Maintenance

Proper Storage

Proper storage of your snow blower is essential to maintain its functionality and protect it from damage. Ideally, snow blowers should be stored in a dry and well-ventilated area, such as a shed or garage. Clean the machine of any snow or debris before storing it to prevent rust or damage. If possible, elevate the snow blower off the ground using blocks or a storage rack to avoid moisture accumulation. Ensure that the storage area is secure and inaccessible to children or unauthorized individuals.

Regular Maintenance and Upkeep

Regular maintenance is key to keeping your snow blower in optimal condition. Follow the manufacturer’s recommendations for maintenance tasks, such as changing the oil, lubricating moving parts, and inspecting belts and augers. Keep the machine clean and free from debris, as this can affect its performance. Promptly address any mechanical issues or unusual noises to prevent further damage. Regular upkeep will not only prolong the lifespan of your snow blower but also ensure efficient and effective snow removal when needed.

Winterizing the Snow Blower

Winterizing your snow blower is a crucial step before storing it for an extended period. This involves properly preparing the machine to withstand the cold temperatures and prevent damage caused by moisture and freezing. Start by draining the fuel tank and running the engine until it runs out of fuel. Remove any excess snow or debris from the machine and inspect it for any signs of wear or damage. Apply a rust inhibitor or lubricant to critical components to prevent rust formation. Cover the snow blower with a protective tarp or use a dedicated snow blower cover to shield it from the elements.

Potential Challenges and Limitations

Clearing Wet and Heavy Snow

While snow blowers are designed to handle various snow conditions, clearing wet and heavy snow may present some challenges. Wet snow can be more difficult to break up and remove, requiring multiple passes or adjustments to prevent clogging. In extreme cases, very wet or compacted snow might exceed the capabilities of certain snow blowers. Consider the typical snow conditions in your area and opt for a snow blower with sufficient power and clearing capabilities to overcome such challenges.

Navigating Obstacles

Obstacles such as curbs, steps, or uneven terrain can pose challenges when operating a snow blower. It’s important to be mindful of these obstacles and adjust the chute direction and machine speed accordingly to avoid damaging the blower or creating hazards. If you frequently encounter obstacles, consider a snow blower with adjustable or pivoting chutes to accommodate different clearing angles. Additionally, exercising caution and proceeding slowly when maneuvering around obstacles can ensure safe and efficient snow removal.

Limited Reach and Width

The reach and width of a snow blower’s clearing path should be considered when determining its suitability for your property. Some smaller snow blowers, particularly electric models, have a limited clearing width, requiring additional passes to clear larger areas. This can be time-consuming and less efficient. Conversely, larger models with wider clearing widths may be challenging to maneuver or overkill for smaller properties. Balance the need for efficiency and ease of use when selecting a snow blower with an appropriate clearing width for your needs.

Snow Build-up and Clogging

Snow build-up and clogging can occur when using a snow blower under certain conditions. Wet and heavy snow, as well as compacted snow, are more prone to clogging the machine’s auger or chute. Taking precautions such as adjusting the speed of the snow blower to match the snow conditions and avoiding overloading the machine’s intake can help reduce the likelihood of clogging. Some snow blowers also come equipped with anti-clogging features, such as auger height adjustments or serrated augers, which can help prevent snow build-up and keep the machine running smoothly.

Whats It Actually Like Owning A Snow Blower?

This image is property of cdn.thewirecutter.com.

Safety Tips and Best Practices

Read and Follow the User Manual

Before using a snow blower, it is crucial to thoroughly read and understand the user manual. The manual provides important safety instructions, operating procedures, and maintenance guidelines specific to your snow blower model. Following the manufacturer’s recommendations will ensure safe and efficient operation, as well as prevent any damage to the machine or potential injuries.

Proper Clothing and Protective Gear

Prioritize your safety by wearing appropriate clothing and protective gear when operating a snow blower. This includes waterproof boots with good traction, warm layers to protect against the cold, and gloves to maintain a secure grip on the controls. Safety goggles or glasses are also recommended to shield your eyes from snow, debris, or any potential projectiles that may be discharged by the machine. Additionally, consider wearing ear protection to minimize the noise exposure during operation.

Watch for Hidden Objects

When clearing snow with a snow blower, be cautious of any hidden objects that may be buried beneath the snow. Move any potential hazards, such as rocks, branches, or toys, out of the way before beginning the snow removal process. Clearing the area of obstructions will prevent damage to the machine and reduce the risk of injury from accidental impact or ejection of objects.

Clearing Snow on Slopes or Gradients

If your property has slopes or gradients, extra caution is required when operating a snow blower. Snow blowers can be less stable on uneven or inclined surfaces, increasing the risk of tipping or losing control. When working on slopes, it’s advisable to proceed slowly and maintain a firm grip on the machine. Clearing snow across the slope rather than up or down can also help improve stability and minimize the risk of accidents.

Avoid Snow Blowing at Night

Snow blowing at night can pose safety risks due to reduced visibility. Inadequate lighting can make it difficult to navigate the machine, identify obstacles, or spot potential hazards. Whenever possible, opt for daylight hours when operating a snow blower. If you do need to clear snow in low-light conditions, ensure that the area is well-illuminated with proper outdoor lighting or use additional lighting tools to enhance visibility.

Conclusion

Owning a snow blower offers numerous advantages when it comes to efficient snow removal and reducing physical strain. From quick and effective snow removal to the versatility of handling different snow conditions, a snow blower can significantly simplify the winter maintenance of your property. However, before purchasing a snow blower, it is vital to consider factors such as the amount and type of snowfall, the size and layout of your property, available storage space, and budget.

Different types of snow blowers, including single-stage electric, single-stage gas, two-stage gas, and three-stage models, offer varying features and capabilities to suit different needs. Operating a snow blower safely involves following proper safety precautions, starting the machine correctly, navigating different snow conditions, and maintaining the equipment according to the manufacturer’s recommendations.

Considerations should also be given to the noise levels and environmental impact of snow blowers, as well as storage and maintenance requirements. While gas-powered snow blowers are typically louder and have higher emissions, electric models offer quieter operation and produce zero emissions. Proper storage and regular maintenance help prolong the lifespan of the machine and ensure efficient performance. Winterizing the snow blower before storage is essential to protect it from cold temperatures and prevent damage.

Potential challenges and limitations of snow blowers include dealing with wet and heavy snow, navigating obstacles, limited reach and width, and the possibility of snow build-up and clogging. By following safety tips and best practices, such as reading the user manual, wearing appropriate clothing and protective gear, and watching for hidden objects, you can ensure safe and successful snow removal.

In conclusion, owning a snow blower provides the convenience of quick and efficient snow removal while considering various factors, such as the size of your property, type of snowfall, and budget, is crucial when making a purchasing decision. By assessing your specific needs and following proper operating procedures, you can enjoy the benefits of owning a snow blower and maintain a clear and accessible environment during the winter season.

Whats It Actually Like Owning A Snow Blower?

This image is property of www.gad.net.

How Long Do Snowblowers Last

Imagine never having to worry about shoveling snow again. with a trusty snowblower at your disposal, you can effortlessly clear your driveway and sidewalks in no time. But just like any other machine, snowblowers have a lifespan. So, how long do snowblowers actually last? In this article, we’ll explore the factors that affect their longevity, from the quality of the machine to the maintenance techniques. By the end, you’ll have a clearer understanding of how to make your snowblower last for many winters to come.

Factors Affecting the Lifespan of Snowblowers

Snowblowers can be a valuable tool during the winter months, helping to clear driveways, walkways, and sidewalks of snow and ice. However, like any piece of equipment, the lifespan of a snowblower can vary based on several factors. Understanding these factors can help you make an informed decision when purchasing a snowblower and ensure that you get the most out of your investment.

Quality of Construction

One of the primary factors that can impact the lifespan of a snowblower is the quality of its construction. Snowblowers that are built with high-quality materials and components are generally more durable and long-lasting compared to those made with cheaper materials. When considering different models, it is essential to research the construction quality and look for brands known for their reliability and durability.

How Long Do Snowblowers Last

This image is property of owenhouse.com.

Usage Frequency and Duration

Another crucial factor that affects the lifespan of a snowblower is how frequently and how long it is used. Snowblowers that are used frequently and for extended periods are more susceptible to wear and tear. If you live in an area with heavy snowfall or frequently experience snowstorms, it is crucial to choose a snowblower that can withstand frequent use without compromising its performance or longevity.

Maintenance and Care

Proper maintenance and care can significantly extend the lifespan of a snowblower. Here are some essential maintenance tasks that should be performed regularly:

Regular Cleaning

Snowblowers are susceptible to rust and corrosion due to the exposure to moisture and snow. Regularly cleaning the snowblower after each use can help prevent these issues. Ensure to remove any snow or moisture from the blower housing, auger blades, and chute. Additionally, cleaning the engine and other components will keep them in optimal condition.

Proper Fuel Management

Using fresh fuel and following the manufacturer’s recommendations regarding fuel type and fuel stabilizers is crucial for the longevity of a snowblower. Stale fuel can lead to engine problems, reducing the lifespan of the machine. Use a fuel stabilizer when storing the snowblower during the offseason to prevent fuel degradation.

Oil Changes

Just like a car, a snowblower requires regular oil changes. The oil lubricates the engine and keeps it running smoothly. It is essential to follow the manufacturer’s guidelines for oil change frequency and use the recommended oil type.

Belt and Auger Maintenance

Snowblowers rely on belts and augers to function correctly. Regularly inspect these components, ensuring that the belts are properly tensioned and not showing signs of excessive wear. Lubricate the auger shaft and ensure it spins freely.

Spark Plug Replacement

A worn-out spark plug can cause starting issues and poor engine performance. Regularly inspect the spark plug and replace it as needed according to the manufacturer’s recommendations.

Tire Maintenance

Check the tire pressure regularly as underinflated or overinflated tires can affect the snowblower’s maneuverability and performance. Additionally, inspect the tires for wear and replace them if necessary.

How Long Do Snowblowers Last

This image is property of cdn.thewirecutter.com.

Brand and Model

The brand and model of a snowblower can also impact its lifespan. Certain brands have reputations for producing high-quality and long-lasting machines. When considering a snowblower, take the time to research different brands and read customer reviews to get an idea of their reliability and durability. Choosing a reputable brand and a model known for its longevity can help ensure that your snowblower lasts for many winters.

Climate and Environmental Conditions

The climate and environmental conditions in your area can also influence the lifespan of a snowblower. If you live in an area with heavy snowfall or extreme weather conditions, the snowblower may be subjected to more extensive use and potential damage. Similarly, if you live in an area with high humidity or salty air, the snowblower’s components may be more prone to rust and corrosion. Understanding the climate and environmental factors in your area can help you choose a snowblower that is better suited for these conditions.

How Long Do Snowblowers Last

This image is property of funintheyard.com.

Average Lifespan of Snowblowers

Snowblowers, when properly maintained and cared for, can last anywhere from 10 to 20 years. However, this lifespan can vary depending on the factors mentioned above. High-quality snowblowers that receive regular maintenance and are used in moderate conditions can last closer to the upper end of this range, while those subjected to frequent heavy use or extreme conditions may have a shorter lifespan.

Manufacturer’s Warranty Period

Another important aspect to consider when discussing the lifespan of a snowblower is the manufacturer’s warranty. Most snowblowers come with a warranty that covers defects and malfunctions for a specific period. The length of the warranty can vary between brands and models. Choosing a snowblower with a longer warranty period not only provides peace of mind but can also indicate the manufacturer’s confidence in the product’s longevity.

How Long Do Snowblowers Last

This image is property of cdn.thewirecutter.com.

Signs that Indicate a Snowblower’s Lifespan is Ending

Even with proper maintenance and care, there will come a time when a snowblower reaches the end of its lifespan. Here are some signs that indicate your snowblower may need to be replaced:

  • Frequent breakdowns or malfunctions that become costly to repair.
  • Reduced performance, such as decreased throwing distance or decreased power.
  • Excessive smoke or unusual noises during operation.
  • Difficulty starting the snowblower, even after following proper starting procedures.
  • Excessive rust or corrosion that compromises the machine’s structural integrity.
  • Difficulty finding replacement parts due to the snowblower being outdated or discontinued.

Doing Repairs vs. Buying a New Snowblower

When faced with a snowblower that is showing signs of reaching the end of its lifespan, you may find yourself deciding between repairs and purchasing a new machine. Several factors can influence this decision:

Cost Comparison

Compare the cost of repairing the snowblower to the cost of purchasing a new one. If the repair costs are significantly higher than the value of the snowblower or the cost of a new one, it may be more cost-effective to invest in a new machine.

Availability of Parts

If the snowblower is an older model or has been discontinued, finding replacement parts may be challenging. Consider whether the necessary parts are readily available and how much time and effort it would take to locate them.

Labor and Skill

Consider your own skill level and the availability of a qualified technician to perform the repairs. If you are comfortable with DIY repairs and the necessary parts are available, repairing the snowblower may be a viable option. However, if specialized knowledge or expertise is required, it may be more practical to purchase a new machine.

Personal Preference

Ultimately, personal preference plays a role in the decision-making process. If you have grown attached to your snowblower or have had a positive experience with it, you may be more inclined to repair it. On the other hand, if you are ready for an upgrade or have had repeated issues with the current machine, purchasing a new snowblower might be the better choice.

In conclusion, the lifespan of a snowblower is influenced by various factors, including the quality of construction, usage frequency and duration, maintenance and care, brand and model, climate and environmental conditions, and the manufacturer’s warranty period. By understanding these factors and implementing proper maintenance practices, you can ensure that your snowblower lasts for many winters to come. And when the time comes to replace your snowblower, carefully consider the cost of repairs, availability of parts, labor and skill required, and your own personal preference to make an informed decision.

How Long Do Snowblowers Last

This image is property of www.rd.com.

What Are The Stages Of A Snow Blower

Winter has arrived, and with it comes the inevitable task of removing snow from your driveway and walkways. But worry not, as a snow blower is here to save the day! In this article, we will take a close look at the stages of a snow blower and how it efficiently tackles the snowy mess. From the powerful auger that breaks down the snow to the impeller that throws it away, you’ll gain a deeper understanding of the impressive stages that make this machine a winter essential.

What Are The Stages Of A Snow Blower

This image is property of www.thespruce.com.

1. Introduction to Snow Blowers

1.1 What is a Snow Blower?

If you live in an area that experiences heavy snowfall during the winter season, you are likely familiar with the tedious and time-consuming task of shoveling snow. Fortunately, there is a more efficient and convenient solution: a snow blower. A snow blower, also known as a snow thrower, is a machine designed to remove snow from driveways, sidewalks, and other surfaces. It saves you from the back-breaking labor of shoveling and allows you to clear larger areas quickly and effortlessly.

1.2 Importance of Snow Blowers

Snow blowers have become an essential tool for homeowners and businesses in regions with frequent snowfall. They offer significant advantages over manual snow removal methods, such as shoveling, by reducing the physical strain on your body and saving valuable time. Snow blowers are especially beneficial for individuals with health conditions or limited mobility, as they eliminate the need for strenuous physical exertion. Additionally, snow blowers ensure safe passage on driveways and walkways, reducing the risk of slips, falls, and accidents caused by icy surfaces.

2. Types of Snow Blowers

2.1 Single-Stage Snow Blower

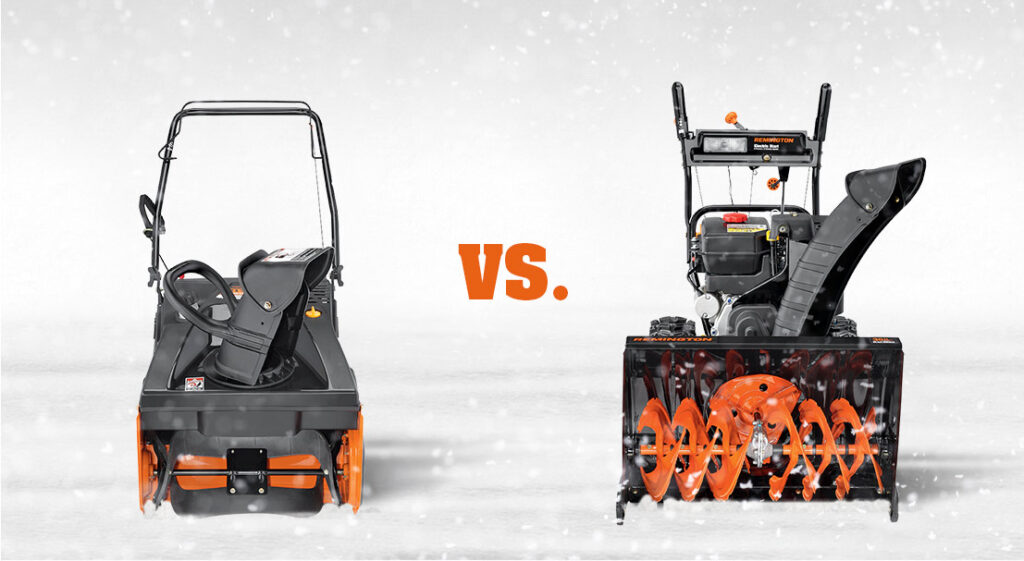
A single-stage snow blower is designed for light to moderate snowfall. It features a rotating rubber or plastic auger that collects and throws the snow in one motion. Single-stage snow blowers are typically smaller, compact, and more maneuverable, making them suitable for clearing small to medium-sized driveways and pathways. They are also lightweight and easy to store, making them a popular choice for residential use.

2.2 Two-Stage Snow Blower

Two-stage snow blowers are more powerful and capable of handling heavier snowfall and larger areas. They consist of an auger that collects the snow and a separate impeller that expels it through a discharge chute. Two-stage snow blowers are equipped with larger engines, adjustable speeds, and broader clearing widths. They can effectively remove both fresh and packed snow, making them suitable for both residential and commercial use.

2.3 Three-Stage Snow Blower

The three-stage snow blower is the most powerful and robust type of snow blower. It incorporates an accelerator in addition to the auger and impeller found in two-stage models. The accelerator helps break down ice and heavy snow, ensuring efficient clearing even in the harshest winter conditions. Three-stage snow blowers are ideal for professionals, large properties, and areas with frequent heavy snowfall.

3. Stage 1: Snow Intake

3.1 Snow Intake Mechanism

The first stage of a snow blower’s operation is the snow intake mechanism. In single-stage snow blowers, the auger performs the dual function of collecting and propelling the snow forward. The auger’s rotation feeds the snow into the second stage for processing. In contrast, both two-stage and three-stage snow blowers feature an auger solely responsible for gathering the snow and transferring it to the impeller.

3.2 Auger Design

The design of the auger is crucial for efficient snow intake. Augers can be made of rubber or hard plastic in single-stage snow blowers, while two-stage and three-stage models generally utilize durable metal augers. The spiral shape of the auger blades helps break up the snow and ice, allowing for easier intake and processing. Additionally, some snow blowers have adjustable augers, allowing you to alter the height at which the machine comes into contact with the ground, ensuring optimal performance on various surfaces.

4. Stage 2: Snow Processing

4.1 Impeller Function

Once the snow is collected by the auger, it is passed on to the impeller in the second stage of the snow blower’s operation. The impeller is a high-speed rotating component that propels the snow towards the discharge chute. Its primary function is to enhance the throwing distance and efficiency, particularly in two-stage and three-stage snow blowers. The impeller’s design and speed contribute to the overall performance and clearing capacity of the machine.

4.2 Chute Orientation

The orientation of the discharge chute plays a crucial role in the snow blower’s effectiveness. It allows you to control the direction in which the snow is expelled, ensuring that the cleared areas remain free from additional snow accumulation. Many snow blowers offer 180-degree or 200-degree chute rotation, providing flexibility and maneuverability. Some advanced models even have electrically controlled chute rotation, allowing you to adjust the direction effortlessly while operating the machine.

What Are The Stages Of A Snow Blower

This image is property of www.snowblowersdirect.com.

5. Stage 3: Ejection of Snow

5.1 Discharge Chute

The discharge chute is the final component in the snow blower’s operation. It directs the ejected snow away from the cleared area and ensures that it is efficiently thrown to a safe distance. The chute can usually be adjusted in terms of height and angle to control the throwing trajectory. This versatility is particularly beneficial when working near driveways, walkways, or other areas where you want to avoid stacking the snow or causing obstructions.

5.2 Throwing Distance

The throwing distance of a snow blower varies depending on the model and the type of snow being cleared. Two-stage and three-stage snow blowers generally have superior throwing distances, allowing the snow to be expelled much farther away from the cleared area. This is especially advantageous in regions with heavy snowfall, as it prevents piles of snow from accumulating and obstructing pathways. The throwing distance should be considered when choosing a snow blower, ensuring it aligns with your specific needs and conditions.

6. Benefits and Limitations

6.1 Advantages of Snow Blowers

Snow blowers offer numerous benefits that make them an excellent investment for snow removal:

  • Efficiency: Snow blowers can clear large areas quickly and efficiently, saving you significant time and effort compared to manual methods.
  • Reduced Physical Strain: By eliminating the need for shoveling, snow blowers help prevent injuries and strain on your body, especially for individuals with health conditions or limited mobility.
  • Versatility: Snow blowers can be used on various surfaces such as driveways, walkways, and sidewalks, ensuring safe passage in winter conditions.
  • Increased Clearing Capacity: Two-stage and three-stage snow blowers are particularly powerful and capable of handling heavy snowfall and large areas, making them suitable for both residential and commercial use.

6.2 Limitations and Considerations

While snow blowers offer many advantages, it is essential to consider their limitations and factors that may affect their performance:

  • Surface Compatibility: Not all snow blowers are suitable for all surfaces, as some models may damage delicate surfaces like wooden decks or gravel driveways. It is crucial to choose a snow blower specifically designed for the surface you will be clearing.
  • Fuel and Maintenance: Gas-powered snow blowers require regular maintenance, including fueling, oil changes, and spark plug inspections. Electric snow blowers need access to a power source and may have limitations based on cord length or battery life.
  • Cost and Storage: Snow blowers can be a significant investment, especially for more powerful models. Additionally, they require adequate storage space when not in use, which should be considered if storage is limited.

What Are The Stages Of A Snow Blower

This image is property of remingtonpowertools.com.

7. Maintenance and Care

7.1 Preseason Inspection

Performing a preseason inspection for your snow blower helps ensure that it is in optimal working condition for the winter season. Some essential maintenance tasks include:

  • Checking the fuel system for leaks or clogs
  • Inspecting the belts, cables, and pulleys for any signs of wear or damage
  • Testing the ignition system and spark plug
  • Cleaning or replacing the air filter
  • Verifying the condition of the cutting components, such as the auger and impeller

7.2 Regular Cleaning and Lubrication

Regular cleaning and lubrication are vital for the longevity and efficient operation of your snow blower. After each use, remove any snow or debris from the machine, paying particular attention to the auger, impeller, discharge chute, and intake areas. Additionally, lubricate moving parts, such as the auger shaft and chute rotation mechanism, according to the manufacturer’s recommendations. These maintenance tasks will ensure that your snow blower remains in top condition and ready to tackle the next snowfall.

8. Choosing the Right Snow Blower

8.1 Factors to Consider

Selecting the right snow blower for your needs involves considering several factors:

  • Snowfall Amount: Determine the average snowfall in your area to gauge the power and clearing capacity required. Heavier snowfall may necessitate a more robust snow blower.
  • Surface Type: Consider the type of surface you will be clearing, such as asphalt, concrete, gravel, or delicate surfaces. Choose a snow blower with appropriate features and adjustability to prevent damage.
  • Clearing Area Size: Determine the size of the area you need to clear to select a snow blower with an appropriate clearing width and capacity.
  • Maneuverability: Take into account the layout of your property and any obstacles that may require more maneuverable snow blowers, such as single-stage models.

8.2 Budget and Snowfall

Another critical consideration when choosing a snow blower is your budget. Snow blowers can vary significantly in price depending on their power, features, and brand. Evaluate your snow removal needs and decide on a budget that aligns with your requirements. It is also essential to consider the ongoing costs of maintenance, fuel, and potential repairs. Balancing your budget with the expected snowfall and clearing needs will help you make an informed decision.

What Are The Stages Of A Snow Blower

This image is property of i.ytimg.com.

9. Safety Precautions

9.1 Operating Instructions

When operating a snow blower, it is essential to prioritize safety to prevent accidents and injuries. Follow these operating instructions:

  • Familiarize yourself with the snow blower’s manual and read all safety instructions before use.
  • Wear appropriate protective gear, including goggles, gloves, and sturdy footwear.
  • Keep the area clear of people and pets while operating the snow blower.
  • Never put your hands or feet near the auger or impeller, even when the machine is off.
  • Avoid operating the snow blower on steep inclines or uneven surfaces to prevent tipping.

9.2 Protective Gear

Protective gear is vital when using a snow blower to ensure your safety and prevent potential injuries. Consider the following protective gear:

  • Goggles or Safety Glasses: Protect your eyes from flying debris and snowy particles.
  • Gloves: Insulated, waterproof gloves provide warmth and protection while allowing you to maintain a firm grip on the machine’s controls.
  • Sturdy Footwear: Wear boots or shoes with proper traction to prevent slips and maintain stability while operating the snow blower.

10. Conclusion

Snow blowers have revolutionized the task of snow removal, providing a faster, more efficient, and safer alternative to manual shoveling. Whether you choose a single-stage, two-stage, or three-stage snow blower, each stage of its operation plays a crucial role in effectively removing snow from your property. By understanding the different stages, factors to consider, and safety precautions, you can choose the right snow blower for your needs and enjoy a winter season free from the backbreaking labor of shoveling snow. Stay safe, stay warm, and let the snow blower do the hard work for you!

What Are The Stages Of A Snow Blower

This image is property of anestwithayard.com.

How Do I Know If My Spark Plug Is Bad On Snowblower?

Have you ever found yourself wondering if the spark plug on your snowblower is causing some trouble? If so, you’re not alone. Many snowblower owners are often perplexed by this question. In this article, we will shed some light on the signs that indicate a bad spark plug in your snowblower. From unusual engine sounds to difficulty starting your machine, we’ll explore the telltale signs that may suggest it’s time to replace your spark plug. So, if you’re ready to tackle this common snowblower conundrum, keep reading to learn more.

Signs of a Bad Spark Plug on Snowblower

When using a snowblower, it is crucial to ensure that all the components are in good working condition. One such component that often gets overlooked but plays a vital role in the snowblower’s performance is the spark plug. A bad spark plug can lead to various issues, ranging from difficulty in starting the engine to reduced power and increased fuel consumption. In this article, we will explore the signs of a bad spark plug on a snowblower and discuss how to identify and resolve these issues.

How Do I Know If My Spark Plug Is Bad On Snowblower?

This image is property of www.lawnmowerfixed.com.

Lack of Startup

One of the most obvious signs of a bad spark plug on a snowblower is a lack of startup. When you try to start the engine, it may struggle or fail to start altogether. This could be due to a weak spark or no spark at all, which prevents the fuel in the engine from igniting properly. If you notice that your snowblower is not starting as it should, it is essential to check the condition of the spark plug.

Engine Misfires

Another indication of a bad spark plug on a snowblower is engine misfires. You may notice that the engine is running unevenly or experiencing intermittent firing. This can result in a choppy and inconsistent performance, causing the snowblower to vibrate excessively and create a rough ride. If you experience engine misfires, it is advisable to inspect the spark plug and replace it if necessary.

Reduced Power

A bad spark plug can significantly affect the power output of a snowblower. When the spark plug is worn or damaged, it fails to ignite the fuel-air mixture efficiently, leading to a decrease in the engine’s power. You may notice a reduction in the snowblower’s overall performance, such as a decrease in the throwing distance or a struggle to clear snow effectively. If you find that your snowblower lacks power, it is crucial to examine the spark plug and replace it if needed.

Increased Fuel Consumption

An inefficient spark plug can also result in increased fuel consumption. When the spark plug fails to ignite the fuel properly, unburned fuel can accumulate in the engine, leading to higher fuel consumption. This not only affects your snowblower’s running costs but also puts additional strain on the engine. If you notice that your snowblower is consuming more fuel than usual, it is advisable to check the spark plug and address any issues promptly.

How Do I Know If My Spark Plug Is Bad On Snowblower?

This image is property of besthomegear.com.

Difficulty in Starting the Engine

If you experience difficulty in starting the engine of your snowblower, a bad spark plug could be a possible culprit. A worn or damaged spark plug can make it challenging to ignite the fuel-air mixture, resulting in repeated failed attempts to start the engine. This can be frustrating and time-consuming, especially when you need to clear snow quickly. Checking the spark plug and replacing it if necessary can help resolve this problem.

Rough Engine Idle

A rough engine idle is another telltale sign of a bad spark plug. When the spark plug is faulty, it can cause the engine to idle roughly, creating vibrations and uneven performance. You may notice that the engine doesn’t run smoothly, leading to an uncomfortable user experience. If you observe a rough engine idle, it is crucial to inspect the spark plug and take appropriate action to rectify the issue.

How Do I Know If My Spark Plug Is Bad On Snowblower?

This image is property of i.ytimg.com.

Poor Acceleration

A snowblower with a bad spark plug may exhibit poor acceleration. The spark plug’s role is to ignite the fuel-air mixture in the engine cylinders, creating the necessary power for acceleration. If the spark plug is not functioning correctly, it can hamper the combustion process, resulting in sluggish acceleration. If you notice a lack of responsiveness or a delay in acceleration while operating your snowblower, it is advisable to check the spark plug and replace it if needed.

Sooty or Fouled Plug

Visual inspection of the spark plug can provide valuable insights into its condition. A sooty or fouled spark plug is an indication of combustion problems or improper fuel combustion. If the spark plug appears black and dirty, it is likely that there is carbon buildup or fuel residue on the electrode. This can prevent the spark plug from producing a strong spark and hinder the snowblower’s performance. Cleaning or replacing the spark plug can help eliminate this problem.

How Do I Know If My Spark Plug Is Bad On Snowblower?

This image is property of www.lawnmowerfixed.com.

Damaged or Worn Electrode

The electrode is a critical component of the spark plug that wears out over time due to repeated sparking. A damaged or worn electrode can interfere with the spark plug’s ability to generate a strong spark, leading to performance issues. If you notice visible damage or excessive wear on the electrode, it is essential to replace the spark plug to restore optimal performance.

Testing the Spark Plug

To determine definitively if the spark plug is bad on your snowblower, you can perform a spark plug test. This involves removing the spark plug, inspecting it for any signs of damage or wear, and testing its spark. The spark plug test can be conducted using a spark plug tester or by grounding the spark plug against the engine’s metal surface while attempting to start the engine. If the spark plug produces a weak or no spark, it is likely that it is faulty and needs to be replaced.

In conclusion, a bad spark plug can significantly impact the performance of a snowblower. By being aware of the signs of a bad spark plug, such as a lack of startup, engine misfires, reduced power, increased fuel consumption, difficulty in starting the engine, rough engine idle, poor acceleration, a sooty or fouled plug, or a damaged or worn electrode, you can promptly address any issues and ensure your snowblower operates optimally. Regular inspection and maintenance of the spark plug are essential to avoid any potential problems and to keep your snowblower running smoothly during the winter season.

How Do I Know If My Spark Plug Is Bad On Snowblower?

This image is property of www.lawnmowerfixed.com.

Can A Snowblower Work On A Gravel Driveway?

Curious about whether a snowblower is compatible with your gravel driveway? Look no further! We’ve got the answers you need. In this article, we’ll discuss the practicality of using a snowblower on a gravel surface, addressing potential concerns and offering useful tips to ensure a smooth snow-clearing experience. Whether you’re a seasoned snowblower owner or considering one for the first time, read on to discover everything you need to know about using a snowblower on a gravel driveway.

What is a snowblower?

Definition

A snowblower, also known as a snow thrower, is a machine that is used to remove snow from outdoor surfaces, particularly driveways and sidewalks. It is designed to efficiently and effectively remove snow by blowing it away instead of manually shoveling it.

How it works

A snowblower works by utilizing a powerful motor to drive a rotating auger or impeller mechanism. This mechanism helps break up and move the snow from the ground into the discharge chute, which then throws the snow to a desired location. The speed and efficiency of the snowblower depend on the type and power of the motor, as well as the design and size of the auger or impeller system.

Characteristics of a gravel driveway

Benefits of a gravel driveway

Gravel driveways have become increasingly popular due to their affordability and rustic charm. Some of the benefits of having a gravel driveway include:

  1. Cost-effectiveness: Gravel is generally more affordable compared to other driveway materials such as asphalt or concrete. It can be a great option for those on a tight budget.

  2. Low maintenance: Gravel driveways require minimal maintenance. Regular grading and adding additional gravel are typically the only tasks needed to keep the driveway in good condition.

  3. Drainage: Gravel allows for better drainage compared to solid surfaces like asphalt or concrete. This can help prevent water buildup and reduce the risk of ice forming on the driveway.

Challenges of a gravel driveway

While gravel driveways have their advantages, they also come with a few challenges that can affect the use of a snowblower:

  1. Uneven surface: Gravel driveways often have an uneven surface, with small rocks and bumps scattered throughout. This can make it more challenging to operate a snowblower smoothly and effectively.

  2. Gravel displacement: The force generated by a snowblower’s auger or impeller can sometimes pick up loose gravel and throw it along with the snow. This can result in gravel being displaced and potentially causing damage or injury if thrown at high speeds.

  3. Maintenance: Gravel driveways require regular maintenance to ensure they stay in good condition. This includes filling in potholes and raking the gravel to redistribute it evenly. Using a snowblower on a gravel driveway may require additional maintenance and adjustments to avoid damaging the machine or the driveway.

Can A Snowblower Work On A Gravel Driveway?

This image is property of i.ytimg.com.

Types of snowblowers

Single-stage snowblower

A single-stage snowblower is a compact and lightweight option ideal for smaller areas with light to moderate snowfall. It features a single high-speed auger that both collects and throws the snow. While these snowblowers are generally more affordable, they may not be the best choice for gravel driveways due to their auger making direct contact with the ground.

Two-stage snowblower

Two-stage snowblowers are more powerful and versatile than single-stage snowblowers. They feature an auger that collects and breaks up the snow, and a separate impeller that throws the snow out of the discharge chute. Two-stage snowblowers can handle heavier snowfall and are generally more effective on gravel driveways as they have an adjustable clearance height to prevent direct contact with the ground.

Three-stage snowblower

Three-stage snowblowers are the most powerful and heavy-duty option. They have an additional accelerator that helps break up heavy and compacted snow before being collected by the auger. These snowblowers are designed for professional use and can effectively handle large amounts of snow. However, they may be excessive for most residential gravel driveways.

Considerations for using a snowblower on a gravel driveway

When using a snowblower on a gravel driveway, there are several factors to consider to ensure the machine operates effectively and without causing damage:

Snowblower weight

The weight of the snowblower is an important consideration, especially for gravel driveways. Lightweight snowblowers may struggle to maintain traction on loose gravel surfaces, while heavier models may dig into the gravel and cause damage. Finding a snowblower with an optimal weight that strikes a balance between stability and maneuverability is crucial.

Auger height adjustment

It is essential to have a snowblower with adjustable auger height to prevent direct contact with the gravel. Adjustable auger height allows for customization based on the depth of the snow, ensuring efficient snow removal without damaging the gravel surface.

Tire type

Snowblowers come with various tire types, such as standard tires, snow tires, or tracks. When using a snowblower on a gravel driveway, it is preferable to have tires designed for snowy and uneven terrains. Snow tires or models with deep-treaded tires can provide better traction and prevent slipping or sliding on the gravel surface.

Skid shoes

Skid shoes are metal or plastic plates located at the bottom of the snowblower housing. They provide a buffer between the auger or impeller and the ground. Adjustable skid shoes allow users to set an appropriate clearance height, preventing contact between the machine and the gravel. This adjustment ensures effective snow removal while minimizing the risk of damage to the driveway.

Can A Snowblower Work On A Gravel Driveway?

This image is property of www.gardentoolexpert.com.

Advantages of using a snowblower on a gravel driveway

Efficiency

Using a snowblower on a gravel driveway can significantly enhance efficiency compared to manual shoveling. Snowblowers can quickly clear large amounts of snow, reducing the time and effort required to keep the driveway clean and safe.

Ease of use

Snowblowers are designed to be user-friendly and require minimal physical exertion. Instead of the strenuous labor involved in shoveling, operating a snowblower involves simply guiding the machine along the driveway. This ease of use makes snowblowers a convenient option for gravel driveway owners.

Reduced physical exertion

Shoveling heavy snow can be physically demanding, especially for those with physical limitations or health issues. By utilizing a snowblower, the physical strain of shoveling is eliminated, reducing the risk of injury and allowing individuals to clear their driveways with ease.

Potential challenges of using a snowblower on a gravel driveway

Propelling gravel

One of the main challenges when using a snowblower on a gravel driveway is the potential for the machine to pick up loose gravel and throw it along with the snow. This can be a concern if the gravel causes damage to the machine, surrounding property, or poses a safety risk to individuals in the vicinity.

Adjustment and maintenance

Using a snowblower on a gravel surface may require additional adjustments and maintenance compared to using it on a smooth pavement. Regularly inspecting and adjusting the auger height, skid shoes, and other components to ensure proper functioning and prevent damage is crucial. Additionally, removing any accumulated gravel or debris from the machine after each use can help maintain optimal performance.

Dealing with uneven surfaces

Gravel driveways are notoriously uneven, with varied heights and bumps throughout. Maneuvering a snowblower on such surfaces can pose challenges, affecting the machine’s overall performance and potentially causing damage. Careful navigation and adjusting the snowblower settings according to the surface irregularities are necessary to ensure smooth operation.

Can A Snowblower Work On A Gravel Driveway?

This image is property of blog.machinefinder.com.

Tips for effectively using a snowblower on a gravel driveway

Clearing techniques

When clearing snow with a snowblower on a gravel driveway, it is best to work in straight lines or overlapping paths. This ensures complete coverage while preventing the need to backtrack. By maintaining a steady and consistent speed, the snowblower can remove snow efficiently without causing damage to the surface.

Operating speed

It is crucial to find the right operating speed when using a snowblower on a gravel driveway. Moving too quickly can result in inadequate snow removal, while moving too slowly can cause excessive wear on the machine and potentially lead to clogging. Experimenting with different speeds and observing the snowblower’s performance can help determine the optimal operating speed for the specific gravel driveway.

Avoiding clogging

Clogging can occur when wet or heavy snow becomes compacted inside the snowblower’s auger or impeller system. To minimize the risk of clogging, it is important to avoid overloading the snowblower with large amounts of snow. Clearing snow in layers, especially when dealing with deep snowfall, can help prevent clogging and maintain optimal performance.

Recommended snowblower features for gravel driveways

Adjustable skid shoes

When using a snowblower on a gravel driveway, adjustable skid shoes are crucial to maintain an appropriate clearance height. Ensure the snowblower you choose has easily adjustable skid shoes to prevent the auger or impeller from contacting the ground and potentially causing damage.

Large tires with good traction

Snowblowers equipped with large tires that offer good traction are beneficial for gravel driveways. Deep-treaded tires or specialized snow tires can provide the necessary grip on the uneven and potentially slippery surface, preventing slippage or loss of control.

Auger housing height

Opt for a snowblower with adjustable auger housing height. This feature allows customization according to the snow depth and gravel driveway’s irregularities. Having control over the auger housing height minimizes the risk of damaging the gravel while effectively removing the snow.

Can A Snowblower Work On A Gravel Driveway?

This image is property of www.popsci.com.

Alternatives to using a snowblower on a gravel driveway

Shoveling

Shoveling is a traditional alternative to using a snowblower on a gravel driveway. While it can be a cost-effective option, it requires significant physical exertion and can be time-consuming, especially for larger driveways. Shoveling also carries a higher risk of strain or injury due to the repetitive and strenuous movements involved.

Snow plows

Snow plows are another alternative for clearing snow from a gravel driveway. These devices attach to trucks or tractors and can quickly clear large amounts of snow in a single pass. However, snow plows may be less suitable for residential gravel driveways due to their size and the need for specialized vehicles.

Snow pushers

Snow pushers are manual tools with a wide blade or plow-like attachment. They are designed to push snow out of the way rather than collect and throw it. Snow pushers can be effective for lighter snowfall or small areas but may not be suitable for heavy or compacted snow.

Conclusion

When considering whether a snowblower can work on a gravel driveway, it is essential to assess personal needs and the specific characteristics of the gravel driveway. While using a snowblower offers many advantages, such as efficiency, ease of use, and reduced physical exertion, it also poses potential challenges and requires careful consideration.

By choosing a snowblower with the right features, adjusting settings according to the gravel surface, and following effective clearing techniques, a snowblower can be successfully used on a gravel driveway. However, alternatives such as shoveling, snow plows, or snow pushers may also be worth considering based on budget, maintenance, and individual preferences. Ultimately, selecting the most suitable option will depend on personal circumstances and the specific needs of the gravel driveway owner.

Can A Snowblower Work On A Gravel Driveway?

This image is property of www.popsci.com.

How Do I Make My Snowblower Rev Higher?

Are you tired of your snowblower constantly struggling to clear snow from your driveway? If you find yourself asking “How do I make my snowblower rev higher?” look no further! In this article, we will share with you some simple and effective tips to help increase the engine revs on your snowblower, ensuring you can tackle even the heaviest snowfalls with ease. Say goodbye to the frustration of a sluggish machine and hello to a snowblower that powers through snowdrifts effortlessly.

1. Check the Throttle Position

When troubleshooting issues with your snowblower’s rev, the first step is to check the throttle position. Ensure that the throttle is in the correct position and doesn’t have any obstructions. Adjusting the throttle may help increase the rev and improve performance.

1.1 Adjust the Throttle

To adjust the throttle, locate the throttle lever on the control panel of your snowblower. It is usually found near the handlebars. Gradually move the throttle lever to increase the rev. Take note of any changes in the engine sound and revolutions per minute (RPM). Aim for a higher rev without straining the engine.

1.2 Inspect Throttle Cable

The throttle cable connects the throttle lever to the carburetor and controls the engine’s speed. Over time, the throttle cable may become loose or develop issues, resulting in poor rev performance. Inspect the throttle cable for any signs of wear, fraying, or stretching. If you notice any damage, it’s essential to replace the cable to ensure proper functioning.

1.3 Clean or Replace Throttle Mechanism

A dirty or faulty throttle mechanism can also affect the rev of your snowblower. Check the throttle mechanism for any dirt, debris, or corrosion. Clean the mechanism using a suitable cleaning solution and a brush. If cleaning doesn’t resolve the issue, it may be necessary to replace the throttle mechanism entirely. Consult the snowblower’s manual or a professional technician for guidance.

2. Ensure Proper Choke Functioning

The choke plays a vital role in starting and running your snowblower smoothly. If the choke is not functioning correctly, it can affect the rev. Follow these steps to ensure proper choke functioning.

2.1 Verify Choke Position

Locate the choke lever on your snowblower. It is usually labeled and can be found on the control panel. Check the choke position and adjust it according to the manufacturer’s recommendations. The choke should be engaged when starting the snowblower and gradually disengaged as the engine warms up. Incorrect choke positioning can lead to a low rev or stalling issues.

2.2 Clean Choke Valve

Over time, the choke valve can accumulate dirt and debris, affecting its performance. Inspect the choke valve for any signs of blockage or buildup. If you notice any obstructions, carefully clean the valve using a cloth or a soft brush. Ensure that the choke valve moves freely without any resistance once it is cleaned.

2.3 Adjust Choke Mechanism

If the choke mechanism is not adjusted correctly, it can impact the engine’s rev. Refer to the snowblower’s manual to locate the choke adjustment screws. Make small adjustments to the screws while monitoring the engine’s sound and RPM. The goal is to find the optimal adjustment that allows for a higher rev without sacrificing engine performance and smooth operation.

How Do I Make My Snowblower Rev Higher?

This image is property of i.ytimg.com.

3. Evaluate Fuel System

A properly functioning fuel system is crucial for optimal snowblower performance. Issues with the fuel level, filter, or lines can impact the rev. Follow these steps to evaluate the fuel system.

3.1 Check Fuel Level

Ensure that your snowblower has an adequate fuel level before starting or operating it. Low fuel levels can result in reduced rev and stalling. If the fuel level is low, refill the tank with fresh gasoline that meets the manufacturer’s recommended specifications. Avoid using stale or contaminated fuel, as it can cause engine problems.

3.2 Inspect Fuel Filter

The fuel filter prevents debris and impurities from entering the engine. Over time, the filter can become clogged or dirty, affecting fuel flow and rev performance. Locate the fuel filter on your snowblower, usually along the fuel line, and inspect it for any signs of blockage. If necessary, clean or replace the fuel filter to ensure proper fuel flow and optimize the rev.

3.3 Clean or Replace Fuel Lines

Inspect the fuel lines for any cracks, leaks, or blockages. Damaged or blocked fuel lines can restrict fuel flow to the engine, resulting in a low rev. Clean the fuel lines thoroughly using compressed air or a suitable cleaning solution. If you notice any severe damage or leaks, it is advisable to replace the fuel lines altogether. Consult a professional technician if you’re unsure about performing this task.

4. Examine Spark Plug

The spark plug is responsible for igniting the fuel-air mixture in the engine. A fouled or malfunctioning spark plug can cause a weak spark or misfires, impacting the rev and overall snowblower performance. Follow these steps to examine the spark plug.

4.1 Remove and Inspect Spark Plug

Carefully remove the spark plug from the snowblower’s engine using a socket wrench or spark plug removal tool. Examine the spark plug for any signs of wear, carbon buildup, or damage. If the spark plug electrode is worn, the gap is too wide, or the plug appears dirty, it’s essential to address the issue to improve the rev.

4.2 Clean or Replace Spark Plug

If the spark plug appears dirty or has a significant carbon buildup, it can affect the spark and result in a low rev. Clean the spark plug using a wire brush or a specialized spark plug cleaner. It is crucial to maintain the proper electrode gap during cleaning. If the spark plug is severely worn, damaged, or cleaning doesn’t improve performance, replace the spark plug with a new one that meets the manufacturer’s specifications.

4.3 Adjust Spark Plug Gap

The spark plug gap refers to the distance between the center electrode and the ground electrode. An incorrect gap can cause starting and rev issues. Using a spark plug gap tool, adjust the gap according to the manufacturer’s recommended specifications. A proper spark plug gap ensures a strong spark and contributes to a higher rev and smoother engine operation.

How Do I Make My Snowblower Rev Higher?

This image is property of i.ytimg.com.

5. Review Air Filter

An air filter prevents dirt, debris, and contaminants from entering the engine. A clogged or dirty air filter can restrict airflow, affecting the snowblower’s rev and overall performance. Follow these steps to review the air filter.

5.1 Remove and Inspect Air Filter

Locate the air filter housing, usually near the engine, and remove the cover or filter compartment. Take out the air filter and inspect it for any signs of dirt, debris, or damage. If the filter appears dirty or clogged, it is essential to clean or replace it.

5.2 Clean or Replace Air Filter

If the air filter is dirty, clean it using a mild detergent or a specialized air filter cleaner. Gently wash the filter and ensure that it is completely dry before reinstalling it. If the filter is damaged, excessively dirty, or cleaning doesn’t restore its functionality, it’s best to replace it with a new one. A clean and properly functioning air filter improves airflow, leading to a higher rev and better performance.

6. Inspect the Carburetor

The carburetor is a critical component in the fueling process of your snowblower’s engine. A dirty or misadjusted carburetor can lead to poor rev and overall performance issues. Follow these steps to inspect the carburetor.

6.1 Clean Carburetor

Over time, the carburetor can accumulate dirt, varnish, or other deposits that can affect fuel delivery and engine performance. Disconnect the spark plug wire for safety, and carefully remove the carburetor from the snowblower’s engine. Clean the exterior and interior components of the carburetor using a carburetor cleaner or solvent. Pay close attention to the jets, passages, and fuel inlet. Once cleaning is complete, reassemble the carburetor and reinstall it.

6.2 Adjust Fuel-to-Air Mixture

Correct fuel-to-air mixture is vital for optimal engine performance and rev. Determine if your carburetor allows adjustments to the fuel-to-air mixture. Refer to the snowblower’s manual or consult a professional technician for guidance on adjusting the carburetor. The goal is to find the ideal ratio that provides a higher rev while ensuring smooth operation and preventing fuel-related issues such as sputtering or stalling.

6.3 Rebuild or Replace Carburetor

If cleaning and adjustments don’t resolve the rev issues, it may be necessary to rebuild or replace the carburetor. Rebuilding a carburetor involves disassembling, cleaning, and replacing worn or damaged components. If the carburetor is beyond repair or significantly worn, consider replacing it with a new one. Carburetor rebuilding or replacement should be performed by a certified technician or someone with advanced knowledge and experience.

How Do I Make My Snowblower Rev Higher?

This image is property of i.ytimg.com.

7. Verify Drive Belt

The drive belt is responsible for transferring power from the engine to the snowblower’s wheels or auger, depending on the model. A worn, loose, or damaged drive belt can affect the rev and overall performance. Follow these steps to verify the drive belt condition.

7.1 Inspect Drive Belt Condition

Carefully examine the drive belt for any signs of wear, cracking, glazing, or stretching. A worn or damaged belt may not grip properly, resulting in a low rev and reduced performance. Additionally, check for proper tension in the belt. It should have a slight give but not be excessively loose.

7.2 Adjust or Replace Drive Belt

If the drive belt shows significant signs of wear, damage, or incorrect tension, it is necessary to address the issue. Adjusting the belt tension may help improve the rev and performance. Refer to the snowblower’s manual or consult a professional technician for proper adjustment procedures. If the belt is severely worn or damaged, replace it with a new one that matches the manufacturer’s specifications.

8. Check Engine Compression

Engine compression refers to the pressure generated inside the engine cylinder during the combustion process. Low compression can result in a weak rev and poor performance. Follow these steps to check engine compression.

8.1 Perform Compression Test

A compression test requires a compression gauge and typically involves removing the spark plug. Follow the instructions in your snowblower’s manual or seek guidance from a certified technician for the specific procedure. The compression gauge provides a reading that indicates the engine’s compression level. If the compression is low, further investigation is needed to identify and address the underlying issue.

8.2 Address Low Compression Issues

Low compression can be caused by several factors, including worn piston rings, valve issues, or cylinder wear. Diagnosing and fixing low compression issues require advanced knowledge and expertise. It is advisable to consult a certified technician or a reputable service center to accurately identify the problem and carry out the necessary repairs. Addressing low compression will help restore the rev and overall performance of your snowblower.

How Do I Make My Snowblower Rev Higher?

This image is property of i.ytimg.com.

9. Evaluate Muffler

The muffler plays an important role in reducing noise and directing exhaust gases away from the engine. A blocked or damaged muffler can impact the rev and cause performance issues. Follow these steps to evaluate the muffler.

9.1 Inspect Muffler for Blockages

Visually inspect the muffler for any signs of blockages or restrictions. Obstructions such as debris, carbon buildup, or damaged baffles can limit the exhaust flow, affecting the rev and overall engine performance. If you notice any blockages, it is crucial to address them promptly.

9.2 Clean or Replace Muffler

If the muffler has blockages, carefully clean it using a suitable brush or compressed air. Remove any debris or carbon buildup that may be restricting the exhaust flow. If the muffler is damaged or cleaning doesn’t resolve the rev issues, it may be necessary to replace it with a new one. Consult the snowblower’s manual or a professional technician for guidance on muffler replacement.

10. Seek Professional Help

If you’ve followed the above steps and are still experiencing rev issues with your snowblower, it’s time to seek professional help. A certified technician or a reputable service center specializing in snowblower repairs can provide expert assistance. They have the knowledge, experience, and specialized tools to diagnose and resolve complex rev problems. Don’t hesitate to consult a professional to ensure the proper functioning and performance of your snowblower.

10.1 Consult a Certified Technician

A certified technician can offer professional advice and guidance based on their expertise and industry knowledge. They can perform advanced diagnostics, identify any underlying issues, and provide accurate solutions to improve the rev of your snowblower. Consulting a certified technician can save you time, effort, and potential damage from attempting complex repairs without the necessary skills.

10.2 Consider Professional Maintenance

Regular professional maintenance is essential for keeping your snowblower in excellent condition and ensuring optimal rev and performance. Consider scheduling periodic maintenance appointments with a reputable service center. During these visits, a certified technician can inspect, clean, and tune up your snowblower, addressing any potential rev issues before they become major problems. Professional maintenance helps prolong the lifespan of your snowblower and ensures reliable operation when you need it most.

By following these comprehensive steps and seeking professional help when needed, you can effectively address rev issues with your snowblower. Remember, regular maintenance, cleanliness, and proper adjustments are key to maintaining optimal rev, engine performance, and overall snowblower functionality. With a well-revving snowblower, you’ll be prepared to tackle snow removal efficiently and enjoy a hassle-free winter season. Stay safe and happy snowblowing!

How Do I Make My Snowblower Rev Higher?

This image is property of i.ytimg.com.

How Far Off The Ground Should My Snowblower Be?

When it comes to using a snowblower, one question that often comes to mind is, “How far off the ground should my snowblower be?” This seemingly straightforward question holds the key to optimizing the efficiency and effectiveness of your snow-clearing machine. Finding the perfect height ensures that your snowblower performs at its best, making your winter chores a breeze. In this article, we will explore the importance of proper snowblower height and provide you with essential tips to ensure you achieve the ideal clearance for clearing snow.

How Far Off The Ground Should My Snowblower Be?

This image is property of www.snowblowersdirect.com.

Proper Snowblower Clearance

Snowblowers are essential tools for efficiently clearing snow during the winter season. However, many homeowners may not be aware of the importance of proper clearance for their snowblowers. Determining the right height and ensuring correct clearance is crucial for maximizing the effectiveness of the machine and preventing any potential damage. In this article, we will delve into the factors to consider when determining the snowblower clearance, the impact it has on snow removal effectiveness, potential risks of incorrect clearance, tips for determining the right clearance, and clearance preferences for different surfaces. Let’s dive in!

Factors to Consider

Several factors come into play when determining the appropriate snowblower clearance. It is essential to take into account the terrain and surface conditions, including the slope and texture of the area where the snow will be cleared. The amount and type of snow also play a role, as heavy, wet snow requires a different clearance compared to light, fluffy snow. Additionally, considering any attachment accessories, such as drift cutters or snow cabs, is important to ensure proper clearance. Finally, the physical capabilities of the user should also be taken into consideration, as a comfortable height is key for minimizing fatigue and avoiding strain during operation.

Recommended Clearance Range

Standard clearance guidelines exist for snowblowers, which provide a general range suitable for most situations. However, it is vital to adapt the clearance height based on different snow conditions and surface types. As a general rule of thumb, the clearance range should be set to allow the snowblower to consistently make contact with the ground, while still maintaining a slight gap to prevent damage to the auger or scraper bar. By properly adjusting the clearance, snow removal efficiency can be optimized, ensuring effective clearing and minimizing the risk of clogging or jamming.

Adjusting the Snowblower Height

Most snowblowers come with adjustable features that allow users to fine-tune the clearance height. It is crucial to follow the manufacturer’s instructions for adjusting the height, as each model may have specific requirements. Many snowblowers are equipped with adjustable skid shoes, which can be raised or lowered to modify the clearance. Additionally, some models have an adjustable auger housing that enables further customization. Regular maintenance and servicing of the snowblower, including inspecting and adjusting the height, will contribute to the machine’s longevity and optimal performance.

How Far Off The Ground Should My Snowblower Be?

This image is property of www.snowblowersdirect.com.

Impact on Snow Removal Effectiveness

Proper snowblower clearance has several benefits that directly impact the machine’s snow removal effectiveness. Firstly, achieving the correct height ensures enhanced clearing performance by allowing the snowblower to make consistent contact with the ground. This results in the removal of a greater amount of snow and prevents the need for multiple passes. Secondly, optimizing the throwing distance is achievable through appropriate clearance. By maintaining the ideal gap, the snow is propelled away from the machine efficiently, reducing the chances of it falling back onto the cleared area. Lastly, correct clearance minimizes the risk of clogging and jamming, which can significantly disrupt the snow removal process.

Potential Risks of Incorrect Clearance

Conversely, inadequate or excessive clearance can pose various risks and negatively impact the snow clearing process. Insufficient clearance may result in ineffective snow removal, leaving behind a layer of snow that still requires manual labor to clear. Furthermore, incorrect clearance can potentially damage the equipment. If the snowblower’s auger or scraper bar comes into contact with the ground, it may become worn out or incur more severe damage. Moreover, working with an improper height can increase user fatigue, leading to discomfort and reduced efficiency. Lastly, incorrect clearance can pose safety hazards and increase the risk of accidents, particularly if the snowblower becomes unstable on uneven terrain.

How Far Off The Ground Should My Snowblower Be?

This image is property of i.ytimg.com.

Tips for Determining the Right Clearance

Determining the appropriate snowblower clearance can be achieved through several strategies. Firstly, it is crucial to consider the user’s comfort during operation. Adjusting the clearance height to a level where the user feels at ease and can maintain a comfortable posture goes a long way in reducing fatigue and promoting efficient snow removal. Secondly, it is recommended to gradually adjust the height until the desired clearance is achieved. Making small incremental changes and testing the snowblower on different surfaces and snow conditions helps in finding the optimal height. Additionally, utilizing the trial and error method is an effective approach to determine the right clearance. Testing the machine at various heights and observing the snow clearing effectiveness provides valuable insights. Lastly, always consult the user manual provided by the manufacturer. It contains specific instructions and guidelines tailored to the particular model, ensuring accurate clearance adjustment.

Clearance Preferences for Different Surfaces

The ideal snowblower clearance can vary depending on the surface type being cleared. Here are some guidelines for different surfaces:

Paved or Concrete Surfaces

For paved or concrete surfaces, it is generally recommended to set the clearance height with a slight gap, allowing the snowblower to navigate smoothly without contacting the surface. This prevents any potential damage to the underlying infrastructure while ensuring effective snow removal.

Gravel or Uneven Terrains

On gravel or uneven terrains, a slightly higher clearance is advisable to prevent the snowblower from picking up and throwing loose gravel or rocks. The clearance should be set to avoid scraping the ground while still effectively removing the snow.

Turfs and Delicate Surfaces

When clearing turfs or delicate surfaces, such as lawns or flowerbeds, a higher clearance is essential to avoid damaging the delicate vegetation. Ensuring the machine does not make direct contact with the ground is crucial to prevent any harm to the area being cleared.

Sidewalks and Pathways

Sidewalks and pathways often have consistent surfaces, making it easier to determine the appropriate clearance height. It is recommended to set the height with a slight gap to accommodate any bumps or irregularities on the surface, while still effectively removing the snow.

How Far Off The Ground Should My Snowblower Be?

This image is property of www.simplystoring.com.

General Snowblower Usage Guidelines

Aside from proper snowblower clearance, there are several general guidelines that users should follow to ensure safe and efficient operation. Adhering to safety precautions, such as wearing appropriate protective gear, is crucial to prevent any accidents or injuries during operation. Regular snowblower maintenance, including checking and adjusting the clearance height, is essential for keeping the machine in optimal condition. Performing regular inspections and servicing can identify any issues or wear and tear, allowing for timely repairs or replacements. Additionally, users may consider recommended accessories and modifications, such as installing drift cutters or snow cabs, to enhance snow removal effectiveness.

Conclusion

Proper snowblower clearance is of utmost importance when it comes to effectively and safely clearing snow. By considering factors like terrain, snow conditions, and attachment accessories, users can determine the appropriate clearance height. Achieving the right clearance enhances snow removal effectiveness, optimizing throwing distance, and minimizing clogging or jamming. Conversely, incorrect clearance can result in ineffective snow removal, damage to the equipment, user fatigue, and safety hazards. Utilizing tips such as considering user comfort, gradually adjusting the height, and consulting the user manual will aid in determining the right clearance. Furthermore, different surfaces may require specific clearance preferences to protect the underlying infrastructure, vegetation, or delicate areas. Lastly, adhering to safety precautions, performing regular maintenance, and considering recommended accessories contribute to efficient snowblower usage. With the proper snowblower clearance, homeowners can tackle the winter season with ease and efficiency, ensuring snow-free driveways, sidewalks, and pathways.

How Far Off The Ground Should My Snowblower Be?

This image is property of qph.cf2.quoracdn.net.

Should You Put Stabilizer In Snowblower?

Ladies and gentlemen, we are here today to discuss a burning question that has been on the minds of snowblower owners everywhere: should you put stabilizer in your snowblower? Ah, the winter season – a time of cozy nights, hot chocolate, and of course, the relentless battle against the snow. But amidst the excitement of winter wonderlands, one niggling concern may arise: how can we ensure our snowblower stays in top-notch condition? Today, we aim to shed light on this debate surrounding the use of stabilizer in snowblowers, examining whether it is truly a necessary step or merely an optional precaution.

Importance of Stabilizer in Snowblower

When it comes to maintaining the performance and longevity of your snowblower, using a fuel stabilizer is of utmost importance. Snowblowers are seasonal equipment that often sit idle for months at a time. During this period, fuel degradation can occur, leading to various issues when you try to start up your snowblower again. By using a fuel stabilizer, you can prevent fuel degradation, maintain fuel freshness, and improve the overall performance of your snowblower.

Preventing Fuel Degradation

One of the primary reasons to use a fuel stabilizer in your snowblower is to prevent fuel degradation. Over time, fuel can break down and lose its quality, leading to the formation of gum, varnish, and other deposits that can clog the fuel system of your snowblower. This degradation is often accelerated by factors such as exposure to oxygen, moisture, and temperature fluctuations.

By using a fuel stabilizer, you can effectively inhibit the oxidation process and prevent the formation of harmful deposits. This ensures that the fuel remains in its optimal state, reducing the likelihood of clogged fuel lines, carburetor issues, and engine damage.

Maintaining Fuel Freshness

When your snowblower sits idle for an extended period, the fuel in the tank can become stale. Stale fuel is not only less efficient but can also lead to difficulties starting the engine. Fuel stabilizers work by prolonging the freshness of the fuel, allowing it to remain usable even after months of storage.

By maintaining fuel freshness, you can avoid starting problems and ensure that your snowblower is ready to tackle the winter weather whenever you need it. This is especially crucial for regions that experience long periods of snowfall, where snowblowers may be stored for several months without use.

Improving Engine Performance

Using a fuel stabilizer can also have a positive impact on the overall performance of your snowblower’s engine. When fuel degrades or becomes stale, it can lead to reduced combustion efficiency, resulting in decreased power output, rough idling, and potential engine misfires.

By keeping the fuel fresh and free from harmful deposits, a fuel stabilizer helps to optimize the combustion process, allowing the engine to operate at its best. This results in smoother operation, improved fuel efficiency, and more reliable starting, ensuring that your snowblower performs at its peak when you need it most.

Factors to Consider Before Using Stabilizer

Before using a fuel stabilizer in your snowblower, there are a few factors to consider. These factors will help you determine the right type of stabilizer, the correct mixing ratio, and the most effective usage methods.

Type of Fuel

The type of fuel used in your snowblower plays a significant role in selecting the appropriate stabilizer. It is essential to ensure compatibility between the stabilizer and the fuel to achieve optimal results. Most snowblowers run on either gasoline or a gasoline-ethanol blend.

Storage Duration

The length of time your snowblower will be stored is another crucial factor to consider. If you live in an area with long winters and extended periods of snowfall, your snowblower may remain idle for several months. In such cases, a longer-lasting fuel stabilizer may be necessary to maintain fuel freshness throughout the storage period.

Climate Conditions

The prevailing climate conditions in your area can affect fuel stability. Extreme temperature fluctuations and high humidity levels can accelerate fuel degradation, making the use of a stabilizer even more crucial. Consider the climate of your region when choosing a fuel stabilizer that is formulated to withstand the specific conditions your snowblower will face during storage.

Should You Put Stabilizer In Snowblower?

This image is property of www.goldeagle.com.

Types of Fuel Stabilizers

Fuel stabilizers come in various types, each designed to address specific needs and fuel compositions. Understanding the different types of stabilizers will help you make an informed decision based on your snowblower’s requirements.

Ethanol Fuel Stabilizers

Many modern fuels contain ethanol, which can pose challenges to fuel stability. Ethanol fuel stabilizers are specifically formulated to counteract the negative effects of ethanol on fuel quality. These stabilizers prevent phase separation, corrosion, and other issues that can arise from using ethanol-blended fuels, ensuring optimal performance.

Non-Ethanol Fuel Stabilizers

For snowblowers using non-ethanol fuels, there are stabilizers available that are tailored to these fuel types. These stabilizers are designed to protect against fuel degradation, maintain freshness, and improve engine performance without the specific focus on ethanol-related issues.

Multi-Purpose Fuel Stabilizers

If you have multiple small engines or equipment that require fuel stabilizers, opting for a multi-purpose stabilizer can offer convenience and versatility. These stabilizers are formulated to work well with various fuel types, making them suitable for snowblowers as well as other power equipment you may own.

Benefits of Using Fuel Stabilizer

Using a fuel stabilizer in your snowblower provides a range of benefits that significantly contribute to the longevity and reliability of your machine. Let’s explore some of the key advantages of incorporating a fuel stabilizer into your snowblower maintenance routine.

Prevents Fuel Separation

One of the primary benefits of using a fuel stabilizer is its ability to prevent fuel separation. Ethanol-blended fuels are prone to phase separation, where ethanol and water separate from the gasoline. This can lead to engine damage and starting issues when the snowblower is not used for an extended period.

A fuel stabilizer acts as a protective barrier, preventing the ethanol from absorbing moisture and causing separation. By stabilizing the fuel composition, the stabilizer ensures that the gasoline, ethanol, and water remain evenly mixed, reducing the risk of costly engine repairs and improving overall performance.

Reduces Carburetor Issues

Fuel degradation can result in deposits and varnish formation in the carburetor, leading to performance problems in your snowblower. These issues can range from difficulty starting the engine to inconsistent power delivery and poor throttle response.

By using a fuel stabilizer, you significantly reduce the likelihood of such carburetor problems. The stabilizer’s additives help keep the fuel system clean, preventing the buildup of deposits and varnish. This results in smoother operation, improved fuel flow, and better combustion efficiency, allowing your snowblower’s engine to run optimally.

Protects Fuel System Components

The fuel system components of your snowblower, including fuel lines, filters, and carburetors, can suffer from wear and damage caused by degraded fuel. Deposits and contaminants that form due to fuel degradation can clog fuel lines and filters, leading to reduced fuel flow and potential engine damage.

Using a fuel stabilizer helps protect the fuel system components, keeping them clean and free from harmful deposits. This ensures proper fuel delivery, prevents clogs, and prolongs the life of the fuel system, ultimately saving you time and money on costly repairs.

Should You Put Stabilizer In Snowblower?

This image is property of www.snowblowersdirect.com.

Proper Fuel Stabilizer Usage

To reap the full benefits of a fuel stabilizer, it’s essential to understand and follow the proper usage guidelines. Here are some key considerations when using a fuel stabilizer in your snowblower.

Reading the Manufacturer’s Instructions

Before using any fuel stabilizer, it is crucial to read and understand the manufacturer’s instructions provided with the product. These instructions outline the specific recommendations, mixing ratios, and usage guidelines for the stabilizer.

Determining the Correct Mixing Ratio

Fuel stabilizers are typically added to the fuel tank in precise ratios to ensure optimal performance. The correct mixing ratio can vary depending on the brand and type of stabilizer you choose. Consult the product instructions for guidance on the appropriate amount of stabilizer to add based on the fuel tank capacity.

Adding Stabilizer in the Fuel Tank

Once you’ve determined the correct mixing ratio, add the fuel stabilizer directly into the fuel tank that is filled with fresh fuel. Avoid adding the stabilizer to old or stale fuel, as its effectiveness may be reduced. It is recommended to add the stabilizer at the beginning of the snowblower’s storage period to maintain fuel freshness throughout.

Effectiveness of Fuel Stabilizer

The effectiveness of a fuel stabilizer is crucial to the success of using it in your snowblower. Let’s explore some factors that determine its overall effectiveness.

Long-Term Fuel Stability

A good fuel stabilizer should maintain fuel stability over an extended period, ensuring that the fuel remains fresh and usable throughout storage. By inhibiting oxidation and preventing the formation of harmful deposits, the stabilizer should allow the fuel to retain its quality, leading to easier starting and improved performance when you need to use your snowblower.

Compatibility with Snowblower Engines

It is important to choose a fuel stabilizer that is compatible with the specific engine technology used in your snowblower. Some stabilizers may not work as effectively with certain engine types, potentially leading to reduced performance or other issues. Check the product specifications and compare them to the requirements of your snowblower’s engine to ensure compatibility.

User Experiences and Feedback

To gauge the effectiveness of a fuel stabilizer, it can be beneficial to read user experiences and feedback. Online reviews, forums, and discussions with other snowblower owners can provide valuable insights into the results achieved with various fuel stabilizers. This information can help guide your decision and ensure that you choose a stabilizer with a track record of positive outcomes.

Should You Put Stabilizer In Snowblower?

This image is property of i.ytimg.com.

Alternatives to Fuel Stabilizer

While using a fuel stabilizer is highly recommended for snowblower maintenance, there are a few alternative methods you can consider. Let’s explore these alternatives and their pros and cons.

Emptying the Fuel Tank

One way to prevent fuel degradation is to empty the fuel tank completely before storing your snowblower. By removing all the fuel, you eliminate the risk of degradation and potential starting issues. However, this method may not be practical for everyone and requires careful handling and disposal of the fuel.

Running the Snowblower Dry

Similar to emptying the fuel tank, running the snowblower until the fuel is depleted is another alternative. By running the machine without any fuel, you avoid the need for a stabilizer. However, this method may require additional time and effort, as well as potential wear on the engine when operating without fuel.

Using Fresh Fuel Regularly

Another alternative is to use fresh fuel regularly. By using the snowblower frequently and consuming the fuel within a shorter period, the risk of fuel degradation is significantly reduced. While this method requires more regular use of the snowblower, it can be an effective way to avoid fuel stability issues altogether.

Common Myths About Fuel Stabilizers

When it comes to fuel stabilizers, there are a few common myths that can confuse snowblower owners. Let’s debunk some of these myths and provide accurate information about the use of stabilizers.

Stabilizer Damages Snowblower Engines

One common myth is that using a fuel stabilizer can damage snowblower engines. However, when used correctly, a fuel stabilizer should not cause any harm to the engine. In fact, it can help prevent engine damage by maintaining fuel quality and protecting the fuel system components.

Stabilizer Causes Fuel System Clogs

Another myth suggests that fuel stabilizers can cause fuel system clogs. While it is true that some additives can form deposits if used in excessive amounts, following the manufacturer’s instructions and using the correct mixing ratio will ensure that the stabilizer does not cause clogs or other fuel system issues.

Stabilizer is Only for Old Fuel

Contrary to popular belief, a fuel stabilizer is not solely intended for use with old fuel. It can be used with fresh fuel as well to maintain fuel freshness and prevent degradation. Adding a stabilizer to fresh fuel at the beginning of the storage period ensures that the fuel remains in optimal condition until the next use.

Should You Put Stabilizer In Snowblower?

This image is property of i.ytimg.com.

Considerations for Different Types of Snowblowers

Different types of snowblowers may have specific considerations when it comes to using a fuel stabilizer. Here are some factors to consider based on the type of snowblower you own.

Single-Stage vs. Two-Stage Snowblowers

Single-stage and two-stage snowblowers may have different fuel requirements and usage patterns. Single-stage snowblowers are typically smaller and may consume less fuel, while two-stage snowblowers are larger and may have higher fuel consumption rates. Consider the fuel tank capacity and consumption rate when determining the appropriate mixing ratio of a fuel stabilizer for your specific snowblower type.

Electric vs. Gas-Powered Snowblowers

Electric snowblowers do not require fuel, eliminating the need for a fuel stabilizer. However, for gas-powered snowblowers, using a fuel stabilizer is essential to maintaining fuel quality and ensuring optimal engine performance. Make sure to select a stabilizer that is compatible with gas-powered snowblower engines.

Compact vs. Large Snowblowers

The size and power output of your snowblower can affect its fuel consumption rate and storage requirements. Compact snowblowers may have smaller fuel tanks and shorter storage periods, while larger snowblowers with higher power output may require more fuel and longer storage durations. Consider these factors when choosing a fuel stabilizer and following the correct usage guidelines.

Conclusion

Using a fuel stabilizer in your snowblower is vital for maintaining fuel freshness, preventing degradation, and improving engine performance. By considering factors such as the type of fuel, storage duration, and climate conditions, you can choose the right stabilizer for your snowblower’s needs.

Whether you opt for an ethanol fuel stabilizer, non-ethanol stabilizer, or multi-purpose stabilizer, the benefits of using a fuel stabilizer are clear. It prevents fuel separation, reduces carburetor issues, and protects fuel system components, ultimately ensuring that your snowblower is ready to tackle the winter weather with ease.

Proper usage of a fuel stabilizer includes reading the manufacturer’s instructions, determining the correct mixing ratio, and adding the stabilizer to the fuel tank filled with fresh fuel. This will effectively maintain fuel stability and optimize the performance of your snowblower.

While fuel stabilizers are highly effective, alternative methods such as emptying the fuel tank, running the snowblower dry, or using fresh fuel regularly can also be considered. Each method has its own pros and cons, and it’s essential to choose the option that best suits your needs and preferences.

Lastly, it is important to dispel common myths surrounding fuel stabilizers, such as the belief that they can damage snowblower engines or cause fuel system clogs. By using a fuel stabilizer correctly and following the recommended guidelines, you can enjoy the benefits without any negative effects on your snowblower.

Considerations for different types of snowblowers, including single-stage vs. two-stage, electric vs. gas-powered, and compact vs. large, should also be taken into account when using a fuel stabilizer.

In conclusion, the decision to put a stabilizer in your snowblower is a personal one based on various factors. However, it is clear that using a fuel stabilizer offers numerous benefits in maintaining the performance and reliability of your snowblower. With the proper usage and consideration of different factors, you can ensure that your snowblower is always prepared to tackle the winter weather with ease.

Should You Put Stabilizer In Snowblower?

This image is property of i.ytimg.com.

What Kind Of Oil Should I Use In My Snowblower?

Whether you’re a seasoned snowblower operator or a first-time user, choosing the right oil for your snowblower is vital for optimal performance and longevity. In this article, we’ll explore the various factors to consider when selecting the appropriate oil for your snowblower. From understanding the types of oil available to knowing the specific requirements of your machine, we’ll provide you with the knowledge you need to ensure smooth operation and a reliable snow-clearing experience.

What Kind Of Oil Should I Use In My Snowblower?

This image is property of images.thdstatic.com.

Understanding Snowblower Oil Requirements

When it comes to maintaining our snowblowers, one crucial aspect that often gets overlooked is the choice of oil. Using the right oil is vital for the proper functioning and longevity of our snowblower engines. In this article, we will walk you through everything you need to know about snowblower oil requirements, including matching the oil type to the engine, considering the climate and temperature, checking the snowblower oil capacity, understanding conventional and synthetic oils, choosing the right viscosity, API certification and ratings, oil additives, maintaining proper oil levels, common FAQs, dealing with extreme cold conditions, and environmental considerations. So, let’s dive in!

Matching the Oil Type to the Engine

One of the first things to consider when choosing the right oil for your snowblower is matching the oil type to the engine. Different engines have different requirements, and using the wrong type of oil can lead to poor lubrication, excessive wear and tear, and even engine damage. To ensure the best performance and longevity of your snowblower, consult the manufacturer’s manual or website for the recommended oil type. They will typically specify whether the engine requires a 2-stroke oil or 4-stroke oil.

Considering the Climate and Temperature

Another critical factor to consider when selecting snowblower oil is the climate and temperature in which you will be operating the machine. Cold weather conditions can significantly impact the performance and viscosity of the oil. If you live in an area with extremely cold temperatures, you may want to consider using a specific oil type that is formulated for cold climates. These oils are designed to maintain their viscosity even in freezing temperatures, ensuring optimal lubrication and preventing damage to the engine.

Checking the Snowblower Oil Capacity

Before adding oil to your snowblower, it’s essential to know the machine’s oil capacity. Using the correct amount of oil is crucial for ensuring proper lubrication and optimal engine performance. Consult the manufacturer’s manual or website to find the recommended oil capacity for your specific snowblower model. Overfilling or underfilling the oil can lead to engine damage or inefficient operation. So, be sure to measure the oil accurately and add the appropriate amount.

Conventional Oil vs. Synthetic Oil

Next, let’s take a closer look at the two primary types of oil available for snowblowers: conventional oil and synthetic oil. Each has its own set of benefits and considerations.

Conventional Oil

Conventional oil is made from refined crude oil and undergoes a process to remove impurities and improve its performance properties. It is commonly used in small engines and offers good lubrication and protection against wear and tear. One advantage of conventional oil is its affordability compared to synthetic oil. However, it may not perform as well as synthetic oil in extreme temperatures or under high-stress conditions.

Synthetic Oil

Synthetic oil, on the other hand, is chemically engineered to provide superior lubrication and protection for engines. It is created by combining high-quality base oils with additives to enhance its performance properties. Synthetic oil offers numerous advantages over conventional oil, including better cold-temperature flow, reduced engine wear, improved fuel efficiency, and extended oil change intervals. Although synthetic oil tends to be more expensive, its benefits make it a worthwhile investment for those seeking optimal engine performance and longevity.

Blends and High Mileage Oils

In addition to conventional and synthetic oils, there are also oil blends and high mileage oils available in the market. Oil blends are a mixture of conventional and synthetic oils, offering a balance between performance and affordability. High mileage oils, on the other hand, are specifically formulated for engines with higher mileage or older engines. These oils contain additional additives that help reduce oil consumption and minimize engine wear in aging snowblowers.

Choosing the Right Viscosity

Viscosity is another important factor to consider when selecting snowblower oil. Viscosity measures the oil’s resistance to flow and determines its thickness. Choosing the right viscosity is crucial for ensuring proper lubrication in different weather conditions.

Understanding Viscosity Ratings

Viscosity ratings are indicated by numbers preceded by the letter “W” (e.g., 5W-30 or 10W-40). The “W” stands for winter and represents the oil’s flow characteristics at low temperatures. The first number indicates the oil’s viscosity at cold temperatures, while the second number represents its viscosity at high temperatures. Generally, lower viscosity oils (e.g., 5W) flow better in cold conditions, while higher viscosity oils (e.g., 30 or 40) provide better protection at high temperatures.

Wintertime Viscosity Considerations

In colder climates, it’s crucial to select an oil with a lower winter viscosity rating to ensure easy engine startup and proper lubrication. This is because low temperatures can cause the oil to thicken, making it harder for the engine to start and reducing its flow. By using an oil with a lower winter viscosity rating, you can minimize the risk of cold start issues and ensure optimal engine performance even in freezing conditions.

Avoiding Cold Start Issues

Cold start issues can be quite frustrating, especially when you need to clear snow quickly in the freezing cold. To avoid these problems, consider using a synthetic oil with a low winter viscosity rating. Synthetic oils have excellent cold-temperature flow properties and can start flowing quickly, providing immediate lubrication and protection to the engine parts. Additionally, using an oil heater or block heater can help preheat the oil and reduce cold start issues, ensuring a smooth startup even in extreme cold.

API Certification and Ratings

API Certification and ratings are essential indicators for determining the quality and performance of snowblower oils. The American Petroleum Institute (API) provides certifications and ratings based on extensive testing and analysis.

Understanding API Certification

API Certification ensures that an oil meets the specific performance standards set by the API. This certification is indicated by the API “Donut” symbol on the oil container, followed by a two-letter code. The first letter indicates the oil’s performance level for gasoline engines, while the second letter represents its performance level for diesel engines. Always choose an oil that carries the appropriate API Certification to ensure it meets the necessary requirements for your snowblower engine.

Choosing the Proper API Rating

API ratings indicate the quality and performance of the oil based on its ability to meet specific criteria. Higher API ratings typically indicate superior performance and protection for the engine. However, it’s essential to match the API rating to the snowblower engine’s requirements. Consult the manufacturer’s manual or website to determine the recommended API rating for your snowblower. Using an oil with a lower API rating than required can result in poor engine performance, increased wear, and potential damage.

What Kind Of Oil Should I Use In My Snowblower?

This image is property of mobileimages.lowes.com.

Understanding Oil Additives

Oil additives are chemical compounds that are added to oils to enhance their performance and provide additional benefits. Different additives serve different purposes, ranging from improving lubrication to reducing engine wear. Understanding oil additives can help you make informed decisions when selecting the right oil for your snowblower.

Benefits of Oil Additives

Oil additives offer several benefits that contribute to better engine performance and longevity. Some common additives found in snowblower oils include:

  1. Anti-wear additives: These additives form a protective layer on engine parts, reducing friction and wear.

  2. Detergents: Detergent additives help keep the engine clean by preventing the buildup of deposits, sludge, and varnish.

  3. Dispersants: Dispersant additives suspend contaminants and prevent them from forming harmful deposits in the engine.

  4. Anti-foaming agents: These additives reduce foam formation in the oil, ensuring efficient lubrication.

  5. Corrosion inhibitors: Corrosion inhibitors protect engine components from rust and corrosion, especially during storage or in high-humidity environments.

Considering the Manufacturer’s Recommendations

When it comes to oil additives, it’s crucial to consider the manufacturer’s recommendations. Some manufacturers specify the use of specific additives or discourage the use of certain additives that may not be compatible with their snowblower engines. Always consult the manufacturer’s manual or website to ensure you are using the recommended oil additives for optimal engine performance.

Maintaining Proper Oil Levels

Now that we understand the importance of selecting the right oil, let’s dive into the essential practices for maintaining proper oil levels in your snowblower.

Checking Oil Levels Correctly

Regularly checking the oil levels in your snowblower is crucial for monitoring engine health and preventing potential damage. To check the oil levels correctly, start by ensuring that the snowblower is on a level surface and the engine is off. Locate the oil dipstick or oil fill cap, remove it, and wipe it clean. Then, reinsert the dipstick or cap all the way in and remove it again to check the oil level. The dipstick will have indicators or lines showing the minimum and maximum oil levels. Ensure that the oil level is within this range, adding or draining oil as necessary.

Changing the Oil Regularly

Regular oil changes are vital for maintaining the integrity of the oil and preventing contaminants from accumulating in the engine. The frequency of oil changes will depend on various factors, including the snowblower model, usage frequency, and operating conditions. Consult the manufacturer’s recommendations for the appropriate oil change intervals for your snowblower. Typically, it is recommended to change the oil at the start of each winter season or after a specific number of hours of use.

Storing the Snowblower with Properly Drained Oil

Properly storing your snowblower between seasons is essential for its longevity. If you plan to store your snowblower for an extended period, it’s crucial to drain the oil and replace it with fresh oil before doing so. Fresh oil minimizes the risk of contaminants settling in the engine and ensures optimal lubrication when you restart the snowblower. Consult the manufacturer’s recommendations for specific oil storage instructions, as they may provide additional guidance based on your snowblower model.

What Kind Of Oil Should I Use In My Snowblower?

This image is property of cdn.yurishwedoff.com.

Common FAQs about Snowblower Oil

Now, let’s address some common questions that snowblower owners often have regarding oil usage.

Can I Use Automotive Oil in My Snowblower?

While it may be tempting to use automotive oil in your snowblower, it is generally not recommended. Snowblowers operate in colder temperatures and require oils specifically formulated for low-temperature flow and protection. Automotive oils may not provide the necessary lubrication and protection, leading to potential engine damage. Always use oils specifically designed for snowblower engines to ensure optimal performance and longevity.

How Often Should I Change the Oil in My Snowblower?

The frequency of oil changes in a snowblower can vary depending on several factors. It is best to consult the manufacturer’s recommendations for your specific snowblower model. In general, oil changes are recommended at the start of each winter season or after a certain number of hours of usage. Regular oil changes are vital for maintaining optimal engine performance and minimizing the risk of engine damage due to contaminated or degraded oil.

What Happens If I Use the Wrong Oil?

Using the wrong oil in your snowblower can have detrimental effects on engine performance and longevity. Different oils are formulated to meet specific requirements and provide the necessary lubrication and protection for engines under various operating conditions. Using the wrong oil can result in poor lubrication, increased friction and wear, reduced engine efficiency, and potential damage. Always adhere to the manufacturer’s recommendations for oil type, viscosity, and API rating to ensure the best performance and longevity of your snowblower.

Dealing with Extreme Cold Conditions

Operating a snowblower in extreme cold conditions can present unique challenges. Here are some tips for handling cold climates.

Using Synthetic Oil for Cold Climates

As mentioned earlier, synthetic oil performs exceptionally well in cold temperatures. Its low-temperature flow properties allow for easy engine startup and immediate lubrication. If you live in an area with extremely cold temperatures, consider using a synthetic oil specifically formulated for cold climates. This will ensure optimal performance and protection, even in freezing conditions.

Using an Oil Heater or Block Heater to Prevent Cold Start Problems

Cold start problems can be common in extremely cold conditions. To prevent these issues, you can use an oil heater or block heater to preheat the engine oil. These devices ensure that the oil is in its optimal viscosity range, making it easier for the engine to start and reducing wear. Oil heaters or block heaters can be particularly useful in colder climates where temperatures regularly drop below freezing.

What Kind Of Oil Should I Use In My Snowblower?

This image is property of i.ytimg.com.

Environmental Considerations

When using and disposing of snowblower oil, it’s essential to consider the environmental impact. Let’s explore some eco-friendly practices.

Proper Disposal of Used Oil

When it’s time to change the oil in your snowblower, make sure to dispose of the used oil responsibly. Improper disposal of oil can have severe adverse effects on the environment. Check with your local recycling or waste management facilities to find out the proper procedures for oil disposal in your area. Many facilities offer oil recycling services or provide guidance on how to dispose of it safely. Remember, never dispose of oil down drains, sewers, or regular trash bins.
Using Biodegradable or Eco-Friendly Oil Alternatives

For environmentally conscious individuals, there are biodegradable or eco-friendly oil alternatives available in the market. These oils are formulated using renewable resources and biodegradable additives, making them more sustainable and eco-friendly. While these oils may come at a higher price, they provide an excellent option for those looking to reduce their impact on the environment.
Conclusion

Choosing the right oil for your snowblower is a crucial step in maintaining its optimal performance and longevity. By understanding snowblower oil requirements, matching the oil type to the engine, considering the climate and temperature, checking the oil capacity, choosing the right viscosity, considering API certification and ratings, understanding oil additives, maintaining proper oil levels, dealing with extreme cold conditions, and considering environmental factors, you can ensure that your snowblower runs smoothly and efficiently for years to come. So, take the time to select the right oil and follow proper maintenance practices to keep your snowblower in top condition, ready to tackle the winter snow with ease. Stay safe and enjoy the snowy season!
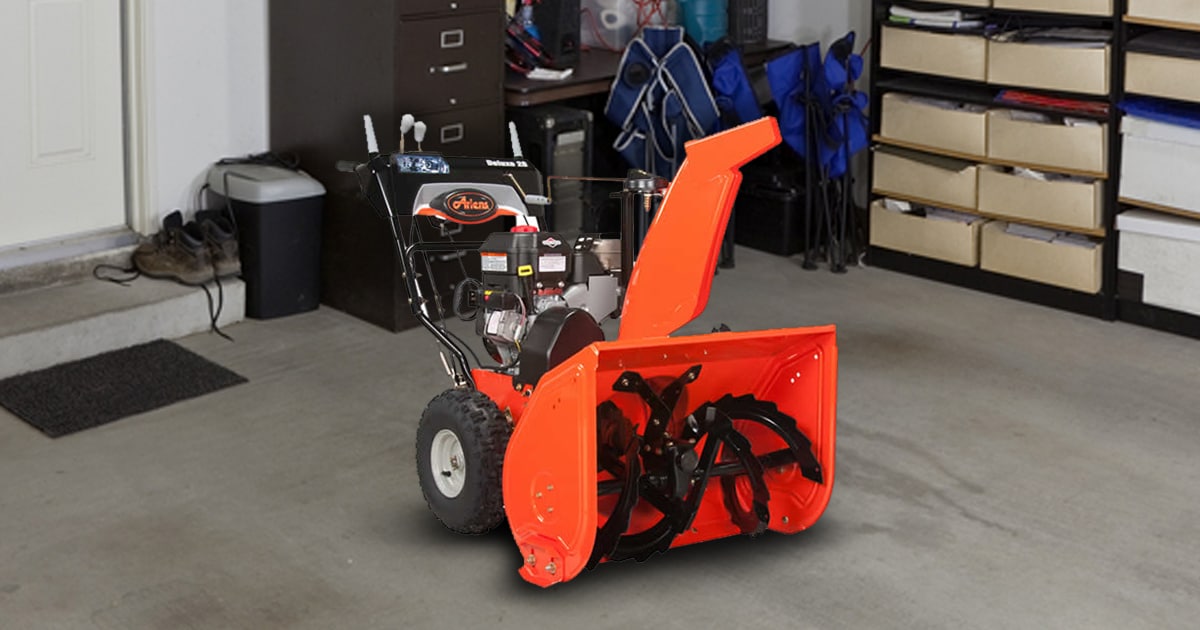
What Kind Of Oil Should I Use In My Snowblower?

This image is property of images.thdstatic.com.