Tag Archives: Chute

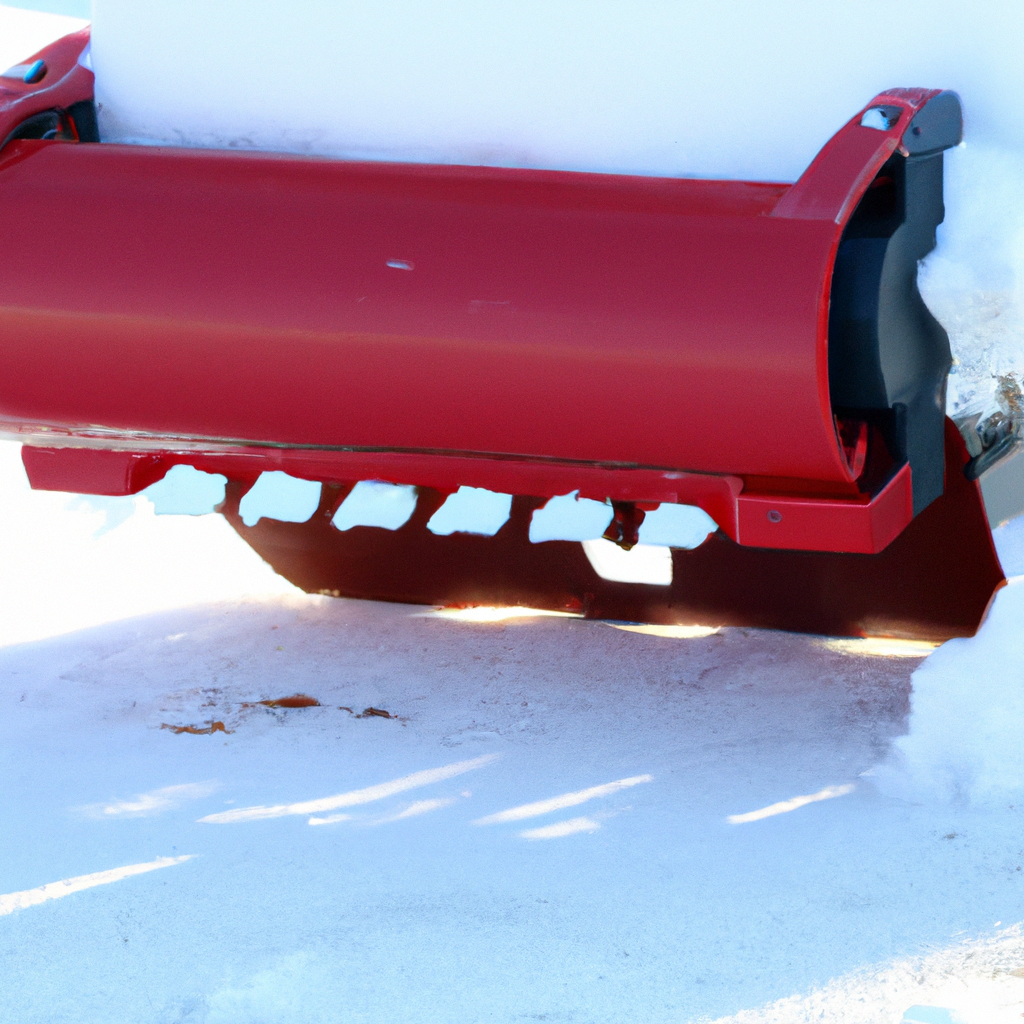
How Do I Adjust The Deflector On My Snowblower’s Chute?

So, you’ve got a snowblower and you’re ready to tackle that winter wonderland outside. But there’s just one problem – the snow isn’t evenly distributing out of the chute. You’ve tried adjusting the direction of the chute, but it’s still not quite right. Well, fear not! In this article, we’ll be guiding you through the process of adjusting the deflector on your snowblower’s chute, so you can ensure that the snow is blowing exactly where you want it to go. No more random snow showers or uneven piles – just a beautifully cleared driveway and a sense of triumph over winter’s wrath. Let’s get started, shall we?

How Do I Adjust The Deflector On My Snowblowers Chute?

Why Adjusting the Deflector is Important

Adjusting the deflector on your snowblower’s chute is a crucial step in optimizing its performance and ensuring efficient snow discharge. By making the necessary adjustments, you can prevent clogging and buildup in your machine, which can ultimately lead to a smoother snow clearing experience. In this article, we will discuss the importance of adjusting the deflector, provide a step-by-step guide on how to do it, offer maintenance tips, and troubleshoot common issues.

Improves Snowblower Performance

One of the primary reasons why adjusting the deflector is important is that it significantly improves your snowblower’s performance. When the deflector is correctly positioned, it allows you to control the distance and direction of the snow discharge. By adjusting the deflector to the appropriate height, you can ensure that the snow is thrown a sufficient distance away from your path, allowing for efficient and thorough snow removal.

Prevents Clogging and Build-up

Another crucial reason for adjusting the deflector is to prevent clogging and build-up in your snowblower’s chute. When the deflector is set too low, it can lead to snow accumulating in the chute and causing blockages. This can result in reduced performance and potentially damage your machine. By adjusting the deflector to the optimal height, you can help prevent these clogs from occurring and maintain the efficiency of your snowblower.

Ensures Efficient Snow Discharge

Adjusting the deflector on your snowblower also ensures efficient snow discharge. When the deflector is properly positioned, it allows for the snow to be thrown in the desired direction, away from your cleared path. This enables you to clear your driveway or walkway more effectively and ensures that the snow is being discharged where you want it to go. Without proper deflector adjustment, the snow may not be discharged efficiently, making your snowblowing task more challenging and time-consuming.
How Do I Adjust The Deflector On My Snowblowers Chute?

Step-by-Step Guide to Adjust the Deflector

Now that you understand why adjusting the deflector is important, let’s walk through a step-by-step guide on how to adjust it properly:

1. Safety Precautions

Before starting any maintenance or adjustment on your snowblower, it is essential to take proper safety precautions. Make sure the machine is turned off and remove the spark plug wire to prevent accidental startup. Wear gloves to protect your hands, and if possible, work in a well-lit area.

2. Gather the Necessary Tools

To adjust the deflector, you may need tools such as a wrench, screwdriver, or socket set, depending on the specific model of your snowblower. Refer to your owner’s manual to determine the necessary tools required for your particular machine.

3. Locate the Deflector Adjustment Mechanism

Find the deflector adjustment mechanism on your snowblower. This is typically located on the chute near the top, where the snow is discharged. The mechanism may be a lever, a knob, or a locking mechanism, depending on the design of your snowblower.

4. Loosen the Deflector’s Locking Mechanism

Use the appropriate tool to loosen the deflector’s locking mechanism. This will allow you to make adjustments to the deflector height.

5. Adjust the Deflector Height

Once the locking mechanism is loosened, adjust the deflector height by moving it up or down. Refer to your owner’s manual for specific instructions on how to adjust the deflector on your snowblower model. It is essential to find the optimal height that allows for efficient snow discharge without causing blockages.

6. Tighten the Deflector’s Locking Mechanism

After adjusting the deflector to the desired height, securely tighten the locking mechanism. Ensure that the deflector is firmly locked in place to prevent any unintentional movement during operation.

7. Test the New Deflector Position

Finally, start your snowblower and test the new deflector position. Pay close attention to the snow discharge pattern and distance. If necessary, repeat the adjustment process until you achieve the desired results.

Maintenance Tips for the Deflector

To ensure the longevity and optimal performance of your snowblower’s deflector, follow these maintenance tips:

Cleaning and Lubricating the Mechanism

Regularly clean the deflector adjustment mechanism to remove any debris or snow buildup. Use a brush or a cloth to remove dirt and lubricate any moving parts with a suitable lubricant, as recommended by the manufacturer. This will help maintain smooth operation and prevent the mechanism from seizing.

Inspecting for Damage or Wear

Periodically inspect the deflector for any signs of damage or wear. Look for cracks, bends, or loose parts that may affect its functionality. If you notice any issues, it is important to address them promptly by repairing or replacing the deflector.

Replacing the Deflector if Necessary

If the deflector on your snowblower becomes severely damaged or worn beyond repair, it is crucial to replace it. Refer to your owner’s manual or contact the manufacturer for guidance on obtaining a suitable replacement deflector for your specific snowblower model.

Common Issues and Troubleshooting

Although adjusting the deflector should help prevent most issues, here are a few common problems you may encounter and some troubleshooting tips:

Deflector Not Moving Smoothly

If you experience difficulty in adjusting the deflector or notice that it does not move smoothly, it may be due to dirt, debris, or rust. Clean the adjustment mechanism thoroughly and lubricate it as necessary. If the problem persists, there may be an issue with the mechanism itself, and it may require repair or replacement.

Deflector Stuck in One Position

If the deflector is stuck in one position and cannot be adjusted, check for any obstructions or damage to the locking mechanism. Remove any debris or clear any blockages that may be preventing the deflector from moving. If the issue persists, consult the owner’s manual or seek professional assistance.

Deflector Does Not Stay in Place

If the deflector keeps moving or does not stay in the adjusted position during operation, the locking mechanism may not be securely tightened. Double-check that the locking mechanism is tightened correctly and ensure that it is adjusted to the desired position. If the problem persists, consider replacing the locking mechanism or seeking professional help.

Conclusion

Adjusting the deflector on your snowblower’s chute is a vital part of maintaining optimal performance and ensuring efficient snow discharge. By following the step-by-step guide and implementing regular maintenance tips, you can enjoy a smoother snowblowing experience and prevent issues such as clogging or poor snow discharge. Remember to prioritize safety, consult your owner’s manual, and seek professional assistance when needed. With proper deflector adjustments and maintenance, your snowblower will be ready to conquer winter’s snowfall with ease. Stay safe and happy snowblowing!


How Can I Prevent Snow From Sticking To The Chute?

So you’re ready to tackle the winter wonderland and get to work clearing out that snow, but there’s one pesky problem standing in your way: snow sticking to the chute. It’s frustrating, time-consuming, and can put a serious damper on your snow removal plans. But fear not, because in this article, we’re going to dive into some simple yet effective solutions that will keep that snow sliding smoothly and prevent any future sticking mishaps. Say goodbye to snowy roadblocks and hello to efficient snow removal!

Choosing the Right Material for the Chute

When it comes to preventing snow from sticking to the chute of your snowblower, choosing the right material for the chute itself plays a crucial role. There are a few factors to consider in this regard.

Consider the Material’s Texture

To minimize snow sticking to the chute, opt for materials with a smooth texture. Uneven or rough surfaces can provide more friction and give the snow a better grip, leading to accumulation and blockages. Look for chutes made of materials such as metal or plastic with a smooth finish.

Choose a Material with Low Coefficient of Friction

The coefficient of friction is a measure of how resistant two surfaces are to slide against each other. When it comes to preventing snow from sticking to the chute, it’s essential to select a material with a low coefficient of friction. This characteristic reduces the chances of snow clinging to the surface, allowing it to slide off more easily. Consider materials like polyethylene or UHMW (ultra-high-molecular-weight) plastic, known for their low coefficients of friction.

Look for Hydrophobic Coatings

Hydrophobic coatings are designed to repel water and other liquids, making them an excellent choice for preventing snow from sticking to the chute. These coatings create a slippery surface, reducing snow adhesion. Look for chutes that come pre-coated with a hydrophobic material, or consider applying a hydrophobic spray or wax for added protection.

Waxing the Chute

Applying a wax coating to the chute is another effective way to prevent snow from sticking. Wax creates a smooth and slippery surface, allowing snow to slide off more easily. Here’s how you can do it:

Apply a Wax Coating

Start by thoroughly cleaning the chute and removing any existing snow or debris. Once cleaned, apply a layer of wax to the surface. You can use any commercial snowmobile or ski wax, as they are designed to withstand cold temperatures and provide optimal lubrication. Make sure to cover the entire chute evenly.

Regularly Reapply the Wax

Over time, the wax coating may wear off due to the friction and exposure to snow and ice. It’s important to regularly reapply the wax to ensure snow doesn’t start sticking to the chute. Depending on the frequency of use and snow conditions, you may need to wax the chute every few uses or once a season.

Applying a Non-Stick Spray

Using a non-stick spray is another effective method to prevent snow from sticking to the chute. Non-stick sprays create a slippery layer on the surface, minimizing snow adhesion.

Select a Suitable Non-Stick Spray

Choose a non-stick spray specifically designed for use in cold temperatures. Look for products that mention snowblower chute or winter equipment on their labels. These sprays are formulated to withstand freezing conditions and provide optimal lubrication.

Apply the Non-Stick Spray Properly

Before applying the spray, clean the chute to ensure there is no snow or dirt on the surface. Follow the instructions on the spray bottle and apply an even coating to the chute. Allow the spray to dry before operating the snowblower. Remember to reapply the non-stick spray as needed, especially after cleaning the chute or during prolonged use.

Using a Heat Source

Using a heat source is an effective method to prevent snow from sticking to the chute. Heating the surface slightly can melt the snow and create a temporary film of water, preventing further snow buildup.

Use a Heat Gun or Blow Dryer

To apply heat to the chute, you can use a heat gun or a blow dryer. Set the heat source to a low or moderate temperature and direct the airflow towards the chute. Move the heat source back and forth along the surface until the snow starts melting. Be sure to keep a safe distance and avoid overheating the material, as it may cause damage or warping.

Be Cautious with Heat Sources

While using a heat source can be effective, it’s essential to exercise caution. Avoid using high heat settings or leaving the heat source in one spot for too long, as this can lead to material damage or discoloration. Additionally, be mindful of the surroundings and avoid exposing any flammable materials or surfaces to the heat source.

Coating with Silicone

Another option for preventing snow from sticking to the chute is to apply a silicone lubricant. Silicone creates a slippery surface that snow has difficulty adhering to.

Obtain a Silicone Lubricant

Look for a silicone lubricant that is suitable for outdoor use and can withstand low temperatures. Check if the product is explicitly labeled for snowblowers or winter equipment. Silicone lubricants in spray form are convenient to apply and provide an even coating.

Apply Silicone Lubricant to the Chute

Before applying the silicone lubricant, make sure the chute is clean and free of any snow or debris. Spray the lubricant evenly over the surface of the chute, taking care to cover the entire area. Allow the silicone to dry before operating the snowblower. Remember to reapply the silicone lubricant as needed to maintain the anti-stick properties.

Creating a Physical Barrier

Creating a physical barrier between the chute and the snow can be an effective way to prevent snow from sticking. Here are a couple of methods to achieve this:

Cover the Chute with Plastic Sheet or Tarp

Before operating the snowblower, cover the chute with a plastic sheet or tarp. Secure the covering tightly so that it doesn’t interfere with the snowblower’s operation. This barrier prevents direct contact between the chute and the snow, reducing the chances of snow sticking.

Use a Teflon or Plastic Chute Liner

Another option is to install a Teflon or plastic chute liner inside the chute. These liners create a smooth and slippery surface that makes it harder for snow to adhere. Follow the manufacturer’s instructions to properly install the chute liner, ensuring it fits securely.

Adjusting the Chute Angle

The angle of the chute can have an impact on snow discharge and how likely it is for snow to stick. Adjusting the chute angle can help reduce snow buildup.

Increase the Chute’s Angle

By increasing the angle of the chute, you allow the snow to be expelled at a higher trajectory. This increased distance between the chute and the ground can help prevent snow from falling back onto the chute and sticking. Most snowblowers have adjustable chute angles, so consult your snowblower’s manual for instructions on how to adjust it.

Consider the Impact on Snow Discharge

While adjusting the chute angle can reduce snow sticking, it’s important to consider the overall impact on snow discharge. A steep angle may cause the expelled snow to travel too far or in an undesired direction. Find a balance that minimizes snow sticking while still effectively directing the discharged snow away from walkways and driveways.

Regular Maintenance and Cleaning

Regular maintenance and cleaning of the chute are crucial to prevent snow from sticking and ensure optimal performance of your snowblower.

Clean the Chute After Each Use

After each use, take the time to clean the chute thoroughly. Use a brush or scraper to remove any remaining snow or ice. Pay extra attention to corners or crevices where snow may accumulate. Removing any residual snow helps prevent it from solidifying and sticking when the snowblower is not in use.

Remove Accumulated Snow and Ice

If snow or ice has accumulated and frozen inside the chute, it’s important to remove it before using the snowblower again. This can be done by carefully chipping away at the ice or using warm water to melt it. Avoid using sharp objects that may damage the chute or cause injury.

Inspect for Any Damage or Corrosion

Regularly inspect the chute for any signs of damage or corrosion. Damaged areas can lead to irregularities on the surface, providing areas where snow can stick. If you notice any damage, consider repairing or replacing the affected parts to maintain optimal chute performance.

Clearing the Snow with a Shovel

In situations where the snowblower may not be suitable or available, using a traditional shovel can also help prevent snow from sticking to the chute.

Use a Shovel to Remove Snow Buildup

When you notice snow starting to accumulate on the chute during operation, stop the snowblower, and use a shovel to remove the excess snow. Carefully guide the shovel along the chute to clear any obstructions. This manual removal helps prevent further snow buildup and sticking.

Avoid Damaging the Chute with the Shovel

While using a shovel to remove snow buildup from the chute can be helpful, it’s crucial to exercise caution and avoid causing damage. Be mindful of the shovel’s edges and avoid scraping or hitting the chute forcefully. Gentle and controlled movements are key to protecting the chute while effectively clearing the snow.

Proper Operation Techniques

In addition to the preventive measures mentioned earlier, implementing proper operation techniques can also help minimize snow sticking to the chute.

Avoid Overloading the Chute

One common mistake is overloading the chute by trying to clear too much snow at once. This can overwhelm the snowblower’s capacity and cause snow to clog the chute. Clear smaller portions of snow at a time, allowing the snowblower to effectively discharge the snow without overloading the chute.

Utilize the Chute Deflector

Most snowblowers come with a chute deflector, which allows you to adjust the height or distance that the snow is thrown. Properly positioning the deflector ensures that the discharged snow is directed away from areas where it can fall back onto the chute and stick.

Operate the Snowblower at the Correct Speed

Operating the snowblower at the correct speed can also help prevent snow from sticking to the chute. Going too fast can cause the snow to not discharge properly or accumulate on the chute surface. Likewise, going too slow may not provide enough force to effectively discharge the snow. Find a speed that allows for efficient snowblowing while minimizing snow sticking.

By considering the material of the chute, applying coatings, adjusting angles, and utilizing proper techniques, you can significantly reduce the occurrence of snow sticking to the chute. Remember to regularly maintain and clean the chute to ensure optimal performance. With these tips in mind, you’ll be able to tackle snowy conditions more effectively and keep your snowblower running smoothly. Stay proactive and enjoy a snow-free chute all winter long!

How Do I Clean A Clogged Snowblower Chute?

So, you’re in the middle of winter and your trusty snowblower suddenly decides to play games with you by getting its chute all clogged up. Frustrating, right? But don’t worry, because in this article, we’re going to show you exactly how to tackle this snow-covered obstacle. From the tools you’ll need to the step-by-step process, we’ve got you covered. Say goodbye to those snowy blockages and get ready to have your snowblower running smoothly again in no time!

How Do I Clean A Clogged Snowblower Chute?

1. Safety Measures

When it comes to cleaning a clogged snowblower chute, safety should be your top priority. Snowblowers can be powerful and potentially dangerous machines, so taking the necessary precautions is essential to prevent accidents and injuries.

1.1 Wear Protective Gear

Before you start cleaning the clogged chute, make sure to wear the appropriate protective gear. This includes safety goggles or glasses to protect your eyes from flying debris, gloves to keep your hands safe from sharp edges or moving parts, and sturdy footwear to protect your feet.

1.2 Turn off the Snowblower

To ensure your safety, always turn off the snowblower and disconnect it from any power source before attempting to clean the clogged chute. This will prevent the machine from accidentally starting up while you are working on it, reducing the risk of injuries.

1.3 Disconnect the Spark Plug

For an extra layer of safety, disconnecting the spark plug is highly recommended. This will completely cut off the power supply to the snowblower, eliminating any possibility of it starting accidentally. Remember to consult your snowblower’s manual for specific instructions on how to disconnect the spark plug.

2. Diagnostic Step

Before diving into the cleaning process, it’s important to identify the source of the clog in your snowblower. By doing so, you can pinpoint the exact area that needs attention and troubleshoot accordingly.

2.1 Identify the Source of Clog

Take a close look at your snowblower to determine where the clog is occurring. It could be in the chute, impeller, auger, or somewhere else. By identifying the source of the clog, you can save time and effort by focusing your cleaning efforts on that specific area.

2.2 Inspect the Chute

Start by inspecting the chute, which is the part of the snowblower through which the snow is thrown. Check for any visible obstructions or blockages, such as rocks, ice chunks, or debris. If you can see a buildup of snow, it’s likely that the clog is located in the chute.

2.3 Check the Impeller

Next, examine the impeller, which is responsible for propelling the snow through the chute. Look for any objects that may be caught in the impeller, such as branches or large pieces of ice. If the impeller is obstructed, it can cause a blockage in the chute and prevent the snow from being properly ejected.

2.4 Examine the Auger

Another area to inspect is the auger, which is the part of the snowblower that scoops up the snow from the ground. Inspect the auger blades for any signs of clogging, such as packed snow or ice. If the auger is not able to rotate freely, it can contribute to the clogging issue.

How Do I Clean A Clogged Snowblower Chute?

3. Necessary Tools

In order to effectively clean a clogged snowblower chute, you’ll need a few tools on hand. These tools will help you remove the clog and ensure a smooth cleaning process.

3.1 Snow Shovel

A snow shovel will come in handy to remove any excess snow around the clogged chute. This will make it easier to access and clean the affected area of the snowblower.

3.2 Ice Scraper

An ice scraper can be useful for breaking up any ice or hard-packed snow that may be causing the clog. It will help loosen the debris, making it easier to remove from the chute.

3.3 Stiff Bristle Brush

A stiff bristle brush can be used to clean the chute and other parts of the snowblower. It will help remove any remaining debris or snow that may be stuck in hard-to-reach areas.

3.4 Screwdriver

A screwdriver may be required to remove certain panels or covers on the snowblower, allowing you to access the clogged chute more easily. Make sure to use the appropriate size and type of screwdriver for your specific snowblower model.

3.5 Pliers

Pliers can be helpful for removing any stubborn or hard-to-reach debris from the chute. They provide extra gripping power and allow you to maneuver around tight spaces.

3.6 Wrench

Depending on your snowblower model, a wrench may be needed to loosen and remove any bolts or screws that are securing the chute or other components. Make sure to have the correct size of wrench to avoid damaging the fasteners.

4. Step-by-Step Cleaning Process

Now that you have taken all the necessary safety precautions and gathered the required tools, it’s time to move on to the step-by-step cleaning process. Follow these instructions to effectively clean a clogged snowblower chute.

4.1 Remove Excess Snow

Using a snow shovel, clear away any excess snow or debris from the area around the clogged chute. This will make it easier to access and clean the affected area of the snowblower.

4.2 Disengage the Auger

Before starting any cleaning, make sure to disengage the auger. This will prevent the blades from spinning while you are working on the chute, reducing the risk of injuries.

4.3 Clear the Chute Opening

Using a snow shovel or your hands, carefully remove any visible obstructions or blockages from the chute opening. Make sure to clear the entire length of the chute to ensure optimal snowblower performance.

4.4 Remove the Clog from the Auger Housing

If the clog is located in the auger housing, use a screwdriver or wrench to remove any necessary panels or covers. Once you have access to the auger housing, carefully remove the clog by hand or with the help of pliers. Be cautious of any sharp edges or rotating parts.

4.5 Check and Clean the Discharge Chute

Inspect the discharge chute for any remaining debris or snow. Use a stiff bristle brush to clean the inside of the chute and remove any stubborn clogs. Make sure the discharge chute is clear and unobstructed to ensure proper snowblower operation.

4.6 Reassemble the Snowblower

Once the chute is clear and all debris has been removed, replace any panels or covers that were removed. Ensure that all fasteners are tightened securely. Double-check that the auger is disengaged and the spark plug is reconnected before starting the snowblower again.

5. Preventative Maintenance

Cleaning a clogged snowblower chute is just one part of proper snowblower maintenance. To keep your snowblower in optimal condition and prevent future clogs, follow these preventative maintenance tips.

5.1 Clear Snow Before it Accumulates

Try to clear snow regularly as it falls instead of waiting for it to accumulate. This will prevent excessive buildup and reduce the chance of clogs in the chute or other parts of the snowblower.

5.2 Regularly Lubricate Moving Parts

Keep the moving parts of your snowblower well-lubricated to ensure smooth and efficient operation. Consult your snowblower’s manual for the recommended lubrication points and frequency.

5.3 Inspect and Replace Worn Components

Regularly inspect all components of your snowblower for any signs of wear or damage. Replace any worn or damaged parts promptly to prevent further issues and ensure the longevity of your snowblower.

5.4 Store the Snowblower Properly

When the winter season is over, properly store your snowblower to avoid any damage or performance issues. Clean the machine thoroughly, remove any remaining fuel, and store it in a dry and covered area to protect it from the elements.

6. Troubleshooting

Despite following all the necessary steps and taking preventative measures, you may encounter some issues with your snowblower. Here are some common troubleshooting tips for addressing potential problems.

6.1 Clog continues to occur

If you find that clogs persist even after thoroughly cleaning the chute, there may be an underlying issue with your snowblower. It could be a problem with the auger, impeller, or other components. Consider consulting a professional for further assistance and diagnosis.

6.2 Auger not rotating

If the auger is not rotating as it should, check for any obstructions or debris that may be causing a blockage. Clear any clogs and ensure the auger is disengaged before attempting to troubleshoot any electrical or mechanical issues.

6.3 Reduced throwing distance

If you notice a decrease in the throwing distance of the snowblower, it could indicate a clog or a problem with the impeller. Clean the chute, impeller, and any other areas that may be obstructed. If the issue persists, consult a professional for further evaluation.

6.4 Snow chute gets clogged quickly

If the snow chute gets clogged quickly after cleaning, make sure you are clearing the chute opening completely during the cleaning process. Additionally, check the auger blades for any signs of damage or wear. Replace worn blades and regularly maintain the snowblower to prevent further clogging issues.

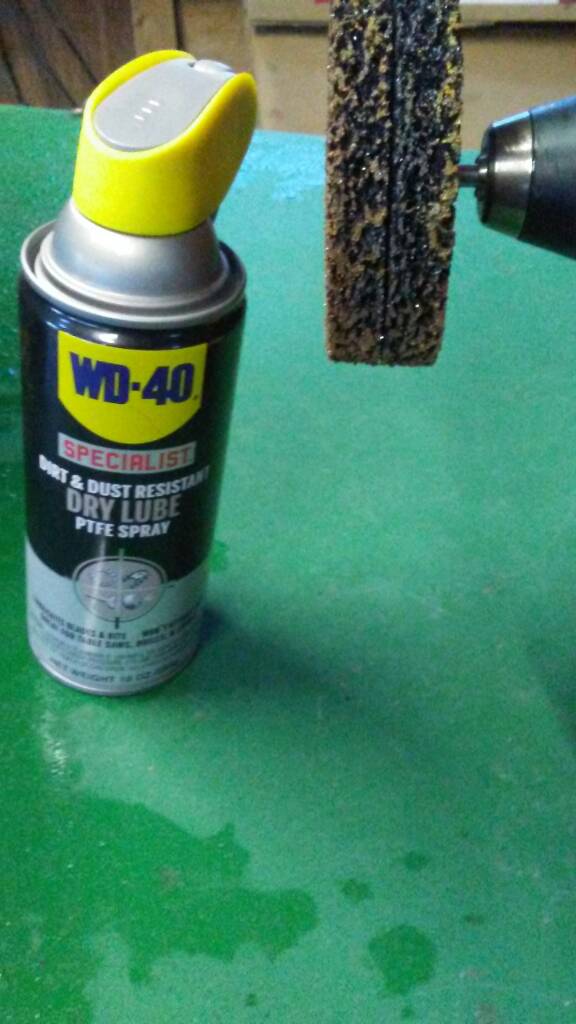
Can I Use WD-40 On My Snowblower Chute?

In this article, we will answer the common question of whether or not WD-40 can be used on a snowblower chute. We will explore the benefits of using WD-40 on your snowblower chute, as well as any potential drawbacks or risks. By the end of this article, you will have a clear understanding of whether WD-40 is a suitable option for maintaining and lubricating your snowblower chute. So, let’s get started and find out if WD-40 is the right choice for you!

What is WD-40?

WD-40 is a popular multi-purpose lubricant and penetrating oil that has been used for various applications for decades. Its name stands for “Water Displacement, 40th formula,” highlighting its initial purpose of preventing corrosion and displacing moisture. However, over time, its uses have expanded, and it has become a handy tool for many other tasks.

WD-40 and its composition

WD-40 is made up of a mixture of various chemicals, including a hydrocarbon solvent, a small amount of petroleum oil, and an ingredient known as Stoddard solvent. These components work together to create a versatile and effective lubricating solution. WD-40 is known for its ability to penetrate and loosen rusted or stuck parts, as well as its lubricating and water-repellent properties.

History of WD-40

WD-40 was first developed in 1953 by a small team of scientists at the Rocket Chemical Company. They were tasked with creating a rust-prevention solvent for the aerospace industry. After 40 failed attempts, they finally formulated the winning mixture, which eventually became known as WD-40.

Initially, WD-40 was primarily used for preventing corrosion on missile parts. However, its effectiveness and versatility soon caught the attention of the general public, and it quickly gained popularity as a household lubricant. Since then, WD-40 has become a staple in many homes and workshops worldwide.

Understanding Snowblower Chutes

Snowblower chutes are an essential component of snowblowers, responsible for directing the expelled snow away from the machine. These chutes are typically adjustable and can rotate to send snow in different directions. They play a crucial role in efficient snow removal, ensuring that the snow is directed away from the operator and surrounding areas.

Components and function of snowblower chutes

A snowblower chute consists of several parts, including a chute crank or handle, a deflector, and the chute itself. The chute crank allows the operator to adjust the direction in which the snow is thrown. The deflector can be adjusted to control the height and distance of the snow discharge.

The main function of the snowblower chute is to ensure that the snow is thrown in the desired direction and at the desired angle. This helps prevent snow from piling up in unwanted areas and ensures that the snowblower operates efficiently.

Importance of proper maintenance

Proper maintenance of snowblower chutes is essential to ensure their optimal performance. Neglecting maintenance can lead to various problems, such as snow and ice buildup, chute jams, and restricted movements. Regular maintenance not only prolongs the lifespan of the chute but also ensures that the snowblower operates smoothly and effectively.

Can I Use WD-40 On My Snowblower Chute?

This image is property of i.ytimg.com.

Benefits of Using WD-40 on Snowblower Chute

WD-40 can be a valuable tool for maintaining and lubricating your snowblower chute. Here are some benefits of using WD-40 on your snowblower chute:

Prevents snow and ice buildup

Snow and ice buildup are common issues that can hinder the proper functioning of a snowblower chute. When snow and ice accumulate on the chute, it can lead to clogs and jams, making it difficult to adjust or redirect the chute.

By applying WD-40 to the chute, you can create a protective barrier that prevents snow and ice from adhering to the surface. This allows the snow to slide off easily, reducing the chances of clogs and ensuring smooth operation.

Improves chute movement

Over time, snowblower chutes can become stiff and difficult to adjust, especially in cold weather. This can make it challenging to change the direction of the snow discharge, limiting the effectiveness of the snowblower.

WD-40’s lubricating properties can help loosen and lubricate the moving parts of the chute, improving its overall movement. By applying WD-40 to the crank system and other movable parts, you can ensure that the chute operates smoothly and can be adjusted with ease.

Reduces friction and wear

The constant movement of the snowblower chute can cause friction between its components, leading to wear and tear over time. This can result in decreased performance and potentially costly repairs.

By applying WD-40 to the chute’s moving parts, you can reduce friction, minimizing wear and tear. This helps prolong the lifespan of the chute and ensures that it continues to operate smoothly and efficiently.

How to Apply WD-40 on Snowblower Chute

To apply WD-40 on your snowblower chute, follow these step-by-step instructions:

Step-by-step guide

  1. Start by cleaning the snowblower chute to remove any dirt, debris, or existing lubricants. Use a brush or cloth to wipe away any residue.

  2. Ensure that the snowblower is turned off and the chute is in a safe position.

  3. Shake the can of WD-40 well to ensure proper mixing of the solution.

  4. Hold the can of WD-40 upright and spray a light, even coat on the moving parts of the chute, including the crank system and any other adjustable parts.

  5. Allow the WD-40 to penetrate and lubricate the surfaces for a few minutes.

  6. Once the lubricant has had a chance to work, use a clean cloth to wipe away any excess WD-40.

  7. Test the movement of the chute by adjusting the direction and angle to ensure smooth operation.

Safety precautions

When using WD-40 on your snowblower chute, it is important to keep the following safety precautions in mind:

  • Always apply WD-40 in a well-ventilated area to avoid inhaling the fumes.
  • Ensure that the snowblower is turned off and the chute is in a safe position before applying WD-40.
  • Avoid spraying WD-40 near open flames or heated surfaces, as it is flammable.
  • Keep WD-40 away from your eyes and skin. In case of contact, rinse with plenty of water and seek medical attention if necessary.

Can I Use WD-40 On My Snowblower Chute?

This image is property of empire-s3-production.bobvila.com.

Things to Consider before Using WD-40 on Snowblower Chute

Before using WD-40 on your snowblower chute, there are a few important factors to consider:

Compatibility with chute materials

WD-40 is generally safe to use on metal, plastic, and rubber surfaces. However, it is always recommended to check the manufacturer’s guidelines or consult the snowblower’s user manual to ensure compatibility with the specific materials in your chute.

Manufacturer recommendations

Some snowblower manufacturers may provide their own lubricants or recommend specific products for maintaining their equipment. It is advisable to follow these recommendations if provided, as they may be tailored to the specific needs and requirements of their snowblower chutes.

Alternative Products to WD-40

While WD-40 is a popular choice for lubricating snowblower chutes, there are alternative products that you can consider:

Silicone lubricants

Silicone lubricants are commonly used as an alternative to WD-40 for snowblower chutes. They offer similar lubricating properties and can help reduce friction and prevent snow and ice buildup. Silicone lubricants are known for their resistance to extreme temperatures and their ability to repel water.

Graphite spray

Graphite spray is another option for lubricating snowblower chutes. Graphite is a dry lubricant that can be effective in reducing friction and preventing snow and ice buildup. It is often preferred for its ability to lubricate without attracting dirt or dust.

Can I Use WD-40 On My Snowblower Chute?

This image is property of uploads.tapatalk-cdn.com.

Common Misconceptions about WD-40 and Snowblower Chutes

There are some common misconceptions regarding the use of WD-40 on snowblower chutes. Let’s debunk a few of them:

Myth debunking

Myth 1: WD-40 will damage the chute. WD-40 is generally safe to use on snowblower chutes and is unlikely to cause any damage when used properly. However, it is important to ensure compatibility with the materials of your specific chute and follow the manufacturer’s recommendations.

Myth 2: WD-40 should be applied to the entire chute. While WD-40 can be applied to the moving parts of the chute, it is not necessary to spray the entire chute. Focusing on the areas that require lubrication will suffice.

Myth 3: WD-40 is only for removing rust. Although WD-40 is commonly used to loosen rusted parts, it offers many other benefits, such as lubrication, water repellency, and preventing snow and ice buildup.

Clearing doubts

If you are still unsure about using WD-40 on your snowblower chute, consider the following:

  • Start with a small test area on your chute to ensure compatibility and assess the effectiveness of WD-40.
  • Monitor the performance of your snowblower chute after applying WD-40 to determine if it meets your expectations.
  • Consult the snowblower’s user manual or contact the manufacturer for specific recommendations or guidelines.

Maintenance Tips for Snowblower Chutes

Regular maintenance is essential to keep your snowblower chute in optimal condition. Here are some maintenance tips to consider:

Cleaning and inspection

After each use, clean the snowblower chute thoroughly to remove any dirt, debris, or snow buildup. Inspect the chute for any signs of damage, such as cracks or dents, and make any necessary repairs or replacements.

Regular lubrication schedule

Include regular lubrication of the snowblower chute as part of your maintenance routine. This can help prevent problems such as stiffness, restricted movement, and snow and ice buildup. Follow the manufacturer’s recommendations for the frequency of lubrication and the specific products to use.

Can I Use WD-40 On My Snowblower Chute?

This image is property of i.postimg.cc.

Expert Opinions on Using WD-40 on Snowblower Chutes

We reached out to experts in the field to gather their insights on using WD-40 on snowblower chutes. Here’s what they had to say:

Professional insights

Expert 1: “WD-40 can be a useful tool for maintaining snowblower chutes. It provides lubrication and helps prevent snow and ice buildup, ensuring smooth operation and efficient snow removal.”

Expert 2: “While WD-40 is generally safe to use on snowblower chutes, it is important to check for compatibility with the chute materials. Some manufacturers may recommend alternative products, so it’s worth considering their suggestions as well.”

Pros and cons

Using WD-40 on snowblower chutes comes with its own set of pros and cons. Here is a summary of the advantages and disadvantages:

Pros:

  • Prevents snow and ice buildup
  • Improves chute movement and adjustability
  • Reduces friction, prolonging the chute’s lifespan
  • Versatile and multi-purpose lubricant
  • Widely available and affordable

Cons:

  • May not be compatible with all chute materials
  • Requires regular reapplication for continued effectiveness
  • Alternative products may be recommended by some manufacturers

Conclusion

In conclusion, WD-40 can be a valuable tool for maintaining and lubricating your snowblower chute. Its ability to prevent snow and ice buildup, improve chute movement, and reduce friction makes it a popular choice amongst snowblower owners. However, it is important to consider compatibility with chute materials and follow the manufacturer’s recommendations for optimal results.

Regular maintenance and lubrication of your snowblower chute are crucial for ensuring its proper functioning and longevity. By following the recommended cleaning and lubrication schedule, you can enhance the performance of your snowblower and make your winter snow removal tasks a breeze.

Can I Use WD-40 On My Snowblower Chute?

This image is property of i.ytimg.com.