Category Archives: Home Improvement

How Can I Reduce The Noise Level Of My Snowblower?

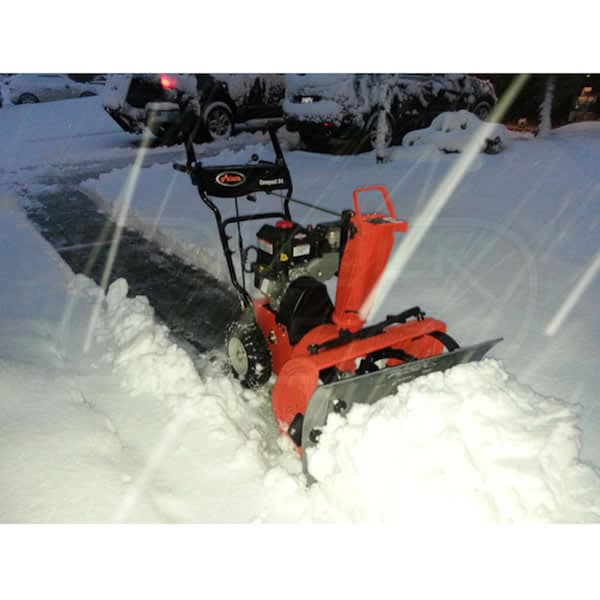
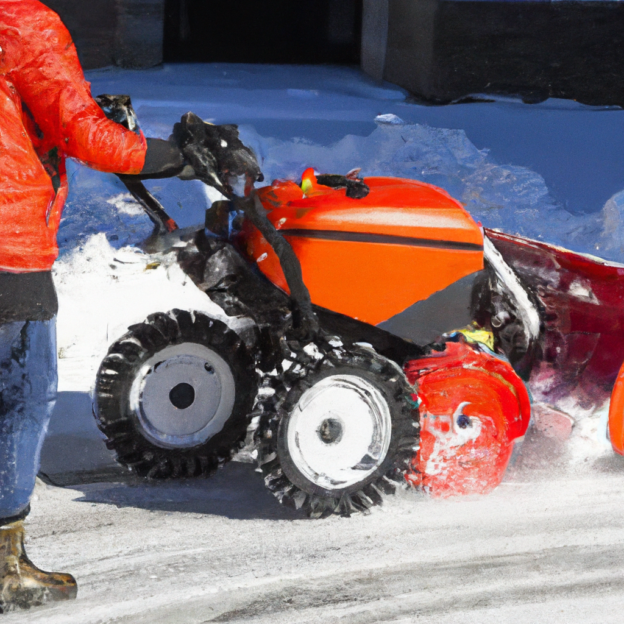
If you’ve ever operated a snowblower, you know the deafening noise it can create, making it a less-than-pleasant experience for both you and your neighbors. But fear not, there are ways to hush that noisy snow-clearing machine! In this article, we’ll walk you through some practical tips and tricks that will help you reduce the noise level of your snowblower, ensuring a quieter and more enjoyable snow removal process for everyone involved. So get ready to tackle that winter wonderland without waking up the entire neighborhood!

How Can I Reduce The Noise Level Of My Snowblower?

Regular Maintenance

Oil Change

One of the most important steps in reducing the noise level of your snowblower is to perform regular oil changes. Over time, the oil in your snowblower can become dirty and lose its effectiveness, leading to increased noise and vibrations. By changing the oil at the recommended intervals, you can ensure that your snowblower’s engine runs smoothly and quietly.

Air Filter Cleaning

A clean air filter is crucial for the proper operation of your snowblower and can also contribute to reducing noise levels. Over time, the air filter can become clogged with dirt, debris, and dust, restricting airflow and causing the engine to work harder. By regularly cleaning or replacing the air filter, you can maintain optimal engine performance and minimize noise.

Spark Plug Replacement

Worn-out spark plugs can cause your snowblower engine to misfire, resulting in increased noise levels. By replacing the spark plugs at the recommended intervals, usually annually or after a certain number of operating hours, you can ensure that your snowblower runs smoothly and quietly.

Belts and Pulleys Check

Loose or worn-out belts and pulleys can not only affect the performance of your snowblower but also contribute to increased noise levels. Regularly inspecting and tightening the belts, as well as checking for signs of wear on the pulleys, can help minimize noise and vibrations.

Tighten Loose Bolts

Over time, the vibrations and constant use of a snowblower can cause bolts to become loose. Loose bolts can create additional noise and may even compromise the overall stability of the machine. By taking the time to inspect and tighten all the bolts regularly, you can reduce unnecessary noise and ensure safe operation.

Proper Operation Practices

Avoid High Speeds

Operating your snowblower at high speeds can significantly increase noise levels. Instead of rushing through the snow-clearing process, try adjusting your pace to a slower speed. Not only will this help reduce noise, but it will also allow the snowblower to work more efficiently.

Use Proper Technique

Using the correct technique while operating your snowblower can also make a difference in noise levels. Instead of forcing the machine through heavy snow, let the snowblower do the work by allowing it to move forward at its own pace. This will not only reduce noise but also prevent unnecessary strain on the engine.

Avoid Overly Dry or Wet Snow

Operating your snowblower in extremely dry or wet snow conditions can increase noise levels. Dry snow can clog the auger and force the machine to work harder, while wet snow can put extra strain on the engine and lead to increased noise. Wait for the snow to reach a desirable moisture level before using your snowblower to reduce noise levels.

Avoid Overloading the Machine

While it may be tempting to push your snowblower to its limits, overloading the machine can cause excessive noise and decrease its lifespan. If the snowfall is particularly heavy, consider making multiple passes instead of trying to remove all the snow in one go. This will not only reduce noise but also ensure the longevity of your snowblower.

Noise Reduction Accessories

Muffler Upgrade

Upgrading the muffler on your snowblower can significantly reduce noise levels. Look for a high-quality muffler specifically designed for your snowblower model. With a properly functioning muffler, the exhaust noise can be greatly reduced, making your snowblower quieter and more enjoyable to use.

Noise Reduction Pads

Another effective way to reduce noise is by using noise reduction pads on your snowblower. These pads are designed to absorb vibrations and dampen the overall noise produced by the machine. Simply attach them to the areas where noise is most prominent, such as the engine assembly or the body of the snowblower, to enjoy a quieter snow-clearing experience.

Insulated Snow Cab

If noise reduction is a top priority for you, consider investing in an insulated snow cab. These cabs provide a shielded enclosure for the operator, effectively reducing noise levels and keeping you protected from wind and snow. Not only will an insulated snow cab make your snowblower quieter, but it will also provide added comfort during those long winter days.

Vibration Dampening

Excessive vibrations can contribute to the overall noise levels of your snowblower. To reduce vibrations and subsequently reduce noise, consider attaching vibration dampening pads to key areas of the machine. These pads absorb vibrations and create a smoother operation, resulting in a quieter and more pleasant snow-clearing experience.

How Can I Reduce The Noise Level Of My Snowblower?

Choose a Quieter Snowblower Model

Compare Noise Levels

When shopping for a snowblower, it is important to compare noise levels between different models. Look for models that are specifically designed for noise reduction and have lower decibel ratings. Manufacturers often provide noise level information in the product specifications or user manuals, allowing you to make an informed decision.

Consider Electric Snowblowers

Electric snowblowers tend to be quieter than their gas-powered counterparts. Since electric snowblowers do not have an internal combustion engine, they produce less noise and vibration. Consider switching to an electric snowblower to enjoy a quieter snow-clearing experience without compromising performance.

Look for Rubber Auger Paddles

Some snowblower models come with rubber auger paddles instead of metal ones. Rubber auger paddles not only provide superior performance in terms of clearing snow but also contribute to noise reduction. As they make contact with the ground and the snow, they produce less noise compared to metal auger paddles.

Check for Noise-reducing Technologies

Certain snowblower models feature noise-reducing technologies that can greatly minimize noise levels. These technologies might include advanced muffler designs, sound-dampening materials, or innovative engine configurations. Look for snowblowers that incorporate such noise-reducing technologies to achieve a quieter snow-clearing experience.

Snowblower Placement and Surroundings

Positioning the Snowblower

Where you position your snowblower during operation can impact noise levels. Whenever possible, try placing your snowblower away from areas where noise could be amplified, such as walls or structures that can reflect sound waves. Opting for an open and spacious area can help dissipate noise effectively.

Use Noise Barriers

To minimize the noise that reaches your surroundings, consider using noise barriers around your snowblower. Constructing a makeshift barrier using materials such as plywood, blankets, or foam panels can help absorb and block some of the noise. By strategically placing these barriers, you can help reduce noise pollution for both yourself and your neighbors.

Distance from Neighbors

When using your snowblower in a residential area, be mindful of the distance between your machine and your neighbors’ properties. Aim to keep a respectful distance to ensure that the noise disturbance is minimized. By showing consideration for the peace and quiet of those around you, you can maintain positive relationships with your neighbors.

Avoid Snowblowing at Inappropriate Times

Check Local Ordinances

Before firing up your snowblower, make sure to check local ordinances or noise regulations in your area. Some municipalities have specific rules regarding noise levels and times when powered machinery, including snowblowers, can be used. By familiarizing yourself with these regulations, you can avoid any potential legal issues and keep noise levels in check.

Respect Quiet Hours

Even if there are no specific noise regulations in your area, it is always important to be considerate of others. Respect designated quiet hours, typically during early mornings, late evenings, or overnight, to avoid causing unnecessary noise disturbances. Being a good neighbor and mindful of others’ peace and tranquility can go a long way in fostering positive relationships within your community.

Consider Noise-cancelling Ear Protection

Earplugs

In addition to taking steps to reduce noise levels from the snowblower itself, it’s also essential to protect your own hearing. Wearing earplugs specifically designed for noise cancellation can greatly reduce the impact of loud noises on your ears. Invest in a high-quality pair of earplugs that provide adequate protection without compromising your ability to hear important sounds and warnings.

Ear Muffs

If earplugs don’t suit your comfort or preference, consider using ear muffs designed for noise reduction. These over-ear devices provide excellent protection from loud noises, including the noise generated by your snowblower. Look for ear muffs that have a high noise reduction rating (NRR) to ensure maximum hearing protection and comfort.

Regularly Inspect and Maintain the Silencer

Clean the Silencer

The silencer, or the exhaust system, plays a vital role in reducing the noise emitted by your snowblower’s engine. Regularly inspect the silencer for any blockages or buildup that could restrict airflow and increase noise levels. Clean the silencer as needed, following the manufacturer’s instructions, to ensure optimal performance and noise reduction.

Replace Worn-out Parts

Over time, the silencer and its components, including gaskets and seals, may wear out and lose their effectiveness in reducing noise. Inspect these parts regularly and replace any worn-out or damaged components. By keeping the silencer in good condition, you can ensure that it continues to perform its noise-reduction function effectively.

Consult a Professional

Seek Expert Advice

If you’ve tried various methods to reduce the noise of your snowblower without success, it may be time to seek expert advice. Consult with a professional snowblower technician or a knowledgeable dealer who can provide guidance on specific noise reduction techniques or recommend advanced solutions tailored to your snowblower model.

Explore Soundproofing Options

For those who require the utmost peace and quiet while operating their snowblower, it may be worth exploring soundproofing options. Soundproofing materials, such as acoustic foam or mass-loaded vinyl, can effectively reduce noise levels when applied to the walls, floor, or ceiling of a dedicated snowblower storage area. Consult a professional specializing in soundproofing to determine the best options for your specific needs.

Additional Tips

Use Snowblower Covers

When not in use, consider using a snowblower cover to protect and reduce noise from your machine. A cover can help muffle the sound and prevent dust, debris, or moisture from entering your snowblower, ensuring that it remains in good working condition and ready for use.

Try Soundproofing the Surrounding Area

If noise reduction is a top priority, consider soundproofing the surrounding area where you operate your snowblower. This could include adding insulation to walls and doors, installing sound-absorbing panels, or even constructing a dedicated enclosure. By minimizing sound reflections and dampening noise, you can create a quieter environment for both yourself and those around you.

In conclusion, reducing the noise level of your snowblower requires a combination of regular maintenance, proper operation practices, noise reduction accessories, strategic placement, and consideration for others. By implementing these tips and techniques, you can enjoy a quieter snow-clearing experience while maintaining positive relationships with your neighbors. Remember to prioritize your safety and protect your hearing by using appropriate ear protection. If all else fails, consult with professionals who can provide expert advice and explore advanced soundproofing options.

Can I Run A Snowblower Without The Auger Belt?

So, you’ve found yourself in a predicament: the auger belt on your snowblower has snapped, leaving you wondering if you can still use the machine without it. After all, shoveling snow by hand is not exactly your idea of a fun time. Well, before you grab that shovel, let’s take a closer look at whether or not it’s possible to run a snowblower without the auger belt and what consequences you might face if you do.

Can I Run A Snowblower Without The Auger Belt?

Can I Run A Snowblower Without The Auger Belt?

Introduction

If you find yourself in a situation where your snowblower’s auger belt breaks or malfunctions, you might wonder if you can still use the machine without it. In this article, we will explore the importance of the auger belt, the potential problems you may encounter when running a snowblower without it, the safety concerns involved, alternative options, and the steps to take if you choose to run a snowblower without the auger belt.

Importance of the Auger Belt

The auger belt in a snowblower is a critical component that powers the turning of the auger, which is responsible for gathering and propelling snow into the machine. By driving the auger, the belt allows for efficient and effective snow removal. Without the auger belt, the snowblower loses its primary mechanism for clearing snow, which can significantly limit its performance.

Can I Run A Snowblower Without The Auger Belt?

Potential Problems Without the Auger Belt

Running a snowblower without the auger belt can lead to several issues. First and foremost, the machine will be unable to effectively clear snow from driveways, walkways, and other areas. This can result in incomplete snow removal, leaving behind a messy and potentially hazardous surface.

Additionally, overworking the machine without the auger belt may put unnecessary stress on the remaining components, such as the engine or drive system. This increased strain can lead to premature wear and tear, reducing the snowblower’s overall lifespan. It’s crucial to consider the potential long-term damage when deciding whether or not to run a snowblower without the auger belt.

Safety Concerns

Apart from the reduced performance and potential damage to the snowblower, there are significant safety concerns associated with running the machine without the auger belt. When functioning correctly, the auger helps prevent clogging by breaking up and propelling snow. Without it, the snowblower may experience frequent clogs, causing the machine to stall or malfunction.

Attempting to clear clogged snow manually while the snowblower is still running can lead to serious injuries. The exposed auger poses a significant risk, as it rotates rapidly and can cause severe cuts or amputations. It is crucial to prioritize safety and avoid using a snowblower without the auger belt, especially when dealing with heavy snowfall.

Alternative Options

If your snowblower’s auger belt is broken or missing, it is generally recommended to replace it rather than attempting to operate the machine without it. However, if you must clear snow immediately and cannot obtain a replacement belt right away, there are alternative options available.

One option is manually shoveling the snow using a traditional snow shovel. While this may require more physical effort and time, it eliminates the safety risks associated with operating a snowblower without the auger belt.

Another alternative is to rent or borrow a snowblower with a functioning auger belt until you can replace yours. This allows you to clear snow efficiently without compromising safety or risking damage to your own machine.

Steps to Run a Snowblower Without the Auger Belt

1. Disconnecting the Auger Belt

If you still choose to run your snowblower without the auger belt temporarily, it is crucial to disconnect it properly. Start by turning off the snowblower and removing the spark plug wire to ensure it cannot accidentally start. Then, locate the auger belt tensioner pulley and release the tension by loosening or removing the attachment bolts or screws.

2. Adjusting the Snowblower’s Settings

Once the auger belt is disconnected, you need to adjust your snowblower’s settings to accommodate the belt’s absence. Consult your snowblower’s manual for specific instructions on disengaging the auger and any other necessary adjustments. Failure to properly adjust the settings may result in an imbalance and strain on the remaining components.

3. Clearing Snow without the Auger Belt

When using the snowblower without the auger belt, it is essential to focus on smaller snow accumulations. The machine will have limited clearing capability, so attempting to remove large amounts of snow can lead to clogs and potential damage. Take your time and clear snow incrementally, allowing the machine to handle smaller loads effectively.

4. Regular Maintenance and Care

After running the snowblower without the auger belt, it is crucial to perform regular maintenance and care to keep the machine in good condition. Clean and inspect the machine thoroughly, removing any remaining snow or debris. Check for any signs of damage or wear and address them promptly. Additionally, ensure the auger belt is replaced as soon as possible to restore the snowblower’s full functionality.

5. Replacing the Auger Belt

Running a snowblower without the auger belt should only be a temporary solution. As soon as possible, you should obtain a replacement auger belt and install it according to the manufacturer’s instructions. Replacing the belt allows you to restore your snowblower’s intended performance and ensure efficient snow removal.

Conclusion

In conclusion, while it is possible to run a snowblower without the auger belt, it is not recommended. Doing so can lead to limited snow-clearing capability, potential damage to the machine, and significant safety risks. It is best to prioritize safety and obtain a replacement auger belt promptly. If immediate snow removal is necessary, consider alternative options such as manual shoveling or borrowing a functioning snowblower. By properly maintaining your snowblower and addressing any issues promptly, you can enjoy efficient and safe snow removal for years to come.

How Do I Sharpen The Blades Of My Snowblower?

So you’ve got yourself a trusty snowblower to tackle the winter weather, but now you find yourself wondering, “How do I sharpen the blades of my snowblower?” Well, fret not because we’ve got you covered. Keeping your snowblower’s blades sharp is essential for efficient snow removal, ensuring that it effortlessly cuts through the snow and keeps your driveway clear. In this article, we’ll walk you through a step-by-step guide on how to sharpen the blades of your snowblower, giving you the confidence to take on even the heaviest snowfall.

Why should I sharpen the blades of my snowblower?

Sharpening the blades of your snowblower is an essential maintenance task that ensures optimal performance and longevity of your machine. Over time, the blades of your snowblower can become dull due to repeated use, hitting rocks or debris, or general wear and tear. Dull blades not only decrease the efficiency of your snowblower but also put unnecessary strain on the engine, leading to reduced power and potential damage to other parts of the machine. By regularly sharpening the blades, you can ensure smooth and efficient operation, making clearing snow a breeze.

When should I sharpen the blades?

The frequency of sharpening the blades largely depends on the usage and the condition of the blades. As a general guideline, it is recommended to sharpen the blades of your snowblower at least once a season or after every 25 hours of use. However, it’s important to keep an eye on the blades for signs of wear, such as reduced cutting performance or visible nicks and chips. If you notice any of these signs, it’s a good indication that it’s time to sharpen your blades. Additionally, if you frequently encounter icy or gravelly terrain, you may need to sharpen the blades more often.

How Do I Sharpen The Blades Of My Snowblower?

What do I need to sharpen the blades?

To sharpen the blades of your snowblower, you will need a few tools and materials. Here’s a list of what you’ll need:

  1. Safety goggles: Protect your eyes from any debris that may fly off during the sharpening process.
  2. Gloves: Ensure your hands are protected from the blades and any sharp edges.
  3. Socket wrench set: Required for removing the bolts that secure the blades in place.
  4. Bench vise or workbench: Provides a stable and secure surface for sharpening the blades.
  5. Metal file: Choose a file with medium grit, preferably a mill bastard file, for effective sharpening.
  6. Lubricating oil: Use oil to prevent rusting and corrosion of the blades after sharpening.
  7. Cleaning brush: Helps remove any dirt, debris, or rust from the blades before sharpening.
  8. Rags or paper towels: Use these to clean and wipe the blades throughout the sharpening process.

By gathering these tools and materials beforehand, you’ll be fully prepared to tackle the blade sharpening process.

Preparing for the blade sharpening process

Proper preparation is crucial for a successful blade sharpening process. Before you begin, it’s important to take a few necessary precautions to ensure a safe and efficient experience.

1. Disconnect the spark plug wire

Safety should always be your top priority. Before working on your snowblower’s blades, make sure to disconnect the spark plug wire to prevent any accidental starts. This step will eliminate the risk of injuries caused by the machine accidentally turning on while you’re handling the blades.

2. Remove the blades

To access and sharpen the blades, you’ll need to remove them from your snowblower. Start by tilting the snowblower so it rests on its handlebars, making sure the fuel tank is empty to prevent leaks. Then secure the snowblower in this tilted position by using a block or wedges. With the snowblower in a stable position, use a socket wrench to remove the bolts that hold the blades in place. Carefully lift the blades out of the housing, ensuring you keep track of all the parts and bolts removed.

3. Clean the blades

Once the blades are removed, take the time to thoroughly clean them. Use a cleaning brush to remove any dirt, debris, or rust that may have accumulated on the blades. Pay special attention to the areas around the cutting edges and the center hole. Removing these contaminants will ensure a cleaner sharpening process and a more effective end result.

4. Secure the blades for sharpening

Before you begin sharpening, it’s important to secure the blades properly. You can use a bench vise or a workbench with clamps to stabilize the blades during the sharpening process. Make sure the blades are held firmly in place, allowing you to focus on sharpening without any unnecessary movements. This step will not only ensure your safety but also guarantee a more precise and consistent sharpening process.

How Do I Sharpen The Blades Of My Snowblower?

Sharpening the snowblower blades

Now that you’ve properly prepared for the blade sharpening process, it’s time to sharpen the blades themselves. Follow these steps to achieve sharp and effective cutting edges:

  1. Put on your safety goggles and gloves to protect yourself from any potential injuries.
  2. Take the metal file and position it against the cutting edge of the first blade. Hold the file at a slight angle, roughly matching the existing angle of the blade. Using consistent light strokes, file across the cutting edge from one end to the other, maintaining the same angle throughout. Repeat this motion several times, exerting equal pressure with each stroke.
  3. After several passes, inspect the cutting edge for sharpness. If necessary, continue filing until you achieve the desired sharpness. Be mindful not to remove too much material, as this can weaken the blades.
  4. Once satisfied with the first blade, repeat the sharpening process for all remaining blades. Remember to maintain the same angle and apply consistent pressure to ensure uniform sharpness.
  5. After sharpening all the blades, carefully wipe away any metal shavings and debris. Use a rag or paper towel to clean the blades thoroughly, ensuring no residue is left behind.

Safety precautions

While sharpening the blades of your snowblower, it’s crucial to follow important safety precautions to prevent accidents or injuries. Here are a few key safety measures to keep in mind:

  1. Always wear safety goggles to protect your eyes from flying debris.
  2. Use gloves to protect your hands from sharp edges and potential cuts.
  3. Disconnect the spark plug wire before removing the blades to prevent accidental starts.
  4. Secure the blades properly using a bench vise or workbench to avoid any slippage or movement during sharpening.
  5. Maintain a consistent angle and pressure while filing to ensure even sharpening and avoid removing excessive material.
  6. Check the blades for balance after sharpening. If they are imbalanced, it’s essential to adjust or replace them to maintain smooth operation.

By adhering to these safety precautions, you can ensure a safe and effective blade sharpening process, prolonging the life of your snowblower and enhancing its performance.

In conclusion, sharpening the blades of your snowblower is vital for maintaining its efficiency and prolonging its lifespan. Regularly sharpening the blades, following the appropriate steps and safety precautions, will allow you to tackle the toughest winter conditions with ease. By investing a little time in maintaining your snowblower, you guarantee dependable performance every time you need to clear snow from your driveway or walkway. So, grab your tools, follow the steps outlined, and get ready for a winter season filled with effortless snow clearing!

How Do I Adjust The Tension On My Snowblower’s Belts?

If you find yourself struggling with the performance of your snowblower, the issue may lie with the tension on its belts. Adjusting the tension on your snowblower’s belts can greatly improve its efficiency and effectiveness in clearing snow. However, knowing how to properly adjust this tension can be a challenge for many snowblower owners. In this article, we will walk you through the step-by-step process of adjusting the tension on your snowblower’s belts, ensuring that you can breeze through your winter chores with ease.

How Do I Adjust The Tension On My Snowblowers Belts?

Inspecting the Belt Tension

Checking the Belt Condition

Before adjusting the tension on your snowblower’s belts, it is crucial to inspect their condition. Start by visually examining the belts for any signs of wear, such as fraying, cracking, or missing chunks. Additionally, check for any oil or grease stains that may indicate a need for replacement. It is important to ensure that the belts are in good condition before attempting any adjustments.

Determining the Belt Tightness

To determine if your snowblower’s belts need adjustment, you need to check their tightness. This can be done by pressing the belts in the center with your finger, applying moderate pressure. Ideally, the belts should have a slight give but should not be too loose or too tight. If the belts feel loose or saggy, they may require tightening. On the other hand, if they feel extremely tight or difficult to press, they may need to be loosened.

Preparing for Belt Adjustment

Gathering the Necessary Tools

Before you start adjusting the belt tension, make sure you have the necessary tools at hand. Typically, you will need a wrench or a socket set to loosen or tighten the belt adjustment mechanism. Additionally, it is helpful to have a flashlight to provide better visibility, especially if you are working in dimly lit areas. Gathering these tools beforehand will save you time and make the adjustment process more efficient.

Taking Safety Precautions

Adjusting a snowblower’s belt tension involves working with moving parts and potentially high tension. Therefore, it is important to take some safety precautions to prevent any accidents or injuries. Firstly, ensure that the snowblower is turned off and the spark plug is disconnected to avoid accidental startup. Secondly, wear appropriate protective gear such as safety goggles and gloves to protect yourself from any debris or sharp edges. Safety should always be your top priority when working on any machinery.

Adjusting the Belt Tension

Locating the Belt Adjustment Mechanism

To adjust the belt tension, you need to locate the belt adjustment mechanism on your snowblower. This mechanism is usually found near the engine or the transmission and may vary depending on the make and model of your snowblower. Refer to the user manual or consult the manufacturer’s website for specific instructions on where to find the adjustment mechanism on your particular snowblower.

Loosening the Adjustment Mechanism

Once you have located the belt adjustment mechanism, you can proceed to adjust the tension. Typically, loosening the adjustment mechanism will relieve tension on the belts. Using the appropriate wrench or socket, turn the adjustment mechanism counterclockwise to loosen it. It is important to only loosen the mechanism enough to provide adequate slack in the belts, as over-loosening can lead to belt slippage or inefficiency in operation.

Tightening the Adjustment Mechanism

If your snowblower’s belts are too loose and require tightening, you can use the adjustment mechanism to achieve the desired tension. With the wrench or socket, turn the adjustment mechanism clockwise to tighten it. Remember to only tighten the mechanism enough to eliminate excess slack in the belts without making them overly tight. The right amount of tension will ensure optimal performance and longevity of the belts.

How Do I Adjust The Tension On My Snowblowers Belts?

Testing the Belt Tension

Starting the Snowblower

After adjusting the belt tension, it is important to test the snowblower to ensure that the belts are appropriately adjusted. Start by reconnecting the spark plug and starting the snowblower as you normally would. Allow the engine to warm up for a few minutes to ensure smooth operation. Engage the snowblower’s drive system and observe its performance to assess the effectiveness of the belt adjustment.

Observing the Belt Movement

While the snowblower is running, carefully observe the movement of the belts. They should be running smoothly without any excessive slipping, squeaking, or grinding noises. Additionally, check for any signs of the belts rubbing against other parts of the snowblower, as this could indicate a misalignment or further adjustment required. The belts should move steadily and without interruption for proper operation.

Fine-tuning the Tension

If you notice any issues with the belt movement or if the snowblower’s performance is not optimal, you may need to fine-tune the belt tension further. This can be done by re-adjusting the belt adjustment mechanism slightly. Loosening or tightening the mechanism in small increments and testing the snowblower’s performance after each adjustment will help you find the perfect tension for your specific snowblower.

Maintenance Tips for Belt Longevity

Cleaning the Belt

To ensure the longevity of your snowblower’s belts, regular cleaning is essential. Over time, debris and grime can accumulate on the belts, causing them to wear out faster. To clean the belts, use a soft brush or cloth to gently remove any dirt or debris. Avoid using harsh chemicals or solvents, as they can damage the belts. Regular cleaning will prolong the life of the belts and prevent premature wear.

Inspecting for Wear and Tear

Regular inspection of the belts is crucial for identifying any signs of wear and tear. Check the belts periodically for any fraying, cracking, or signs of damage. If you notice any significant wear or damage, it is advisable to replace the belts promptly. Ignoring worn-out belts can lead to inefficiency and potential breakdown of other components, resulting in more significant repairs or replacements.

Lubricating the Belt Mechanism

Keeping the belt adjustment mechanism properly lubricated is essential for smooth operation and longevity. Use a silicone-based lubricant or a specialized belt lubricant to lubricate the moving parts of the mechanism. Apply the lubricant according to the manufacturer’s instructions, ensuring that you do not over-lubricate. Proper lubrication will reduce friction, prevent unnecessary wear, and extend the lifespan of the belt adjustment mechanism.

Common Issues and Troubleshooting

Belt Slippage

If you notice that your snowblower’s belts are slipping during operation, it indicates an issue with the tension. Check the tension and ensure that the belts are appropriately tightened. If the tension is correct and the belts continue to slip, inspect them for any signs of wear or damage. Worn-out or damaged belts may need to be replaced to resolve the slippage issue. Additionally, check for any debris or obstructions that may be causing the belts to slip.

Excessive Belt Tightness

If the belts on your snowblower feel excessively tight, it may hinder the snowblower’s performance and put unnecessary strain on the belts themselves. Check the tension and ensure that the belts are not overly tight. Loosen the adjustment mechanism slightly if necessary. Remember that the belts should have a slight give but should not be too loose or too tight for optimal operation.

Incorrect Belt Size

Using the correct belt size is essential for proper tension and operation of your snowblower. If you have recently replaced the belts and notice issues with tension or operation, ensure that the new belts match the specifications provided by the manufacturer. Using incorrect belt sizes can result in poor performance and premature wear. Always consult the user manual or seek professional assistance when selecting and installing new belts.

Additional Measures for Optimal Performance

Proper Storage

When not in use, proper storage of your snowblower is crucial to maintain its performance and extend the life of the belts. Store the snowblower in a clean, dry area away from direct sunlight and extreme temperatures. Ensure that the belts are not under tension during storage to prevent unnecessary wear. Following the manufacturer’s guidelines for winterization and storage will help keep your snowblower in optimal condition.

Regular Snowblower Maintenance

In addition to belt adjustments, regular maintenance of your snowblower is essential for optimal performance. This includes checking and replacing fluids, inspecting and cleaning other components, and ensuring proper lubrication. Regularly refer to the user manual for maintenance schedules and follow the prescribed maintenance tasks accordingly. Proper maintenance will prevent premature wear of the belts and other integral parts of the snowblower.

Occasional Professional Service

While performing regular maintenance and adjustments can significantly improve the lifespan and performance of your snowblower’s belts, there may be certain repairs or adjustments that require professional expertise. If you encounter complex issues or if you are unsure about the correct adjustments, it is advisable to seek the assistance of a professional snowblower technician or authorized service center. They will have the knowledge and experience to diagnose and resolve any intricate problems effectively.

Understanding Your Snowblower’s Belt System

Overview of Belt Components

A snowblower’s belt system consists of several components that work together to transfer power from the engine to the auger and other moving parts. These components typically include drive belts, auger belts, pulleys, and tensioners. The drive belts transfer power from the engine to the transmission, while the auger belts engage the snowblower’s auger for snow removal. Pulleys and tensioners help maintain proper belt tension and ensure efficient operation.

How the Belt System Works

The snowblower’s belt system operates on the principle of transferring rotational energy from the engine to the moving parts. When the engine is started, it spins the drive pulley, which, in turn, spins the drive belts. The rotation of the drive belts engages the auger pulley and auger belts, enabling the auger to break up and discharge the snow. Proper tension in the belts is vital for efficient power transfer and effective snow removal.

Different Types of Snowblower Belts

Single-Stage Snowblower Belts

Single-stage snowblowers typically use a single belt that drives both the engine and the auger. These belts are usually V-belts or serpentine belts made of durable rubber materials. Proper tension in these belts is crucial for both engine operation and auger performance. Regular adjustment and maintenance of the single belt ensure optimal power transfer and efficient snow clearing.

Two-Stage Snowblower Belts

Two-stage snowblowers utilize two separate belts for driving the engine and powering the auger and impeller. These belts are usually cogged or notched belts made of durable materials such as Kevlar. The drive belt connects the engine to the transmission, while the auger belt engages the auger and impeller for snow removal. Regular adjustment and inspection of these belts are essential for effective snowblower performance.

Safety Precautions while Adjusting Belts

Disconnecting the Spark Plug

Before making any adjustments to the snowblower’s belts, it is critical to disconnect the spark plug. This prevents accidental startup of the engine while you are working on the belts. Locate the spark plug wire and gently pull it off the spark plug. Keep the wire away from the spark plug to ensure that there is no connection. This precaution guarantees your safety and eliminates the risk of injury.

Wearing Protective Gear

Always wear appropriate protective gear while working on any machinery, including a snowblower. This includes safety goggles to protect your eyes from flying debris and gloves to shield your hands from sharp edges or burns. Additionally, consider wearing sturdy footwear to provide stability and protect your feet from falling objects. Safety gear is essential to minimize the risk of accidents or injuries while adjusting the tension on your snowblower’s belts.

By following these guidelines and performing regular inspections and adjustments, you can ensure optimal performance and extend the life of your snowblower’s belts. Remember to prioritize safety, take necessary precautions, and consult the user manual or seek professional assistance when needed. With proper maintenance and care, your snowblower will reliably tackle those winter snowfalls year after year.

How Do I Replace The Drive Cable On My Snowblower?

So, you’ve found yourself in a bit of a predicament with your snowblower. The drive cable seems to have given up on you, and now you’re left wondering how on earth you’re going to replace it. Well, fear not, because in this article, we’re going to walk you through the steps to get your snowblower up and running again. Don’t worry if you’re not the handiest person around – we’ll break it down in simple terms, making sure you’re back to clearing that driveway in no time.

How Do I Replace The Drive Cable On My Snowblower?

This image is property of pixabay.com.

Overview of Drive Cable Replacement

Replacing the drive cable on your snowblower is a necessary task when the cable becomes worn or broken. This article will provide you with step-by-step instructions to successfully replace the drive cable and ensure your snowblower is running smoothly. By following these simple steps, you’ll be able to get your snowblower back up and running in no time.

Step 1: Preparation

Before you begin the drive cable replacement process, it’s important to gather the necessary tools. You will need a wrench or socket set, as well as any other tools specified by the manufacturer. Safety should always be a priority, so make sure to wear gloves and protective eyewear. It’s also a good idea to review the safety precautions outlined in your snowblower’s manual before starting any maintenance tasks.

How Do I Replace The Drive Cable On My Snowblower?

This image is property of pixabay.com.

Step 2: Accessing the Drive Cable

To access the drive cable, you’ll need to remove the drive cover. Depending on the model of your snowblower, this may involve removing a few screws or simply releasing some clips. Carefully lift off the drive cover and set it aside. Once the cover is removed, you’ll be able to locate the drive cable.

Step 3: Disconnecting the Old Cable

Before you can install the new drive cable, you’ll need to disconnect the old one. Start by releasing the tension on the cable. This can typically be done by loosening or removing a tensioning spring or adjusting screw. Once the tension is released, carefully remove the cable from the transmission. Take note of how the cable is routed through any guides or pulleys so that you can properly install the new cable later. Finally, detach the cable from the control handle by removing any retaining clips or screws.

How Do I Replace The Drive Cable On My Snowblower?

This image is property of pixabay.com.

Step 4: Installing the New Cable

With the old cable removed, it’s time to install the new one. Begin by attaching the new cable to the control handle using any retaining clips or screws. Make sure it is securely fastened. Next, connect the new cable to the transmission, following the same path as the old cable. It’s important to ensure the cable is properly seated in any guides or pulleys to prevent future issues.

Step 5: Adjusting the Cable

After the new drive cable is installed, it’s crucial to adjust the tension. This will ensure proper operation of your snowblower. Refer to your snowblower’s manual for specific instructions on how to adjust the tension. Typically, this involves tightening or loosening an adjustment screw near the control handle. Once you’ve made the necessary adjustments, verify that the cable moves smoothly and there are no signs of excessive slack or tension.

How Do I Replace The Drive Cable On My Snowblower?

Step 6: Reassembling the Snowblower

To complete the drive cable replacement, it’s time to reassemble the snowblower. Carefully place the drive cover back onto the snowblower, aligning it with the appropriate screw holes or clips. Once in place, secure all fasteners to ensure the cover is securely attached. Take a moment to double-check that all components are properly aligned and nothing is obstructing the movement of the drive cable.

Tips and Warnings

It’s always important to double-check the compatibility of the replacement drive cable with your specific snowblower model. Using an incompatible cable may lead to further damage or improper operation. Be sure to follow the manufacturer’s instructions carefully throughout the entire process. They provide specific guidance based on the design and specifications of your snowblower. Lastly, exercise extra caution when working with sharp parts during the drive cable replacement process to avoid injury.

How Do I Replace The Drive Cable On My Snowblower?

Frequently Asked Questions

Q: How often should I replace the drive cable?

A: The lifespan of a drive cable can vary depending on usage and maintenance. It’s a good idea to inspect the cable regularly for signs of wear or damage and replace it as needed. Generally, it is recommended to replace the drive cable every 1 to 2 years or when any issues arise.

Q: Can I use a universal drive cable?

A: While universal drive cables are available, it’s typically recommended to use an exact replacement cable specified by the manufacturer. This ensures proper fit and function, minimizing the risk of compatibility issues or additional damage to your snowblower.

Q: What if I cannot find the exact replacement cable?

A: If an exact replacement cable is not available, reach out to the manufacturer or an authorized dealer for guidance. They may be able to provide alternative options or suggestions for suitable replacements.

Conclusion

Replacing the drive cable on your snowblower is a task that can be completed with a few basic tools and some careful attention to detail. By following the steps outlined in this article, you’ll be able to replace your drive cable and keep your snowblower running smoothly. Remember to prioritize safety throughout the process and consult your snowblower’s manual for any specific instructions. With the new drive cable properly installed and adjusted, you’ll be ready to take on any snowfall with ease.

Can I Attach A Plow To My Snowblower?

So you’ve invested in a snowblower to tackle those hefty snowfalls, but now you’re wondering if you can take it a step further and attach a plow to it. Well, the answer is, sort of. While not all snowblowers are designed to accommodate a plow attachment, there are some models out there that offer this option. In this article, we’ll explore the possibilities and limitations of attaching a plow to your snowblower, so you can make an informed decision about how to handle those snowy driveways.

Can I Attach A Plow To My Snowblower?

This image is property of cdn.shopify.com.

Safety Considerations

When it comes to attaching a plow to your snowblower, there are several important safety considerations to keep in mind. By taking the necessary precautions, you can ensure that the process is done safely and effectively.

Evaluate the Power of Your Snowblower

Before you even think about attaching a plow to your snowblower, it’s crucial to evaluate the power of your machine. Plowing snow can be a demanding task, and not all snowblowers are designed to handle the additional weight and strain of a plow attachment. Make sure your snowblower has enough power to handle the extra workload without compromising its performance or causing damage.

Check the Manufacturer’s Guidelines

To ensure safe and proper attachment, it’s essential to check the manufacturer’s guidelines. Different snowblower models may have specific recommendations or restrictions when it comes to attaching a plow. The guidelines will provide you with valuable information regarding the compatibility, weight limits, and necessary modifications for your snowblower.

Ensure Proper Weight Distribution

When attaching a plow to your snowblower, it’s important to ensure proper weight distribution. Adding a plow can increase the weight on the front of your snowblower, which may affect its balance and maneuverability. Be mindful of this and make adjustments as needed to maintain stability while operating the snowblower with the plow attached.

Choosing the Right Plow

Choosing the right plow for your snowblower is crucial for optimal performance and efficiency. Consider the following factors when selecting a plow attachment.

Consider the Width and Size

When choosing a plow, consider the width and size that will work best for your snowblower. The plow should be wide enough to cover a significant area with each pass, but not too wide that it becomes difficult to maneuver or puts excessive strain on your snowblower. Take accurate measurements of your snowblower and consult the manufacturer’s guidelines to ensure you choose a plow that is compatible in size.

Determine the Mounting System Compatibility

Check the mounting system compatibility of the plow attachment with your snowblower. Different snowblower models may have different mounting systems, so it’s crucial to select a plow that is compatible with your specific snowblower. This will ensure a secure and stable attachment that can withstand the forces exerted during plowing.

Opt for Adjustable Plow Angles

An adjustable plow angle is another important feature to consider. This allows you to adapt the plow to different snow conditions and angles, making your plowing more efficient and effective. An adjustable plow angle also enables you to clear snow off to the side rather than directly in front, reducing the need for multiple passes.

Can I Attach A Plow To My Snowblower?

This image is property of Amazon.com.

Attachment Process

Attaching a plow to your snowblower involves several steps. Follow these guidelines to ensure a smooth and secure attachment process.

Gather the Necessary Tools

Before you begin, gather all the necessary tools for the attachment process. This may include wrenches, pliers, a drill, and any other tools specified in the manufacturer’s guidelines. Having everything on hand will make the process more efficient and prevent delays.

Prepare the Snowblower

Before attaching the plow, make sure your snowblower is in proper working condition. Check the engine oil, fuel levels, and any other maintenance requirements outlined in the snowblower’s manual. Ensuring that your snowblower is in good shape will help prevent any issues during the attachment process and ensure optimal performance.

Install the Mounting Bracket

Follow the manufacturer’s guidelines to install the mounting bracket onto your snowblower. The mounting bracket provides the necessary support and stability for the plow attachment. Make sure to fasten the bracket securely, following the provided instructions.

Attach the Plow to the Mounting Bracket

Once the mounting bracket is securely in place, attach the plow to the bracket according to the manufacturer’s instructions. Double-check that all connections are tight and secure before proceeding.

Secure the Plow to the Snowblower

After attaching the plow to the mounting bracket, take the time to double-check all connections and ensure that the plow is securely fastened to the snowblower. This will prevent any unintentional detachment or accidents during operation.

Maintenance and Upkeep

Proper maintenance and upkeep of your plow attachment are essential for its longevity and performance. Follow these maintenance tips to keep your plow in optimal condition.

Regularly Inspect and Clean the Plow

Regular inspections and cleanings are necessary to avoid the buildup of dirt, debris, and rust on your plow attachment. After each use, thoroughly inspect the plow for any signs of damage or wear. Clean off any accumulated snow, ice, or salt residue to prevent corrosion.

Sharpen the Blade as Needed

Over time, the plow blade may become dull due to constant contact with the ground and abrasive materials. Check the blade regularly and sharpen it as needed to ensure efficient cutting and clearing of snow. A sharp blade will also reduce strain on your snowblower.

Lubricate Moving Parts

Keep all the moving parts of your plow attachment properly lubricated to prevent rust and ensure smooth operation. Regularly lubricate hinges, pivots, and other points of articulation according to the manufacturer’s recommendations.

Check and Adjust Mounting Hardware

Periodically inspect the mounting hardware of your plow attachment to ensure it remains tight and secure. Vibrations and the forces exerted during plowing can loosen bolts and nuts, compromising the stability of the attachment. Follow the manufacturer’s guidelines for proper inspection and adjustment.

Store the Plow Properly

When not in use, store your plow attachment in a clean, dry, and secure location. Protect it from exposure to the elements and potential damage. Follow the manufacturer’s recommendations for specific storage instructions, such as disassembling or covering the plow.

Can I Attach A Plow To My Snowblower?

This image is property of www.snowblowersdirect.com.

Plowing Techniques

Learning and practicing proper plowing techniques will help you achieve the best results and avoid any potential mishaps. Keep the following tips in mind when operating your snowblower with the attached plow.

Start with a Slow Speed

Begin plowing at a slow speed to get a feel for how the snowblower and plow combination handle. Gradually increase the speed as you gain confidence and experience. Starting slow allows you to better navigate obstacles and ensures a smoother and more controlled plowing process.

Avoid Plowing on Uneven Surfaces

It’s important to avoid plowing on uneven surfaces to prevent damage to both your snowblower and the plow attachment. Be cautious of bumps, curbs, rocks, and other obstacles that could cause the plow to catch or the snowblower to lose balance. Opt for a different route or take the necessary precautions to navigate around such obstacles.

Use Overlapping Passes

To ensure thorough snow removal, use overlapping passes when plowing. This will help eliminate any missed areas and prevent snow from being left behind. Overlapping passes also distribute the workload more evenly, preventing excessive strain on specific areas of the plow blade.

Avoid Plowing Near Obstacles

When plowing, it’s essential to avoid plowing near obstacles such as cars, fences, or buildings. The plow attachment may inadvertently hit these obstacles, causing damage to both the plow and the snowblower. Maintain a safe distance to prevent any accidents or collateral damage.

Clear Snowbank Buildup

During the plowing process, snow can accumulate on the sides of the plow, creating a snowbank. Periodically clear this buildup to prevent it from interfering with the plowing operation or affecting visibility. Use a shovel or other suitable tool to remove the excess snow from the plow.

Additional Attachments and Accessories

While a plow attachment can be effective on its own, there are additional attachments and accessories that can enhance its performance and versatility.

Consider Snow Tire Chains

Snow tire chains can provide increased traction, especially in icy or slippery conditions. Consider installing snow tire chains on your snowblower to improve its traction while plowing. This will help prevent sliding and ensure more efficient snow removal.

Explore Drift Cutters and Bumpers

Drift cutters are attachments that help prevent snow from drifting over the top of the plow blade. They can be especially useful in windy conditions or areas prone to heavy snow accumulation. Bumpers, on the other hand, provide added protection to the front of your snowblower and plow. Explore these accessories to enhance the performance and durability of your plow attachment.

Install Weight Kits for Improved Traction

Weight kits are designed to add additional weight to the snowblower, enhancing its traction and stability. Depending on the model of your snowblower, weight kits may be available as an optional accessory. Consider installing a weight kit if you frequently encounter challenging snow conditions or if your snowblower requires additional stability for plowing.

Can I Attach A Plow To My Snowblower?

This image is property of www.snowblowersdirect.com.

Limitations and Alternatives

It’s important to understand the limitations of a snowblower with a plow attachment and explore alternative options when necessary.

Not Suitable for Heavy Duty or Deep Snow

While a snowblower with a plow attachment can effectively handle moderate snowfall, it may not be suitable for heavy-duty or deep snow conditions. In such cases, it’s important to consider alternative methods or equipment, such as hiring professional snow removal services or using snow pushers and shovels.

Consider Snow Pushers and Shovels

For smaller areas or when dealing with light snowfall, snow pushers and shovels can be an effective alternative to a snowblower with a plow attachment. Snow pushers can easily clear snow from driveways and sidewalks, while shovels provide precise control and allow for more detailed snow removal.

Hire Professional Snow Removal Services

In situations where heavy snowfall or extreme weather is expected, or if you simply prefer to leave the plowing to the professionals, hiring a snow removal service may be the best option. Professional snow removal services have the necessary equipment and expertise to handle any snow removal job safely and efficiently.

Conclusion

Attaching a plow to your snowblower can be a convenient and efficient way to clear snow from your property. However, it’s crucial to prioritize safety considerations, choose the right plow, follow the proper attachment process, and maintain the plow attachment for optimal performance. By understanding the limitations and exploring alternative options when necessary, you can make informed decisions and ensure a successful snow removal experience. Remember to always prioritize safety and consult the manufacturer’s guidelines to ensure compatibility and prevent any unnecessary damage. Stay safe, be prepared, and enjoy the benefits of a snowblower with a plow attachment!

Can I Attach A Plow To My Snowblower?

This image is property of cdn.shopify.com.

What’s The Role Of The Choke In Starting A Snowblower?

So you’ve got your snowblower ready to tackle that mountain of snow in your driveway, but you’re not quite sure what to do with that choke. You may have heard about it before, but you’re not exactly sure what its role is in getting your snowblower up and running. Well, fear not, because we’re here to break it down for you. The choke actually plays a crucial role in starting a snowblower, as it helps to regulate the flow of air and fuel into the engine. By adjusting the choke, you can control the air-to-fuel ratio, ensuring a smooth and efficient start. So, let’s take a closer look at why the choke is an essential component when it comes to firing up your snowblower.

Whats The Role Of The Choke In Starting A Snowblower?

This image is property of pixabay.com.

Understanding the Choke

What is a choke?

A choke is a device that controls the air-to-fuel mixture in the carburetor of a snowblower’s engine. It restricts the airflow to the engine, allowing for a richer fuel mixture to be delivered during the starting process. This is necessary because an excessively lean fuel mixture can make starting the engine difficult, especially in cold weather.

How does a choke work?

When the choke is engaged, it closes off the air intake, reducing the amount of air entering the carburetor. This creates a vacuum effect, causing more fuel to be drawn into the combustion chamber. With a higher concentration of fuel, the engine is able to start more easily. As the engine warms up, the choke gradually opens, allowing more air to enter and restoring the proper air-to-fuel ratio for efficient combustion.

Why is a choke necessary for starting a snowblower?

A choke is necessary for starting a snowblower because cold weather can affect the fuel’s ability to evaporate. In low temperatures, fuel tends to condense, making it difficult to vaporize and ignite in the combustion chamber. By enriching the air-fuel mixture with the help of the choke, the snowblower’s engine gets the added fuel it needs to start and overcome the challenges posed by cold weather.

Effects of Choke Positions

Full choke position

The full choke position completely closes off the air intake, limiting the airflow to the minimum. This results in maximum fuel concentration in the mixture, making it easier to start the engine in extremely cold weather conditions. However, it’s important to remember that using the full choke position for an extended period can lead to a rich fuel mixture, which may cause the engine to bog down or run poorly.

Partial choke position

The partial choke position allows for some airflow to enter the carburetor while still restricting it to some extent. It provides a moderately rich air-fuel mixture, making it suitable for starting the snowblower in mildly cold conditions. The partial choke position strikes a balance between fuel enrichment and maintaining proper engine performance, gradually transitioning the snowblower to regular operation.

No choke position

The no choke position, as the name suggests, opens the air intake completely, allowing for normal airflow into the carburetor. This position is used after the engine has warmed up and stabilized to operating temperature. Once the engine is running smoothly, it is important to switch off the choke to prevent an overly rich fuel mixture, which can lead to poor engine performance and higher fuel consumption.

Whats The Role Of The Choke In Starting A Snowblower?

This image is property of pixabay.com.

Starting Process

Step 1: Verify safety precautions

Before starting the snowblower, it’s important to ensure proper safety precautions. This includes checking for any loose or damaged parts, ensuring the snowblower is on a flat and stable surface, and making sure there are no obstacles in the surrounding area that could cause harm or damage.

Step 2: Set the choke position

Depending on the temperature and starting conditions, set the choke to the appropriate position. In colder temperatures, the full choke position is typically recommended, while the partial choke position may be suitable for milder conditions.

Step 3: Prime the engine

Priming the engine involves delivering a small amount of fuel directly into the carburetor to aid in cold starts. Follow the manufacturer’s instructions to properly prime the engine, which may involve pressing a primer bulb a specific number of times or using a separate priming mechanism.

Step 4: Engage the ignition system

Once the choke is set and the engine is primed, engage the ignition system. This typically involves turning the ignition key to the “start” position or pulling the starter cord. Be sure to follow the manufacturer’s instructions for starting the specific snowblower model.

Step 5: Adjust choke gradually

As the engine starts to run, adjust the choke gradually to allow more air into the carburetor and regulate the air-to-fuel mixture. This prevents the engine from running too rich and ensures optimal performance. Once the engine has warmed up and stabilized, switch off the choke and the snowblower should be ready for operation.

Common Choke-Related Issues

Choke plate obstruction

One common issue is when the choke plate becomes obstructed or stuck due to dirt, debris, or gummed-up fuel. This can prevent the choke from properly engaging or disengaging, leading to difficulties in starting and running the engine. Regular cleaning and maintenance of the choke assembly can help prevent choke plate obstructions.

Choke stuck in a position

Sometimes, the choke can become stuck in a particular position, usually due to corrosion or mechanical issues. This can prevent the choke from being adjusted or switched off, causing the engine to run too rich or lean. A thorough inspection and potential repair or replacement of the choke mechanism may be necessary if it becomes stuck.

Choke not working properly

If the choke is not working properly, it may not provide the necessary fuel enrichment during starting, making it difficult to start the snowblower. This can be due to a faulty choke assembly, damaged choke plate, or other underlying issues. Troubleshooting the choke system, such as cleaning or repairing it, can help resolve the problem.

Choke cable damage

The choke cable connects the choke lever or control knob to the choke assembly, allowing for easy adjustment of the choke position. If the choke cable becomes damaged, frayed, or disconnected, it can impede proper choke operation. Regular inspection of the choke cable and addressing any signs of damage can prevent choke-related issues.

Whats The Role Of The Choke In Starting A Snowblower?

This image is property of pixabay.com.

Maintenance and Troubleshooting

Cleaning the choke assembly

Regularly cleaning the choke assembly is essential for continued proper operation. Remove any dirt, debris, or fuel residue that may have accumulated on the choke plate or inside the carburetor. Using a carburetor cleaner or a small brush can help remove any stubborn build-up. Ensure all components are dry before reassembling.

Inspecting the choke cable

Inspect the choke cable for any signs of damage, such as fraying, corrosion, or loose connections. If any issues are identified, it may be necessary to replace the choke cable. Lubricating the choke cable periodically can help maintain its smooth operation.

Repairing or replacing the choke

If the choke plate, choke assembly, or other choke-related components are damaged or malfunctioning, it may be necessary to repair or replace these parts. Consult the snowblower’s manual or seek assistance from a professional technician to properly address any choke-related issues.

Seeking professional assistance

If troubleshooting and basic maintenance do not resolve choke-related problems, seeking professional assistance is recommended. A qualified technician can diagnose and repair any underlying issues or provide guidance on proper choke maintenance.

Alternative Starting Methods

Using an electric starter

Some snowblowers are equipped with an electric starter, which eliminates the need for manual choke operation. Simply plug in the electric starter, press the start button, and the starter motor will crank the engine to begin the ignition process. This method can be especially convenient for individuals who may have difficulty with manual starting procedures.

Using a primer bulb

Another alternative starting method is using a primer bulb. The primer bulb is typically located on the carburetor and allows for manual fuel priming. By pressing the primer bulb a few times, fuel is forced into the carburetor, aiding in cold starts. This method can be effective in reducing the reliance on the traditional choke system.

Warming up the engine without choke

In certain weather conditions, such as when the engine is already warm or during mild temperatures, it may be possible to start the snowblower without using the choke. This can be done by following the manufacturer’s recommended starting procedure without engaging the choke. However, it’s important to note that using the choke during cold starts is still generally recommended for optimal performance and reliability.

Whats The Role Of The Choke In Starting A Snowblower?

Importance of Choke Control

Ensuring smooth engine operation

Proper choke control plays a crucial role in ensuring smooth engine operation, especially during cold starts. By enriching the air-fuel mixture with the choke, the engine receives the necessary fuel supply to ignite and run smoothly. This helps prevent stalling, sputtering, or other performance issues that can arise from a lean fuel mixture.

Preventing damage to the engine

Using the choke when starting a snowblower helps prevent damage to the engine components. Without the choke, the engine may experience a lean fuel condition, leading to increased heat and potential damage to the piston, cylinder walls, or other internal parts. The choke provides the necessary enriching effect to protect the engine during the starting process.

Optimizing fuel efficiency

Proper choke control optimizes fuel efficiency by ensuring the correct air-to-fuel ratio for combustion. Using the choke in the starting process allows for a richer fuel mixture to be delivered, compensating for the lower evaporative ability of fuel in cold weather. Once the engine warms up and reaches operating temperature, switching off the choke prevents excessive fuel consumption and promotes efficient fuel utilization.

Difference in Choke Design

Manual choke vs. automatic choke

Manual chokes require the user to manually adjust the choke position using a lever, knob, or other control mechanism. This allows for more precise control over the air-to-fuel ratio, especially for individuals who are familiar with their snowblower’s starting requirements. Automatic chokes, on the other hand, adjust the choke position automatically based on the engine’s temperature, requiring less user intervention.

Cable-operated choke vs. lever-operated choke

A cable-operated choke is controlled by a cable that connects to the choke lever or control knob. This allows for remote control of the choke position, providing convenience and ease of adjustment. Lever-operated chokes, on the other hand, have the choke control lever located directly on the carburetor, requiring manual operation in close proximity to the engine.

Older choke systems vs. newer choke systems

Older choke systems may rely on mechanical linkages and manual adjustments. They tend to be more prone to issues such as sticking, corrosion, or wear and tear. Newer choke systems often incorporate more advanced technologies, such as automatic chokes or electronic choke controls, which can improve reliability and ease of operation.

Whats The Role Of The Choke In Starting A Snowblower?

Understanding the Snowblower Engine

Why is a choke required for small engines?

Small engines, such as those found in snowblowers, rely on a precise air-to-fuel mixture for proper combustion. Due to their small size and limited air intake capabilities, they are more sensitive to changes in the ambient temperature and fuel evaporation rates. By using the choke, which enriches the air-fuel mixture, small engines are better equipped to start and run smoothly, especially during cold weather.

How does the choke affect the air-to-fuel ratio?

The choke affects the air-to-fuel ratio by increasing the fuel concentration in the mixture during the starting process. By limiting the intake of air, the choke creates a richer mixture that is easier to ignite in colder temperatures. As the engine warms up, the choke gradually opens, allowing more air to enter and ultimately restoring the proper air-to-fuel ratio for efficient combustion.

Importance of proper air-to-fuel mixture

Maintaining the proper air-to-fuel mixture is crucial for the overall performance and longevity of the snowblower’s engine. A lean mixture, caused by inadequate fuel supply, can result in engine overheating, increased wear on internal components, and poor performance. Conversely, an excessively rich mixture can lead to fouled spark plugs, carbon deposits, and decreased fuel efficiency. The choke helps ensure that the engine receives the appropriate fuel supply for reliable and efficient operation.

Choke Usage in Different Weather Conditions

Cold weather and choke operation

In cold weather, the choke operation becomes particularly important. Cold temperatures hinder fuel evaporation and make starting the engine more challenging. It is recommended to use the full choke position in extremely cold conditions to provide the necessary fuel enrichment for successful starts. Gradually adjusting the choke as the engine warms up helps maintain optimal performance.

Warm weather and choke requirements

In warm weather, the need for choke enrichment is reduced. The fuel evaporation rates are higher, and the engine can typically start more easily without the full choke. In such conditions, starting the engine with the choke in the partial choke position or no choke position may be sufficient to achieve smooth starts and operation.

Humid weather and choke adjustments

Humid weather can affect the density of the air, potentially requiring adjustments to the choke position during the starting process. The level of fuel enrichment needed may vary depending on the humidity level. It’s important to monitor the engine’s performance and adjust the choke as necessary to ensure proper starting and optimal air-to-fuel mixture.

How Do I Fix A Snowblower With A Broken Ignition System?

So, you wake up on a snowy winter morning ready to tackle the task of clearing your driveway, only to find that your trusty snowblower isn’t starting. Frustration starts to set in as you realize that the ignition system might be the culprit. But fear not, because in this article, we’ll guide you through the steps to fix a snowblower with a broken ignition system, getting you back to tackling that snow in no time.

How Do I Fix A Snowblower With A Broken Ignition System?

Overview of Snowblower Ignition System

Snowblowers are commonly used during winter to clear snow from driveways and sidewalks. The ignition system of a snowblower is crucial for its proper functioning, as it is responsible for igniting the engine and getting it started. Understanding the function and diagnosing any issues with the ignition system is essential for maintaining and repairing your snowblower.

Understanding the Function of the Ignition System

The ignition system of a snowblower consists of several components that work together to start the engine. The main components include the spark plug, ignition switch, ignition coil, and starter motor. When you turn the ignition switch, it sends an electrical signal to the ignition coil, which generates high voltage. This high voltage is then transferred to the spark plug, creating a spark to ignite the fuel mixture in the engine. The starter motor is responsible for turning the engine’s flywheel to initiate the combustion process.

Common Signs of a Broken Ignition System

Identifying the signs of a broken ignition system in your snowblower is crucial for prompt repairs. Some common signs that indicate a problem with the ignition system include:

  1. Difficulty Starting: If your snowblower is difficult to start or doesn’t start at all, it may indicate an issue with the ignition system.

  2. No Spark: When you remove the spark plug and check for spark while pulling the starter cord, if you don’t see a spark, it suggests an ignition problem.

  3. Engine Stalling: If your snowblower starts but then stalls shortly afterward, it could be due to a faulty ignition system.

  4. Inconsistent Engine Performance: An ignition system issue can lead to sporadic engine performance, including rough idling or misfiring.

Diagnosing the Issue

Properly diagnosing the issue with your snowblower’s ignition system is crucial for effective repairs. Here are some steps you can take to diagnose the problem:

Checking for Spark

Begin by removing the spark plug and reconnecting it to the spark plug wire. Hold the spark plug against a metal surface on the engine and pull the starter cord. Check for a spark between the electrodes of the spark plug. If you don’t see a spark, it could indicate a problem with the ignition system.

Inspecting the Ignition Switch

The ignition switch is usually located on the control panel of the snowblower. Ensure that the ignition switch is properly connected and not damaged. Inspect the wiring for any loose connections or broken wires, as they can cause issues with the ignition system.

Examining the Starter Motor

If your snowblower’s starter motor is not functioning correctly, it can prevent the engine from starting. Check the starter motor for any signs of damage or wear. Ensure that it is properly connected and free from any debris or obstruction.

How Do I Fix A Snowblower With A Broken Ignition System?

Replacing the Ignition System

If you have determined that the ignition system needs to be replaced, here are the steps to follow:

Gathering the Necessary Tools and Parts

Before starting the replacement process, gather all the necessary tools and parts. These may include a socket wrench set, pliers, a replacement ignition system, and any other equipment specific to your snowblower model.

Disconnecting the Spark Plug

Ensure that the engine is cool, then disconnect the spark plug wire from the spark plug. This will prevent accidental starts during the replacement process.

Removing the Ignition Switch

Locate the ignition switch on the control panel and carefully disconnect any wiring or connectors attached to it. Remove any screws or fasteners holding the ignition switch in place. Take note of the positions of the wires and connectors as you will need to reconnect them later.

Installing the New Ignition System

Carefully install the new ignition system, following the reverse order of the removal steps. Ensure that all wires and connectors are properly attached according to the previous positions. Tighten any screws or fasteners securely.

Reconnecting the Spark Plug

Finally, reconnect the spark plug wire to the spark plug. Ensure a firm connection, but be careful not to overtighten. This will complete the replacement process of the ignition system.

Repairing the Ignition System

If the issue with your snowblower’s ignition system can be repaired rather than replaced, here are some steps you can take:

Cleaning and Testing the Spark Plug

Remove the spark plug and clean it using a wire brush or a spark plug cleaner. Inspect the spark plug for any signs of damage or wear. If necessary, replace the spark plug with a new one. Before reinstalling the spark plug, use a spark plug tester to ensure that it is producing a spark.

Repairing or Replacing the Ignition Coil

If the ignition coil is faulty, it may need to be repaired or replaced. Check the coil for any visible damage or signs of wear. If the coil is damaged, it will need to be replaced. If it is still in good condition, you can try cleaning the connections and inspecting the wiring for any issues.

Repairing or Replacing the Ignition Switch

If the ignition switch is causing the ignition system problem, you may need to repair or replace it. Inspect the switch for any damage or loose connections. If the switch is damaged or not functioning correctly, it will need to be replaced. For loose connections, ensure they are tightened securely.

Troubleshooting the Starter Motor

If the starter motor is not functioning correctly, troubleshooting may be necessary. Check for any obstructions or debris that may be preventing the motor from turning. Cleaning the motor and ensuring proper lubrication may resolve the issue. If the motor is damaged, it may need to be replaced.

Maintaining the Ignition System

Proper maintenance of the ignition system can prolong its lifespan and prevent costly repairs. Here are some maintenance tips for the ignition system of your snowblower:

Cleaning the Ignition Components

Regularly clean the spark plug, ignition coil, and ignition switch to remove any debris or buildup. Use a soft brush or compressed air to gently clean the components. Ensure that the spark plug electrode gap is within the manufacturer’s specifications.

Replacing the Spark Plug Regularly

It is advisable to replace the spark plug periodically, according to the manufacturer’s recommendations. Over time, spark plugs can become worn or fouled, leading to ignition system issues. Replace the spark plug with the recommended type and ensure proper installation.

Performing Routine Maintenance Checks

Regularly inspect the ignition system components for any signs of damage or wear. Check the wiring connections for tightness and repair any loose or damaged wires promptly. Lubricate the starter motor as recommended by the manufacturer to keep it operating smoothly.

Advisory: Seeking Professional Help

Repairing or replacing the ignition system of a snowblower can be complex, especially if you are not experienced in small engine repairs. Additionally, safety precautions must be taken when working with electrical components. It is advisable to seek professional help if you are unsure or uncomfortable performing these repairs yourself.

Complexity of Ignition System Repairs

The ignition system of a snowblower is a complex assembly of components that require proper knowledge and expertise to diagnose and repair. Mistakes during repairs can lead to further damage or even personal injury. Professional technicians have the necessary skills and tools to accurately resolve ignition system issues.

Safety Precautions

Working with electrical components carries inherent risks. Snowblowers with broken ignition systems may not start or shut off unexpectedly, posing safety hazards. Professional technicians are trained to handle these risks and take appropriate safety precautions.

Consulting a Professional Technician

If you are unsure or uncomfortable performing ignition system repairs yourself, it is best to consult a professional technician. They can accurately diagnose the issue and recommend the most suitable repair or replacement options. Additionally, they can ensure that all safety precautions are followed during the repair process.

Alternative Solutions

In some cases, alternative solutions may be viable for temporary use or as a workaround for a broken ignition system. These solutions include:

Using an External Starter

An external starter, such as a jump box or a battery pack, can be used to start the snowblower engine without relying on the ignition system. By connecting the external starter to the starter motor directly, you can bypass the ignition system temporarily.

Jump-Starting the Snowblower

If the ignition system issue is due to a weak or dead battery, jump-starting the snowblower may be possible. Use jumper cables and a separate power source, such as a car battery, to provide the necessary electrical current to start the engine.

Preventive Measures

To minimize the chances of facing ignition system issues with your snowblower, consider following these preventive measures:

Protecting the Snowblower from Moisture

Snow and moisture can cause damage to the ignition system and other electrical components of your snowblower. When not in use, store the snowblower in a dry and protected area, away from rain or extreme weather conditions. Use a cover to protect it from moisture and prevent rusting.

Storing the Snowblower Properly

During the off-season, it is important to store your snowblower properly. This includes draining the fuel system, cleaning the equipment, and storing it in a clean and dry location. Proper storage can prevent issues with the ignition system caused by stale fuel or debris accumulation.

Conclusion

The ignition system is a vital component of a snowblower, responsible for starting the engine and ensuring smooth operation. Understanding its function, diagnosing issues, and performing necessary repairs or maintenance can help keep your snowblower in optimal condition. Following preventive measures and seeking professional help when needed can ensure the longevity and reliability of your snowblower’s ignition system.

Additional Resources

If you require further assistance or information regarding snowblower ignition systems, the following resources may be helpful:

  • Snowblower User Manual: Refer to your snowblower’s user manual for specific instructions and diagrams related to the ignition system.
  • Online Forums and Communities: Participate in online forums and communities dedicated to snowblower maintenance and repairs. Here, you can ask questions and learn from the experiences of others.
  • Manufacturer’s Customer Support: Contact the manufacturer’s customer support for expert advice and assistance related to the ignition system of your snowblower. They can provide guidance and recommend authorized service centers for complex repairs.

Can I Retrofit My Old Snowblower With Modern Features?

So you’re tired of manually clearing your driveway and you’re wondering if it’s possible to upgrade your old snowblower with modern features. The good news is, it’s definitely worth considering! With advancements in technology, retrofitting your snowblower can help you tackle those snow-filled days with ease and convenience. From enhanced power and efficiency to adjustable chute controls, there are various options available that can transform your outdated snowblower into a winter powerhouse. So, sit back, grab a hot cocoa, and let’s explore how you can bring your old snowblower into the 21st century.

Can I Retrofit My Old Snowblower With Modern Features?

Upgrading the Engine

Evaluating the Compatibility

Before you start upgrading your snowblower engine, it’s important to evaluate its compatibility for any modifications. Check if the current engine can handle the additional power requirements and if there are any compatibility issues with the existing parts. If the engine is compatible, you can move on to the next step.

Selecting a More Efficient Engine

To enhance the performance of your snowblower, consider selecting a more efficient engine. Look for engines that offer better fuel efficiency, higher power output, and improved reliability. A newer engine will not only make your snowblower more powerful but also more eco-friendly, reducing emissions and overall fuel consumption.

Installation Process

Once you have chosen the engine, it’s time to proceed with the installation process. Make sure to follow the manufacturer’s instructions and refer to any specific guidelines provided for your snowblower model. If you’re not confident in your mechanical abilities, it’s recommended to seek professional assistance to ensure a proper and safe installation.

Enhancing the Power System

Assessing the Power Output

Before upgrading the power system of your snowblower, assess the current power output. Determine if it meets your needs and if there is room for improvement. This evaluation will help you identify the areas that require attention and guide you in making the necessary enhancements.

Upgrading the Belts and Pulleys

Upgrading the belts and pulleys is a crucial step in enhancing the power system of your snowblower. Opt for high-quality belts and pulleys that are designed to handle increased power and torque. This upgrade will ensure smooth power transmission and improve the overall performance of your snowblower.

Adding a Dual-Stage System

Consider adding a dual-stage system to your snowblower for enhanced power and efficiency. A dual-stage snowblower features an impeller in addition to the auger, allowing it to handle heavy, wet snow more effectively. This upgrade will enable your snowblower to tackle even the toughest winter conditions with ease.

Upgrading Controls and Safety Features

Examining the Existing Controls

Take a closer look at the existing controls of your snowblower to identify any areas that require improvement. Pay attention to the ease of use, functionality, and accessibility of the controls. Upgrading the controls will enhance your overall snowblowing experience and make it more convenient.

Installing Electric Start

Installing an electric start system is a great addition to your snowblower, especially if the existing pull start system is difficult to operate or unreliable. Electric start systems are more convenient and eliminate the need for physical exertion to start the engine. This upgrade will save you time and effort during those cold winter mornings.

Upgrading Safety Features

The safety of both you and your snowblower is paramount. Consider upgrading the safety features of your snowblower to ensure its usability and protect yourself during operation. Enhancements such as improved safety guards, emergency shut-offs, and enhanced visibility features will provide added peace of mind while using your snowblower.

Can I Retrofit My Old Snowblower With Modern Features?

Improving the Auger System

Inspecting the Current Auger

Begin by inspecting the current auger of your snowblower. Check for any signs of wear and tear, damages, or performance issues. If the auger is in poor condition or not effectively clearing snow, upgrading it becomes necessary.

Installing a More Efficient Auger

Upgrade your snowblower’s auger system by installing a more efficient one. Look for augers that can handle different types of snow, from fluffy powder to heavy, compacted snow. A well-designed auger will enhance the snow-throwing capabilities of your snowblower and improve its overall efficiency.

Adding Adjustable Height Feature

Consider adding an adjustable height feature to your snowblower’s auger system. This will allow you to adapt to various snow depths, ensuring efficient snow removal regardless of the conditions. Being able to adjust the height of the auger will make your snowblower more versatile and increase its effectiveness.

Enhancing Maneuverability and Navigation

Evaluating the Existing Wheel System

Take a moment to evaluate the existing wheel system of your snowblower. Consider factors such as traction, maneuverability, and stability. Assess whether the current wheels are suitable for your needs or if an upgrade is necessary to improve the overall performance of your snowblower.

Upgrading to Track Drive System

Consider upgrading to a track drive system for improved maneuverability and traction. Track-driven snowblowers provide better traction in snowy and icy conditions, making it easier to navigate through deep snow. This upgrade will enhance the overall performance and control of your snowblower, especially on uneven terrains.

Adding Steering Assist

Enhance the maneuverability of your snowblower by adding a steering assist feature. This can be achieved through various mechanisms such as power steering or assisted steering systems. Steering assist will make turning and navigating your snowblower effortless, reducing strain on your arms and improving overall control.

Installing Heated Handgrips

Cold temperatures can make snowblowing an uncomfortable task. Installing heated handgrips on your snowblower will provide warmth and comfort during operation. Heated handgrips are easy to install and will make a significant difference in your snowblowing experience, especially during long hours of use.

Adding LED Lights

Enhance visibility and safety while operating your snowblower by adding LED lights. LED lights provide brighter illumination, making it easier to see and navigate in dark or low-light conditions. They also consume less power, adding efficiency to your snowblower’s electrical system.

Retrofitting Snow Sensor

Understanding Snow Sensors

Snow sensors are devices that automatically detect the presence of snow and trigger your snowblower to start operating. These sensors can be installed on your snowblower or in the surrounding area. They ensure that your snowblower only operates when necessary, saving you time and energy.

Installing the Snow Sensor System

If you’re interested in retrofitting your snowblower with a snow sensor system, consult the manufacturer’s instructions for installation. Typically, snow sensors are mounted in a strategic location to detect snowfall accurately. The sensor is then wired to your snowblower’s control panel to automate its operation based on snow conditions.

Upgrading the Chute Control System

Assessing the Current Chute System

Evaluate the existing chute control system of your snowblower. Determine if it meets your needs in terms of rotation range, ease of control, and throwing distance. If the current system is lacking in any of these aspects, it may be time for an upgrade to enhance the overall functionality of your snowblower.

Installing Electric Chute Control

Consider installing an electric chute control system for improved convenience and efficiency. Electric chute controls allow you to adjust the direction and angle of the chute without manual effort. This upgrade eliminates the need to step off the snowblower to make adjustments, making snowblowing quicker and easier.

Considering Other Modernization Options

Adding GPS Navigation

If you’re looking to take the modernization of your snowblower to the next level, consider adding GPS navigation. GPS navigation systems can assist in snowblowing by providing real-time location tracking, mapping, and route optimization. This advanced feature will make snowblowing more efficient and provide a better overall user experience.

Installing Remote Control System

For ultimate convenience, you can opt for a remote control system for your snowblower. With a remote control, you can start, stop, and control various functions of your snowblower from a distance. This feature allows you to operate the machine without having to be physically present, providing flexibility and ease of use.

Integrating Smartphone Control

Modernize your snowblower by integrating smartphone control capabilities. This allows you to control your snowblower’s functions directly from your smartphone, offering convenience and ease of use. Smartphone control systems often come with additional features such as performance monitoring and maintenance reminders, further enhancing the user experience.

In conclusion, retrofitting your old snowblower with modern features is indeed possible and can greatly enhance its performance, convenience, and safety. By upgrading the engine, power system, controls, safety features, auger system, maneuverability, and adding various modernizations, you can transform your old snowblower into a powerful and efficient machine that can tackle any snow-clearing task with ease. Choose the upgrades that best suit your needs and budget, and enjoy a winter season with a snowblower that’s equipped with modern features to make your snow-clearing experience more enjoyable and efficient.

What Should I Do If My Snowblower Won’t Start?

So, you wake up in the morning, ready to tackle the heavy snow that has accumulated overnight. You bundle up in your warmest winter gear, march outside, and go to start your trusty snowblower. But wait, it won’t start! Panic sets in as you imagine hours of back-breaking shoveling ahead. But fear not, because in this article, we will discuss some simple troubleshooting steps to help you figure out what to do when your snowblower refuses to start.

Checking the Fuel

Checking the Fuel Tank

The fuel tank is the first component you should check if your snowblower won’t start. Start by ensuring that the gas tank is filled with fresh fuel. Stale fuel can prevent the engine from starting or running smoothly. If you suspect that the fuel may be old, drain the tank and refill it with fresh gasoline. Additionally, inspect the fuel tank for any signs of damage, such as leaks or cracks. If you notice any issues, it is best to have the fuel tank repaired or replaced before attempting to start the snowblower again.

Checking the Fuel Level

Another important step is to check the fuel level in the tank. Ensure that there is enough fuel to effectively power the engine. If the fuel level is low, refill the tank as necessary. However, be cautious not to overfill the tank, as this can lead to fuel spillage and potentially damage the snowblower.

Checking the Fuel Quality

The quality of the fuel can greatly impact the performance of your snowblower. In colder temperatures, it is crucial to use fuel with the correct winter blend or add a fuel stabilizer to prevent the fuel from freezing and causing issues with starting the engine. If you suspect that the fuel may be contaminated or of poor quality, it is advisable to drain the tank and replace it with fresh fuel. The use of stale or contaminated fuel can lead to engine problems and hinder the snowblower’s performance.

Examining the Spark Plug

Inspecting the Spark Plug Wire

An important aspect of troubleshooting a snowblower that won’t start is checking the spark plug wire. Inspect the wire for any signs of physical damage, such as fraying or wear. Ensure that the wire is securely connected to both the spark plug and the ignition coil. If you notice any issues with the spark plug wire, it is recommended to replace it with a new one to ensure proper ignition.

Removing and Inspecting the Spark Plug

The spark plug plays a vital role in the combustion process of the snowblower’s engine. To inspect the spark plug, carefully disconnect the spark plug wire and use a spark plug wrench to remove the plug from the cylinder head. Examine the spark plug for signs of fouling, such as black carbon deposits or oil residue. If the spark plug is dirty or damaged, it may need cleaning or replacement to restore optimal engine performance.

Cleaning or Replacing the Spark Plug

If the spark plug is dirty or fouled, you can try cleaning it to improve its functionality. Use a wire brush or a spark plug cleaner to gently remove any carbon or oil deposits. If cleaning does not resolve the issue, it is advisable to replace the spark plug altogether. When replacing the spark plug, ensure that you use the correct type and gap specified in the snowblower’s manual. A faulty or worn-out spark plug can prevent the engine from starting or running smoothly.

What Should I Do If My Snowblower Wont Start?

Inspecting the Ignition System

Checking the Ignition Switch

The ignition switch is responsible for supplying power to the snowblower’s ignition system. If the ignition switch is defective or not functioning correctly, it can prevent the engine from starting. Inspect the ignition switch for any visible damage or loose connections. Ensure that the switch is in the “on” position when attempting to start the snowblower. If you suspect that the ignition switch is faulty, it is recommended to have it replaced by a professional to avoid any further complications.

Testing the Ignition Coil

The ignition coil is a crucial component of the snowblower’s ignition system. It converts the low voltage from the battery into the high voltage necessary for creating a spark. To test the ignition coil, use a multimeter to measure the resistance across its terminals. Refer to the snowblower’s manual for the specific resistance values that indicate a properly functioning coil. If the ignition coil fails the resistance test, it may need to be replaced to restore proper ignition.

Examining the Safety Key

Some snowblowers are equipped with a safety key or switch that must be engaged for the engine to start. Inspect the safety key and ensure it is in the correct position. If the safety key is missing, damaged, or not engaged correctly, it can prevent the engine from starting. Replace the safety key with a new one if necessary, following the manufacturer’s instructions. It is essential to always prioritize safety and ensure that all safety features are in good working condition.

Checking the Choke

Verifying the Choke Position

The choke plays a critical role in starting a cold engine by enriching the fuel mixture. Check the position of the choke and ensure that it is in the appropriate setting for starting. Refer to the snowblower’s manual for specific instructions on the correct choke position. Incorrect choke adjustment can make it difficult for the engine to start or cause it to run poorly.

Cleaning the Choke

Over time, the choke can become clogged with dirt, debris, or residue from fuel. This can hinder its functionality and prevent the engine from starting. To clean the choke, remove it from the snowblower and use a suitable cleaner or carburetor cleaner to remove any build-up. Ensure that the choke is thoroughly cleaned and free from any obstructions before reattaching it to the snowblower. Regular maintenance and cleaning of the choke can help prevent starting issues.

What Should I Do If My Snowblower Wont Start?

Inspecting the Carburetor

Cleaning the Carburetor Bowl

The carburetor bowl is prone to collecting dirt, debris, and residue from fuel. This can disrupt the proper fuel mixture and cause starting issues. To clean the carburetor bowl, you will need to remove it from the snowblower and carefully disassemble it. Use a carburetor cleaner or a suitable cleaning solution to remove any deposits or obstructions from the bowl and its components. Ensure that all passageways and jets are clean and clear before reassembling the carburetor.

Checking the Carburetor Gaskets

Inspect the carburetor gaskets for any signs of damage or wear. Damaged gaskets can lead to vacuum leaks and affect the fuel-air mixture, resulting in starting problems. If you notice any issues with the gaskets, it is advisable to replace them to ensure a proper seal. Use genuine manufacturer-approved gaskets for the best results and to maintain the integrity of the snowblower’s carburetor system.

Adjusting the Carburetor

In some cases, the carburetor may need adjustment to optimize the fuel-air mixture for starting and running the snowblower. Carburetor adjustment should be done cautiously and preferably following the snowblower’s manual or the manufacturer’s instructions. Each snowblower model may have specific settings and requirements for adjusting the carburetor. If you are not confident or experienced in carburetor adjustment, it is recommended to seek assistance from a professional.

Examining the Air Filter

Removing and Inspecting the Air Filter

The air filter prevents dirt, debris, and other contaminants from entering the engine. A clogged or dirty air filter can restrict airflow and affect the engine’s performance. Remove the air filter and inspect it for any signs of dirt, debris, or damage. If the air filter appears dirty or clogged, it may require cleaning or replacement.

Cleaning or Replacing the Air Filter

If the air filter is dirty, you can clean it with compressed air or by gently tapping it on a hard surface to remove excess dirt. However, if the air filter is excessively dirty or damaged, it is recommended to replace it with a new one. A clean and properly functioning air filter ensures adequate airflow to the engine and contributes to optimal performance.

Checking the Oil Level

Verifying the Oil Level

Checking the oil level is essential for maintaining the proper lubrication of the snowblower’s engine. Refer to the manufacturer’s instructions to locate the oil dipstick and check the oil level. If the oil level is low, add the recommended type and quantity of oil as specified in the manual. However, ensure not to overfill the oil, as it can lead to engine damage.

Changing the Oil

Regular oil changes are crucial for maintaining the performance and longevity of the snowblower’s engine. Over time, oil can become contaminated or degrade, leading to reduced lubrication effectiveness. Refer to the snowblower’s manual for the recommended oil change intervals and specifications. Follow the manufacturer’s instructions to properly drain and refill the oil, ensuring that you dispose of the used oil in an environmentally friendly manner.

Inspecting the Fuel Line

Checking for Clogs

Inspect the fuel line for any signs of clogs or blockages. Clogged fuel lines can prevent the flow of fuel to the engine, causing starting issues. Carefully examine the fuel line for any kinks, bends, or damage. If you notice any clogs or damage, it is advisable to replace the fuel line to ensure proper fuel flow.

Inspecting for Damage

In addition to checking for clogs, it is essential to inspect the fuel line for any signs of damage, such as cracks or leaks. Damaged fuel lines can cause fuel leaks and pose a safety hazard. If you detect any damage, promptly replace the fuel line with a new one. Ensure that you use the appropriate fuel line size and type specified by the snowblower manufacturer.

Checking the Starter Motor

Inspecting the Starter Motor Connections

The starter motor is responsible for initiating the engine’s cranking motion. Inspect the starter motor connections, including the battery cables and solenoid connections, for any signs of corrosion, loose connections, or damage. Tighten any loose connections and clean any corrosion using a wire brush. If the connections are severely corroded or damaged, they may need to be replaced to ensure proper functionality of the starter motor.

Testing the Starter Motor

If you have checked all the other components and the snowblower’s engine still won’t start, it may indicate a problem with the starter motor itself. To test the starter motor, use a multimeter to measure its voltage or perform a physical inspection to identify any visible signs of damage or malfunction. If the starter motor is not functioning correctly, it may require repairs or replacement. Consider consulting a professional or a reliable repair service for assistance with starter motor issues.

Bring it to a Professional

When to Seek Professional Help

If you have exhausted all troubleshooting steps and your snowblower still won’t start, it may be time to seek professional help. Professional technicians have the expertise and specialized tools necessary to diagnose and repair complex issues. Additionally, they can provide guidance on routine maintenance and offer valuable advice to prevent future problems. If you are unsure or uncomfortable with any repairs, it is always a good idea to consult a professional.

Choosing a Reliable Repair Service

When selecting a repair service for your snowblower, it is important to choose a reliable and reputable provider. Consider factors such as their experience, customer reviews, certifications, and warranty policies. Look for a repair service that specializes in snowblower repairs and has a proven track record of quality service. Getting recommendations from friends, family, or neighbors can also help you find a trustworthy repair service. Remember to inquire about service costs and turnaround time to make an informed decision.

In conclusion, troubleshooting a snowblower that won’t start involves a thorough inspection of various components such as the fuel system, spark plug, ignition system, choke, carburetor, air filter, oil level, fuel line, and starter motor. By following the outlined steps and performing regular maintenance, you can increase the chances of getting your snowblower up and running smoothly. However, if you encounter persistent issues or lack the necessary expertise, it is always advisable to seek professional help to ensure the safe and efficient operation of your snowblower.