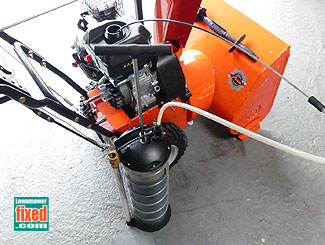
So you’ve noticed that your trusty snowblower isn’t running as smoothly as it used to, and you suspect that a dirty fuel tank might be to blame. Don’t worry, you’re not alone in this predicament. Many snowblower owners have faced the same issue and successfully cleaned their fuel tanks to restore their machine’s performance. In this article, we will guide you through the process of cleaning the fuel tank of your snowblower, ensuring that it runs like a dream in clearing away that pesky winter snow.

This image is property of www.lawnmowerfixed.com.
Inspecting the Fuel Tank
When it comes to cleaning the fuel tank of your snowblower, the first step is to thoroughly inspect its condition. This is important as it allows you to identify any potential issues that may need to be addressed before proceeding with the cleaning process.
Checking for Fuel Contamination
One of the things you should look out for during the inspection is fuel contamination. Over time, dirt, debris, and water can find their way into the fuel tank, causing the fuel to become contaminated. This can lead to a variety of issues, such as engine misfires or poor performance.
To check for fuel contamination, start by removing the fuel cap and visually inspecting the fuel. If you notice any discoloration, presence of dirt or debris, or separation of water from the fuel, it is a clear indication that the fuel has been contaminated.
Examining for Rust or Corrosion
Another crucial aspect of inspecting the fuel tank is examining it for any signs of rust or corrosion. Snowblowers often operate in harsh weather conditions, which can cause the fuel tank to develop rust or corrosion over time. These issues can compromise the integrity of the tank and lead to leaks or fuel system malfunctions.
To examine for rust or corrosion, carefully inspect the interior and exterior of the fuel tank. Look for any areas where the paint may have chipped or peeled off, as these can be potential spots for rust to develop. Additionally, check for any signs of discoloration, pitting, or flaking on the tank’s surface.
Inspecting for Leaks or Cracks
Lastly, don’t forget to inspect the fuel tank for any leaks or cracks. Even the smallest cracks can result in fuel leakage, which can be dangerous and affect the performance of your snowblower. Carefully examine the tank for any visible signs of leaks, such as stains or dampness around the tank or fuel lines.
To conduct a more thorough inspection for leaks, you can also perform a pressure test. This involves pressurizing the fuel tank and checking if there is any loss in pressure over time. If you notice any abnormal pressure loss or fuel seepage, it is an indication that there may be leaks present.
Preparing for Fuel Tank Cleaning
Now that you have completed the inspection of the fuel tank and identified any potential issues, it’s time to prepare for the actual cleaning process. Proper preparation ensures that the cleaning goes smoothly and helps minimize the risk of accidents or damage to your snowblower.
Gathering Necessary Tools and Materials
Before you begin cleaning, gather all the necessary tools and materials. This will save you time and make the process much more efficient. Some of the essential items you will need include:
-
Safety goggles and gloves: These will protect your eyes and hands from any potential splashes of fuel or cleaning agents.
-
Screwdrivers or wrenches: These tools will be required for disconnecting fuel lines and detaching the fuel tank.
-
Cleaning solutions: Choose a suitable cleaning solution specifically designed for fuel tanks. Avoid using harsh chemicals that may damage the tank or its components.
-
Scrub brush or cloth: Use a non-abrasive scrub brush or cloth to clean the interior of the fuel tank.
-
Water source: You will need access to a water source for rinsing the tank. A hose or bucket of water can be used for this purpose.
Ensuring Safety Measures
Safety should always be a top priority when working with fuel and cleaning chemicals. Before you start the cleaning process, take the necessary safety precautions to protect yourself and prevent accidents. Here are a few safety measures to keep in mind:
-
Perform the cleaning process in a well-ventilated area to avoid inhaling any fumes or vapors.
-
Ensure that there are no open flames or sources of ignition near the working area.
-
Avoid smoking or using any electronic devices that could spark.
-
Keep a fire extinguisher nearby in case of emergencies.
-
Follow the instructions and warnings provided by the manufacturer of the cleaning solutions and fuel.
By taking these safety measures, you can ensure a safe and hassle-free fuel tank cleaning process.

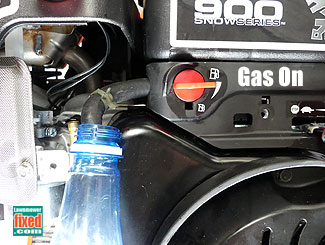
This image is property of www.lawnmowerfixed.com.
Emptying the Fuel Tank
Before you can proceed with cleaning the fuel tank, you need to empty it completely. This will allow you to work with an empty tank and prevent any fuel spillage or accidents during the cleaning process.
Locating the Fuel Tank Drain
The first step in emptying the fuel tank is to locate the fuel tank drain. The drain is a small valve or plug located at the bottom of the fuel tank. It allows you to release the fuel from the tank and drain it out completely.
Consult your snowblower’s manual or refer to the manufacturer’s instructions to find the exact location of the fuel tank drain. In most cases, it is situated near the base of the fuel tank, usually at the rear or side of the machine.
Removing Fuel from the Tank
Once you have located the fuel tank drain, place a suitable container or fuel-safe receptacle beneath it to catch the fuel. Ensure that the container has sufficient capacity to hold the entire contents of the fuel tank.
Using a wrench or screwdriver, loosen the valve or plug and allow the fuel to drain out completely. It may take some time for all the fuel to drain, so be patient and ensure that no fuel spills onto the ground or your surroundings.
Draining the Remaining Fuel
After draining the fuel using the tank drain, there may still be some residual fuel remaining in the tank. To remove this remaining fuel, you can either tilt the snowblower or use a hand pump or syringe to suction out the remaining fuel.
Ensure that you have a suitable container to transfer the fuel from the snowblower to avoid any spillage. Take caution while tilting the snowblower to prevent any damage or injury.
Once you have emptied the fuel tank as much as possible, you are ready to move on to the next step of the cleaning process.
Removing the Fuel Tank
Now that the fuel tank is empty, it’s time to remove it from your snowblower. Removing the fuel tank allows for better access during the cleaning process and ensures that you can clean it thoroughly.
Disconnecting Fuel Lines
Before you can remove the fuel tank, you need to disconnect the fuel lines that connect it to the snowblower’s engine. These fuel lines carry fuel from the tank to the engine, and they need to be detached to remove the tank.
Locate the connections where the fuel lines are attached to the fuel tank. Depending on your snowblower model, you may need to use a wrench or screwdriver to loosen the fittings. Be careful not to damage the fuel lines while disconnecting them.
Detaching the Fuel Tank
Once the fuel lines are disconnected, you can proceed to detach the fuel tank from the snowblower. The tank may be secured to the snowblower using bolts, screws, or mounting brackets. Use the appropriate tools to remove these fasteners and detach the tank.
Take note of the tank’s position and orientation as you remove it. This will be important when it comes time to reattach the fuel tank later on.
With the fuel tank successfully removed, you are now ready to thoroughly clean it.

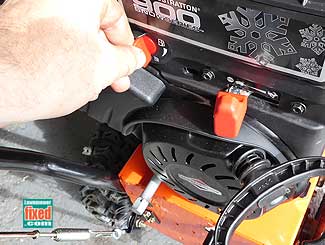
This image is property of www.lawnmowerfixed.com.
Cleaning the Fuel Tank
Cleaning the fuel tank is a crucial step in maintaining the performance and longevity of your snowblower. Over time, debris, sediment, and other contaminants can accumulate inside the tank, affecting the fuel system’s efficiency.
Removing Debris and Sediments
Start the cleaning process by removing any visible debris or sediments from the fuel tank. You can do this by shaking the tank vigorously to dislodge loose particles. Once dislodged, carefully pour out the debris and sediment from the tank. Dispose of them properly and refrain from disposing of them in your regular garbage.
Using Cleaning Solutions
After removing the debris, it’s time to use cleaning solutions specifically designed for fuel tank cleaning. These solutions are designed to break down and remove stubborn contaminants, such as sludge or varnish that may have formed inside the tank.
Follow the instructions provided by the manufacturer of the cleaning solution to ensure safe and effective usage. In most cases, you will need to mix the cleaning solution with water before applying it to the tank.
Scrubbing the Tank Interior
With the cleaning solution applied, use a non-abrasive scrub brush or cloth to scrub the interior of the fuel tank. Pay extra attention to any areas where the debris or sediments were particularly stubborn.
Scrub in a circular motion, ensuring that you cover all areas inside the tank. The gentle scrubbing action helps to dislodge any remaining contaminants and ensures a thorough cleaning.
Cleaning the Tank Cap and Filter
While cleaning the fuel tank, don’t forget to pay attention to the tank cap and filter. These components can also accumulate dirt and debris over time, affecting their functionality.
Remove the tank cap and filter and clean them separately. You can use a combination of mild detergent and water to clean these components. Ensure that you rinse them thoroughly and allow them to dry completely before reattaching them.
Rinsing and Drying the Fuel Tank
After scrubbing the tank interior and cleaning the cap and filter, it is essential to rinse the fuel tank thoroughly to remove any leftover cleaning solution or residue.
Flushing the Tank with Water
Using a hose or bucket of clean water, thoroughly rinse the interior of the fuel tank. Allow the water to flow freely through the tank to flush out any remaining cleaning solution or loosened contaminants.
While rinsing, pay close attention to the tank’s drain or outlet to ensure that no debris or sediment gets lodged there. Continue rinsing until the water coming out of the tank is clear and free from any residue.
Allowing the Tank to Dry Completely
Once the tank has been thoroughly rinsed, it is crucial to allow it to dry completely before reattaching it to the snowblower. Moisture can promote the growth of bacteria or cause rust to develop inside the tank, compromising its integrity.
To facilitate drying, place the fuel tank in a well-ventilated area and allow it to air dry naturally. Avoid using any heat sources or accelerants to speed up the drying process, as this can be dangerous and potentially damage the tank.

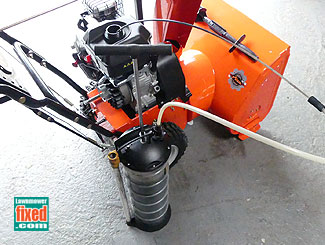
This image is property of www.lawnmowerfixed.com.
Inspecting and Replacing Fuel Tank Components
With the fuel tank clean and dry, it’s time to inspect its components for any signs of wear or damage. This step ensures that your snowblower’s fuel system is in optimal condition and helps prevent future issues.
Inspecting Fuel Lines
Carefully examine the fuel lines for any signs of cracks, leaks, or deterioration. Flex the lines gently to check for any brittleness or stiffness, which can indicate the need for replacement.
If you notice any issues with the fuel lines, it is recommended to replace them to avoid potential fuel leaks or disruptions in fuel flow.
Checking and Replacing Filters
Inspect the fuel filter for any signs of clogging or damage. A clogged fuel filter can restrict fuel flow, leading to poor engine performance.
If the fuel filter appears dirty or clogged, it is advisable to replace it with a new one. This ensures that the fuel entering the engine is free from contaminants and allows for optimal performance.
Examining Tank Cap
Lastly, examine the tank cap for any signs of damage, such as cracks or worn-out seals. A faulty tank cap can allow dirt, water, or debris to enter the fuel tank, leading to contamination.
If you notice any issues with the tank cap, it is essential to replace it to maintain the integrity of the fuel tank and prevent further contamination.
Reattaching the Fuel Tank
After inspecting and replacing any necessary components, it’s time to reattach the fuel tank to your snowblower. Properly securing the fuel tank ensures that it stays in place during operation and prevents any potential fuel leaks.
Connecting Fuel Lines
Begin by reconnecting the fuel lines to the fuel tank. Align the fittings and tighten them properly using the appropriate tool. Ensure that the fuel lines are securely attached to prevent any fuel leaks or disruptions in fuel flow.
Securing the Fuel Tank
Once the fuel lines are connected, it’s time to secure the fuel tank back onto the snowblower. Align the tank with the mounting brackets or fastening points and insert the bolts or screws to hold it in place.
Use the necessary tools to tighten the fasteners securely, but be careful not to overtighten and risk damaging the tank or its mounting points. Take note of the tank’s proper alignment based on its original position and orientation during removal.

This image is property of www.lawnmowerfixed.com.
Refilling the Fuel Tank
With the fuel tank securely reattached to your snowblower, it’s time to refill it with the appropriate fuel. Choosing the right fuel type is crucial for optimal performance and to prevent potential engine damage.
Choosing the Right Fuel Type
Refer to your snowblower’s manual for the recommended fuel type. Typically, snowblowers run on unleaded gasoline with an octane rating of 87 or higher. Avoid using ethanol-blended fuels, as they can cause corrosion and other issues in the long run.
Ensure that the fuel you use is fresh and free from any contaminants or water. Store fuel in a clean, approved container to maintain its quality.
Pouring Fuel into the Tank
Carefully pour the fuel into the fuel tank, ensuring that you do not spill any fuel on your snowblower or its surroundings. Avoid overfilling the tank to prevent fuel overflow and spills.
Once the fuel tank is filled, securely tighten the tank cap to prevent any fuel leakage or evaporation. Make sure the cap’s seal is intact and functioning properly.
Final Checks and Testing
Before you start using your snowblower again, it is crucial to perform a few final checks to ensure everything is in order and ready for operation.
Checking for Fuel Leaks
Inspect the fuel tank and the fuel lines for any signs of leaks. Look for any drips, stains, or puddles of fuel that may indicate a leak. If you notice any leaks, immediately address the issue before using your snowblower.
Testing the Snowblower
Once you have completed all the necessary steps to clean the fuel tank and reassemble the snowblower, it’s time to test it. Start the snowblower and let it run for a few minutes to ensure that the fuel flows smoothly and the engine operates correctly.
Listen for any unusual sounds or vibrations that may indicate an issue. Additionally, pay attention to the snowblower’s performance and make sure it is operating at its optimal level.
By following these comprehensive steps, you can effectively clean the fuel tank of your snowblower and ensure its optimal performance. Regular maintenance and cleaning of the fuel tank will not only prolong the life of your snowblower but also help you avoid costly repairs and inconvenience in the long run.
